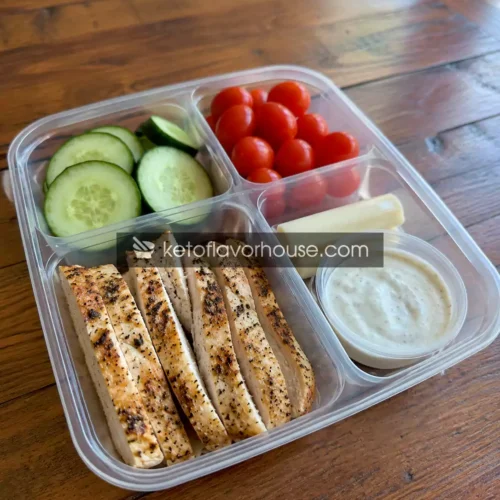
38g Protein Chicken Ranch Lunch Box

This 38g Protein Chicken Ranch Lunch Box is proof that healthy meal prep doesn't have to be complicated. With juicy grilled chicken, crisp cucumbers, sweet cherry tomatoes, creamy Greek yogurt ranch dip, and a light string cheese, it delivers 38 grams of satisfying protein in a refreshing, grab-and-go lunch. Perfect for busy workdays, post-workout recovery, or school lunches, it's a simple recipe you'll want to keep in your weekly meal prep rotation.
Ingredients
- 5 ounces grilled chicken breast
- 1 tablespoon olive oil
- Garlic powder
- Onion powder
- Smoked paprika
- Salt
- Black pepper
- 1 cup cucumber slices
- ½ cup cherry tomatoes
- 1 light string cheese
- 2 tablespoons Greek yogurt ranch dip
Instructions
- Pat the chicken breast dry on all sides using paper towels to remove any excess moisture. This helps the seasonings stick better and allows the chicken to develop a flavorful golden crust during cooking. Drizzle the olive oil evenly over both sides of the chicken, then season generously with garlic powder, onion powder, smoked paprika, salt, and freshly ground black pepper. Rub the seasoning mixture into the chicken until every surface is evenly coated. Let the chicken rest at room temperature for 10–15 minutes so the flavors have time to penetrate the meat and the chicken cooks more evenly.
- Heat a grill pan, cast-iron skillet, nonstick skillet, outdoor grill, or preheated air fryer over medium-high heat. Once hot, place the seasoned chicken onto the cooking surface and cook for approximately 5–7 minutes per side, depending on the thickness of the chicken breast. Avoid flipping the chicken repeatedly so it develops a nicely browned exterior. Continue cooking until the thickest part reaches an internal temperature of 165°F (74°C) when checked with a meat thermometer. Transfer the cooked chicken to a cutting board and allow it to rest for at least 5 minutes before slicing it into even strips. Resting helps keep the chicken moist by allowing the juices to redistribute throughout the meat.
- While the chicken is resting, wash the cucumber and cherry tomatoes thoroughly under cold running water. Dry them completely using a salad spinner or a clean kitchen towel, as removing excess moisture helps the vegetables stay crisp during storage. Slice the cucumber into evenly sized rounds about ¼-inch thick. Leave the cherry tomatoes whole for a convenient grab-and-go lunch, or slice them in half if you prefer smaller bites.
- Spoon the Greek yogurt ranch dip into a small reusable dressing container or the dedicated sauce compartment of your divided meal prep container. Keeping the dip separate from the vegetables prevents them from becoming soggy and keeps everything tasting fresh until lunchtime. Secure the lid tightly to prevent leaks during storage or transport.
- Once the chicken has rested, slice it into even strips or bite-sized pieces and arrange it neatly in one compartment of the meal prep container. Next to the chicken, place the cucumber slices in a tidy row and add the cherry tomatoes in their own section. Keeping the ingredients separated not only creates an attractive presentation but also preserves the texture of each ingredient until you're ready to eat.
- Place the light string cheese into the remaining compartment of the meal prep container. Leave it wrapped if you're preparing lunches in advance to help maintain freshness, or unwrap it if you plan to enjoy the lunch later the same day. Arrange it neatly so it's easy to grab and enjoy alongside the chicken and vegetables.
- Close the meal prep container securely with its lid and refrigerate until ready to eat. The lunch box can be enjoyed straight from the refrigerator with no reheating required. When it's time to eat, use the Greek yogurt ranch dip for dipping the chicken and vegetables, or drizzle it over everything just before serving for a creamy, flavorful finish while keeping the vegetables crisp and refreshing.