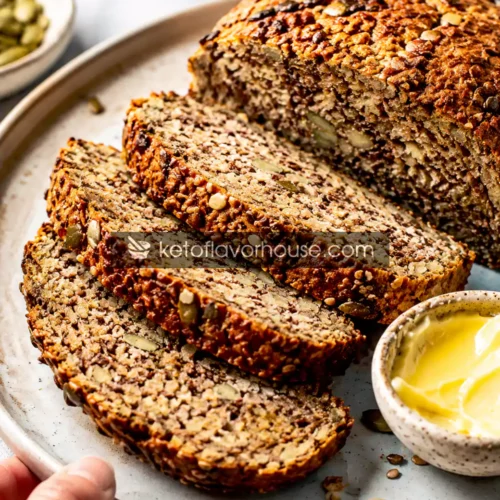
Easy Keto Seed Bread Recipe
This Easy Keto Seed Bread Recipe (3 Ingredients Only) is one of the simplest and most satisfying low-carb bread recipes you can make at home. Packed with healthy seeds, fiber, and rich nutty flavor, it’s perfect for toast, sandwiches, or meal prep. The crisp crust and hearty texture make it feel comforting without the carb crash of traditional bread. Whether you’re new to keto or simply craving a wholesome homemade bread alternative, this recipe is easy, filling, and incredibly versatile.
Ingredients
- 2 cups mixed seeds
- 5 tablespoons psyllium husk powder
- 1 ¾ cups warm water
- Optional salt
Instructions
- Preheat your oven to 350°F (175°C) and line a standard loaf pan with parchment paper, leaving a little extra paper hanging over the sides for easy lifting later. This helps prevent sticking and makes cleanup much easier. If you don’t have parchment paper, lightly grease the pan with olive oil or butter instead.
- Add all of the mixed seeds into a large mixing bowl and stir them together thoroughly until evenly distributed. Using a variety of seeds gives the bread a better texture and richer flavor, so try to spread them evenly throughout the mixture before moving on.
- Sprinkle the psyllium husk powder and optional salt over the seeds, then stir again very well. Make sure there are no clumps of psyllium husk remaining, since uneven mixing can create gummy spots in the bread. The dry mixture should look evenly coated before adding water.
- Slowly pour the warm water into the bowl while stirring continuously with a sturdy spoon or spatula. The mixture will begin thickening very quickly as the psyllium husk absorbs the liquid. Keep mixing until a thick, sticky dough forms and all the seeds are fully hydrated. If the mixture feels too dry or crumbly, add 1–2 tablespoons of extra warm water until it comes together properly.
- Transfer the dough into the prepared loaf pan and gently press it down to remove any air pockets. Use slightly damp hands or the back of a spatula to smooth the top evenly. Don’t worry about making it perfectly smooth — a rustic texture actually makes the finished bread look more homemade and beautiful.
- Let the dough rest in the loaf pan for about 10 minutes before baking. This resting time allows the psyllium husk to fully absorb the moisture and helps the bread hold together better after baking. You’ll notice the dough becoming firmer as it sits.
- If desired, sprinkle extra sunflower seeds, sesame seeds, or pumpkin seeds over the top for added crunch and a bakery-style finish. Gently press the toppings into the surface so they stick while baking.
- Place the loaf pan into the preheated oven and bake for 50–60 minutes, or until the bread feels firm to the touch and develops a deep golden-brown crust. The bread should sound slightly hollow when tapped on top. If the top begins browning too quickly, loosely cover it with foil during the final part of baking.
- Remove the bread from the oven and carefully lift it out of the pan using the parchment paper. Transfer it to a cooling rack and allow it to cool completely before slicing. This step is very important because the inside continues setting as it cools. Cutting too early may make the bread seem gummy or soft in the center.
- Once fully cooled, slice the bread with a serrated knife and serve toasted or plain with your favorite keto toppings. It tastes especially delicious with butter, avocado, cream cheese, eggs, or even as the base for low-carb sandwiches. Toasting the slices brings out the nutty flavor and gives the crust an even better texture.