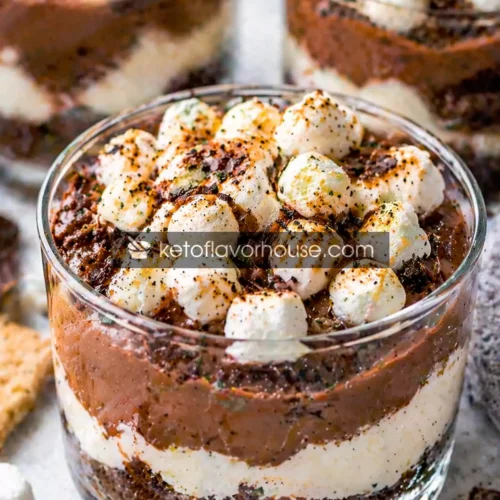
Keto Campfire S’mores Dirt Cups Recipe
These Keto Campfire S’mores Dirt Cups (No-Bake Low-Carb Dessert Recipe) are the perfect blend of nostalgia and indulgence. With creamy chocolate layers, crumbly texture, and fluffy topping, they deliver everything you love about s’mores—without the carbs. Easy, no-bake, and absolutely satisfying.
Ingredients
Chocolate Layer:
- 1 cup heavy cream
- 2 tbsp unsweetened cocoa powder
- 2 tbsp powdered erythritol or keto sweetener
- ½ tsp vanilla extract
“Dirt” Crumb Layer:
- 1 cup almond flour
- 2 tbsp butter melted
- 1 tbsp cocoa powder
- 1 tbsp sweetener
Marshmallow Layer:
- ½ cup heavy cream
- 2 tbsp cream cheese
- 1 tbsp powdered sweetener
- ½ tsp vanilla extract
Instructions
- Pour the heavy cream into a clean mixing bowl and begin whipping it using a whisk or hand mixer on medium speed. Keep an eye on the texture—you’re looking for it to thicken slightly and become creamy, not fully whipped yet. It should still be soft and smooth at this stage, not holding stiff peaks.
- Add the cocoa powder, powdered sweetener, and vanilla extract into the partially whipped cream. Continue mixing gently until everything is fully combined and the mixture turns into a smooth, rich chocolate mousse. Be careful not to overwhip, as this can make the texture grainy instead of silky.
- In a separate bowl, combine the almond flour, cocoa powder, melted butter, and sweetener. Mix everything together using a spoon or your hands until it forms a soft, crumbly texture that resembles crushed cookies. If it feels too dry, you can add a tiny bit more melted butter to bring it together.
- In another bowl, add heavy cream, cream cheese, sweetener, and vanilla extract. Whip this mixture until it becomes light, fluffy, and airy. The texture should be smooth and slightly thick, similar to a soft whipped topping. Make sure the cream cheese is fully blended with no lumps.
- Take your serving cups or glasses and begin assembling the layers. Start by adding a layer of the crumb mixture at the bottom of each cup, pressing it down lightly with the back of a spoon so it forms a stable base.
- Spoon a layer of the chocolate mousse over the crumb base. Gently spread it out to create an even layer without disturbing the crumbs underneath.
- Add a layer of the marshmallow-style cream mixture on top of the chocolate layer. Spread it smoothly so each layer remains distinct and visually appealing.
- Continue repeating the layering process—crumbs, chocolate mousse, and marshmallow cream—until the cups are filled. Try to keep the layers even and neat for the best presentation.
- Finish with a final marshmallow layer on top. Smooth it out carefully with a spoon, then sprinkle a few extra crumbs or a light dusting of chocolate shavings for a decorative, dessert-style finish.
- Place the assembled cups into the refrigerator and allow them to chill for at least 1–2 hours. This step is important because it helps the layers set properly and enhances the overall texture and flavor.
- Once chilled, remove the cups from the fridge just before serving. Serve them cold for the best experience, where each spoonful gives you a perfect mix of creamy, chocolatey, and crumbly textures.