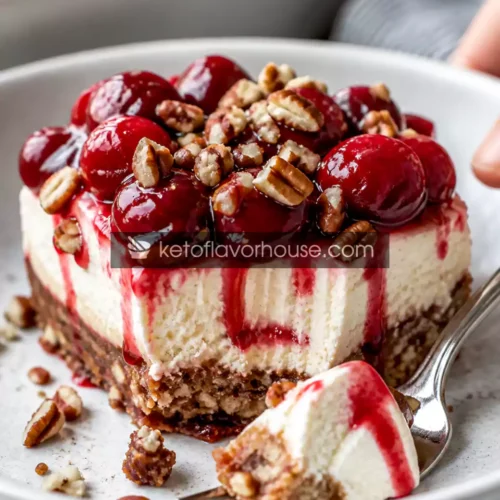
Keto Cherry Pecan Cheesecake Lush Recipe
This Keto Cherry Pecan Cheesecake Lush (No Bake, Low Carb Dessert) is the perfect balance of creamy, crunchy, and fruity flavors—all while staying low in carbs. It’s easy to make, requires no baking, and feels indulgent without breaking your keto goals. Whether you're serving guests or treating yourself, this dessert delivers every single time.
Ingredients
- Pecans – 1½ cups
- Butter – 4 tbsp
- Cream cheese – 200g
- Heavy cream – ½ cup
- Erythritol – ⅓ cup
- Vanilla extract – 1 tsp
- Lemon juice – 1 tbsp
- Cherries – 1 cup
- Chia seeds – 1 tbsp
Instructions
- Start by finely chopping the pecans until they resemble small, even crumbs—this helps the crust hold together better. Transfer them to a mixing bowl, then pour in the melted butter, powdered sweetener, and vanilla extract. Mix everything thoroughly until all the pecans are evenly coated and slightly glossy. The mixture should feel moist but not overly greasy.
- Pour the pecan mixture into your serving dish and begin pressing it down firmly using the back of a spoon or the bottom of a glass. Take your time here—pressing tightly is key to creating a crust that won’t crumble when sliced. Make sure the layer is even across the base, especially around the edges.
- Place the dish into the refrigerator and let the crust chill for about 20–30 minutes. This step allows the butter to solidify, helping the crust set firmly and making it easier to layer the filling later.
- While the crust is chilling, add the softened cream cheese to a mixing bowl. Beat it until completely smooth and creamy, making sure there are no lumps. If the cream cheese isn’t soft enough, it can create a grainy texture, so take a moment to ensure it’s properly softened before mixing.
- Add the powdered sweetener, vanilla extract, and fresh lemon juice to the cream cheese. Continue mixing until everything is fully incorporated and silky smooth. The lemon juice enhances the classic cheesecake flavor, so don’t skip it.
- In a separate bowl, pour in the heavy cream and whip it until soft peaks form. You’ll know it’s ready when the cream holds its shape but still looks soft and airy. Be careful not to overwhip, as it can turn dense or slightly grainy.
- Gently fold the whipped cream into the cream cheese mixture using a spatula. Do this slowly and carefully, lifting and folding rather than stirring. This keeps the mixture light, fluffy, and mousse-like—perfect for that “lush” texture.
- Remove the chilled crust from the refrigerator and spread the cheesecake mixture evenly over it. Use a spatula to smooth out the top, making sure the layer is level and reaches all corners of the dish.
- In a small saucepan, combine the cherries, sweetener, and water. Cook over low to medium heat, stirring occasionally, until the cherries soften and release their juices. This usually takes about 5–7 minutes.
- Once the cherries are soft, stir in the chia seeds and mix well. Remove the saucepan from heat and let the mixture cool. As it cools, it will naturally thicken into a jam-like consistency without needing any starch.
- After the cherry topping has cooled, gently spread it over the cheesecake layer. Try to distribute it evenly so each slice gets a perfect balance of creamy and fruity layers.
- Place the assembled dessert back into the refrigerator and let it chill for at least 4 hours, though overnight is ideal. This allows all the layers to fully set and makes slicing much cleaner and easier.
- When ready to serve, use a sharp knife to cut into portions. For cleaner slices, wipe the knife between cuts. Serve chilled and enjoy the creamy, crunchy, and fruity layers in every bite.