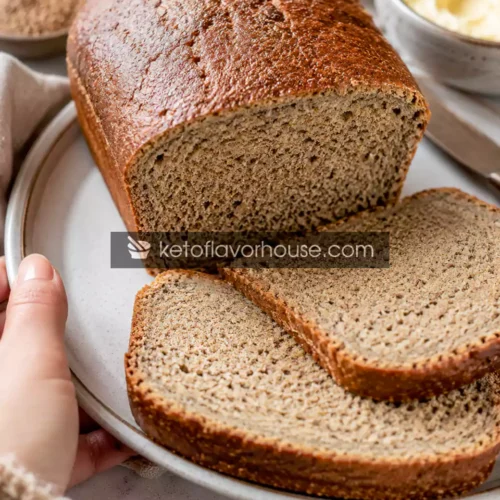
Keto Flaxseed Bread Recipe

This Keto Flaxseed Bread Recipe creates a soft, chewy, bakery-style loaf that finally feels like real sandwich bread again while staying low in carbs. Made with flaxseed meal, vital wheat gluten, and oat fiber, it delivers satisfying texture, hearty flavor, and incredible versatility for toast, sandwiches, and meal prep. Unlike many keto breads that crumble or taste eggy, this loaf slices beautifully and holds together perfectly. Once you try homemade keto bread that actually tastes comforting and satisfying, it quickly becomes a weekly staple.
Equipment
- Mixing bowl
- Measuring cups and spoons
- Whisk or electric mixer
- Loaf pan
- Oven
Ingredients
- 125 g flaxseed meal
- 175 g vital wheat gluten
- 100 g oat fiber
- 7 g salt
- 7 g yeast
- 350 ml warm water
- 65 –75g erythritol
Instructions
- Pour the warm water into a medium bowl and sprinkle the yeast over the top. Stir gently for a few seconds to help dissolve the yeast evenly into the water. Let the mixture sit undisturbed for about 5–10 minutes until small bubbles and a light foam begin forming on the surface. This step confirms the yeast is active and ready to help the bread rise properly. If the mixture stays completely flat with no bubbling, the yeast may be expired or the water may have been too hot or too cold.
- In a large mixing bowl, add the flaxseed meal, vital wheat gluten, oat fiber, salt, and erythritol if using. Stir the dry ingredients thoroughly using a whisk or spoon so everything is evenly combined. This helps prevent uneven texture and ensures the bread rises consistently throughout the loaf.
- Once the yeast mixture looks foamy and activated, pour it directly into the bowl with the dry ingredients. Begin mixing immediately using a sturdy spoon, clean hands, or a stand mixer fitted with a dough hook attachment. The mixture will quickly begin forming into a thick dough.
- Continue kneading the dough for several minutes until it becomes fully combined, stretchy, and slightly elastic. Keto bread dough is naturally firmer and denser than regular bread dough, so don’t worry if it feels tighter than traditional bread dough. The final texture should feel smooth and firm rather than wet or sticky. If using a stand mixer, medium speed usually works best.
- Lightly grease a 9x5 loaf pan with oil or line it with parchment paper to prevent sticking and make removal easier after baking. Be sure to line the corners well if using parchment paper so the loaf lifts out cleanly later.
- Transfer the dough into the prepared loaf pan and gently press it into an even shape using slightly damp hands or a spatula. Smooth the top lightly so the loaf bakes evenly and develops a beautiful bakery-style appearance once baked.
- Cover the loaf pan loosely with a clean kitchen towel and place it in a warm draft-free area for approximately 60–90 minutes. A slightly warm oven that has been turned off works wonderfully for proofing. Allow the dough to rise until it has doubled or even tripled in size. Don’t rush this step because proper rising helps create softer texture and better bread structure.
- Once the dough has finished rising, preheat your oven to 400°F. Allow the oven to fully heat before baking so the bread develops good oven spring and a golden crust.
- Remove the towel carefully from the loaf pan and place the bread into the oven uncovered. Bake for 15–20 minutes during this first stage to help develop a rich golden-brown crust on top. You’ll begin noticing a warm bakery-style aroma filling the kitchen as the bread bakes.
- After the initial baking time, loosely cover the top of the loaf with aluminum foil. This helps prevent the crust from becoming too dark while the center finishes baking completely. Continue baking for another 20–25 minutes until the loaf feels firm, deeply golden, and fully cooked through.
- Carefully remove the bread from the oven and let it cool completely before slicing. This is one of the most important steps in keto bread baking because the internal texture continues setting as it cools. Slicing too early can make the bread seem gummy or dense inside.
- Once fully cooled, slice the bread using a serrated bread knife for clean even slices. Serve toasted with butter, cream cheese, avocado, or use it as sturdy sandwich bread for your favorite keto meals and meal prep recipes.