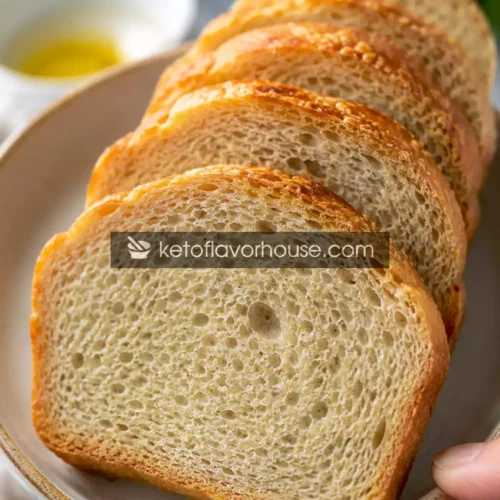
The Best Keto Bread Recipe That Actually Tastes Like Real Bread
This keto bread recipe delivers the soft, chewy texture most low-carb breads miss. Made with vital wheat gluten, almond flour, and oat fiber, it creates a realistic bakery-style loaf that’s high in protein and low in net carbs. Whether you use it for sandwiches, toast, or garlic bread, this recipe makes keto feel comforting and sustainable again.
Ingredients
- 289 g warm water
- 11 g instant yeast
- 7 g honey
- 2 eggs
- 95 g oat fiber
- 21 g golden flax meal
- 140 g vital wheat gluten
- 63 g almond flour
- Slightly more than 1/8 tsp xanthan gum
- 19 g allulose
- 9 g salt
- 2 tbsp butter
Instructions
- In a large mixing bowl, combine the warm water, instant yeast, honey, and eggs. Stir gently until everything is evenly mixed together. Let the mixture rest for about 5 minutes so the yeast can activate slightly and become lightly foamy on top. Don’t worry if it doesn’t bubble aggressively — instant yeast can still work perfectly even with minimal foam.
- In a separate bowl, whisk together the oat fiber, golden flax meal, vital wheat gluten, almond flour, xanthan gum, allulose, and salt until fully combined. Mixing the dry ingredients thoroughly helps distribute the fibers and gluten evenly, which creates a smoother dough and prevents clumping later.
- Attach the dough hook to your stand mixer and slowly begin adding the dry ingredients into the wet mixture a little at a time. Start mixing on low speed so the flour mixture doesn’t fly out of the bowl. Once most of the dry ingredients are incorporated, increase the speed slightly to continue building the dough structure.
- Continue kneading the dough with the dough hook for about 8–10 minutes. At first, the dough may look sticky, rough, or uneven, but keep mixing because the gluten needs time to properly develop. If the dough repeatedly climbs up the dough hook, stop the mixer occasionally and push the dough back down into the bowl before continuing. By the end of mixing, the dough should look smoother, stretchier, and more elastic.
- Add the softened butter to the dough and continue mixing for another few minutes until fully incorporated. The dough should become softer, richer, and more cohesive. If the dough feels excessively dry, add a very small splash of warm water. If it feels overly sticky or loose, sprinkle in a little extra oat fiber until manageable.
- Lightly grease your hands and divide the dough into your preferred shapes. You can form sandwich loaves, rustic artisan loaves, or baguette-style shapes depending on how you plan to serve the bread. Place the shaped dough onto parchment-lined baking sheets or into greased loaf pans. Don’t stress about making the shapes perfect — slightly rustic loaves still bake beautifully and taste amazing.
- Cover the dough loosely with plastic wrap or a clean kitchen towel and place it in a warm, draft-free area to proof for about 40–60 minutes. The dough should become slightly puffed and airy. Keto dough usually won’t double in size like traditional bread dough, so don’t worry if the rise looks more subtle.
- While the dough is finishing its proof, preheat your oven to 450°F. Make sure the oven is fully hot before baking because strong initial heat helps create better rise and crust development. For an extra bakery-style crust, you can place a small oven-safe dish of hot water on the lower oven rack to create steam.
- Bake the bread for about 10–15 minutes, depending on the size and shape of your loaves. The crust should turn deep golden brown and slightly crisp on the outside. For the most accurate doneness check, use a thermometer to ensure the internal temperature reaches approximately 200–206°F.
- Remove the bread from the oven and immediately transfer it onto a cooling rack. Allow the loaves to cool for at least 20–30 minutes before slicing. Cutting too early can make the inside seem gummy because the bread is still setting internally. Once cooled, slice and enjoy warm, toasted, or however you love your bread best.