This post may contains Amazon affiliate and other affiliate links. If you make a purchase through these links, I may earn a small commission at no extra cost to you. Your support helps me continue to provide quality content. I only recommend products I personally trust and believe will add value to your experience. For more details, please visit my Privacy Policy.
There was a time when I genuinely believed that good bread was something I had to completely give up on keto. I tried the usual options — egg-heavy microwave breads, dry almond flour loaves, and those dense “healthy” slices that somehow tasted both bland and overly sweet at the same time. None of them satisfied that real bread craving. You know the one: a warm slice with a chewy center, a golden crust, and that comforting bakery-style aroma filling the kitchen.
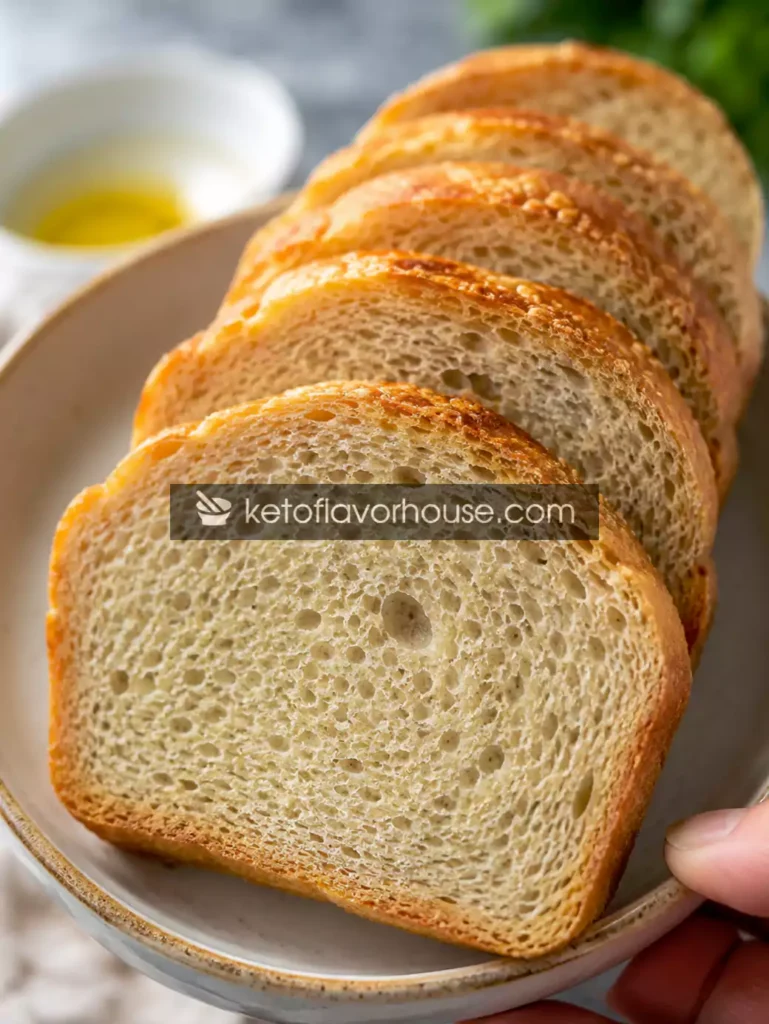
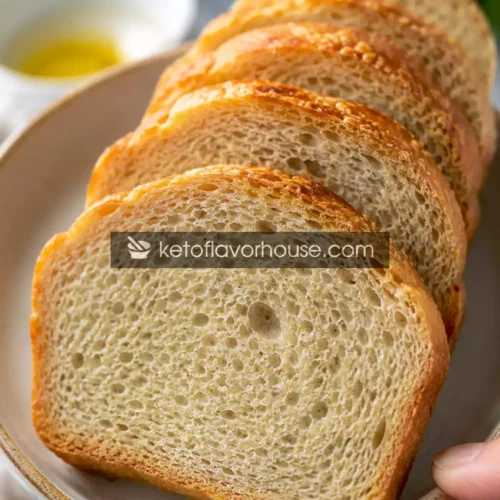
That’s exactly why this The Best Keto Bread Recipe That Actually Tastes Like Real Bread has become one of my absolute favorite keto baking recipes ever.
The first time I pulled this loaf from the oven, I honestly didn’t expect much. The dough looked promising, but keto baking can be unpredictable. Then the crust browned beautifully, the inside stayed soft and airy, and the texture was shockingly close to traditional bread. Not “good for keto bread.” Just genuinely good bread.
What makes this recipe special is the balance. It has the chewiness and structure you miss on a low-carb lifestyle, but it still stays keto-friendly and high in protein. Thanks to the combination of vital wheat gluten, oat fiber, almond flour, and flax meal, you get a loaf that feels hearty and satisfying without loading up on carbs.
This bread is perfect for sandwiches, toast, garlic bread, grilled cheese, breakfast toast with butter, or simply warm slices straight from the oven. It’s also one of those recipes that makes keto feel sustainable long-term because it brings back comfort foods in a realistic way.
If you’ve been searching for a keto bread that doesn’t crumble apart, taste like eggs, or feel dry and chalky, this might become your new favorite too.
Why You’ll Love This Recipe
💛 It Actually Tastes Like Bread
The texture is soft, chewy, and bakery-style instead of cakey or eggy.
🥪 Perfect for Sandwiches
It slices beautifully and holds together well for sandwiches, toast, or grilled cheese.
🔥 Keto-Friendly & Low Carb
Each serving stays low in net carbs while still feeling filling and satisfying.
💪 High in Protein
Thanks to the vital wheat gluten and eggs, this bread contains a solid protein boost.
🧈 Soft Interior with Golden Crust
The combination of almond flour and butter helps create a rich, tender crumb.
🍞 No Weird Aftertaste
Unlike some keto breads, this one doesn’t taste overly “healthy” or artificial.
🥶 Freezer-Friendly
Make extra loaves and freeze slices for quick keto meals during the week.
👩🍳 Beginner-Friendly
Even if you’re new to keto baking, this recipe is surprisingly approachable.
My Personal Experience
The first time I made this bread, I was honestly frustrated halfway through mixing the dough. It kept climbing up the dough hook, sticking to the sides, and refusing to behave like regular bread dough. I almost gave up and assumed I had messed something up.
But keto doughs can be a little different, especially when working with vital wheat gluten and oat fiber.
Once I shaped the loaves and let them proof, everything changed. The dough puffed beautifully, and when the bread hit the oven, the smell alone made the entire kitchen feel like a real bakery.
I sliced into it while it was still slightly warm — which I always tell myself not to do — and immediately knew this recipe was staying in my regular rotation.
The texture was soft yet chewy, the crust lightly crisp, and it finally felt like I could enjoy real bread again while staying keto.
Now I make this recipe almost every week. Some weeks I shape it into sandwich loaves. Other times I turn it into baguettes, dinner rolls, or even pizza crust.
That versatility is what makes this recipe so valuable for keto meal prep.
Required Equipment
Large Mixing Bowl
You’ll need a large bowl to comfortably mix and knead the dough ingredients without making a mess.
Stand Mixer with Dough Hook
This dough benefits from strong mixing to properly develop the gluten structure. A dough hook makes the process much easier.
Measuring Cups & Kitchen Scale
A kitchen scale helps ensure accurate keto baking, especially for ingredients like oat fiber and vital wheat gluten.
Baking Sheet
Perfect for shaping baguettes or free-form artisan-style loaves.
Parchment Paper
Helps prevent sticking and makes transferring the dough much easier.
Plastic Wrap or Clean Kitchen Towel
Used to cover the dough while proofing so it doesn’t dry out.
Cooling Rack
Allows air circulation around the bread after baking, helping maintain the texture.
Bread Knife
A sharp serrated knife helps create clean slices without squishing the loaf.
Ingredients & Substitutions
Warm Water – 289 g
Warm water activates the yeast and hydrates the dough.
Substitute:
You can use slightly less water for a firmer dough if preferred.
Instant Yeast – 11 g
Helps create lift and authentic bread flavor.
Substitute:
Active dry yeast can work, but it may need a slightly longer proofing time.
Honey – 7 g
Feeds the yeast and improves browning.
Substitute:
Maple syrup can work, though honey gives better flavor development.
Eggs – 2 Large
Provide structure, moisture, and protein.
Substitute:
Egg substitutes are not recommended here because the bread relies on eggs for stability.
Oat Fiber – 95 g
Adds bulk and texture without digestible carbs.
Substitute:
Do not replace with oat flour. Oat flour is much higher in carbs.
Golden Flax Meal – 21 g
Adds fiber and helps improve texture.
Substitute:
Brown flax meal also works.
Vital Wheat Gluten – 140 g
The key ingredient for chewy, bread-like texture.
Substitute:
There’s no true substitute if you want authentic bread texture.
Almond Flour – 63 g
Adds softness and richness.
Substitute:
Sunflower seed flour can work, though flavor may slightly change.
Xanthan Gum – Slightly More Than 1/8 tsp
Improves elasticity and helps bind the dough.
Substitute:
Psyllium husk powder can help, though texture may differ.
Allulose – 19 g
Adds subtle sweetness without sugar spikes.
Substitute:
Monk fruit sweetener blends work well too.
Salt – 9 g
Enhances flavor and balances the dough.
Butter – 2 Tbsp
Creates a softer crumb and richer flavor.
Substitute:
Olive oil or avocado oil can be used instead.
How to Make The Best Keto Bread Recipe That Actually Tastes Like Real Bread
Step 1: Activate the Yeast
In a large mixing bowl, combine the warm water, yeast, honey, and eggs.
Let the mixture sit for about 5 minutes until slightly foamy.
Don’t panic if the foam isn’t dramatic — instant yeast often works quietly.
Step 2: Combine the Dry Ingredients
In a separate bowl, whisk together:
- Oat fiber
- Flax meal
- Vital wheat gluten
- Almond flour
- Xanthan gum
- Allulose
- Salt
Mixing thoroughly helps prevent uneven texture later.
Step 3: Mix the Dough
Slowly add the dry ingredients into the wet ingredients while mixing with the dough hook.
Continue mixing for about 8–10 minutes.
At first, the dough may look messy or too sticky. Keep mixing. The gluten needs time to develop.
If the dough climbs the hook repeatedly, simply stop the mixer occasionally and push it back down.
Step 4: Add the Butter
Add softened butter and continue kneading until fully incorporated.
The dough should become smoother and more elastic.
If it feels extremely dry, add a tiny splash of warm water.
If it feels too wet, sprinkle in a little extra oat fiber.
Step 5: Shape the Dough
Divide the dough into loaves or shape it into baguettes.
Place onto parchment-lined baking sheets or into greased loaf pans.
Don’t stress about making them perfectly shaped. Rustic loaves still bake beautifully.
Step 6: Proof the Dough
Cover loosely with plastic wrap or a kitchen towel.
Place in a warm area for about 40–60 minutes until slightly puffed.
Keto dough usually won’t double dramatically like regular bread, and that’s completely normal.
Step 7: Bake Until Golden
Preheat the oven to 450°F.
Bake for about 10–15 minutes depending on loaf size.
The bread should develop a golden brown crust and reach around 200–206°F internally.
Step 8: Cool Before Slicing
Transfer the bread to a cooling rack.
Try to let it cool at least 20–30 minutes before slicing.
Warm keto bread can seem gummy if cut too early.
Common Mistakes to Avoid
Adding Too Much Extra Flour
Keto dough can feel stickier than traditional dough. Resist the urge to overload it with dry ingredients.
Skipping the Mixing Time
Vital wheat gluten needs enough kneading time to properly develop structure.
Underproofing the Dough
Even keto bread benefits from proper proofing for better texture.
Slicing Too Soon
Fresh bread smells amazing, but cutting immediately can make the inside seem dense.
Using Cold Ingredients
Warm ingredients help yeast activate properly and improve rise.
Pro Tips for Best Results
Use a Kitchen Scale
Precise measurements make a huge difference in keto baking.
Sift the Flax Meal
This improves texture and removes larger particles.
Lightly Oil Your Hands
Sticky dough becomes much easier to shape.
Create Steam in the Oven
Place a small oven-safe pan with hot water inside the oven for better crust development.
Toast Leftover Slices
This bread becomes even better toasted the next day.
Keto Benefits of Vital Wheat Gluten
Vital Wheat Gluten is one of the most important ingredients for creating realistic keto bread textures.
It’s incredibly high in protein and relatively low in net carbs compared to traditional flour. Because most starch is removed, what remains is concentrated gluten protein that creates chewiness and elasticity.
For keto bakers, this ingredient is game-changing because it allows low-carb bread to behave much more like real bread dough.
Combined with fiber-rich ingredients like oat fiber and flax meal, it helps create a loaf that feels satisfying without the heavy carb load of traditional wheat bread.
Variations You Can Try
Cheesy Keto Bread
Add shredded mozzarella or cheddar cheese into the dough.
Garlic Herb Bread
Mix in garlic powder, Italian seasoning, and parsley.
Spicy Jalapeño Version
Add diced jalapeños and cheddar for extra flavor.
Cinnamon Breakfast Bread
Add cinnamon and keto-friendly sweetener for a sweeter loaf.
Pizza Dough Variation
Use the dough as a keto pizza crust by flattening and prebaking it.
Tips for This Recipe
- Store slices individually for easy meal prep.
- Toasting enhances both flavor and texture.
- Use a serrated knife for clean slices.
- Let the bread fully cool before freezing.
- Thin slices work beautifully for sandwiches.
Optional Additions
- Sesame seeds
- Everything bagel seasoning
- Garlic butter topping
- Parmesan cheese
- Rosemary
- Chili flakes
- Italian herbs
Serving Ideas
This bread works beautifully for:
- Keto breakfast toast
- Grilled cheese sandwiches
- Garlic bread
- Burgers
- Keto BLTs with turkey or beef bacon
- French toast
- Soup side dishes
- Charcuterie boards
It’s also excellent alongside keto chili, creamy soups, or BBQ dinners.
Storage Recommendations
Refrigerator
Store in an airtight container for up to 5 days.
Freezer
Freeze individual slices for up to 2 months.
Place parchment between slices for easy separation.
Reheating
Toast slices directly from frozen or warm in the oven at 350°F for a few minutes.
An air fryer also works wonderfully for reheating.
Frequently Asked Questions
Is this bread really keto-friendly?
Yes. Despite containing vital wheat gluten, the overall net carbs remain low when sliced properly.
Can I make this without almond flour?
Yes, though texture may become slightly less soft and rich.
Why is my dough sticky?
Keto bread dough is naturally stickier than regular bread dough due to the fiber content.
Can I use active dry yeast?
Yes, but allow slightly longer proofing time.
Can I make this in loaf pans?
Absolutely. Loaf pans create more traditional sandwich bread slices.
Does this bread taste eggy?
No. Unlike many keto breads, this recipe has a very balanced flavor.
Can I make this dairy-free?
Yes. Replace butter with olive oil or avocado oil.
Nutritional Breakdown (Per Serving)
Approximate values per slice:
- Calories: 125
- Protein: 12g
- Fat: 6g
- Total Carbs: 7g
- Fiber: 5g
- Net Carbs: 2g
Values may vary depending on loaf size and slicing thickness.
Recipe Snapshot
Prep Time
20 minutes
Cook Time
15 minutes
Total Time
35 minutes plus proofing
Course
Bread
Cuisine
American Keto
Servings
30 slices
Calories
125 per slice
The Best Keto Bread Recipe That Actually Tastes Like Real Bread
Ingredients
- 289 g warm water
- 11 g instant yeast
- 7 g honey
- 2 eggs
- 95 g oat fiber
- 21 g golden flax meal
- 140 g vital wheat gluten
- 63 g almond flour
- Slightly more than 1/8 tsp xanthan gum
- 19 g allulose
- 9 g salt
- 2 tbsp butter
Instructions
- In a large mixing bowl, combine the warm water, instant yeast, honey, and eggs. Stir gently until everything is evenly mixed together. Let the mixture rest for about 5 minutes so the yeast can activate slightly and become lightly foamy on top. Don’t worry if it doesn’t bubble aggressively — instant yeast can still work perfectly even with minimal foam.
- In a separate bowl, whisk together the oat fiber, golden flax meal, vital wheat gluten, almond flour, xanthan gum, allulose, and salt until fully combined. Mixing the dry ingredients thoroughly helps distribute the fibers and gluten evenly, which creates a smoother dough and prevents clumping later.
- Attach the dough hook to your stand mixer and slowly begin adding the dry ingredients into the wet mixture a little at a time. Start mixing on low speed so the flour mixture doesn’t fly out of the bowl. Once most of the dry ingredients are incorporated, increase the speed slightly to continue building the dough structure.
- Continue kneading the dough with the dough hook for about 8–10 minutes. At first, the dough may look sticky, rough, or uneven, but keep mixing because the gluten needs time to properly develop. If the dough repeatedly climbs up the dough hook, stop the mixer occasionally and push the dough back down into the bowl before continuing. By the end of mixing, the dough should look smoother, stretchier, and more elastic.
- Add the softened butter to the dough and continue mixing for another few minutes until fully incorporated. The dough should become softer, richer, and more cohesive. If the dough feels excessively dry, add a very small splash of warm water. If it feels overly sticky or loose, sprinkle in a little extra oat fiber until manageable.
- Lightly grease your hands and divide the dough into your preferred shapes. You can form sandwich loaves, rustic artisan loaves, or baguette-style shapes depending on how you plan to serve the bread. Place the shaped dough onto parchment-lined baking sheets or into greased loaf pans. Don’t stress about making the shapes perfect — slightly rustic loaves still bake beautifully and taste amazing.
- Cover the dough loosely with plastic wrap or a clean kitchen towel and place it in a warm, draft-free area to proof for about 40–60 minutes. The dough should become slightly puffed and airy. Keto dough usually won’t double in size like traditional bread dough, so don’t worry if the rise looks more subtle.
- While the dough is finishing its proof, preheat your oven to 450°F. Make sure the oven is fully hot before baking because strong initial heat helps create better rise and crust development. For an extra bakery-style crust, you can place a small oven-safe dish of hot water on the lower oven rack to create steam.
- Bake the bread for about 10–15 minutes, depending on the size and shape of your loaves. The crust should turn deep golden brown and slightly crisp on the outside. For the most accurate doneness check, use a thermometer to ensure the internal temperature reaches approximately 200–206°F.
- Remove the bread from the oven and immediately transfer it onto a cooling rack. Allow the loaves to cool for at least 20–30 minutes before slicing. Cutting too early can make the inside seem gummy because the bread is still setting internally. Once cooled, slice and enjoy warm, toasted, or however you love your bread best.