This post may contains Amazon affiliate and other affiliate links. If you make a purchase through these links, I may earn a small commission at no extra cost to you. Your support helps me continue to provide quality content. I only recommend products I personally trust and believe will add value to your experience. For more details, please visit my Privacy Policy.
Introduction
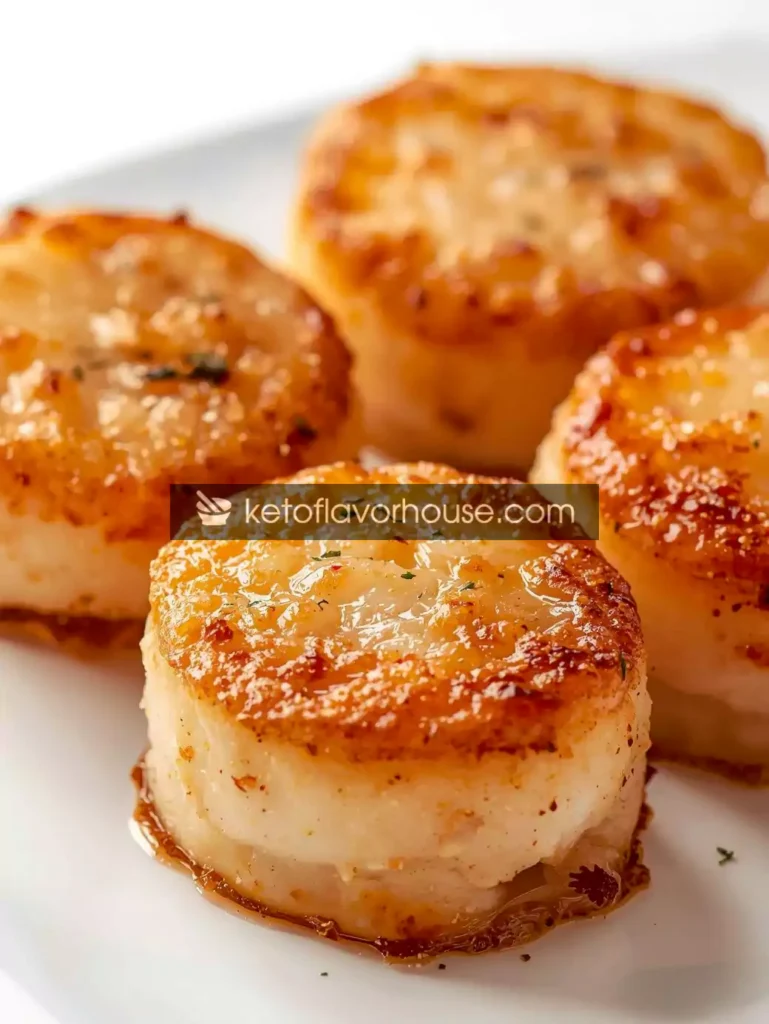
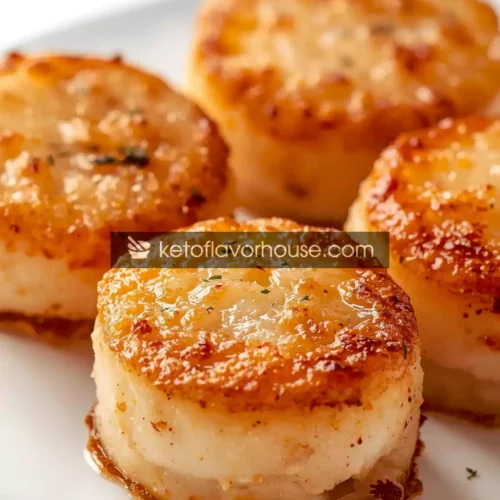
If you’ve ever hesitated to cook scallops at home because they seem fussy, this Air Fryer Scallops recipe will change your mind. I used to think perfectly seared scallops meant a sizzling hot pan and a restaurant kitchen. Yet after testing dozens of small adjustments — drying, temperature control, minimal butter, timing by feel — I discovered that the air fryer reliably gives a golden crust and an impossibly tender interior. In this post I’ll show you exactly how to select, prep, season, cook, and finish scallops in the air fryer so they come out like a restaurant plate every time.
Why You’ll Love This Air Fryer Scallops recipe
- ⏱️ Fast — a show-stopping plate in 12–15 minutes start to finish.
- 🧈 Buttery, golden crust without wrestling with hot oil on the stovetop.
- 🥗 Versatile — serves as an appetizer, main, or elegant salad topper.
- 🥘 Low carb & keto-friendly — naturally high-protein, low-carb.
- 🔁 Repeatable — consistent results batch after batch when you follow the timing and staging.
My Personal Experience
I learned to love scallops by trial and error. Early attempts ended rubbery or under-seasoned; later attempts had great crust but dry centers. The breakthrough came when I stopped guessing and started staging: buy dry (not water-packed) scallops, pat them aggressively dry, bring them to near room temperature, and use a butter+oil blend so the garlic flavor infuses without burning. After that, the air fryer’s high steady heat finished them perfectly while keeping the kitchen calm. Now, whenever I want something elegant but simple, I reach for scallops.
Required Equipment
Air Fryer
A basket-style fryer is ideal — wide enough to lay scallops in a single layer. The circulating hot air is what creates the crust without deep frying.
Instant-Read Thermometer
Scallops cook quickly and can go from perfect to overcooked in a minute. A thermometer helps you hit the internal target of 63°C / 145°F reliably.
Mixing Bowls
A small bowl for the butter mixture and a shallow bowl or plate for seasoning make assembly fast.
Tongs
Soft silicone-tipped tongs let you place scallops gently and flip them without marring the crust.
Paper Towels
Vital. Patting scallops dry is the single most important prep step for good browning.
Basting Brush (optional)
Useful if you want to brush extra garlic butter on after the cook for shine and flavor.
Ingredients & Substitutions
(Makes 3–4 servings as a main or 6–8 as an appetizer)
- 450 g / 1 lb large sea scallops (about 10–12 large scallops) — use dry scallops if possible.
Why it matters: Dry scallops brown; water-soaked (wet) scallops steam and won’t crust.
Substitute: Bay scallops cook faster — reduce time (see FAQ). - 28 g / 2 tbsp unsalted butter, melted — flavor and glossy finish.
Substitute: Ghee for higher heat tolerance; dairy-free margarine or olive oil for non-dairy. - 15 g / 1 tbsp avocado or light olive oil — raises smoke point so butter doesn’t burn.
- 2 garlic cloves, minced (≈6–8 g) — fresh garlic brightens and perfumes the butter.
- 1 tbsp fresh lemon juice (15 g) — bright acid to finish and cut richness.
- ½ tsp fine sea salt + ¼ tsp freshly cracked black pepper — seasoning baseline.
- 1 tsp smoked paprika or mild chili flakes (optional) — color and gentle warmth.
- 1 tbsp chopped fresh parsley or chives — finishes the dish with freshness.
Why each matters: Scallops are mild — they show off simple aromatics. Butter and oil give flavor and browning; lemon and herbs lift the plate.
Air-Fryer Notes
- Preheat: Always preheat the air fryer to 200°C / 400°F for 3 minutes. A hot environment locks a crust quickly.
- Single layer: Space scallops so hot air surrounds each piece; overcrowding = steam.
- Fat choice: Butter adds flavor; oil increases browning reliability. Combine them.
- Flipping: Flip once halfway through to brown both sides.
- Finishing: If you want extra color, you can give them a 1–2 minute finish at 205°C / 401°F — watch closely.
How to Make Air Fryer Scallops — step-by-step (with times & temps)
Step 1 — Choose & thaw correctly
If using frozen scallops, thaw slowly overnight in the fridge and drain. Avoid microwaving or short soaking — that retards texture.
Step 2 — Pat dry thoroughly (5 minutes)
Lay scallops on a paper towel, top with another towel, and press gently. Moisture is the enemy of crust.
Step 3 — Brief seasoning & room temp (5–10 minutes)
Lightly salt both sides and let scallops rest 5–10 minutes at room temp. This reduces temperature shock during cooking.
Step 4 — Prepare the garlic-butter mix
Melt 28 g (2 tbsp) butter and whisk with 15 g (1 tbsp) avocado oil, minced garlic, and lemon juice. Let cool slightly so garlic doesn’t scorch.
Step 5 — Preheat the air fryer (3 minutes)
Set to 200°C / 400°F and preheat for 3 minutes. A hot basket equals fast browning.
Step 6 — Arrange & cook (8–10 minutes total)
Brush or toss scallops very lightly with the butter/oil mixture (reserve a tablespoon for finishing). Place in a single layer. Air fry at 200°C / 400°F for 8–10 minutes, flipping once at 4–5 minutes. For large (U/10) scallops aim for 8 minutes; for extra-large, 9–10 minutes.
Internal target temperature: remove when scallops read 63°C / 145°F with an instant-read thermometer — they will be opaque and slightly springy.
Step 7 — Rest & finish (1–2 min)
Remove to a warm plate, brush with reserved garlic butter, scatter parsley, and serve immediately with lemon wedges.
Friendly encouragement: Don’t worry if the timing seems exact — after one test batch you’ll know your fryer’s quirks. The thermometer is your best friend.
Common Mistakes to Avoid
- ❌ Skipping the dry step — damp scallops steam and won’t brown.
- ❌ Cooking straight from freezer — lowers basket temp and overcooks exterior before center is done.
- ❌ Overcrowding the basket — causes steaming, not searing.
- ❌ Using too much sugar or sticky glaze before cooking — sugars can burn at air-fryer temps. Add glazes at the end.
Pro Tips for Best Results
- Buy dry scallops when you can — labeled “dry” or unfrozen-soaked. They brown better.
- Room temperature scallops sear more evenly than cold straight from the fridge.
- Test one first: cook one scallop to confirm time for your model — then batch cook.
- Use the butter-oil combo: you get flavor plus a higher smoke point.
- Finish with acid: a squeeze of lemon right before eating brightens flavors dramatically.
- If you crave a restaurant sear: quickly sear scallops for 30–45 seconds per side in a screaming hot pan with no more than 1 tsp oil, then finish 2–3 minutes in the air fryer to flush heat evenly.
Air-Fryer Benefits of Scallops
Air frying reduces added oil while delivering consistent, strong dry heat. Unlike a pan where hot spots can burn and splatter, the air fryer’s circulating heat produces a uniform crust and cooks the interior evenly. It’s cleaner, faster, and well suited for delicate shellfish.
Variations You Can Try
- Garlic-Parmesan: sprinkle 1 tbsp grated Parmesan after cooking.
- Spicy Citrus: add zest of ½ orange + ¼ tsp cayenne.
- Asian glaze: brush with a 1 tbsp mix of soy sauce + sesame oil + ½ tsp honey (add after cooking).
- Herb butter: fold tarragon or dill into the finishing butter.
- Oven option: roast at 220°C / 425°F for 8–10 min on a sheet pan, flipping once.
Tips for This Recipe (make-ahead & staging)
- Dry scallops and keep them covered in the fridge up to 2 hours before cooking.
- Make garlic butter ahead and warm slightly before use.
- Cook in small batches and keep finished scallops on a warm plate in a 90°C / 200°F oven for up to 8–10 minutes while you finish remaining batches.
Optional Additions (with carb notes)
- Herb butter — negligible carbs.
- Lemon-garlic aioli — ~1–2 g net carbs per tbsp depending on mayo.
- Chili oil drizzle — 0 g carbs, adds heat.
- Sautéed greens or cauliflower mash — low carb pairings.
Serving Ideas — pairings & occasions
- Date night: scallops over a lemon-butter risotto (or cauliflower mash for keto).
- Appetizer: 2–3 scallops per person on crostini with herb oil.
- Weeknight: serve beside asparagus and roasted tomatoes.
- Entertaining: plated with a simple beurre blanc or herb vinaigrette.
Storage & Reheating
- Fridge: store cooled scallops in an airtight container up to 48 hours.
- Freezer: not recommended — scallops lose texture.
- Reheat: re-crisp in the air fryer at 175°C / 350°F for 2–3 minutes — do not overcook.
Frequently Asked Questions (6)
1. Can I use frozen scallops?
Yes — thaw overnight in the fridge, drain, and pat dry thoroughly before cooking.
2. How do I know scallops are done without a thermometer?
They’ll be opaque, slightly firm with a spring (not mushy), and have a golden edge.
3. Are bay scallops OK?
Bay scallops are much smaller; cut cook time to 3–4 minutes total and watch carefully.
4. Why do scallops get rubbery?
Overcooking — they must be removed as soon as they reach 63°C / 145°F.
5. Can I marinate them?
Avoid long acidic marinades (>15 minutes) — acid will “cook” the scallop and change texture.
6. What’s the difference between dry and wet scallops?
Dry scallops are not treated with water and brown better; wet scallops have been treated with solutions and can be waterlogged.
Nutritional Breakdown (Per Serving — recipe yields 4 servings)
(Approximations based on ingredient quantities and common nutrition values — shown to help planning)
- Calories: ~194 kcal
- Protein: ~20.0 g
- Fat: ~11.0 g
- Total Carbs: ~4.5 g
- Net Carbs: ~4.3 g
Note: These values were calculated from 450 g scallops plus butter, oil, garlic, lemon, and a small amount of Parmesan, then divided into 4 servings. Values are estimates; adjust if you change quantities.
Recipe Snapshot
- Prep Time: 10–15 minutes (including drying)
- Cook Time: 8–10 minutes (per batch)
- Total Time: 20–25 minutes
- Course: Main / Appetizer
- Cuisine: Modern, Seafood
- Servings: 3–4 (main) or 6–8 (appetizer)
- Calories (per serving): ~194 kcal
Air Fryer Scallops Recipe
Ingredients
- 450 g / 1 lb large sea scallops 10–12
- 28 g / 2 tbsp unsalted butter melted
- 15 g / 1 tbsp avocado or light olive oil
- 2 garlic cloves minced (≈6–8 g)
- 1 tbsp lemon juice 15 g
- ½ tsp sea salt
- ¼ tsp black pepper
- 1 tsp smoked paprika optional
- 1 tbsp chopped fresh parsley or chives
- Lemon wedges for serving
Instructions
- Thaw & dry: If frozen, thaw scallops overnight in fridge. Pat scallops dry with paper towels until no surface moisture remains.
- Season: Lightly season both sides with ½ tsp sea salt and ¼ tsp pepper. Let rest 5–10 minutes at room temp.
- Make butter mix: Whisk together 28 g (2 tbsp) melted butter, 15 g (1 tbsp) oil, 2 minced garlic cloves, and 1 tbsp lemon juice. Cool slightly.
- Preheat air fryer: Preheat to 200°C / 400°F for 3 minutes.
- Coat & arrange: Lightly brush scallops with the butter/oil mix (reserve 1 tbsp). Place scallops in a single layer in the basket with space between them.
- Air fry: Cook at 200°C / 400°F for 8–10 minutes, flipping once at 4–5 minutes. Remove when internal temp reaches 63°C / 145°F and scallops are opaque with a golden edge.
- Finish & serve: Brush with reserved butter, sprinkle parsley, and serve immediately with lemon wedges.