This post may contains Amazon affiliate and other affiliate links. If you make a purchase through these links, I may earn a small commission at no extra cost to you. Your support helps me continue to provide quality content. I only recommend products I personally trust and believe will add value to your experience. For more details, please visit my Privacy Policy.
Introduction
There are certain cravings that hit at the worst possible time — late at night, after a long day, or right when you’re trying your best to stay on track. For me, it’s always been that irresistible combination of chocolate and peanut butter. But the problem? Most desserts in this category are loaded with sugar and empty calories.
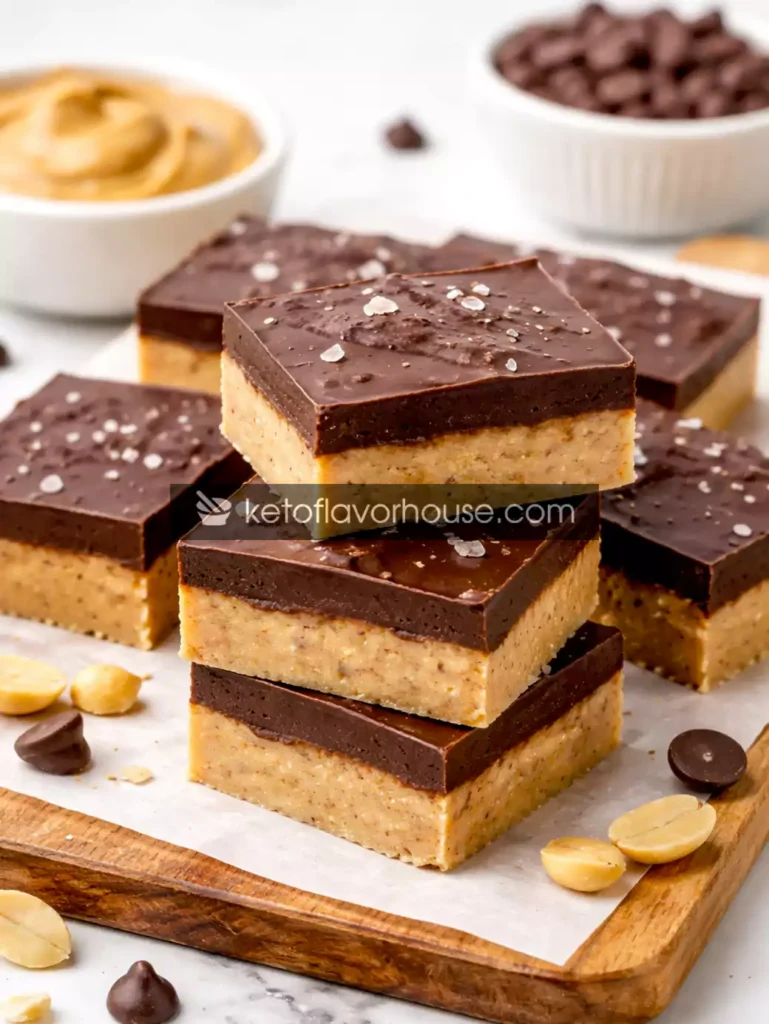
That’s exactly why I created these High-Protein No-Bake Chocolate Peanut Butter Bars — a recipe that satisfies your sweet tooth without sabotaging your goals. The first time I made these, I wasn’t even aiming for perfection. I just wanted something quick, indulgent, and aligned with a high-protein lifestyle. But what came out of my kitchen that day? Honestly, it felt like I had cracked a secret formula.
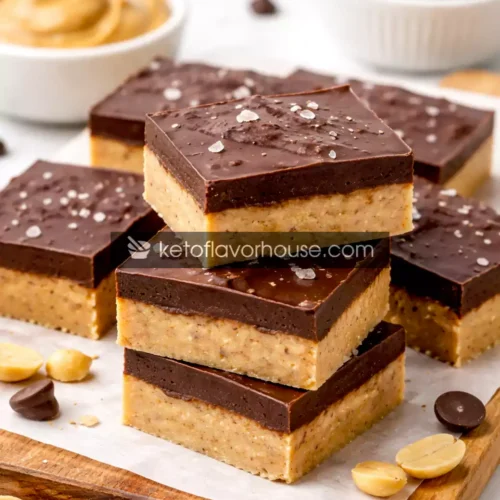
These bars are creamy, rich, slightly fudgy, and packed with real satisfaction — not just flavor, but nutrition. And the best part? They require no baking, minimal effort, and deliver a serious protein boost.
If you’re someone focused on fat loss, muscle recovery, or simply staying full longer, this recipe fits beautifully into your routine. Unlike traditional desserts that spike your blood sugar and leave you hungry again, these bars are designed to keep you energized, satisfied, and on track.
Why You’ll Love This Recipe
- 🍫 Rich chocolate + peanut butter flavor – the ultimate comfort combo
- 💪 High-protein dessert – supports muscle recovery & satiety
- ⚡ No-bake & quick prep – ready with minimal effort
- 🥜 Healthy fats included – keeps you full for longer
- 🚫 Sugar-free – perfect for low-carb & diabetic-friendly lifestyles
- 🧊 Meal-prep friendly – make once, enjoy all week
- 👨👩👧 Family-friendly – even non-dieters will love these
My Personal Experience
I still remember the first time I attempted a “healthy dessert.” It was dry, bland, and honestly… disappointing. That experience stuck with me. I realized that if I was going to stick to a high-protein lifestyle long-term, I needed recipes that didn’t feel like compromises.
So when I developed these bars, I focused on three things:
- Texture (creamy but firm)
- Flavor (indulgent, not artificial)
- Satisfaction (actually filling)
The first batch? Gone within two days.
What surprised me the most wasn’t just the taste — it was how satisfying they were. One bar actually kept me full for hours. That’s when I knew this recipe wasn’t just a dessert… it was a tool for consistency.
Required Equipment
Mixing Bowl
A medium to large mixing bowl is essential for combining your base ingredients smoothly. I prefer a slightly deeper bowl to avoid spills when mixing thick peanut butter.
Silicone Spatula
This is your best friend for no-bake recipes. It helps you scrape every bit of mixture and ensures nothing goes to waste. Also great for even spreading.
Baking Dish (8×8 inch recommended)
Even though we’re not baking, a dish helps shape the bars. Line it with parchment paper for easy removal.
Microwave-Safe Bowl
Used for melting chocolate. You can also use a double boiler if you want more control.
Parchment Paper
Makes lifting and cutting the bars incredibly easy. Trust me — don’t skip this.
Ingredients & Substitutions
Base Layer
- 1 cup natural peanut butter
Primary fat + protein source. Provides creaminess and structure.
Substitute: Almond butter or cashew butter. - 1/2 cup protein powder (whey or casein)
The core protein boost. Helps transform this into a functional dessert.
Substitute: Plant-based protein (texture may vary slightly). - 1/4 cup almond flour
Adds structure and slight nuttiness. Also contributes healthy fats.
Substitute: Coconut flour (use less, as it absorbs more). - 1/4 cup sugar-free sweetener (powdered)
Keeps the recipe diabetic-friendly.
Substitute: Stevia blend, monk fruit. - 2–3 tbsp unsweetened almond milk
Helps bind everything together.
Chocolate Layer
- 100g sugar-free dark chocolate
Rich flavor without sugar spikes. - 1 tbsp coconut oil
Helps chocolate melt smoothly and set with a glossy finish.
How to Make High-Protein No-Bake Chocolate Peanut Butter Bars
Step 1: Prepare the Base
In a mixing bowl, combine peanut butter, protein powder, almond flour, and sweetener. Mix until crumbly.
👉 Tip: If it feels too dry, don’t panic — that’s normal at this stage.
Step 2: Adjust Texture
Slowly add almond milk, 1 tablespoon at a time, until the mixture becomes thick but moldable.
👉 You’re aiming for a dough-like consistency.
Step 3: Press into Pan
Transfer mixture into a lined baking dish. Press evenly using a spatula or your hands.
👉 Pro tip: Wet your fingers slightly to prevent sticking.
Step 4: Melt Chocolate
Melt chocolate with coconut oil in a microwave-safe bowl in 20-second intervals.
Step 5: Add Chocolate Layer
Pour melted chocolate over the base and spread evenly.
Step 6: Chill
Refrigerate for 1–2 hours until firm.
Step 7: Slice & Serve
Lift using parchment paper and cut into bars.
Common Mistakes to Avoid
- ❌ Too dry mixture → Add more almond milk gradually
- ❌ Overloading protein powder → Can make bars chalky
- ❌ Skipping parchment paper → Difficult removal
- ❌ Overheating chocolate → Leads to grainy texture
Pro Tips for Best Results
- Use creamy peanut butter, not dry or separated
- Chill before slicing for clean cuts
- Balance protein powder — more isn’t always better
- Add a pinch of salt to enhance flavor
High-Protein Nutrition & Strategy
These bars aren’t just a dessert — they’re a strategic addition to a high-protein diet.
Protein helps:
- Improve satiety
- Support muscle recovery
- Stabilize blood sugar
According to general nutrition guidelines, incorporating protein into snacks can reduce overeating and improve long-term adherence to healthy eating patterns.
These bars are perfect for:
- Post-workout recovery
- Evening cravings
- Meal-prep snacks
Variations You Can Try
- 🍫 Double Chocolate – Add cocoa powder to base
- 🥜 Crunchy Version – Add crushed peanuts
- 🥥 Coconut Twist – Mix shredded coconut
- 🍓 Berry Protein Bars – Add freeze-dried strawberries
Tips for This Recipe
- Cut into smaller pieces for portion control
- Store chilled for best texture
- Sprinkle sea salt on top for a gourmet touch
Optional Additions
- Chia seeds → fiber boost
- Flax seeds → omega-3
- Collagen powder → skin & joint benefits
Serving Ideas
- Post-workout snack
- Midday energy boost
- Healthy dessert after dinner
Pair with:
- Black coffee
- Protein shake
- Greek yogurt
Storage Recommendations
- Fridge: 5–7 days
- Freezer: Up to 2 months
👉 Store in airtight container
Frequently Asked Questions (FAQ)
Can I add more protein powder?
Yes, but balance with liquid to avoid dryness.
Is this good for weight loss?
Yes, if consumed in controlled portions.
Can I make it vegan?
Absolutely — use plant protein and dairy-free chocolate.
Is it keto-friendly?
Yes, if using low-carb sweeteners.
Can I skip chocolate topping?
Yes, but it adds flavor and texture.
Nutritional Breakdown (Per Serving)
- Calories: 180
- Protein: 14g
- Fat: 12g
- Total Carbs: 8g
- Fiber: 3g
- Net Carbs: 5g
- Sugar: 1g
- Sodium: 90mg
📌 Recipe Snapshot
- Prep Time: 10 minutes
- Cook Time: 0 minutes
- Total Time: 1 hour 10 minutes (including chilling)
- Course: Dessert / Snack
- Cuisine: Healthy / Low-Carb
- Servings: 10 bars
- Calories: 180 per serving
- Protein: 14g per serving
High-Protein No-Bake Chocolate Peanut Butter Bars Recipe
Ingredients
- 1 cup peanut butter
- 1/2 cup protein powder
- 1/4 cup almond flour
- 1/4 cup sweetener
- 2 –3 tbsp almond milk
- 100 g sugar-free chocolate
- 1 tbsp coconut oil
Instructions
- Start by taking a medium-sized mixing bowl and adding the peanut butter, protein powder, almond flour, and sweetener into it. Use a spatula or spoon to mix everything together slowly at first, then more firmly, until all ingredients are evenly combined. At this stage, the mixture will look slightly dry and crumbly — this is completely normal, so don’t worry if it doesn’t come together yet.
- Begin adding the almond milk gradually, starting with one tablespoon. Mix thoroughly after each addition, pressing and folding the mixture together as you go. Continue adding small amounts of almond milk until the texture changes from crumbly to a thick, soft dough. You’ll know it’s ready when you can press it between your fingers and it holds its shape without cracking or falling apart.
- Prepare a square baking dish (around 8×8 inches works best) by lining it with parchment paper, making sure some paper hangs over the sides for easy removal later. Transfer the dough into the dish and start pressing it down firmly. Use the back of a spoon, spatula, or even your hands to spread it evenly into all corners, creating a smooth and compact base layer. Take your time here to ensure it’s level and tightly packed so the bars hold together well after setting.
- Set the prepared base aside and move on to the chocolate topping. In a microwave-safe bowl, add the sugar-free chocolate along with the coconut oil. The coconut oil helps the chocolate melt smoothly and gives it a glossy finish once set.
- Place the bowl in the microwave and heat it in short 20-second intervals. After each interval, remove the bowl and stir the mixture gently. This prevents the chocolate from overheating or burning. Continue this process until the chocolate is completely melted, smooth, and silky in texture.
- Carefully pour the melted chocolate over the prepared peanut butter base. Use a spatula or the back of a spoon to spread it evenly across the surface, making sure it reaches all edges and forms a smooth, even top layer. If you want a more polished look, gently tap the dish on the counter to level the chocolate.
- Transfer the entire dish into the refrigerator and let it chill for at least 1 to 2 hours. During this time, both the base and chocolate layer will firm up and set properly. Avoid rushing this step, as cutting too early can cause the bars to break or lose shape.
- Once fully chilled and firm, remove the dish from the refrigerator. Lift the entire slab out using the parchment paper overhang and place it onto a cutting board. Use a sharp knife to slice into evenly sized bars or squares, wiping the knife between cuts if needed for clean edges. Your high-protein bars are now ready to serve and enjoy.