This post may contains Amazon affiliate and other affiliate links. If you make a purchase through these links, I may earn a small commission at no extra cost to you. Your support helps me continue to provide quality content. I only recommend products I personally trust and believe will add value to your experience. For more details, please visit my Privacy Policy.
Introduction
There are some cravings that feel almost emotional. For me, cheesecake has always been one of those desserts — creamy, rich, slightly tangy, and comforting in a way that feels indulgent and nostalgic all at once. I still remember family gatherings where cheesecake was the “special” dessert, the one everyone waited for after dinner. The problem, of course, was that traditional cheesecake never quite fit into a high-protein or health-focused lifestyle.
That’s exactly why these High-Protein Strawberry Cheesecake Jars came to life in my kitchen.
The first time I tested this recipe, I wasn’t trying to reinvent cheesecake. I simply wanted a dessert that tasted like the real thing but didn’t leave me feeling sluggish or guilty afterward. Something I could enjoy after a workout, during a busy workday, or even as a late-night treat — without derailing my nutrition goals.
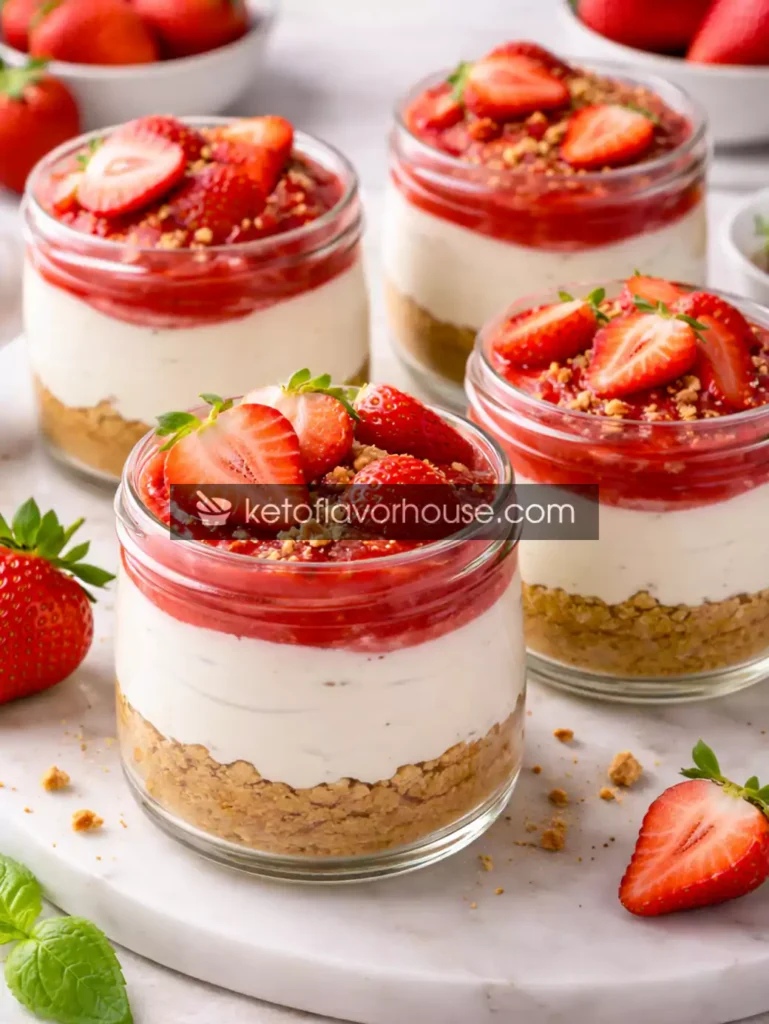
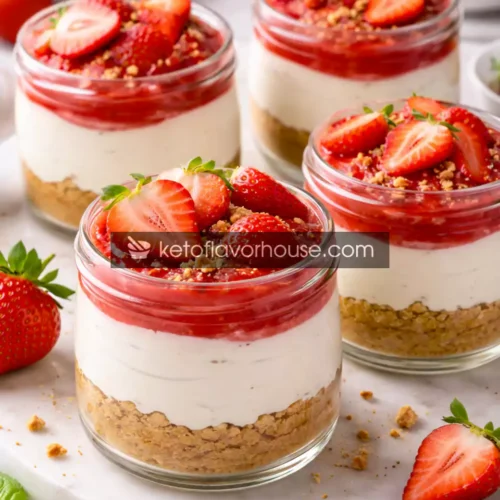
These High-Protein Strawberry Cheesecake Jars are creamy, naturally sweet, and layered with fresh strawberries, yet they’re built around protein-rich ingredients that support muscle recovery, stable energy, and long-lasting satiety. They’re no-bake, easy to prep, and surprisingly satisfying for how light they feel.
What makes this recipe truly special is how it balances indulgence and intention. You get the flavor and texture of cheesecake, the freshness of strawberries, and the nutritional benefits of a high-protein dessert — all in a jar that’s perfect for meal prep, portion control, and everyday enjoyment.
Whether you’re focused on fitness, weight loss, or simply eating better without giving up dessert, this recipe fits seamlessly into a high-protein lifestyle.
Why You’ll Love This Recipe
- 🍓 Creamy & Cheesecake-Like — rich texture without heaviness
- 💪 High-Protein & Filling — supports muscle recovery and satiety
- ❄️ No-Bake & Easy — no oven, no stress
- 🫙 Perfect for Meal Prep — make ahead and enjoy all week
- 🍰 Dessert Without Guilt — indulgent flavor, balanced nutrition
- 👨👩👧 Family-Friendly — tastes like a treat, not “diet food”
My Personal Experience
The first version of these jars wasn’t perfect. I added too much yogurt, not enough sweetness, and skipped chilling them properly. The result tasted good but didn’t feel like cheesecake. That trial taught me something important: texture matters just as much as flavor when it comes to dessert.
Once I adjusted the ratio of cream cheese to Greek yogurt and added a subtle sweetness boost, everything changed. The jars thickened beautifully in the fridge, the strawberry layer settled perfectly, and suddenly it felt like a dessert I’d happily serve to guests — not just eat secretly after the gym.
What I love most about these jars is how they’ve become a reliable part of my routine. When you live a high-protein lifestyle, desserts can feel complicated. These jars remove that friction. They’re ready when cravings hit, satisfying enough to prevent overeating, and balanced enough to enjoy regularly.
They’re proof that eating high-protein doesn’t mean giving up comfort food — it just means being smarter about how you build it.
Required Equipment
Mixing Bowl
A medium to large mixing bowl is essential for blending the cheesecake filling smoothly. I prefer a bowl with enough space to whisk vigorously without splashing.
Alternative: Any deep bowl works, but avoid shallow ones — cream cheese needs room to blend properly.
Hand Mixer or Whisk
A hand mixer makes the filling extra smooth and airy, which gives that true cheesecake texture.
Alternative: A sturdy whisk works if the cream cheese is fully softened.
Measuring Cups & Spoons
Accurate measurements help maintain the right balance between protein, sweetness, and creaminess.
Small Saucepan
Used for cooking the strawberry layer gently without burning or over-thickening.
Alternative: Microwave-safe bowl for quick heating.
Glass Jars or Containers
Clear jars are ideal for layering and presentation, especially if you’re using them for meal prep or photos.
Ingredients & Substitutions
Cream Cheese (1 cup, softened)
Provides classic cheesecake flavor and richness.
Nutrition role: Healthy fats + creaminess for satiety.
Substitution: Light cream cheese for lower calories.
Greek Yogurt (1 cup, full-fat or low-fat)
Boosts protein while keeping the filling light.
Substitution: Skyr or blended cottage cheese.
Protein Powder (½ cup, vanilla or unflavored)
Primary protein boost for the recipe.
Tip: Use whey or whey/casein blend for smooth texture.
Natural Sweetener (¼ cup, to taste)
Balances tanginess.
Options: Monk fruit, erythritol, honey, or maple syrup.
Vanilla Extract (1 tsp)
Enhances cheesecake flavor.
Fresh Strawberries (2 cups, chopped)
Adds natural sweetness and freshness.
Lemon Juice (1 tsp)
Brightens strawberry flavor.
Chia Seeds (optional, 1 tbsp)
Adds fiber and thickness.
How to Make High-Protein Strawberry Cheesecake Jars
Step 1: Prepare the Strawberry Layer
Add chopped strawberries and lemon juice to a saucepan. Cook over medium heat until strawberries soften and release juices. Mash lightly and simmer until thickened. Let cool completely.
Tip: Cooling prevents melting the cheesecake layer.
Step 2: Make the Cheesecake Filling
In a bowl, add softened cream cheese and Greek yogurt. Beat until smooth. Add protein powder, sweetener, and vanilla. Blend until creamy and lump-free.
Tip: Taste and adjust sweetness now.
Step 3: Assemble the Jars
Spoon strawberry layer into jars, followed by cheesecake mixture. Repeat layers if desired.
Step 4: Chill
Refrigerate jars for at least 2–3 hours to set.
Common Mistakes to Avoid
- Using cold cream cheese → lumpy texture
- Adding protein powder too fast → gritty filling
- Skipping chilling time → loose consistency
- Overcooking strawberries → jam-like heaviness
Pro Tips for Best Results
- Use high-quality protein powder
- Blend cottage cheese if substituting
- Chill overnight for best texture
- Keep sweetness moderate — protein dulls sweetness
High-Protein Nutrition & Strategy
Protein-rich desserts help control cravings, support muscle repair, and prevent blood sugar spikes. These jars offer slow-digesting protein combined with fats for long-lasting fullness, making them ideal post-workout or as a smart dessert.
Variations You Can Try
- 🍫 Chocolate strawberry cheesecake
- 🫐 Mixed berry protein jars
- 🍋 Lemon cheesecake jars
- 🥜 Peanut butter swirl version
Tips for This Recipe
Serve chilled with fresh strawberry slices or crushed nuts for texture.
Optional Additions
- Chia seeds for fiber
- Extra protein powder for macros
- Nut crumbs for crunch
Serving Ideas
Perfect for post-workout dessert, meal-prep snacks, summer gatherings, or healthy celebrations.
Storage Recommendations
Fridge: 4–5 days sealed
Freezer: Not recommended (texture changes)
Reheat: Not needed — serve cold
Frequently Asked Questions
Can I add more protein powder?
Yes, but balance with yogurt to avoid dryness.
Is this post-workout friendly?
Absolutely — ideal protein-to-carb balance.
Can I make it dairy-free?
Use dairy-free cream cheese and yogurt alternatives.
Meal-prep friendly?
One of the best protein desserts for prep.
Can I use frozen strawberries?
Yes, thaw and drain excess liquid first.
Nutritional Breakdown (Per Serving)
- Calories: ~210
- Protein: ~20 g
- Fat: ~9 g
- Total Carbs: ~10 g
- Fiber: ~2 g
- Net Carbs: ~8 g
- Sugar: ~6 g
- Sodium: ~140 mg
📌 Recipe Snapshot
Prep Time: 15 minutes
Cook Time: 10 minutes
Total Time: 25 minutes + chilling
Course: Dessert
Cuisine: American
Servings: 4 jars
Calories: ~210 per serving
Protein: ~20 g per serving
High-Protein Strawberry Cheesecake Jars Recipe
Ingredients
- Cream cheese 1 cup
- Greek yogurt 1 cup
- Protein powder ½ cup
- Strawberries 2 cups
- Sweetener Vanilla
Instructions
- Add the chopped strawberries to a small saucepan along with the lemon juice and place it over medium heat. As the strawberries warm up, they will begin to release their natural juices. Stir gently and allow them to cook for several minutes until the fruit becomes soft and slightly jam-like. Use the back of a spoon to lightly mash some of the strawberries for a thicker texture, but leave a few small chunks for freshness. Once the mixture looks glossy and naturally thickened, remove it from the heat and let it cool completely. Cooling is important so the warm fruit doesn’t melt or thin out the cheesecake layer later.
- Place the softened cream cheese and Greek yogurt into a mixing bowl. Using a hand mixer or a sturdy whisk, beat the mixture until it becomes completely smooth and creamy with no visible lumps. This step sets the foundation for a true cheesecake-like texture, so take your time and scrape down the sides of the bowl as needed to ensure everything is evenly combined.
- Add the protein powder, sweetener, and vanilla extract to the cream cheese mixture. Blend again until fully incorporated and silky smooth. Make sure the protein powder is evenly mixed in without any dry pockets, as uneven blending can cause a grainy texture. At this stage, taste the mixture and adjust sweetness if needed, keeping in mind that flavors become slightly more muted once chilled.
- Take your serving jars or containers and begin assembling the layers. Spoon a layer of the cooled strawberry mixture into the bottom of each jar, spreading it evenly. Follow with a generous layer of the cheesecake filling, smoothing the top gently with the back of a spoon. Repeat the layers if your jars are tall enough, finishing with either the cheesecake layer or a thin strawberry layer on top for visual appeal.
- Cover the jars and place them in the refrigerator for at least 2–3 hours to allow the cheesecake filling to firm up and the flavors to fully develop. For the best texture and flavor, chilling overnight is even better. Once set, the jars are ready to serve straight from the fridge as a creamy, refreshing, high-protein dessert.
Subscribe to our newsletter!