This post may contains Amazon affiliate and other affiliate links. If you make a purchase through these links, I may earn a small commission at no extra cost to you. Your support helps me continue to provide quality content. I only recommend products I personally trust and believe will add value to your experience. For more details, please visit my Privacy Policy.
These Keto Cheesecake Brownies bring together the best of both worlds—rich, fudgy brownie layers swirled with creamy, tangy cheesecake! Perfect for a low-carb dessert that doesn’t skimp on flavor, they’re ideal for satisfying those chocolate cravings without kicking you out of ketosis.
If you’re loving keto-friendly recipes like this, why not take your journey to the next level? Discover meal plans crafted to suit your taste and help you stay on track with your goals. Start your custom plan today!
My Personal Experience
These Keto Cheesecake Brownies have quickly become one of my favorite low-carb desserts! The combination of fudgy brownie and creamy cheesecake layers is simply irresistible. They’re perfect for when you’re craving something chocolatey, but you still want to stick to your keto diet. I love making a batch and storing them in the fridge to have a tasty treat ready whenever I need it!
Why You’ll Love This Recipe
• Two of the best dessert flavors—chocolate and cheesecake—combined in one treat!
• Low-carb, gluten-free, and keto-friendly, perfect for satisfying your sweet cravings.
• Easy to make with simple ingredients.
• Customize with chocolate chips or your favorite toppings.
• Great for meal prep or as a dessert for gatherings!
Essential Equipment You’ll Need for This Recipe
8×8 Inch Baking Pan
When I first started baking, I was always hunting for the right size pan to get everything baked just right. This 8×8-inch pan became my go-to. It’s the perfect size for making sure your cheesecake brownies bake evenly and come out with that perfect texture. Plus, it’s a versatile pan you’ll use for everything from brownies to small cakes, so it’s always a win in my kitchen!
Parchment Paper
If you haven’t tried using parchment paper, you’re in for a treat. It makes a world of difference when it comes to easy cleanup. No more scraping stuck-on bits! I use it every time for recipes like this, where you want to ensure that your brownies come out without a hassle. Plus, it makes cutting them into neat squares a breeze.
Mixing Bowls
You’ll need a good set of mixing bowls for this one. I prefer having a few of varying sizes, especially when you’re handling both the brownie and cheesecake layers. A nice, deep bowl gives you enough space to blend everything smoothly without any spills. Trust me, the right bowls can make prep time so much easier and more organized.
Electric Mixer or Whisk
When it comes to mixing, the electric mixer really steps up the game. It saves me so much time when I need to blend cream cheese and heavy cream for the cheesecake layer. I also love using it for beating the eggs and mixing dry ingredients without much effort. If you don’t have an electric mixer, a whisk works fine, but the mixer just makes it quicker and smoother—especially for those times when you’re mixing multiple ingredients at once.
Spatula
A good spatula is a kitchen essential, and for this recipe, it’s a must-have. You’ll be using it for folding the layers together and making sure every little bit of the batter is scraped from the bowl. I love using a silicone spatula because it doesn’t scratch up my pans and works perfectly for scraping everything out cleanly. You’ll thank yourself when you’re spreading the brownie batter evenly in the pan!
Ingredients & Substitutions
For the Brownie Layer:
• Almond Flour – The base flour for these brownies, giving them a soft texture. You can’t replace almond flour with regular flour, but other nut flours can work in its place.
• Cocoa Powder (unsweetened) – Gives the brownies their rich chocolate flavor. Make sure it’s unsweetened for a keto-friendly treat.
• Butter (melted) – Adds moisture and richness. Use coconut oil for a dairy-free version.
• Granulated Erythritol or Monk Fruit Sweetener – A keto-friendly sweetener that helps keep the carbs low.
• Eggs – Adds structure and moisture.
• Vanilla Extract – Enhances the flavors in the brownie layer.
• Salt – Balances the sweetness and enhances the flavors.
For the Cheesecake Layer:
• Cream Cheese (softened) – The base of the cheesecake layer. Use dairy-free cream cheese for a dairy-free version.
• Granulated Erythritol or Monk Fruit Sweetener – To sweeten the cheesecake layer.
• Egg – Helps set the cheesecake layer.
• Vanilla Extract – For added flavor in the cheesecake layer.
Follow These Steps to Keto Perfection
- Preheat the Oven
- Preheat your oven to 350°F (175°C). Line an 8×8 inch baking pan with parchment paper, letting the edges hang over the sides for easy removal.
- Prepare the Brownie Layer
- In a mixing bowl, whisk together almond flour, cocoa powder, and salt.
- In a separate bowl, combine the melted butter, sweetener, eggs, and vanilla extract. Stir well until smooth.
- Gradually add the dry ingredients to the wet mixture, stirring until fully combined.
- Pour about 3/4 of the brownie batter into the prepared baking pan, spreading it out evenly. Reserve the remaining batter for swirling on top.
- Prepare the Cheesecake Layer
- In another bowl, beat the softened cream cheese with the sweetener until smooth.
- Add the egg and vanilla extract, mixing until creamy and fully combined.
- Assemble the Brownies
- Gently pour the cheesecake mixture over the brownie layer in the pan, spreading it evenly.
- Drop spoonful of the reserved brownie batter on top of the cheesecake layer, then use a knife or skewer to swirl the brownie and cheesecake layers together for a marbled effect.
- Bake
- Place the pan in the oven and bake for 25-30 minutes, or until the cheesecake layer is just set and a toothpick inserted into the brownie layer comes out with only a few moist crumbs.
- Let the brownies cool in the pan for about 15 minutes, then lift them out using the parchment paper and allow them to cool completely on a wire rack before slicing.
Bonus Tips: Make the Most of This Recipe
- For an Extra Fudge Texture: Slightly underbake by 2 minutes if you like gooey brownies. They’ll firm up as they cool.
- Dairy-Free Option: Substitute cream cheese with dairy-free cream cheese, and butter with coconut oil for a dairy-free version.
- Add Chocolate Chips: Mix in some sugar-free chocolate chips for extra chocolatey richness.
Best Ways to Store and Enjoy Later
- Refrigeration: Store in an airtight container in the fridge for up to 5 days.
- Freezing: Individually wrap slices and freeze for up to 2 months. Let them thaw in the fridge or at room temperature before serving.
Frequently Asked Questions
1. Can I use coconut flour instead of almond flour?
Yes, but use only 1/4 the amount, as coconut flour absorbs more liquid. Adjust based on texture.
2. Why does my cheesecake layer crack?
Overmixing or overbaking can cause cracks. Mix just until combined, and don’t bake past the recommended time.
3. Can I make these brownies sweeter?
Feel free to add a bit more sweetener to taste, but be cautious as too much can affect the texture.
Nutrition Information (per serving, based on 9 servings)
- Calories: 180
- Fat: 16g
- Carbohydrates: 4g
- Fiber: 2g
- Protein: 4g
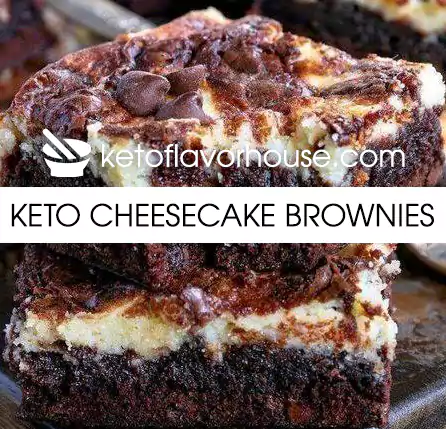
Keto Cheesecake Brownies Recipe
Equipment
- 8×8-inch baking pan
- Parchment Paper
- Mixing Bowls
- Electric Mixer or Whisk
- Spatula
Ingredients
- For the Brownie Layer:
- 1/2 cup almond flour
- 1/4 cup unsweetened cocoa powder
- 1/2 cup granulated erythritol or monk fruit
- 1/4 tsp salt
- 1/4 cup unsalted butter melted
- 2 large eggs
- 1 tsp vanilla extract
- For the Cream Cheese Cheesecake Layer:
- 4 oz cream cheese softened to room temperature
- 2 tbsp granulated erythritol or monk fruit sweetener
- 1 egg
- 1/2 tsp vanilla extract
Instructions
- Preheat your oven to 350°F (175°C). Line an 8×8-inch pan with parchment paper.
- Make the brownie base: In a bowl, whisk together almond flour, cocoa powder, erythritol, and salt. Add melted butter, eggs, and vanilla extract. Mix until you get a thick, smooth batter.
- Pour about ¾ of the brownie batter into the prepared pan and smooth it out evenly.
- Make the cream cheese layer: In another bowl, beat softened cream cheese, erythritol, egg, and vanilla extract until creamy and lump-free.
- Assemble: Spoon the cream cheese mixture over the brownie base, then dollop the remaining brownie batter on top. Use a knife or toothpick to swirl the two layers together for a marbled effect.
- Bake for 22–25 minutes, or until the edges are set but the center is slightly soft.
- Cool completely before slicing. For best texture, chill for at least 1 hour before serving.
I’m so excited to hear how this recipe turned out for you! 😊 Don’t forget to follow us on Instagram and Facebook for daily keto inspiration, tasty recipes, and all the support you need to crush your goals. Want to make your keto journey easier? Get a meal plan tailored to your unique needs and preferences, designed to keep you on track effortlessly. Start your personalized plan now!
Subscribe to our newsletter!

The cheesecake layer of the recipe is missing! you can’t leave that out!
You’re absolutely right — thank you for catching that! 🙏 The cheesecake layer is made with cream cheese, sweetener, an egg, and vanilla extract. I’ve now added the full cheesecake layer instructions to the recipe card so it’s complete. Appreciate you pointing that out! 💛
What is the cream cheese recipe?
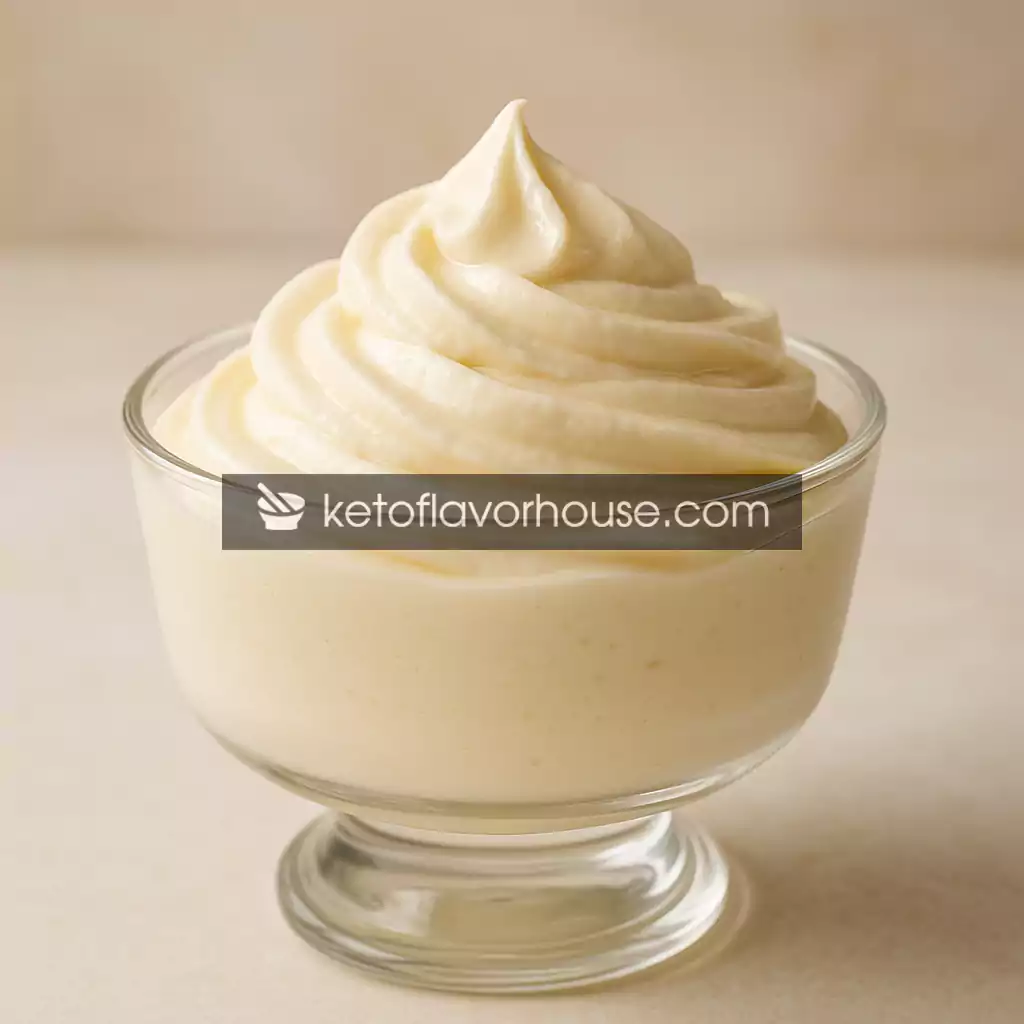
Great question! 🙌 The cream cheese portion is actually the cheesecake layer in these Keto Cheesecake Brownies — that’s what gives them their creamy, tangy swirl! 💛
Here’s the quick breakdown for the cream cheese layer recipe 👇
4 oz cream cheese (softened)
2 tbsp granulated erythritol or monk fruit sweetener
1 egg
1/2 tsp vanilla extract
Just beat everything together until smooth and creamy, then spread it over the brownie layer before swirling and baking. That’s it! The cream cheese layer sets beautifully while baking and gives these brownies their signature cheesecake swirl. 🍫💫