This post may contains Amazon affiliate and other affiliate links. If you make a purchase through these links, I may earn a small commission at no extra cost to you. Your support helps me continue to provide quality content. I only recommend products I personally trust and believe will add value to your experience. For more details, please visit my Privacy Policy.
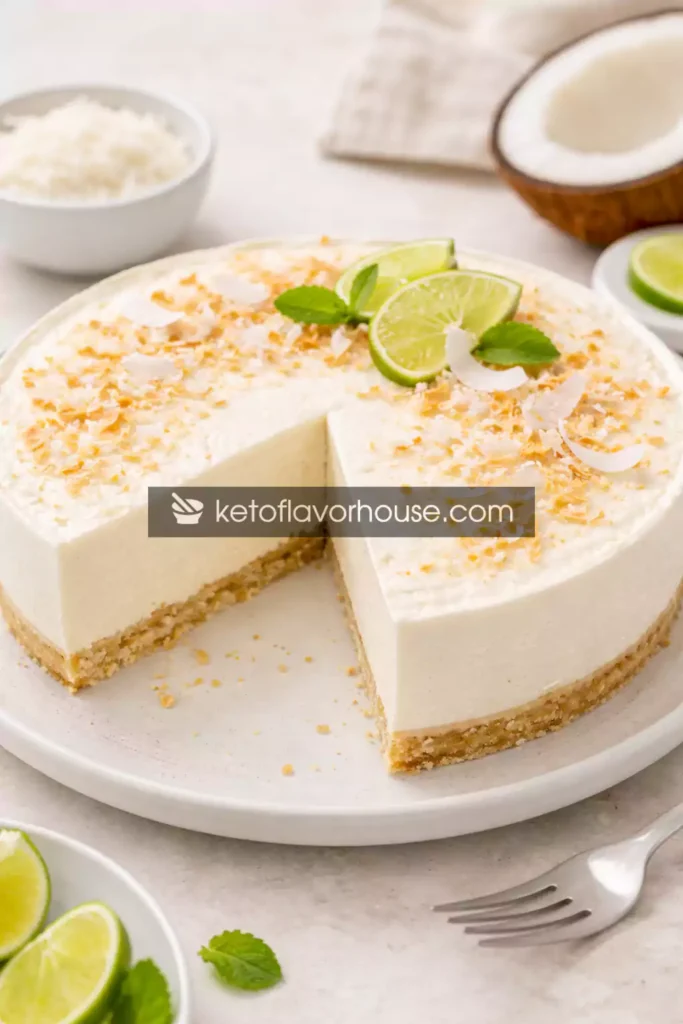
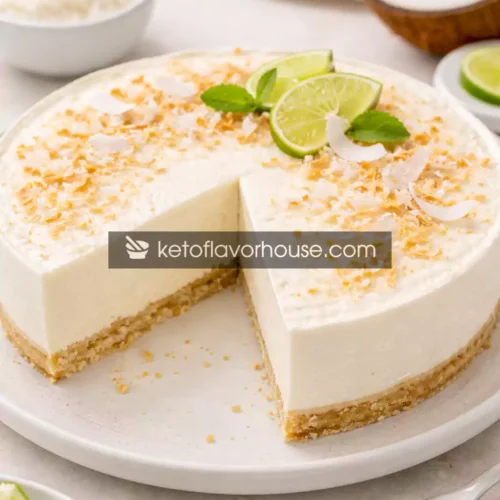
Some dessert cravings don’t want heat, ovens, or long bake times. They want something cool, creamy, and soothing—especially on warm days or after a heavy meal. That’s exactly where this No-Bake Keto Coconut Yogurt Cheesecake comes in.
I first started experimenting with no-bake keto desserts during a phase when I loved cheesecake flavor but didn’t always want the density or the oven time. Traditional baked cheesecakes are amazing, but sometimes you just want something lighter, fresher, and easier—something you can mix, chill, and enjoy without babysitting an oven.
This recipe was born out of that craving.
This cheesecake is ultra creamy, gently tangy from coconut yogurt, lightly sweet, and refreshing rather than heavy. It’s the kind of dessert that feels indulgent but doesn’t leave you feeling weighed down. And best of all, it fits beautifully into a low-carb, sugar-free, keto lifestyle.
If you’ve ever wanted a keto dessert that feels cooling, silky, and effortless, this one deserves a permanent spot in your recipe collection.
Why You’ll Love This Recipe
There are plenty of reasons this cheesecake wins hearts quickly:
- 🥥 Creamy & refreshing – Coconut yogurt gives a light tang and silky texture.
- ❄️ No oven required – Perfect for summer or busy days.
- 🍰 Classic cheesecake flavor, lighter feel – Rich without being heavy.
- ⏱️ Quick to assemble – Minimal prep, mostly chill time.
- 🧁 Perfect make-ahead dessert – Tastes even better after chilling.
- 💚 Keto & sugar-free – Low net carbs with satisfying fats.
- 👨👩👧👦 Crowd-friendly – Non-keto eaters love it too.
- 🔁 Endlessly customizable – Add citrus, berries, or chocolate easily.
My Personal Experience
I’ll be honest: the first time I tried coconut yogurt in a cheesecake-style dessert, I was skeptical. I worried it might taste too “coconutty” or too thin. But once I paired it with cream cheese, heavy cream, and the right balance of sweetener, something magical happened.
The cheesecake turned out lighter than baked cheesecake, with a smooth, mousse-like texture that melts as you eat it. The coconut yogurt didn’t overpower anything—it simply added a gentle tang that made every bite feel refreshing.
This quickly became my go-to dessert when:
- It’s too hot to bake.
- I want something after dinner that doesn’t feel heavy.
- I’m hosting guests and want a dessert I can prepare the day before.
- I want a keto dessert that feels modern and clean, not dense or overly rich.
It’s also one of those recipes that people ask for immediately after the first bite—which is always the best sign.
Required Equipment
You don’t need anything fancy for this no-bake cheesecake.
Springform Pan or Square Pan
A springform pan (8-inch) works best for a classic cheesecake look, but a square pan also works.
- Springform makes slicing and serving easier.
- A square pan is great for cheesecake bars.
Mixing Bowls
You’ll need two mixing bowls:
- One for the crust.
- One for the cheesecake filling.
Using separate bowls keeps the process clean and simple.
Hand Mixer or Whisk
A hand mixer makes the filling extra smooth, but a whisk works too if your cream cheese is very soft.
- Mixing well is key for a lump-free cheesecake.
- Softened cream cheese is essential.
Measuring Cups & Spoons
Accuracy matters, especially with sweeteners and fats.
- Measure coconut flour carefully—it’s very absorbent.
- Liquid measurements affect texture significantly.
Spatula
A rubber spatula helps:
- Fold whipped cream gently.
- Scrape down the bowl so nothing goes to waste.
- Smooth the top before chilling.
Ingredients & Substitutions
Full Ingredient List (8 servings)
Crust (Optional but Recommended)
- 1¼ cups almond flour
- 2 tablespoons coconut flour
- 3 tablespoons powdered keto sweetener
- ¼ teaspoon salt
- 4 tablespoons unsalted butter, melted
Cheesecake Filling
- 8 oz cream cheese, softened
- ¾ cup full-fat coconut yogurt (unsweetened)
- ¾ cup heavy whipping cream
- ½ cup powdered keto sweetener
- 1 tablespoon lemon juice
- 1 teaspoon vanilla extract
- ½ teaspoon coconut extract (optional)
- Pinch of salt
Why Each Ingredient Matters
- Almond Flour – Creates a tender, nutty crust that stays low carb.
- Coconut Flour – Helps bind the crust and absorb moisture.
- Butter – Adds richness and helps the crust set firmly.
- Cream Cheese – The heart of cheesecake flavor and structure.
- Coconut Yogurt – Adds tang, creaminess, and a lighter mouthfeel.
- Heavy Cream – Whipped for volume and silky texture.
- Powdered Sweetener – Dissolves smoothly without graininess.
- Lemon Juice – Balances sweetness and enhances cheesecake tang.
- Vanilla Extract – Brings warmth and classic dessert aroma.
- Salt – Sharpens and balances all flavors.
Substitutions & Adjustments
- Coconut Yogurt
- You may use full-fat Greek yogurt if carbs allow.
- Dairy-free coconut yogurt works well for lighter texture.
- Crust-Free Option
- Skip the crust and pour filling directly into cups or jars.
- Sweetener
- Use powdered erythritol, monk fruit, or allulose.
- Avoid granulated sweeteners—they won’t dissolve properly.
- Heavy Cream
- Coconut cream can be used for dairy-free versions.
How to Make No-Bake Keto Coconut Yogurt Cheesecake
Step 1: Prepare the Crust
In a mixing bowl, combine almond flour, coconut flour, powdered sweetener, and salt. Add melted butter and mix until the texture resembles damp sand.
Press the mixture firmly into the bottom of your pan.
Tip: Use the bottom of a glass to press evenly.
Chill in the fridge for 20–30 minutes while you prepare the filling.
Step 2: Soften and Mix the Cream Cheese
Place softened cream cheese in a bowl. Beat until completely smooth.
Don’t rush this step. Smooth cream cheese is essential for a silky cheesecake.
Step 3: Add Coconut Yogurt and Flavorings
Add coconut yogurt, lemon juice, vanilla extract, coconut extract (if using), sweetener, and salt. Mix until smooth and creamy.
Taste and adjust sweetness if needed.
Step 4: Whip the Cream
In a separate bowl, whip heavy cream until soft peaks form.
- Do not overwhip.
- Soft, fluffy peaks give the best texture.
Step 5: Fold Everything Together
Gently fold the whipped cream into the cheesecake mixture using a spatula.
Go slow. This keeps the filling light and airy.
Step 6: Assemble and Chill
Pour the filling over the chilled crust. Smooth the top evenly.
Refrigerate for at least 4 hours, preferably overnight.
Step 7: Slice and Serve
Once fully set, slice with a clean, sharp knife.
Wipe the knife between slices for clean edges.
Common Mistakes to Avoid
- Using cold cream cheese – causes lumps.
- Overwhipping cream – leads to grainy texture.
- Skipping chill time – cheesecake won’t set properly.
- Using granulated sweetener – results in gritty filling.
- Too much coconut flour – crust becomes dry.
Pro Tips for Best Results
- Chill overnight for best texture.
- Use powdered sweetener only.
- Press crust firmly to prevent crumbling.
- Let cheesecake sit at room temperature for 10 minutes before slicing.
- For ultra-clean slices, use a warm knife.
Keto Benefits of Coconut Yogurt
Coconut yogurt offers:
- Healthy fats that support ketosis.
- A lighter texture than heavy dairy.
- Natural tang without added sugar.
- A refreshing contrast to rich cream cheese.
When used in moderation, it’s a wonderful keto-friendly ingredient that enhances desserts without heaviness.
Variations You Can Try
Lemon Coconut Cheesecake
Add extra lemon zest and juice for a brighter flavor.
Chocolate Coconut Cheesecake
Fold in melted sugar-free chocolate or cocoa powder.
Berry Swirl Cheesecake
Swirl sugar-free berry compote into the filling before chilling.
Mini Jar Cheesecakes
Skip crust and portion into jars for grab-and-go desserts.
Tips for This Recipe
- Best served chilled.
- Make 1 day ahead for best texture.
- Adjust sweetness after chilling if needed.
- Store covered to prevent fridge odors.
Optional Additions
- Toasted coconut flakes
- Sugar-free chocolate drizzle
- Fresh raspberries (in moderation)
- Lime zest
- Keto whipped cream
Serving Ideas
Serve this cheesecake:
- After grilled keto dinners
- At summer gatherings
- With coffee or herbal tea
- As a light holiday dessert
- In small squares for parties
Storage Recommendations
Refrigerator
Store covered for 4–5 days.
Freezer
Freeze slices individually for up to 1 month.
Thaw overnight in the fridge.
Frequently Asked Questions
1. Is this cheesecake truly keto?
Yes. It’s low carb, sugar-free, and keto-friendly when portioned correctly.
2. Can I skip the crust?
Absolutely. The filling holds well on its own.
3. Can I make it dairy-free?
Yes, use coconut cream and dairy-free cream cheese.
4. Does it taste like coconut?
Mildly. The coconut flavor is subtle and balanced.
5. How long does it need to set?
Minimum 4 hours, best overnight.
6. Can I sweeten it more?
Yes, adjust powdered sweetener to taste.
7. Why is my cheesecake too soft?
Likely under-chilled or cream not whipped enough.
Nutritional Breakdown (Per Serving)
Approximate values (1 of 8 slices):
- Calories: ~310
- Protein: ~4.8 g
- Fat: ~29 g
- Total Carbs: ~4.5 g
- Fiber: ~2 g
- Net Carbs: ~2.5 g
Recipe Snapshot
- Prep Time: 20 minutes
- Cook Time: None
- Chill Time: 4–6 hours
- Total Time: About 5 hours
- Course: Dessert
- Cuisine: Keto / Low Carb
- Servings: 8
- Calories: ~310 per serving
Ingredients
Crust
- Almond flour – 1¼ cups 125 g
- Coconut flour – 2 tablespoons
- Powdered keto sweetener – 3 tablespoons
- Butter unsalted, melted – 4 tablespoons (56 g)
Cheesecake Filling
- Cream cheese full-fat, softened – 8 oz (225 g)
- Coconut yogurt unsweetened, full-fat – ¾ cup (180 g)
- Heavy cream – ¾ cup 180 ml
- Powdered keto sweetener – ½ cup
- Lemon juice fresh – 1 tablespoon
- Vanilla extract – 1 teaspoon
Instructions
- In a mixing bowl, combine the almond flour, coconut flour, powdered keto sweetener, and melted butter. Mix until the texture looks like damp sand and holds together when pressed. Transfer the mixture to your pan and press it firmly into an even layer using your fingers or the bottom of a glass. Make sure the corners are compact so the crust doesn’t crumble later. Place the pan in the refrigerator and chill for 20–30 minutes to help the crust firm up.
- While the crust chills, add the softened cream cheese to a clean bowl. Beat it well using a hand mixer or whisk until it is completely smooth and creamy, with no lumps. Take your time here—smooth cream cheese is the key to a silky cheesecake filling.
- Add the coconut yogurt, powdered keto sweetener, lemon juice, vanilla extract, and a small pinch of salt to the cream cheese. Beat again until everything is fully combined and the mixture looks glossy and uniform. Pause to taste and adjust sweetness if needed before moving on.
- In a separate bowl, pour in the heavy cream and whip it until soft peaks form. The cream should hold its shape but still look light and fluffy, not stiff or grainy. Stop whipping as soon as soft peaks appear to avoid over-whipping.
- Gently add the whipped cream to the cheesecake mixture in two additions. Use a spatula to fold it in slowly with light, sweeping motions. Take care not to stir aggressively—gentle folding keeps the filling airy and ultra creamy.
- Remove the chilled crust from the refrigerator and spoon the cheesecake filling on top. Spread it evenly all the way to the edges and smooth the surface with a spatula or the back of a spoon so it looks neat and level.
- Cover the pan and place it back in the refrigerator. Chill for at least 4 hours, or preferably overnight, until the cheesecake is fully set and firm enough to slice cleanly.
- When ready to serve, remove the cheesecake from the pan and slice with a sharp knife. For clean edges, wipe the knife between each cut. Serve well chilled and enjoy the creamy, refreshing texture.
Subscribe to our newsletter!