This post may contains Amazon affiliate and other affiliate links. If you make a purchase through these links, I may earn a small commission at no extra cost to you. Your support helps me continue to provide quality content. I only recommend products I personally trust and believe will add value to your experience. For more details, please visit my Privacy Policy.
🥧 Introduction
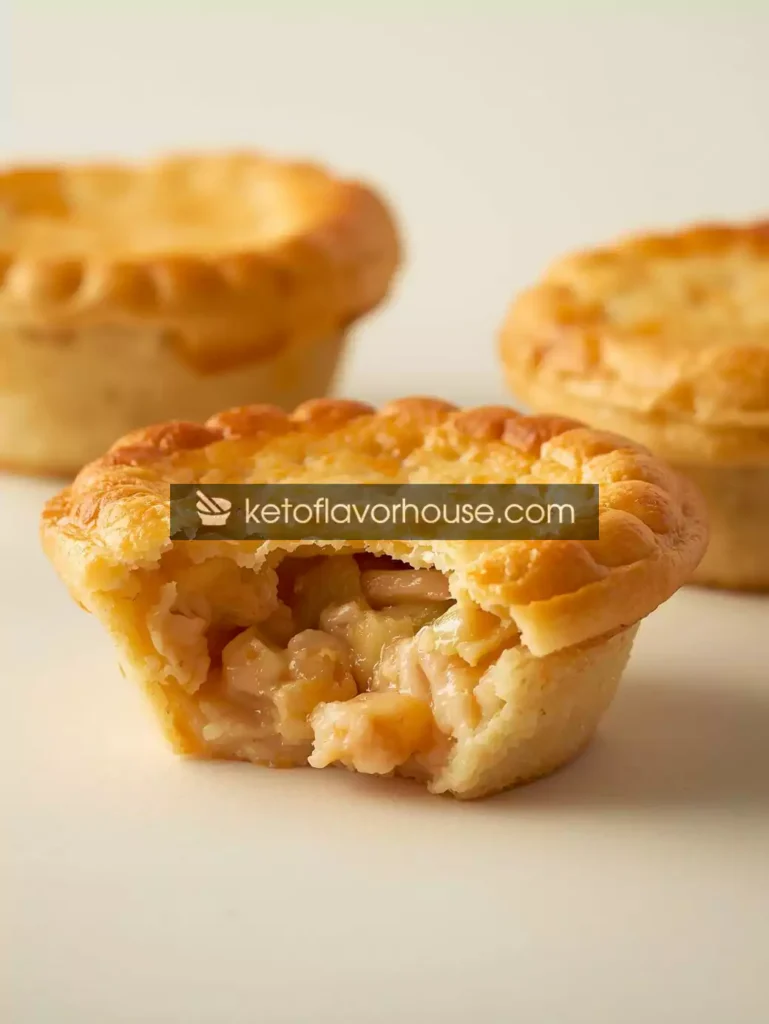
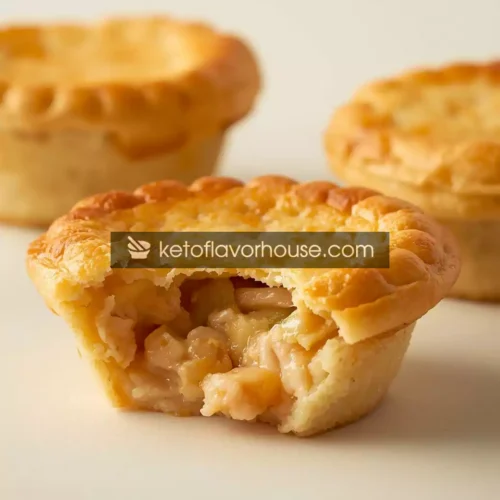
There’s something deeply nostalgic about the smell of warm chicken pot pie baking in the oven — that buttery aroma, the creamy filling bubbling up through golden layers, and the comfort it brings with every bite. But if you’re following Weight Watchers, you probably know how tricky it can be to enjoy that kind of rich comfort food without blowing through your daily SmartPoints.
That’s where these Weight Watchers mini chicken pot pies come in.
They deliver all the creamy, hearty flavor of a traditional pot pie but in a portion-controlled, low-point package that feels indulgent — not restrictive. These little pies are everything you crave on a chilly evening: tender chunks of chicken, a creamy veggie-packed sauce, and a golden, flaky top that you can enjoy guilt-free.
This recipe is for anyone who misses comfort food but doesn’t want to sacrifice progress. Whether you’re cooking for yourself or feeding the whole family, these mini chicken pot pies are a win-win. They’re quick, adorable, and packed with flavor — without the heavy calories or high-fat crusts that traditional versions are known for.
And the best part? Each serving is just around 4 SmartPoints, making it easy to fit into your WW plan any day of the week.
💛 Why You’ll Love This Recipe
- 🥧 Comfort food made light – Classic pot pie flavor with a smart, low-point twist.
- 🐔 Protein-packed – Lean chicken breast keeps you full and satisfied.
- 🕒 Quick & easy – Ready in under 40 minutes with simple prep steps.
- 🧊 Perfect for meal prep – Make ahead, freeze, and reheat anytime.
- 👨👩👧 Family-approved – Even picky eaters will love these creamy, savory pies.
- 🌿 Customizable – Add your favorite zero-point veggies or swap proteins.
⚖️ WW SmartPoints Info
- SmartPoints per serving: 4
- SmartPoints for the full batch (6 mini pies): 24
- Calculated using: Estimated SmartPoints principles based on WW-friendly ingredients (chicken breast, light cream soup, fat-free Greek yogurt, reduced-fat biscuit dough).
Note: These are estimated SmartPoints since WW formulas vary slightly based on the PersonalPoints system and specific product brands.
🥣 My Personal Experience
The first time I made these mini chicken pot pies, it was one of those cold evenings where I craved something warm and soothing but didn’t want to derail my WW streak. I’d been good all week — tracking everything, drinking water, staying active — and the last thing I wanted was to feel deprived.
So, I thought: what if I could make individual pot pies that looked cute, tasted amazing, and didn’t feel “diet” at all?
I used lean shredded chicken from meal prep, some frozen mixed veggies, and fat-free Greek yogurt instead of heavy cream. The result? Absolute magic. When I pulled them out of the oven, the tops were golden and puffed up beautifully. The filling was thick, creamy, and comforting — everything a pot pie should be, just smarter.
Now, I make these almost weekly. They’re great for portion control, meal prep, and those nights when you want something cozy but still aligned with your goals.
🧰 Required Equipment
🧁 Muffin Tin or Ramekins
You’ll need these to shape your mini pot pies. Muffin tins are perfect for portion control, while ramekins add that homemade “bistro” vibe.
🍳 Non-Stick Skillet
For sautéing the veggies and thickening the sauce. Use a good non-stick surface to reduce the need for oil (keeps points lower).
🥄 Mixing Bowls
Use one for your filling mixture and another for dough prep. Lightweight, easy to clean, and essential for organization.
🧈 Silicone Brush
Perfect for brushing the tops of your pies with egg wash or a touch of milk for that beautiful golden finish.
🥄 Measuring Cups & Spoons
Precision is key when tracking SmartPoints. Every tablespoon matters!
🥕 Ingredients & Substitutions
Here’s what you’ll need for these Weight Watchers mini chicken pot pies:
- 1½ cups cooked shredded chicken breast (Zero points – lean protein that keeps you full.)
- 1 cup frozen mixed vegetables (Zero points – adds color, texture, and nutrients.)
- ½ cup fat-free Greek yogurt (Adds creaminess instead of heavy cream, saving major points.)
- ½ cup fat-free condensed cream of chicken soup (Classic flavor without the fat.)
- ½ tsp garlic powder & ½ tsp onion powder (Enhances depth and savoriness.)
- Salt & pepper to taste
- 1 tsp olive oil (Optional, for sautéing; adds 1 point if used.)
- 1 tube reduced-fat biscuit dough (Usually around 10 SmartPoints for the entire tube — the main source of points.)
- 1 egg (for brushing) – Optional for golden tops; minimal SmartPoints impact.
Substitutions:
- Swap Greek yogurt for light sour cream (+1 point per serving).
- Use turkey bacon bits for extra flavor (+0.5 point each).
- Replace biscuit dough with 2-ingredient dough (self-rising flour + Greek yogurt) to reduce SmartPoints by 1–2 per serving.
- For gluten-free: use almond flour crust or gluten-free biscuit mix (SmartPoints vary).
👩🍳 How to Make Weight Watchers Mini Chicken Pot Pies
Step 1: Preheat and Prep
Preheat your oven to 375°F (190°C) and lightly spray your muffin tin or ramekins with nonstick cooking spray. This helps the dough crisp without sticking.
Step 2: Prepare the Filling
In a skillet, warm the olive oil (optional). Add mixed vegetables and sauté until just tender — about 3–4 minutes. Stir in shredded chicken, cream of chicken soup, and Greek yogurt. Season with salt, pepper, garlic powder, and onion powder.
Tip: Don’t overcook the filling here — it will thicken further while baking.
Step 3: Assemble the Mini Pies
Cut your biscuit dough into smaller rounds (or use 2-ingredient dough). Flatten slightly with your fingers. Press one round into each muffin cup, forming a small shell. Spoon 2–3 tablespoons of filling into each shell.
Top with another small piece of dough or leave open-faced for fewer SmartPoints. Brush the top with a light coating of egg wash or milk.
Step 4: Bake to Golden Perfection
Bake for 18–20 minutes, until tops are puffed and golden. Let cool for 5 minutes before removing from the tin — they’ll firm up slightly as they rest.
Step 5: Serve and Enjoy
Serve warm, sprinkled with parsley or thyme if desired. The crust will be tender and flaky, while the filling remains creamy and flavorful.
🚫 Common Mistakes to Avoid
- Overfilling – It’s tempting to pack the filling, but it can bubble over. Stick to ¾ full.
- Undercooked dough – Always check the bottom crust. If it’s pale, bake 3–4 minutes longer.
- Watery filling – Make sure the filling thickens before spooning into the dough.
- Skipping cooling time – They firm up while cooling; removing too early can cause tearing.
🌟 Pro Tips for Best Results
- Brush the tops with a little fat-free milk for a bakery-style golden finish.
- Add a sprinkle of everything bagel seasoning for an unexpected flavor twist.
- For meal prep: slightly underbake, then reheat later to perfection.
- Make mini pies in silicone muffin cups for easy removal.
- Freeze baked pies, not raw — reheating keeps the texture intact.
🍗 WW-Specific Nutrition & Strategy
Chicken breast is one of the most WW-friendly proteins available. It’s zero points on most plans, high in protein, and helps with satiety. The vegetables add bulk without adding points, while the biscuit dough is portioned carefully to stay within your daily SmartPoints.
Pair one or two of these pies with:
- A crisp green salad (0 points)
- A side of roasted veggies (0 points)
- Or a light WW soup for a full meal under 6 points total!
They’re perfect for balancing your points — enjoy comfort food while staying on track.
🧂 Variations You Can Try
- Turkey Bacon & Cheese: Add turkey bacon bits and a tablespoon of shredded reduced-fat cheese (+1 SmartPoint).
- Creamy Mushroom: Replace cream of chicken with cream of mushroom soup — same SmartPoints, different flavor.
- Mexican Style: Add a dash of taco seasoning and corn — +1 point but delicious twist.
- Veggie-Only: Skip the chicken and double the veggies — 3 SmartPoints per pie.
🍽️ Tips for This Recipe
- Chill the dough for 5 minutes before baking to help it puff better.
- Don’t skip seasoning — WW-friendly recipes still need flavor!
- Always track based on your specific ingredient brands in the WW app for the most accurate SmartPoints.
🥕 Optional Additions
- 2 tbsp shredded light mozzarella (+0.5 point)
- Dash of hot sauce or paprika (0 points)
- Fresh herbs like parsley or thyme (0 points)
🍴 Serving Ideas
Serve these warm from the oven with:
- A side salad topped with light vinaigrette
- Steamed broccoli or green beans for balance
- Cauliflower mash for ultimate comfort
They’re also perfect for meal prep lunches — pop one in your lunchbox and heat at work. Or serve them at family dinners; nobody will believe they’re low-point!
🧊 Storage Recommendations
- Fridge: Up to 4 days in an airtight container.
- Freezer: Up to 2 months; thaw overnight before reheating.
- Reheating: Air fryer 350°F for 5 minutes or oven 10 minutes.
Reheating doesn’t change the points but keeps the crust crisp.
❓ Frequently Asked Questions
1. Can I freeze these mini chicken pot pies?
Yes! Freeze them after baking, then reheat in the air fryer or oven. Perfect for grab-and-go meals.
2. Can I use canned chicken?
Absolutely. Just drain well. The texture is slightly softer but still great for this recipe.
3. What’s the lowest-point crust alternative?
The 2-ingredient dough (self-rising flour + Greek yogurt) is your best bet — it saves about 1–2 SmartPoints per pie.
4. Can I make these in an air fryer?
Yes! Cook at 350°F for 12–14 minutes. Watch closely — every air fryer varies slightly.
5. Can I add cheese?
Sure! Just use reduced-fat shredded cheese sparingly (+0.5 to 1 point per pie).
6. How do I keep them from getting soggy?
Cool before storing and reheat in the oven — not the microwave — to retain crispness.
7. Can I make these vegetarian?
Of course! Skip the chicken and use chickpeas or lentils instead. Still filling and low in SmartPoints.
🧮 Nutritional Breakdown (Per Serving)
- Calories: 155
- Protein: 16g
- Fat: 3g
- Total Carbs: 13g
- Fiber: 2g
- Net Carbs: 11g
- Sugar: 2g
- Sodium: 480mg
- SmartPoints (Estimated): 4
📸 Recipe Snapshot
- Prep Time: 15 minutes
- Cook Time: 20 minutes
- Total Time: 35 minutes
- Course: Main Course / Dinner
- Cuisine: American, Comfort Food
- Servings: 6 mini pies
- Calories (per serving): 155
- SmartPoints (per serving): 4
Weight Watchers Mini Chicken Pot Pies Recipe
Ingredients
- 1½ cups shredded cooked chicken breast
- 1 cup frozen mixed vegetables
- ½ cup fat-free Greek yogurt
- ½ cup fat-free cream of chicken soup
- 1 tsp olive oil optional
- Garlic & onion powder salt, pepper
- 1 tube reduced-fat biscuit dough
- 1 egg for brushing, optional
Instructions
- Preheat oven to 375°F. Spray muffin tin or ramekins.
- Sauté mixed veggies in olive oil for 3 minutes. Add chicken, yogurt, and soup; season to taste.
- Press biscuit dough into muffin cups. Fill each with chicken mixture.
- Top with remaining dough (optional). Brush with egg wash.
- Bake 18–20 minutes until golden.
- Cool 5 minutes before removing. Serve warm and enjoy!