This post may contains Amazon affiliate and other affiliate links. If you make a purchase through these links, I may earn a small commission at no extra cost to you. Your support helps me continue to provide quality content. I only recommend products I personally trust and believe will add value to your experience. For more details, please visit my Privacy Policy.
Introduction
If you’re anything like me, there are days when you crave something sweet — not just any sweet, but that nostalgic candy-bar sweetness we all grew up loving. For me, Butterfingers were always that candy. The crispy, peanut-buttery, chocolatey goodness used to be the highlight of road trips, movie nights, and childhood grocery store visits. But once I shifted toward a high-protein lifestyle, Butterfingers became one of those treats I adored but rarely reached for. Too much sugar. Too many carbs. Too easy to overeat.
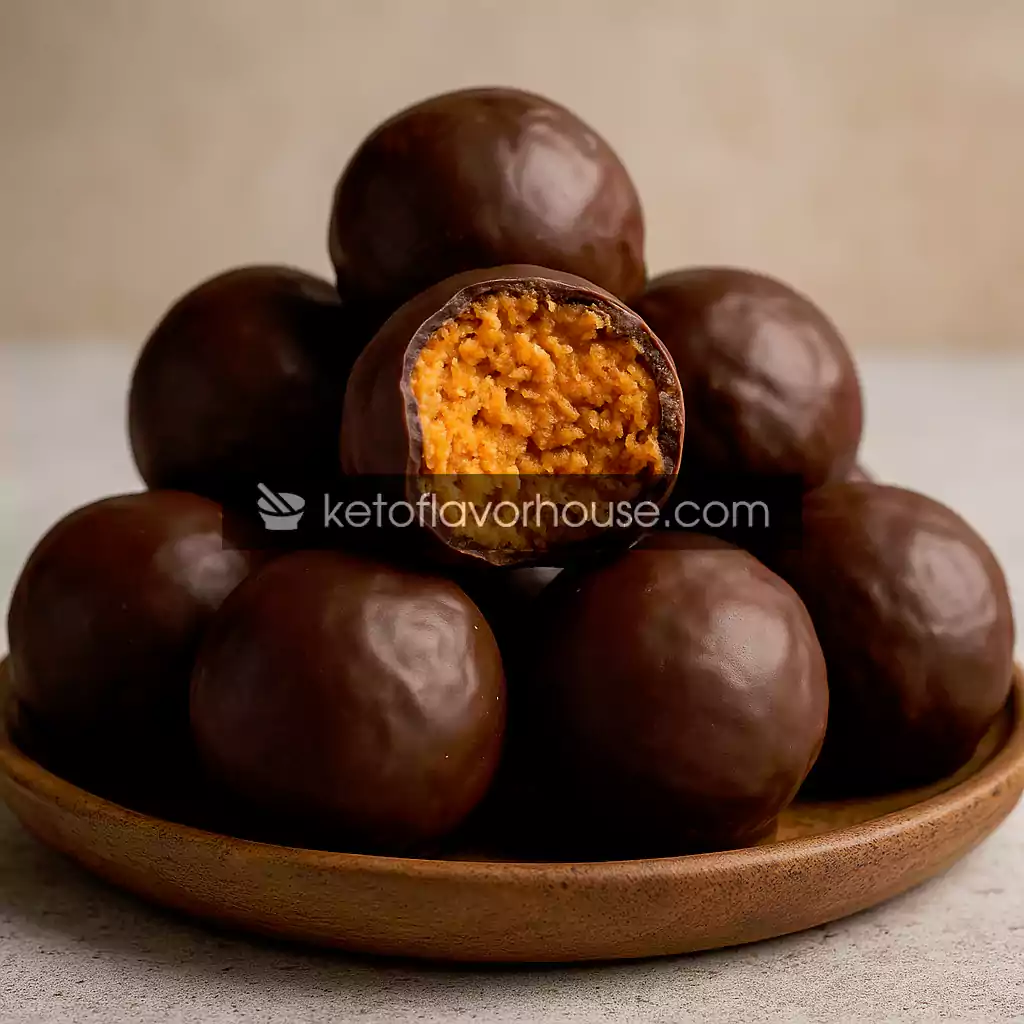
But then came the day — and I still remember this moment vividly — when I experimented with turning a classic candy bar flavor into a healthy protein treat. Within minutes, I had rolled together a small batch of High-Protein Butterfinger Balls, and everything changed. One bite and I was shocked. These tasted shockingly close to the real thing — creamy peanut butter, crispy texture, rich chocolate — yet they were low-carb, high-protein, no-bake, keto-friendly, and ridiculously easy.
That’s why I’m so excited to share this recipe today. This High-Protein Butterfinger Balls treat isn’t just a healthy dessert alternative; it’s a game-changer for anyone trying to follow a fitness, weight-loss, or low-carb lifestyle while still craving real, satisfying flavor. The best part? Each ball packs a powerful protein boost, making it perfect for muscle recovery, post-workout snacking, and keeping cravings under control.
This recipe hits all the right notes: dessert-level delicious, candy-like texture, low carb, keto-approved, and high protein. And because it’s no-bake, you can whip up a batch in just 10 minutes — no fuss, no waiting, no heating the kitchen.
Let’s dive into the magic of this treat and why it might become your new favorite high-protein dessert.
Why You’ll Love This Recipe
- 🍫 Tastes like real Butterfinger candy — but without the sugar crash.
- 💪 Protein-packed — perfect for fitness lovers, weight loss, or post-workout fuel.
- 🍯 Creamy + crispy texture — the best of both worlds.
- 🕒 No-bake, 10-minute prep — fast, easy, and beginner-friendly.
- 🔥 Keto & low-carb — guilt-free sweet craving solution.
- 🍽️ Meal-prep friendly — stores beautifully in the fridge or freezer.
- 👨👩👧 Family-friendly — kids love these just as much as adults.
My Personal Experience With This Recipe
The first time I attempted a high-protein version of a candy-bar dessert, I’ll be honest: I wasn’t expecting greatness. Maybe something “healthy-ish.” Maybe something edible. Definitely not something I’d crave the way I used to crave actual Butterfingers.
But when I combined peanut butter, protein powder, crushed keto cereal, a little sugar-free sweetener, and melted dark chocolate, I had this moment — a real “wait, hang on…” moment. I rolled one ball, coated it in chocolate, placed it on parchment paper, and popped it in the freezer for five minutes.
Then the magic happened.
The chocolate snapped when I bit into it. The inside had that crispy-peanut-butter candy texture, the one I’d been chasing for years. But the best part? Instead of feeling guilty afterward, I felt satisfied — the protein hit me immediately. No sugar crash. No mindless snacking. Just a perfectly sweet, balanced, high-protein treat.
Since then, I’ve made these High-Protein Butterfinger Balls at least once a month. They’re part of my weekly meal prep when I’m trying to cut cravings, part of my post-workout rotation when I want something sweet but nourishing, and honestly… sometimes just part of my midnight snack routine.
They’re THAT good.
Required Equipment
Mixing Bowl
You’ll need a medium mixing bowl to combine the peanut butter, protein powder, and crushed cereal.
Alternative: Any large container or even a food storage box works in a pinch.
Spatula or Wooden Spoon
Helps mix thick ingredients without too much effort.
Alternative: Use clean hands for final mixing — sometimes easier!
Food Processor or Zip-Lock Bag
Used to crush keto cereal (or low-carb tortilla chips) into fine crumbs.
Alternative: Rolling pin + zip-lock bag works perfectly.
Microwave-Safe Bowl
For melting chocolate smoothly.
Alternative: A double boiler works if you prefer stovetop melting.
Parchment Paper
Prevents sticking and keeps chocolate-coated balls smooth.
Alternative: Wax paper or silicone mat.
Baking Sheet or Plate
To arrange the balls while chilling.
Alternative: Any flat surface that fits in your fridge/freezer.
Ingredients & Substitutions
Here’s the full list of ingredients with detailed explanations and why each plays a role in making these high-protein AND delicious.
1 cup natural peanut butter (creamy or crunchy)
Peanut butter forms the base of the candy texture while delivering healthy fats and plant protein.
Substitutes: Almond butter, cashew butter, or powdered peanut butter (mixed thick).
½ cup vanilla or peanut butter protein powder
Boosts protein content + creates structure.
Why it matters: Helps bind the mixture and reduces carbs.
Substitutes:
- Chocolate protein for a darker flavor
- Whey isolate for lower carbs
- Vegan protein (but may need extra moisture)
1 cup keto cereal (crushed)
This creates the iconic crispy texture of Butterfinger candy.
Substitutes:
- Crushed pork rinds (savory but becomes crispy)
- Crushed low-carb tortilla chips
- Crushed high-protein cereal
- Toasted almond slivers (for crunch)
2–3 tbsp sugar-free sweetener
Balances the peanut butter and gives classic candy-bar sweetness.
Substitutes:
- Allulose (softens texture)
- Erythritol (firmer texture)
- Monk fruit blends (best overall)
1 tsp vanilla extract
Adds warm, buttery candy flavor.
¼ tsp salt
Enhances sweetness and balances peanut butter richness.
1 cup sugar-free chocolate chips
Coats the balls and gives them a real candy shell.
Substitutes:
- 85–90% dark chocolate (not fully sugar-free)
- Homemade chocolate mix (cocoa + coconut oil + sweetener)
1 tbsp coconut oil
Helps chocolate melt smoothly and coat evenly.
How to Make High-Protein Butterfinger Balls
1. Prepare the Crispy Base
Crush your keto cereal inside a zip-lock bag using a rolling pin, or pulse lightly in a food processor.
Mini tip: Don’t crush it into powder — some small chunks give better texture.
2. Mix Peanut Butter and Sweetener
In a mixing bowl, combine peanut butter, sweetener, and vanilla extract.
Stir well until smooth and slightly glossy.
Mini tip: If peanut butter is too thick, microwave for 10 seconds.
3. Add Protein Powder
Add half of the protein powder, mix, then add the rest.
This prevents clumping and helps achieve a dough-like consistency.
4. Fold in Crispy Cereal
Add crushed cereal and gently fold until fully combined.
The mixture should feel firm enough to roll.
5. Adjust Texture
If too dry → add 1–2 tsp peanut butter.
If too wet → add 1–2 tbsp protein powder.
6. Roll Into Balls
Scoop 1–2 tablespoons of mixture and roll using your hands.
Place balls on a parchment-lined tray.
7. Melt Chocolate
In a microwave-safe bowl, melt sugar-free chocolate chips + coconut oil for 30 seconds at a time, stirring until silky smooth.
8. Coat the Balls
Dip each ball into melted chocolate using a fork and shake off excess.
Place back onto parchment.
9. Chill
Freeze for 10–12 minutes to set the chocolate perfectly.
10. Enjoy
The candy shell cracks, the inside stays crispy + creamy. absolute perfection.
Common Mistakes to Avoid
❌ Using protein powder with gums → mixture becomes too thick
✔ Choose a smooth whey isolate
❌ Over-crushing cereal → no crunchy texture
✔ Keep some small crisp pieces
❌ Too much peanut butter → balls become greasy
✔ Add more protein powder to balance
❌ Using runny peanut butter → difficult to roll
✔ Choose a thicker, natural brand
❌ Overheating chocolate → burns quickly
✔ Melt in 20–30 second intervals
Pro Tips for Best Results
⭐ Use whey isolate, not concentrate → better texture
⭐ Add ½ tablespoon cocoa powder for deeper flavor
⭐ Mix peanut butter + protein first before adding cereal
⭐ Freeze the balls before dipping — prevents melting
⭐ Add a pinch of sea salt on top for a gourmet finish
⭐ Use crunchy peanut butter for real Butterfinger-style texture
High-Protein Nutrition & Strategy
These Butterfinger Balls are more than just dessert — they’re a smart high-protein strategy for controlling cravings and improving satiety.
Why They Work
- Protein helps regulate hunger hormones
- Healthy fats slow digestion → longer fullness
- Low sugar prevents crashes + cravings
- Perfect as post-workout treat
- Portable → great for meal prep
When to Eat
- After gym sessions (protein + carbs)
- Afternoon cravings
- Pre-workout energy boost
- Dessert without guilt
- Late-night sweet cravings
Variations You Can Try
Chocolate Peanut Explosion
Add mini sugar-free chocolate chips inside.
Salted Caramel Version
Add ½ tbsp sugar-free caramel syrup.
Extra High-Protein Version
Add 2 tbsp cottage cheese or Greek yogurt (but freeze before coating).
Almond Joy Style
Replace peanut butter with almond butter + add shredded coconut.
Nut-Free Version
Use sunflower seed butter + nut-free cereal.
Tips for This Recipe
- Store in silicone molds for perfect round shapes
- Use dark chocolate for a richer shell
- Keep extra crushed cereal for topping
- Make mini or jumbo sizes depending on calorie goals
- Freeze before dipping to hold shape
Optional Additions
💪 1 scoop collagen → smoother texture
🥣 1–2 tbsp Greek yogurt → extra protein
🌰 Crushed nuts → extra crunch
🍫 Cocoa powder → richer chocolate flavor
🍯 Almond flour → thicker dough
Serving Ideas
- Serve chilled for candy-bar texture
- Add to a protein parfait
- Sprinkle broken pieces over keto ice cream
- Enjoy after workouts
- Pack into lunch boxes for healthy dessert
Storage Recommendations
Refrigerator:
Keeps fresh for 7–10 days.
Freezer:
Stores beautifully for 2–3 months.
Reheating:
No reheating needed — just thaw for 5 minutes before biting.
Frequently Asked Questions (FAQ)
1. Can I add protein powder?
Yes — the recipe already includes protein powder, but you can increase it by 1–2 tablespoons if needed.
2. Can I make this plant-based?
Yes — use vegan protein powder + almond butter.
3. Will whey isolate work better?
Yes — whey isolate gives the smoothest texture.
4. Are these keto-friendly?
Absolutely — use sugar-free chocolate and low-carb cereal.
5. Can I meal prep these?
They’re perfect for meal prep and freeze beautifully.
6. Can kids eat these?
Yes — they’re safe, healthy, and sweetener is optional.
7. Can I skip the chocolate coating?
Yes — but the chocolate shell gives that classic Butterfinger crunch.
Nutritional Breakdown (Per Serving)
(Approximate, for 1 ball)
- Calories: 110
- Protein: 6g
- Fat: 8g
- Total Carbs: 5g
- Fiber: 2g
- Net Carbs: 3g
- Sugar: 1g
- Sodium: 55mg
📌 Recipe Snapshot
- Prep Time: 10 minutes
- Cook Time: 0 minutes
- Total Time: 10 minutes
- Course: Dessert / Snack
- Cuisine: American
- Servings: 12–14 balls
- Calories per ball: 110
- Protein per ball: 6g

High-Protein Butterfinger Balls Recipe
Ingredients
- 1 cup peanut butter
- ½ cup protein powder
- 1 cup crushed keto cereal
- 2 –3 tbsp sugar-free sweetener
- 1 tsp vanilla extract
- 1 cup sugar-free chocolate chips
- 1 tbsp coconut oil
- Pinch of salt
Instructions
- Place your keto cereal into a zip-lock bag or food processor. If using a bag, press out the air and seal it tightly. Use a rolling pin or the bottom of a heavy cup to crush the cereal until you have fine crumbs with a few small crunchy pieces left. This gives the Butterfinger Balls their signature crispy texture. Set the crushed cereal aside.
- Add the peanut butter, sweetener, and vanilla extract to a medium mixing bowl. Use a spatula or wooden spoon to mix everything together until the peanut butter becomes smoother, shinier, and slightly lighter in texture. If your peanut butter is extra thick, warm it in the microwave for about 10 seconds so it blends more easily.
- Begin adding the protein powder slowly, about 2 tablespoons at a time. Mix well after each addition. This prevents the dough from becoming chalky and helps it come together evenly. Keep adding and mixing until the mixture thickens into a soft, moldable dough that pulls away from the sides of the bowl.
- Add the crushed cereal to the bowl and gently fold it into the dough. Mix until the crispy pieces are evenly distributed throughout. The mixture should feel firm, slightly sticky, and easy to roll. If it feels too wet, add a teaspoon or two of extra protein powder. If it feels too dry, add a tiny spoonful of peanut butter.
- Scoop out small portions of the dough using a spoon or cookie scoop. Roll each portion between your palms until it forms a smooth, firm ball. Place every ball onto a parchment-lined tray or plate, spacing them slightly apart so they don’t stick together.
- In a microwave-safe bowl, add the sugar-free chocolate chips and coconut oil. Microwave in 20–30 second intervals, stirring well after each round, until the chocolate is completely melted, smooth, and glossy. Be careful not to overheat it, as chocolate can burn quickly.
- Drop one ball at a time into the melted chocolate, using a fork to gently roll and coat it completely. Lift the ball with the fork, tap the fork against the bowl to remove excess chocolate, and then slide the coated ball back onto the parchment paper. Repeat with all remaining balls.
- Transfer the tray of chocolate-coated balls to the freezer and chill them for about 10 minutes, or until the chocolate hardens into a firm, crisp shell that cracks slightly when bitten.
- Enjoy the High-Protein Butterfinger Balls chilled straight from the fridge or allow them to soften for a minute at room temperature for a creamier texture.