This post may contains Amazon affiliate and other affiliate links. If you make a purchase through these links, I may earn a small commission at no extra cost to you. Your support helps me continue to provide quality content. I only recommend products I personally trust and believe will add value to your experience. For more details, please visit my Privacy Policy.
Introduction
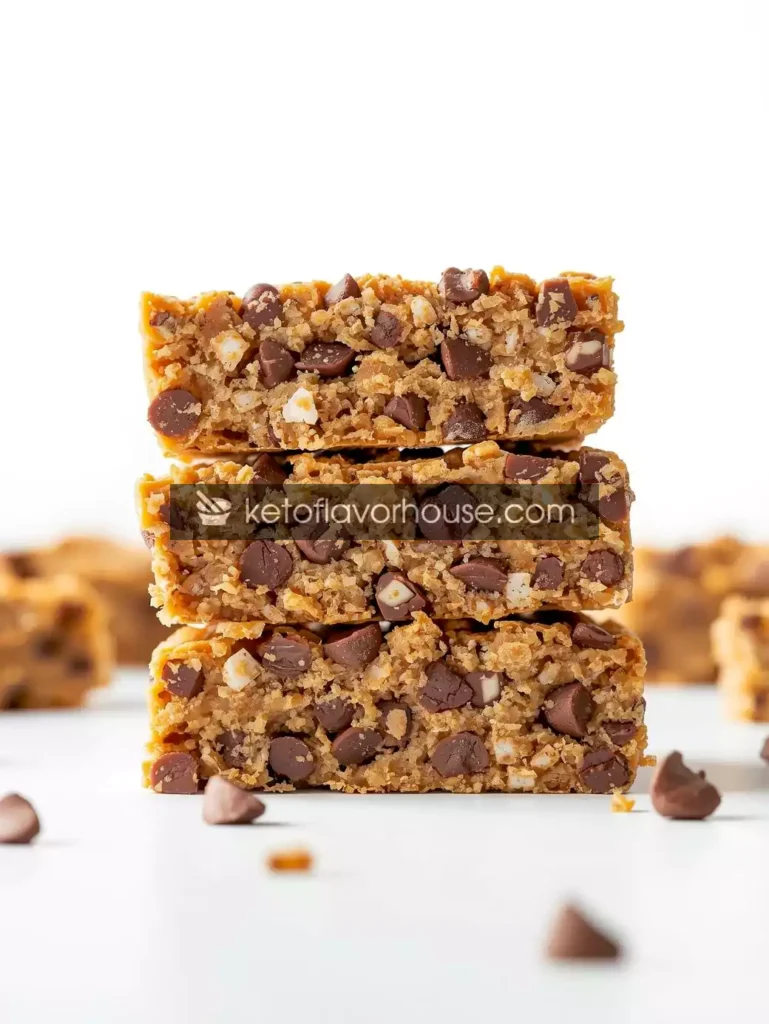
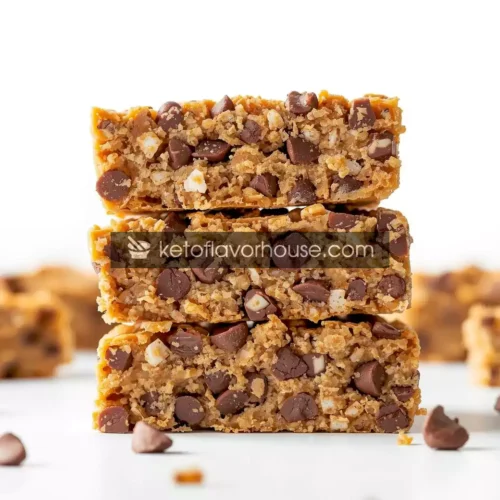
There’s something magical about dessert that feels indulgent yet doesn’t wreck your daily points budget. I remember one summer afternoon when the craving for something crunchy, chocolatey, and sweet hit me hard. You know the kind of craving I mean — the one that whispers: “Just grab that candy bar!” But being on Weight Watchers, I’ve learned that not all treats are off-limits. Instead, it’s about being clever in the kitchen. That’s when I discovered my now-beloved Weight Watchers No-Bake Crunch Bars.
These bars are everything you want in a sweet snack: they’re crunchy, chocolatey, and satisfy that “dessert need” without costing a mountain of SmartPoints. Plus, since they’re no-bake, they’re perfect for busy days when you don’t want to turn on the oven.
Each serving comes in at just 3 SmartPoints (Estimated), making this recipe an absolute win for anyone trying to enjoy dessert while staying on track. The entire pan of 12 bars comes to 36 SmartPoints total.
Whether you’re a Weight Watchers member, a busy parent looking for a quick snack, or simply someone who wants a healthier twist on dessert, this recipe will quickly become a favorite. And let me tell you: once you taste the chewy, crunchy, chocolatey bite of these bars, you’ll wonder how something so easy could feel so decadent.
💫 Why You’ll Love This Recipe
- 🍫 Chocolate Fix Without Guilt – Satisfies your sweet tooth with fewer SmartPoints.
- ⏱️ Quick & No-Bake – Ready in under 20 minutes, no oven required.
- 🥣 Simple Ingredients – Pantry staples you likely already have.
- 🧒 Family-Friendly – Kids and adults both love the crunch.
- 🥄 Portion-Controlled – Perfectly cut into squares so you don’t overdo it.
- 📉 Low SmartPoints – Just 3 per serving (Estimated).
WW SmartPoints Info
- SmartPoints per serving: 3 (Estimated)
- Total recipe SmartPoints: 36 (for 12 bars, Estimated)
How SmartPoints were calculated: Estimated using WW SmartPoints principles based on ingredients such as light peanut butter, puffed rice cereal, and sugar-free chocolate. Since official WW values use proprietary algorithms, treat these as estimates and double-check with your WW app for exact numbers.
My Personal Experience
The first time I made these Weight Watchers No-Bake Crunch Bars, I was skeptical. I’d tried other “healthier dessert hacks” that honestly ended up tasting like cardboard. But these? The moment I pressed the mixture into the pan and let it set, I knew I had stumbled on something good.
When I finally cut into them and took that first bite — crispy rice crunch meets smooth chocolate coating — I had that “aha” moment. This wasn’t diet food. This was a real treat. And the best part? I didn’t feel guilty grabbing a second square, because it still fit perfectly into my daily points.
Now, these bars are a staple in my fridge. They’re my emergency dessert, my movie-night snack, and sometimes even a sweet little breakfast-on-the-go when I’m rushing out the door (no judgment, right?).
Required Equipment
🥣 Mixing Bowl
You’ll need a large bowl to stir together the puffed rice cereal and peanut butter mixture. Make sure it’s big enough to comfortably fold everything in without spilling.
🍯 Saucepan or Microwave-Safe Bowl
Used to melt the peanut butter and syrup together until smooth. If you don’t want to use a stove, a microwave-safe bowl works just as well.
🥄 Rubber Spatula
Perfect for scraping sticky ingredients (like peanut butter) from the bowl and pressing the mixture evenly into the pan.
🧊 8×8-Inch Baking Pan
This is where your bars will set. If you only have a larger dish, you can use it, but your bars will turn out thinner.
📜 Parchment Paper
Makes lifting out the bars super easy once they’ve set — and cleanup is a breeze.
Ingredients & Substitutions
- 2 cups puffed rice cereal – The star crunch element! Using puffed rice keeps the points low. Swap with puffed quinoa or puffed wheat if desired (points may vary).
- ½ cup powdered peanut butter (like PB2), prepared – A lower-point alternative to traditional peanut butter. If you use regular peanut butter, add +2 SmartPoints per bar.
- ¼ cup sugar-free maple syrup – Holds everything together without spiking points. Honey works too but will add +1 point per serving.
- ½ cup sugar-free dark chocolate chips – Melts into a silky topping. You can use semi-sweet, but SmartPoints will increase by about +1 per bar.
- 1 tsp vanilla extract – Adds depth and sweetness without points.
- Pinch of salt – Enhances the chocolate flavor.
Zero-point ingredients: vanilla extract, salt.
How to Make Weight Watchers No-Bake Crunch Bars
Step 1: Prepare Your Pan
Line an 8×8-inch baking pan with parchment paper, leaving an overhang on the sides to lift the bars out easily later.
Step 2: Mix the Base
In a saucepan (or microwave bowl), melt the peanut butter powder (prepared with water) and sugar-free syrup together until smooth. Stir in vanilla extract.
Step 3: Add the Crunch
Pour in the puffed rice cereal and gently fold until everything is evenly coated. Don’t crush the cereal too much — you want that airy crunch!
Step 4: Press Into the Pan
Transfer the mixture into your lined baking dish. Use a spatula to press it down firmly into an even layer.
Step 5: Make the Chocolate Topping
Melt sugar-free chocolate chips in the microwave (30-second bursts, stirring between). Spread over the top of the cereal mixture.
Step 6: Chill & Set
Refrigerate for at least 1 hour, or until firm enough to cut into neat bars.
Common Mistakes to Avoid
- ❌ Overheating the peanut butter mixture – It can seize or harden. Melt slowly.
- ❌ Using too much cereal – Your bars won’t hold together and will crumble.
- ❌ Forgetting parchment paper – You’ll regret trying to pry sticky bars out of the pan.
- ❌ Not pressing firmly enough – Loose layers fall apart when cut.
Pro Tips for Best Results
- Press down with the back of a spoon sprayed lightly with cooking spray to prevent sticking.
- For an extra glossy top, drizzle a second thin layer of melted chocolate over once set.
- Cut into bars using a sharp knife warmed under hot water for clean edges.
WW-Specific Nutrition & Strategy
What makes this recipe smart for WW? It swaps out high-fat peanut butter with powdered peanut butter, reduces sugar by using sugar-free syrup, and keeps portion sizes controlled.
A tip I use: If I’m having one of these bars, I’ll balance it with a zero-point lunch (like a big salad with lean protein) to stay within my daily points budget.
Pair these with:
- A cup of zero-point fruit salad.
- A glass of unsweetened almond milk.
Variations You Can Try
- Peanut Butter Lovers – Use regular peanut butter (adds +2 points per bar).
- Mint Chocolate – Add a drop of peppermint extract to the chocolate layer.
- Protein Boost – Stir in 1 scoop of protein powder (may add +1 point depending on brand).
- Nutty Crunch – Add chopped almonds or walnuts (+1 point per serving).
Serving Ideas
These bars are perfect for:
- Packing in lunchboxes.
- A guilt-free movie night snack.
- Mid-afternoon cravings at work.
- A post-dinner treat when you want “just something sweet.”
Storage Recommendations
- Fridge: Store in an airtight container for up to 1 week.
- Freezer: Freeze for up to 2 months (separate layers with parchment). Let thaw at room temp before eating.
- Reheating: Not necessary — these are best cold and firm.
Frequently Asked Questions
Q: Can I use regular peanut butter instead of powdered?
A: Yes, but it increases SmartPoints by +2 per serving.
Q: Can I freeze these bars?
A: Absolutely! Freeze in layers with parchment. They taste great chilled.
Q: Can I make these without chocolate topping?
A: Yes, but they won’t taste as indulgent. Without chocolate, reduce 1 SmartPoint per serving.
Q: Are these kid-friendly?
A: Definitely — kids love the crunchy texture, and you’ll love that they’re portioned.
Q: How do I reduce points further?
A: Use sugar-free syrup and stick with powdered peanut butter — those are the biggest point savers.
Nutritional Breakdown (Per Serving – Estimated)
- Calories: 110
- Protein: 5g
- Fat: 4g
- Total Carbs: 14g
- Fiber: 2g
- Net Carbs: 12g
- Sugar: 3g
- Sodium: 85mg
- SmartPoints: 3 (Estimated)
Recipe Snapshot
- Prep Time: 10 minutes
- Cook Time: 0 minutes (no-bake)
- Total Time: 1 hour (chill included)
- Course: Dessert / Snack
- Cuisine: American
- Servings: 12 bars
- Calories per serving: 110
- SmartPoints per serving: 3 (Estimated)
Weight Watchers No-Bake Crunch Bars – Low-Point Dessert Recipe
Ingredients
- 2 cups puffed rice cereal
- ½ cup powdered peanut butter prepared
- ¼ cup sugar-free maple syrup
- ½ cup sugar-free dark chocolate chips
- 1 tsp vanilla extract
- Pinch salt
Instructions
- Line an 8×8-inch baking dish with parchment.
- Melt peanut butter powder + syrup until smooth; stir in vanilla.
- Fold in puffed rice cereal until coated.
- Press firmly into pan.
- Melt chocolate chips and spread on top.
- Chill 1 hour, slice into 12 bars, enjoy!