This post may contains Amazon affiliate and other affiliate links. If you make a purchase through these links, I may earn a small commission at no extra cost to you. Your support helps me continue to provide quality content. I only recommend products I personally trust and believe will add value to your experience. For more details, please visit my Privacy Policy.
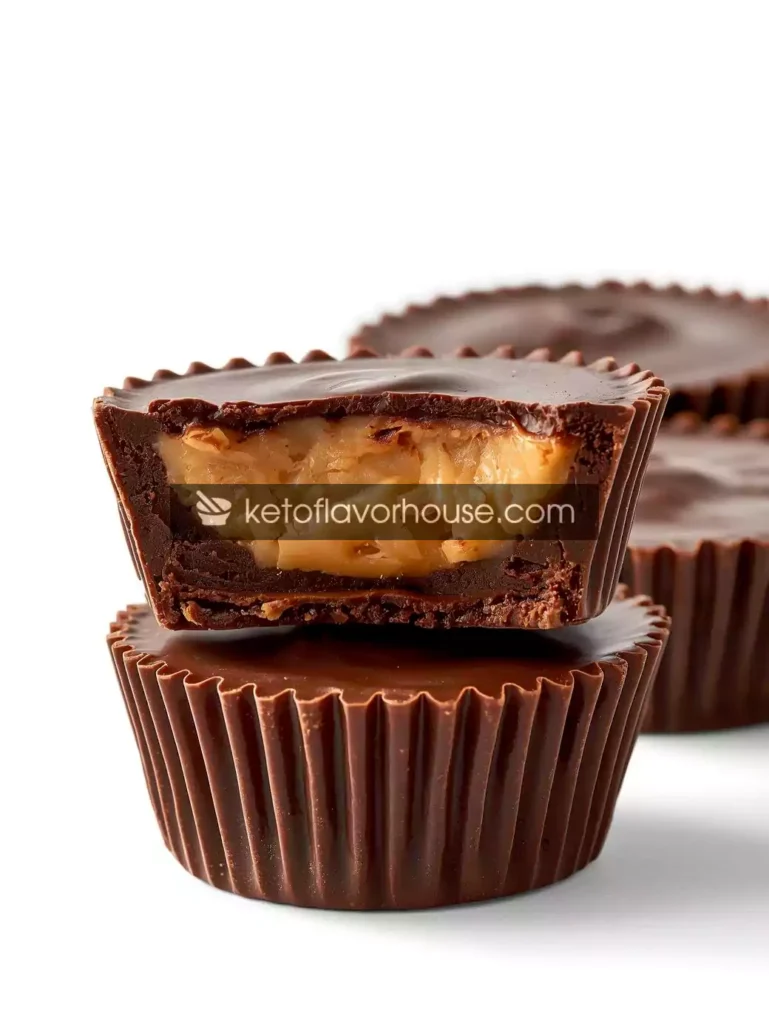
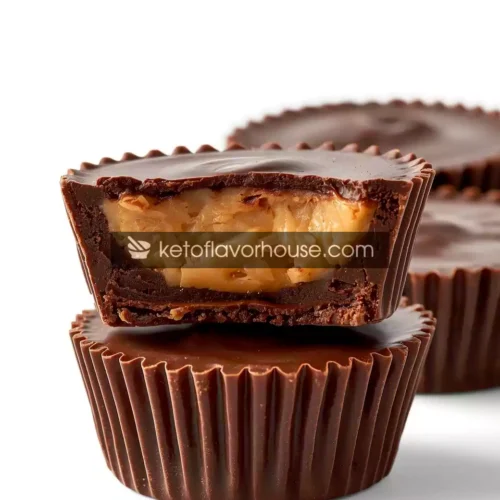
There’s something magical about chocolate and peanut butter together — that sweet, creamy, salty balance that hits every craving spot at once. But here’s the twist — these aren’t your typical candy cups. My High-Protein Chocolate Peanut Butter Cups give you that indulgent, Reese’s-style flavor without the sugar crash. And even better? They’re packed with muscle-loving protein that helps keep you full, energized, and guilt-free.
If you’ve ever wished dessert could double as a protein snack, this is your dream come true. These no-bake peanut butter cups are creamy, chocolatey, and melt-in-your-mouth perfect — yet secretly high in protein and low in sugar. Whether you’re on a fitness journey, managing your weight, or just want a sweet fix that doesn’t derail your goals, this recipe delivers every single time.
💪 Why You’ll Love This Recipe
- 🍫 Chocolate craving approved – tastes just like your favorite candy bar
- 💥 Protein-packed – over 10g protein per serving
- 🕒 No-bake & quick – ready in under 20 minutes
- 🧊 Freezer-friendly – perfect for weekly meal prep
- 🥜 Creamy peanut butter core – rich, satisfying, and sugar-free
- 💡 Versatile – easily adjustable with different protein powders or nut butters
👩🍳 My Personal Experience
I’ll admit — my peanut butter cup obsession started during a late-night Netflix binge. I wanted something sweet but didn’t want to blow through my daily calories. That’s when I started experimenting. My first few tries were… let’s just say grainy and chalky (too much protein powder, not enough balance). But after a few tweaks, I found the perfect ratio: creamy peanut butter, a hint of coconut oil, rich cocoa, and just enough sweetener to make every bite feel like dessert heaven.
Now I make a batch every Sunday. They’ve become my go-to post-workout treat and mid-afternoon energy fix. The texture is silky and satisfying — the kind of snack that keeps your cravings in check and your muscles happy.
🧰 Required Equipment
🥣 Mixing Bowls
You’ll need two medium-sized bowls — one for the chocolate layer and one for the peanut butter filling. A silicone spatula helps mix everything smoothly without lumps.
🍫 Silicone Muffin Molds or Cupcake Liners
These make it easy to pop out your peanut butter cups once set. Silicone molds are best because nothing sticks, but paper liners work in a pinch.
🥄 Measuring Cups & Spoons
Since protein powder and nut butter ratios affect texture, accurate measuring is key.
🧊 Freezer or Fridge
The recipe sets perfectly in about 15–20 minutes in the freezer or an hour in the fridge.
🥜 Ingredients & Substitutions
Here’s what you’ll need for about 10 high-protein peanut butter cups:
For the Chocolate Layer:
- ½ cup sugar-free dark chocolate chips (or 70% dark chocolate, melted)
- 1 tbsp coconut oil (for that glossy, smooth texture)
- 1 scoop chocolate whey protein powder (adds protein and thickens the chocolate layer)
- 1 tsp vanilla extract
- Pinch of sea salt
Substitutions:
- Coconut oil → unsalted butter (for a richer flavor)
- Whey protein → plant-based chocolate protein (for vegan version)
- Dark chocolate → milk chocolate (for sweeter taste)
For the Peanut Butter Filling:
- ½ cup natural peanut butter (unsweetened, creamy)
- 1 scoop vanilla whey protein powder
- 1–2 tbsp almond milk (to loosen texture)
- 1 tbsp honey or sugar-free maple syrup
- 1 tsp coconut flour (optional, for extra firmness)
Substitutions:
- Peanut butter → almond butter or cashew butter
- Honey → monk fruit syrup, erythritol, or stevia
- Coconut flour → omit or use oat flour if you prefer softer cups
💡 Protein role: The whey protein powder turns this dessert into a balanced snack — giving each cup over 10g of protein. Peanut butter provides healthy fats, keeping you full and satisfied.
👩🍳 How to Make High-Protein Chocolate Peanut Butter Cups
Step 1: Melt the Chocolate
In a microwave-safe bowl, combine your dark chocolate chips and coconut oil. Microwave in 20-second bursts, stirring between each, until smooth. Stir in your chocolate whey protein powder, vanilla, and a pinch of sea salt.
Tip: Don’t overheat the chocolate — it can seize. Stir gently to create a glossy texture.
Step 2: Prepare the Peanut Butter Filling
In another bowl, mix peanut butter, vanilla whey protein powder, almond milk, and honey until creamy. Adjust thickness — it should be spreadable but not runny. If it’s too thick, add another teaspoon of milk. If too thin, sprinkle in a bit of coconut flour.
Step 3: Layer It Up
Spoon 1 teaspoon of melted chocolate into each mold and swirl it to coat the bottom. Freeze for 5 minutes to set. Then, add about a teaspoon of peanut butter filling to each mold, gently pressing it down.
Finally, top each cup with another layer of melted chocolate, covering the filling completely.
Step 4: Set and Chill
Place the tray in the freezer for 15–20 minutes, or until fully set. Once firm, pop them out and store in an airtight container.
⚠️ Common Mistakes to Avoid
- ❌ Adding protein powder directly to hot chocolate – it clumps. Let chocolate cool slightly first.
- ❌ Using dry or grainy peanut butter – results in chalky cups. Use smooth, creamy brands.
- ❌ Skipping the freeze time – makes the layers blend instead of setting properly.
- ❌ Over-sweetening – protein powder already adds flavor; taste before adding extra sweeteners.
🌟 Pro Tips for Best Results
- Mix your protein powder slowly to prevent clumping.
- Use natural peanut butter — it blends better with protein powder.
- Want extra crunch? Sprinkle crushed peanuts or cacao nibs before freezing.
- Add a pinch of instant espresso powder for deeper chocolate flavor.
- To keep calories in check, use mini muffin molds for portion control.
💪 High-Protein Nutrition & Strategy
These peanut butter cups are a nutrient-balanced power snack — not just dessert. Each serving packs high-quality whey protein, healthy fats, and minimal sugar.
Why it works for fitness & weight goals:
- Protein aids muscle repair after workouts.
- Healthy fats slow digestion, keeping you full longer.
- Low sugar prevents insulin spikes, helping maintain energy balance.
Best times to enjoy:
- 🏋️ Post-workout snack
- ☕ Afternoon energy boost
- 🍫 Dessert replacement during weight loss
🎨 Variations You Can Try
- Crunchy Protein Cups: Add chopped peanuts or granola between layers.
- Chocolate Almond Cups: Use almond butter and vanilla protein.
- Mocha Protein Cups: Mix espresso powder into chocolate layer.
- Salted Caramel Cups: Add sugar-free caramel syrup in the filling.
Each variation keeps the protein high but changes the flavor experience.
🧠 Tips for This Recipe
- For softer cups, store in the fridge; for firm texture, keep them frozen.
- If using plant-based protein, add a teaspoon of melted coconut oil to smooth texture.
- Drizzle extra melted chocolate on top for a bakery-style finish.
🥄 Optional Additions
Boost your protein even more:
- 💧 1 tbsp chia seeds – adds fiber & omega-3s
- 🍶 1 tbsp collagen peptides – invisible but adds 5g protein
- 🥚 1 tbsp powdered egg whites – boosts protein without changing flavor
🍽️ Serving Ideas
Serve them cold right from the fridge, or slightly softened from the freezer.
Perfect for:
- Post-workout bites
- Office snacks
- Healthy dessert trays
- Late-night sweet tooth fix
Pair with iced coffee or a protein shake for a filling combo.
🧊 Storage Recommendations
- Fridge: Up to 1 week in an airtight container.
- Freezer: Up to 2 months.
- Reheat: Don’t! Just let sit at room temp for 2–3 minutes before eating.
Keep them in layers separated by parchment paper to avoid sticking.
❓ Frequently Asked Questions (FAQ)
1. Can I use protein powder in both layers?
Yes! Using chocolate in the base and vanilla in the filling gives the best flavor combo.
2. Can I make these vegan?
Absolutely — use plant-based protein powder and vegan chocolate.
3. Is this good for post-workout?
Yes — each cup provides quick protein for muscle recovery and slow-digesting fats for energy.
4. Can I use almond butter instead of peanut butter?
Totally. The taste changes slightly, but protein remains high.
5. Can I meal prep these?
Yes — make a batch, freeze, and enjoy throughout the week.
6. How do I increase protein even more?
Add an extra half scoop of whey protein or stir collagen peptides into the filling.
7. Do these melt easily?
Keep them refrigerated; coconut oil softens at room temperature.
🧾 Nutritional Breakdown (Per Serving)
| Nutrient | Amount |
|---|---|
| Calories | 165 kcal |
| Protein | 10 g |
| Fat | 11 g |
| Total Carbs | 6 g |
| Fiber | 2 g |
| Net Carbs | 4 g |
| Sugar | 2 g |
| Sodium | 90 mg |
📌 Recipe Snapshot
- Prep Time: 15 minutes
- Cook Time: 0 minutes
- Total Time: 20 minutes
- Course: Snack / Dessert
- Cuisine: American / Fitness-Friendly
- Servings: 10 cups
- Calories: 165 per serving
- Protein: 10 g per serving
High-Protein Chocolate Peanut Butter Cups Recipe
Ingredients
- ½ cup dark chocolate chips
- 1 tbsp coconut oil
- 1 scoop chocolate whey protein
- ½ cup peanut butter
- 1 scoop vanilla whey protein
- 1 tbsp honey
- 1 –2 tbsp almond milk
- Pinch sea salt
Instructions
- Melt chocolate chips with coconut oil. Stir in chocolate protein powder.
- Pour a spoonful into each silicone mold. Freeze 5 minutes.
- Mix peanut butter, vanilla protein, honey, and almond milk for the filling.
- Add filling over the chocolate base.
- Cover with another layer of melted chocolate.
- Freeze until set (15–20 minutes). Enjoy chilled.