This post may contains Amazon affiliate and other affiliate links. If you make a purchase through these links, I may earn a small commission at no extra cost to you. Your support helps me continue to provide quality content. I only recommend products I personally trust and believe will add value to your experience. For more details, please visit my Privacy Policy.
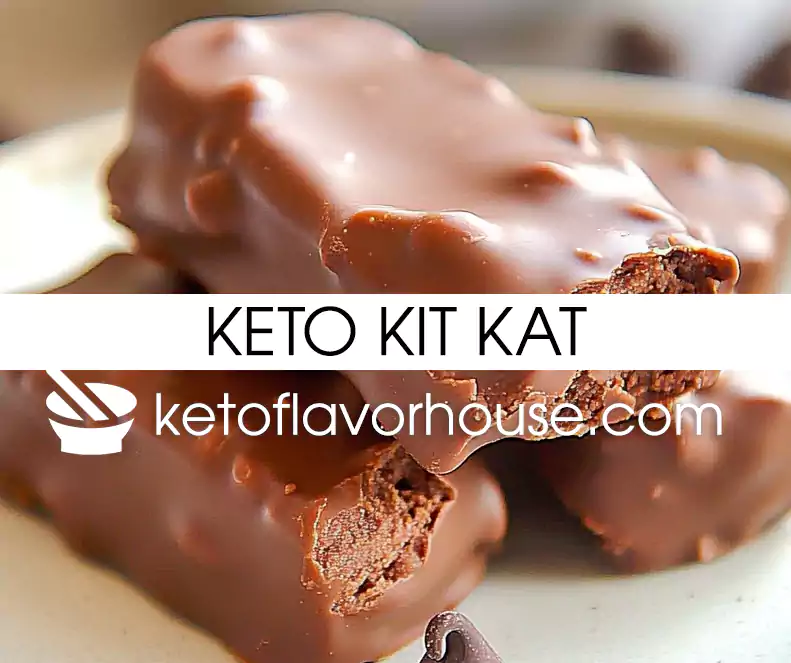
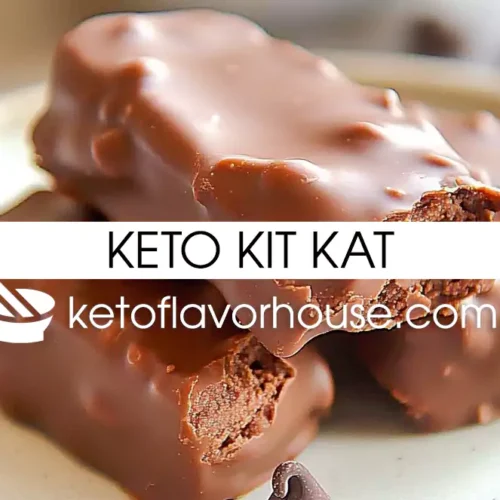
Imagine biting into a rich, chocolate-coated bar that satisfies all your cravings while keeping you in ketosis. These homemade Keto Kit Kats bring the best of both worlds—indulgent chocolate and a crunchy center—all without the guilt. Whether you’re looking for a quick snack, a dessert to impress, or a treat to satisfy your sweet tooth, this recipe is the perfect fit. Plus, it’s super fun to make!
Kick off your keto journey with our Keto Diet Plan for Beginners: A Step-by-Step Guide! Discover boosted energy, sharper focus, and the incredible benefits of a low-carb lifestyle starting from day
Why You’ll Love Keto Kit Kat
- Low-Carb & Keto-Friendly: All the joy of a classic treat, minus the sugar.
- Simple Ingredients: Made with keto staples you likely already have in your pantry.
- Fun to Make: A great recipe to involve family or friends.
- Customizable: Adjust flavors and coatings to suit your preferences.
- Perfect for Any Occasion: Snack, dessert, or even a gift idea!
My Personal Experience
The first time I made these Keto Kit Kats, I couldn’t believe how easy it was to recreate a childhood favorite in a healthier way. The glossy chocolate coating and the satisfying crunch of the center brought back so many memories, and I loved knowing I could enjoy them without breaking my carb limit. Trust me, these bars are addictive—in the best way possible!
Equipment You’ll Need
Small Saucepan: The perfect tool for gently melting chocolate without the fear of scorching. I always reach for one that distributes heat evenly, so the chocolate melts smoothly and consistently. Trust me, a good saucepan makes a world of difference here!
Mixing Bowl: This is where the magic happens! A sturdy bowl with a solid grip is a game changer. It keeps everything in place while you blend the ingredients together. I love how easy it is to mix everything without worrying about spills or slips.
Whisk: This little guy is essential for creating a silky-smooth, lump-free texture. Whether you’re stirring the chocolate or mixing up other ingredients, a good whisk gets everything blended just right, with no chunks in sight!
Measuring Cups and Spoons: When it comes to keto recipes, precision is key, and these tools make it easy to stay accurate. I always use my trusty measuring cups and spoons to ensure I’m hitting the right carb counts every time—so no surprises later on.
Spatula: The spatula is my best friend when it comes to scraping every last bit of that rich chocolate out of the bowl. Seriously, there’s no reason to waste any of that deliciousness! Plus, it helps you spread the mixture evenly in your mold or pan.
Parchment Paper: Removing the bars from the pan has never been easier! I line my pan with parchment paper, and the bars practically lift right out. Cleanup is a breeze too—just toss the paper and you’re done.
Silicone Molds or Square Pan (8×8 or smaller): These are key for shaping your bars into perfect, uniform squares. I love silicone molds because they make it so easy to pop out the bars without sticking. If I’m using a square pan, I make sure it’s no larger than 8×8 to get that ideal bar shape.
Ingredients & Substitutions
- Almond Flour (1 cup): Provides the base for the crunchy layer. Substitute with coconut flour for a slightly different texture but adjust the quantity (about 1/3 cup).
- Erythritol (1/3 cup): Sweetens without spiking blood sugar. Monk fruit sweetener works as an alternative.
- Butter (1/4 cup): Adds richness and helps bind the base. Coconut oil can be used for a dairy-free option.
- Vanilla Extract (1 tsp): Enhances the flavor. You can also use almond or peppermint extract for variety.
- Sugar-Free Chocolate Chips (1 cup): The star ingredient for the coating. Use a high-quality brand for the best results.
- Coconut Oil (1 tbsp): Helps the chocolate coating become smooth and glossy.
How to Make Keto Kit Kat
1. Prepare the Crunchy Base: In a mixing bowl, combine almond flour, erythritol, melted butter, and vanilla extract. Mix until the texture resembles wet sand. Press this mixture into a lined square pan or silicone mold, ensuring it’s evenly spread. Place in the freezer for 20 minutes to set.
2. Melt the Chocolate: In a small saucepan over low heat, melt the sugar-free chocolate chips with coconut oil. Stir continuously to ensure a smooth, lump-free mixture.
3. Coat the Base: Remove the crunchy base from the freezer. Pour the melted chocolate over the base, spreading it evenly with a spatula. For molds, fill each cavity halfway with chocolate, add the base layer, and top with more chocolate.
4. Set the Bars: Return the pan or mold to the freezer for 30 minutes or until fully set.
5. Slice and Serve: If using a square pan, carefully lift the parchment paper and cut the set mixture into bars. Enjoy immediately or store for later!
Tips for Perfect Keto Kit Kats
- Use high-quality chocolate for the best flavor and texture.
- Make sure the base is fully set before adding the chocolate to prevent mixing.
- Work quickly when spreading the chocolate to ensure a smooth finish.
- Keep a spatula handy to scrape every bit of chocolate from the bowl.
Optional Additions
- Add a pinch of sea salt on top of the chocolate layer for a sweet-salty combination.
- Mix in a few chopped nuts or seeds for added crunch.
- Drizzle with white chocolate for a decorative touch.
Serving Ideas
- Pair with a cup of keto-friendly coffee for a satisfying snack.
- Serve as a dessert at gatherings—they’ll be a hit!
- Wrap in parchment and tie with a ribbon for a thoughtful homemade gift.
Storage Recommendations
- Store in an airtight container in the refrigerator for up to 2 weeks.
- For longer storage, keep them in the freezer for up to 3 months. Simply let them thaw for a few minutes before enjoying.
Frequently Asked Questions
Q: Can I use a different sweetener? A: Yes, but make sure it’s keto-approved. Adjust the quantity based on the sweetness level.
Q: Can I make these dairy-free? A: Absolutely! Substitute butter with coconut oil and use dairy-free chocolate chips.
Q: Why isn’t my chocolate smooth? A: Ensure you’re melting it on low heat and stirring constantly. Adding a bit of coconut oil can also help.
Nutritional Breakdown (Per Serving)
- Calories: 120
- Fat: 10g
- Protein: 2g
- Total Carbs: 6g
- Net Carbs: 2g
- Fiber: 4g
Keto Kit Kat Recipe
Equipment
- Small Saucepan
- Mixing bowl
- Whisk
- Measuring cups and spoons
- Spatula
- Parchment Paper
- Silicone Molds or Square Pan (8×8 or smaller)
Ingredients
- Almond Flour 1 cup
- Erythritol 1/3 cup
- Butter 1/4 cup
- Vanilla Extract 1 tsp
- Sugar-Free Chocolate Chips 1 cup
- Coconut Oil 1 tbsp
Instructions
- Combine almond flour, erythritol, melted butter, and vanilla extract in a bowl until the mixture resembles wet sand. Press into a lined pan or mold and freeze for 20 minutes.
- Melt chocolate chips with coconut oil in a saucepan over low heat, stirring until smooth.
- Pour melted chocolate over the frozen base, ensuring an even layer.
- Freeze for 30 minutes or until set. Slice into bars and enjoy!
I’d love to hear how this recipe turned out for you! 😊 Be sure to follow us on Instagram and Facebook for daily keto inspiration and delicious new recipes. If you’re new to keto, don’t miss our Keto Diet Plan for Beginners: Step-by-Step Guide to kickstart your journey to a healthier, low-carb lifestyle today!
Subscribe to our newsletter!

