This post may contains Amazon affiliate and other affiliate links. If you make a purchase through these links, I may earn a small commission at no extra cost to you. Your support helps me continue to provide quality content. I only recommend products I personally trust and believe will add value to your experience. For more details, please visit my Privacy Policy.
Introduction
Have you ever craved the comforting taste of fried rice but wanted a version that doesn’t derail your bariatric journey? I know I have. The first time I tried to recreate fried rice after my bariatric surgery, I was frustrated. Traditional fried rice is loaded with oil and carbs, and even a small serving left me feeling too full and sluggish. That’s when I decided to reinvent it in a way that’s flavorful, satisfying, and bariatric-friendly.
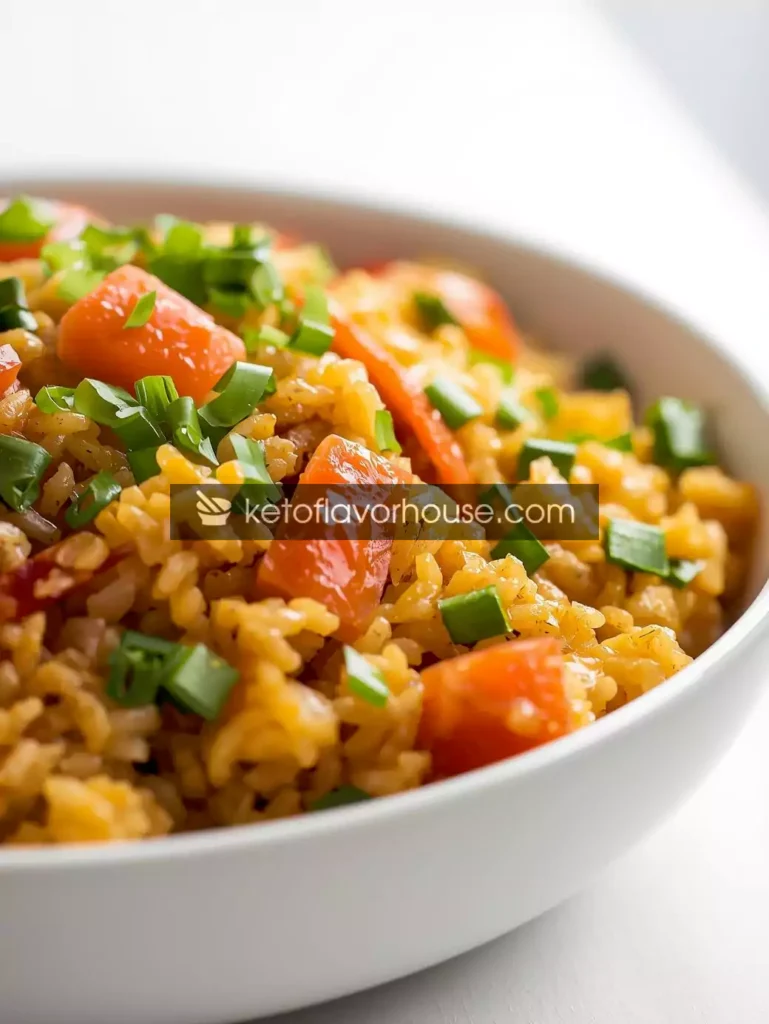
This Bariatric-Friendly ‘Not Really Fried Rice’ – Low-Calorie, High-Protein Recipe became an instant favorite in my kitchen. It gives all the flavors and textures of classic fried rice but without the excess calories, fats, or heavy carbs. You’ll love how it fits perfectly into a post-bariatric diet while still tasting indulgent and comforting.
Whether you’re meal prepping for the week, looking for a quick lunch, or craving a cozy dinner, this recipe solves that “fried rice fix” without compromising your nutrition goals.
Why You’ll Love This Recipe
- 🍗 High-Protein: Keeps you full and supports muscle maintenance.
- 🥦 Bariatric-Friendly Veggies: Gentle on your stomach and nutrient-packed.
- ⏱ Quick & Easy: Ready in under 30 minutes, perfect for busy days.
- 😋 Flavorful Comfort Food: Savory, aromatic, and satisfying.
- 🍴 Family-Friendly: Even non-bariatric eaters will enjoy it.
My Personal Experience
The first time I made this recipe, I remember standing over my skillet, worried it wouldn’t taste like real fried rice. I had low expectations, but the aroma of garlic, ginger, and a hint of soy sauce quickly filled the kitchen. The taste? Surprisingly authentic. My family even asked for seconds, completely unaware this was a bariatric-friendly version.
For anyone adjusting to bariatric eating, this recipe is a revelation. It proves that you can enjoy comfort foods without feeling guilty or overstuffed. The secret lies in the right balance of protein, veggies, and smart cooking techniques to keep texture and flavor intact.
Required Equipment
Skillet or Nonstick Pan
A good nonstick skillet ensures the rice and veggies don’t stick, reducing the need for excessive oil. If you don’t have one, a well-seasoned cast iron pan works beautifully too.
Knife & Cutting Board
Sharp knives make chopping vegetables safer and quicker, and a sturdy cutting board protects your countertops.
Mixing Bowl
Useful for whisking sauces, tossing ingredients, and prepping eggs or proteins separately before combining with the rice.
Wooden Spoon or Spatula
Gentle on your nonstick skillet and perfect for stirring without breaking the rice grains.
Optional:
- Air Fryer: For lightly roasting proteins or vegetables in advance, adding extra crispness.
- Blender or Food Processor: If you like finely minced veggies or cauliflower rice for a lower-carb version.
Ingredients & Substitutions
- 1 cup cauliflower rice – Low in carbs, gentle on the stomach, and bariatric-friendly. Sub: ½ cup finely shredded zucchini for a lighter alternative.
- ½ cup cooked chicken breast, diced – Lean protein to keep you full. Sub: turkey or shrimp works equally well.
- 1 small carrot, finely diced – Adds subtle sweetness and color. Sub: bell pepper for slightly more crunch.
- ¼ cup green peas – Gentle fiber and vitamins. Sub: chopped zucchini or spinach for lower sugar.
- 1 small onion, finely chopped – Flavor base. Sub: shallots or green onions.
- 2 cloves garlic, minced – Enhances aroma and depth.
- 1 tsp ginger, grated – Adds warmth and digestibility.
- 1 tsp low-sodium soy sauce – Flavor enhancer without too much salt. Sub: coconut aminos for soy-free or lower sodium.
- 1 egg, lightly beaten – Extra protein and fluffy texture. Sub: egg whites only for lower fat.
- ½ tsp sesame oil – Optional, for authentic flavor without overpowering.
- Salt & pepper, to taste – Adjust carefully for bariatric needs.
Pro Tip: Keep portions moderate and chop veggies finely for easy digestion post-bariatric surgery.
How to Make Bariatric-Friendly ‘Not Really Fried Rice’
Step 1: Prep the Ingredients
Wash, peel, and finely chop all vegetables. Dice your protein into bite-sized pieces. Whisk the egg in a small bowl and set aside.
Mini-tip: Prepping everything before you cook prevents overcooking and allows the rice to remain fluffy.
Step 2: Cook the Protein
Heat your skillet over medium heat. Add a few drops of oil or use a nonstick spray. Cook the chicken or preferred protein until golden and fully cooked. Remove and set aside.
Tip: Avoid overcooking proteins—they’ll cook slightly more when added back later.
Step 3: Sauté Vegetables
Add onion, garlic, and ginger to the skillet. Sauté for 1–2 minutes until fragrant. Add carrot and peas, cooking for another 2–3 minutes until just tender.
Don’t overcrowd the pan; sauté in batches if necessary for even cooking.
Step 4: Add the “Rice”
Stir in cauliflower rice and toss with the vegetables. Cook for 3–4 minutes, allowing moisture to evaporate so the rice doesn’t get soggy.
Mini-tip: Use a spatula to separate grains for that authentic fried rice texture.
Step 5: Incorporate Egg & Protein
Push the rice to one side of the skillet. Pour the beaten egg on the empty side, scrambling it gently. Once cooked, mix with the rice and vegetables. Return the cooked protein and soy sauce to the pan. Stir to combine.
Tip: Don’t over-stir; gentle folding keeps cauliflower rice from becoming mushy.
Step 6: Season & Finish
Drizzle sesame oil and season with salt and pepper. Taste and adjust. Serve immediately while warm.
Optional Variants:
- Oven: Bake ingredients in a preheated 375°F oven for 10–12 minutes, stirring halfway.
- Air Fryer: Roast protein and veggies separately at 360°F for 8–10 minutes, then combine with cauliflower rice.
Common Mistakes to Avoid
- Overcrowding the pan: Leads to steaming rather than sautéing, making rice soggy.
- Overcooking the egg: Scramble gently for fluffy texture.
- Adding too much soy sauce: Overpowers the light, fresh flavor.
Pro Tips for Best Results
- Use finely chopped vegetables for easy digestion.
- Cook cauliflower rice until slightly dry to mimic fried rice texture.
- Adjust seasoning gradually; bariatric taste buds are sensitive post-surgery.
Bariatric Nutrition & Strategy
Cauliflower rice is low in carbs, gentle on the stomach, and nutrient-rich. Lean protein ensures satiety without excessive fat. Incorporating a small amount of healthy fat (sesame oil) helps flavor absorption while keeping calories controlled. This dish fits well into a daily bariatric meal plan, paired with a small serving of steamed greens or a light soup.
Pro Tip: Serve in small portions to avoid overeating and enjoy leftovers safely.
Variations You Can Try
- Shrimp & Veggie: Swap chicken for shrimp for a seafood twist.
- Egg-Free: Use extra protein from tofu or tempeh.
- Spicy: Add chili flakes or a touch of sriracha (bariatric-safe in small amounts).
Tips for This Recipe
- Serve immediately for best texture.
- Garnish with chopped green onions for color and flavor.
- Keep soy sauce low to manage sodium intake.
Optional Additions
- Lightly steamed broccoli or zucchini for extra fiber.
- Chopped mushrooms for earthy flavor.
- Finely chopped bell peppers for crunch and sweetness.
Serving Ideas
- Perfect for meal prep—stores well in the fridge for 2–3 days.
- Makes a quick lunch or dinner for bariatric-friendly family meals.
- Ideal for small gatherings or potlucks, offering a healthy alternative to traditional fried rice.
Storage Recommendations
- Fridge: 3 days in an airtight container.
- Freezer: 1 month in a freezer-safe container.
- Reheating: Microwave 1–2 minutes or reheat in a skillet with a splash of water to restore moisture.
Frequently Asked Questions (FAQ)
Q1: Can I freeze this recipe?
Yes! Store in an airtight container for up to 1 month. Reheat gently to prevent cauliflower from becoming mushy.
Q2: Can I use regular rice instead of cauliflower rice?
Yes, but carbs and points will increase. For bariatric-friendly meals, cauliflower rice is recommended.
Q3: Is this recipe suitable immediately after bariatric surgery?
It’s ideal for post-op stages once soft solids and proteins are tolerated. Chop veggies finely for easier digestion.
Q4: Can I use air fryer for cooking?
Absolutely! Roast protein and veggies separately, then combine with cooked cauliflower rice.
Q5: Can I make this vegan?
Yes, replace chicken with tofu or tempeh and use scrambled chickpea flour instead of egg.
Q6: How can I make it spicier?
Add chili flakes or a dash of sriracha, but keep in mind bariatric sensitivity to spices.
Q7: Can I add cheese?
A small sprinkle of low-fat cheese works but avoid high-fat quantities for bariatric compliance.
Nutritional Breakdown (Per Serving)
- Calories: 180 kcal
- Protein: 21 g
- Fat: 6 g
- Total Carbs: 12 g
- Fiber: 4 g
- Net Carbs: 8 g
- Sugar: 4 g
- Sodium: 280 mg
Recipe Snapshot
- Prep Time: 10 minutes
- Cook Time: 15 minutes
- Total Time: 25 minutes
- Course: Main / Lunch / Dinner
- Cuisine: Bariatric-Friendly / Low-Calorie
- Servings: 2
- Calories: 180 kcal per serving
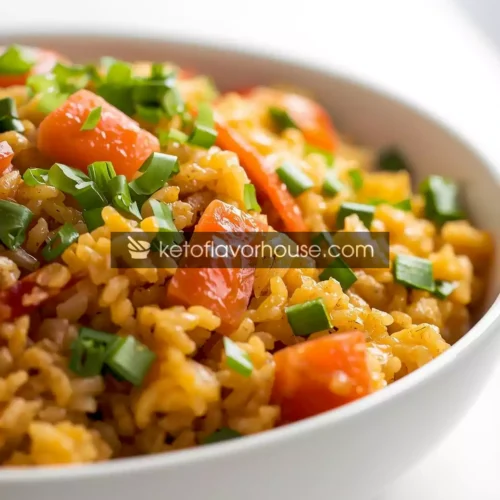
Bariatric-Friendly Not Really Fried Rice Recipe
Ingredients
- 1 cup cauliflower rice
- ½ cup cooked chicken breast diced
- 1 small carrot finely diced
- ¼ cup green peas
- 1 small onion chopped
- 2 cloves garlic minced
- 1 tsp ginger grated
- 1 tsp low-sodium soy sauce
- 1 egg beaten
- ½ tsp sesame oil
- Salt & pepper to taste
Instructions
- Chop all vegetables and dice protein. Whisk egg.
- Cook protein in skillet until done; remove.
- Sauté onion, garlic, ginger, carrot, and peas 2–3 minutes.
- Add cauliflower rice; cook 3–4 minutes until moisture evaporates.
- Scramble egg in pan; combine with rice and vegetables.
- Return protein; stir in soy sauce, sesame oil, salt, and pepper.
- Serve warm immediately.