This post may contains Amazon affiliate and other affiliate links. If you make a purchase through these links, I may earn a small commission at no extra cost to you. Your support helps me continue to provide quality content. I only recommend products I personally trust and believe will add value to your experience. For more details, please visit my Privacy Policy.
Introduction
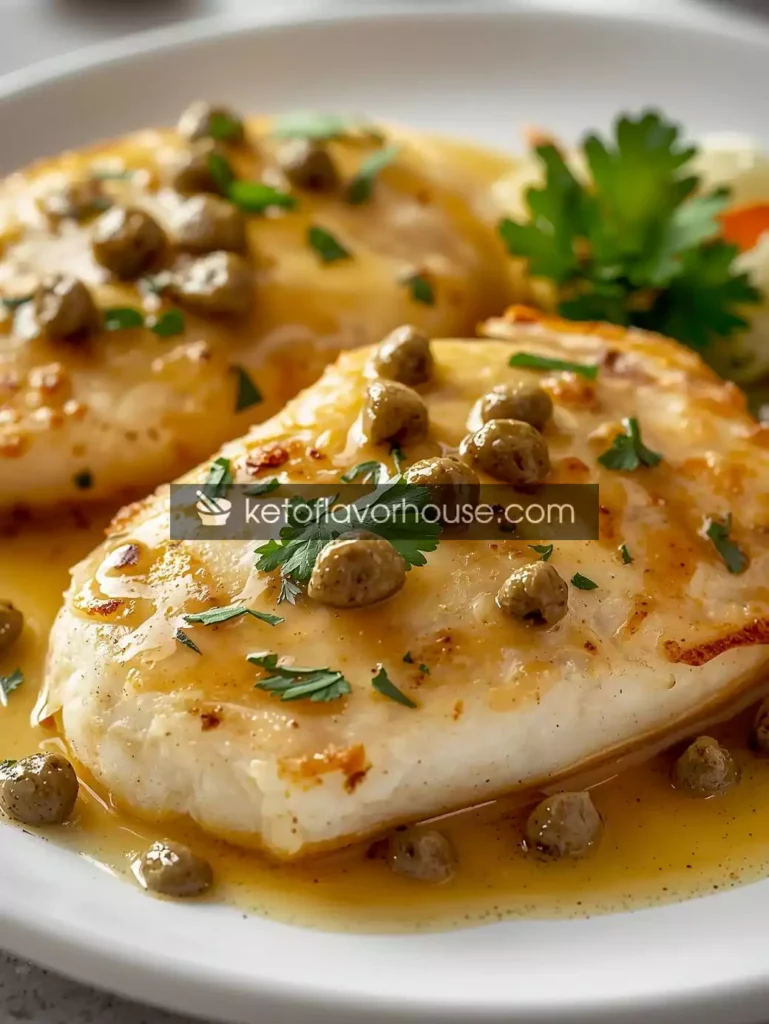
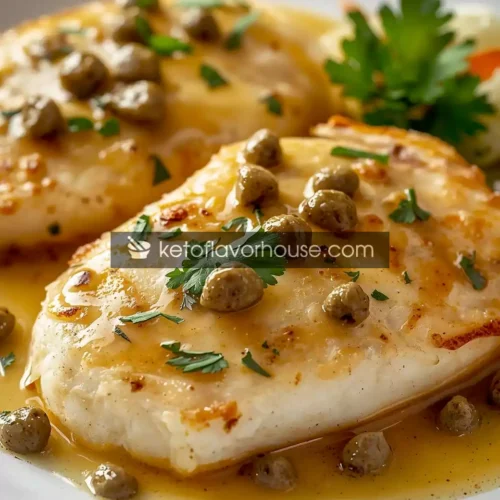
There’s something about restaurant-style meals that always sparks cravings after bariatric surgery. You want the flavors, the textures, the indulgence — but you also need meals that respect your new lifestyle. That’s exactly where this Bariatric Tilapia Piccata (Olive Garden Copycat Recipe) comes in.
I remember the first time I had Olive Garden’s piccata — the delicate tilapia fillet bathed in a silky lemon-butter sauce, with a little tang from capers. It felt so fancy and comforting at the same time. But as someone focusing on bariatric-friendly recipes, I knew I had to create a lighter version that didn’t skimp on taste.
This recipe is bariatric friendly because it’s high in protein, low in carbs, and portion-controlled without losing the buttery, citrusy essence that makes piccata so irresistible. It’s perfect for post-op eaters who want to feel satisfied without overdoing it — and trust me, even family members who aren’t watching carbs will clean their plates.
So today, I’m sharing not just a copycat of Olive Garden’s classic but a smarter, bariatric-approved version you can enjoy guilt-free.
💫 Why You’ll Love This Recipe
- 🍋 Bright, tangy citrus flavor balanced with buttery goodness
- 🐟 High in protein, gentle on your post-op stomach
- ⏱ Quick to make — ready in about 30 minutes
- 🥗 Bariatric-friendly, but family-approved
- 🍴 Restaurant-style flavor without restaurant calories
My Personal Experience
When I first started experimenting with bariatric cooking, I made the mistake of thinking “healthy” meant sacrificing flavor. My early attempts at copycat recipes often turned out bland or watery. But with this tilapia piccata, I realized the secret was balance — keeping the sauce rich enough to feel indulgent but cutting back where it wouldn’t be missed.
I remember plating it up one night, nervous that my husband (who’s a big pasta-and-bread kind of guy) would turn his nose up at “diet food.” But after one bite, he was hooked. He even said it tasted better than the restaurant version because it didn’t leave him feeling heavy afterward.
For me, it was a win-win. I got to enjoy a nostalgic favorite while staying within my bariatric goals. It became one of those recipes I pull out when I want comfort food without the regret.
Required Equipment
🥘 Skillet
A nonstick or stainless-steel skillet is essential here. Tilapia is a delicate fish, and you want a pan that gives you even heat and lets the fillets brown gently without sticking. If you don’t have a skillet, a wide sauté pan works too.
🧂 Small Mixing Bowl
You’ll need this for dredging the fish in a light flour or almond flour coating. It helps keep the coating thin and even, which is important for bariatric-friendly cooking because we don’t want heavy breading.
🥄 Whisk
A whisk helps emulsify the lemon juice, broth, and light butter together into a smooth sauce. If you don’t have one, a fork works in a pinch, but a whisk really makes the sauce silky.
🍴 Tongs or Fish Spatula
Tilapia is fragile, so tongs or a fish spatula will make flipping and removing it easier. A regular spatula might break the fillets if you’re not careful.
🍋 Zester or Grater
Fresh lemon zest brings brightness that bariatric taste buds often crave. If you don’t have a zester, carefully use the small side of a box grater.
Ingredients & Substitutions
- 4 tilapia fillets (about 4–5 oz each) – The protein powerhouse of this dish. Tilapia is mild, easy to digest, and bariatric friendly. Substitution: cod, haddock, or even chicken breast for a variation.
- 2 tbsp almond flour (or oat fiber) – A light coating for the fish to give it structure without heavy carbs. Substitution: coconut flour for gluten-free, or skip flour entirely if you prefer naked fillets.
- 2 tsp olive oil – Just enough to sear the fish without drowning it. Bariatric diets benefit from healthy fats in moderation. Substitution: avocado oil.
- 2 tbsp light butter (divided) – Gives the sauce richness while keeping calories lower than full butter. Substitution: ghee for dairy-sensitive eaters.
- 2 cloves garlic, minced – Adds depth and warmth. Bariatric eaters often appreciate strong flavor in small amounts.
- 1 cup low-sodium chicken broth – Keeps the sauce light and bariatric friendly. Substitution: vegetable broth if cooking vegetarian.
- ¼ cup fresh lemon juice – The tangy star of piccata! It brightens the fish and cuts through richness.
- 1 tbsp lemon zest – Optional, but it enhances the citrus punch.
- 2 tbsp capers, rinsed – Salty, briny bursts of flavor that make piccata special. Substitution: chopped green olives if you don’t like capers.
- 2 tbsp fresh parsley, chopped – A fresh, herby finish. Substitution: basil or cilantro for a twist.
How to Make Bariatric Tilapia Piccata
Step 1: Prep the Tilapia
Pat the fillets dry with paper towels. Lightly dredge them in almond flour — just a whisper of coating is enough. This step helps the fish sear without falling apart.
Mini Tip: Don’t over-coat the fillets; too much flour makes them heavy and carb-laden.
Step 2: Sear the Fish
Heat olive oil and 1 tablespoon butter in your skillet over medium heat. Lay the tilapia in gently and cook for 3–4 minutes per side, until golden. Remove and set aside.
Mini Tip: Don’t overcrowd the pan — it will steam the fish instead of browning it.
Step 3: Build the Sauce
In the same skillet, add garlic and sauté until fragrant (about 30 seconds). Pour in chicken broth and lemon juice, whisking to loosen browned bits. Let it simmer for 3 minutes.
Step 4: Add Capers & Butter
Stir in capers and the remaining tablespoon of butter. Let the sauce thicken slightly, about 2 minutes.
Mini Tip: If your sauce feels too thin, let it simmer uncovered. If too thick, add a splash more broth.
Step 5: Finish the Dish
Return tilapia to the pan and spoon the sauce over the fillets. Sprinkle with parsley and lemon zest before serving.
Common Mistakes to Avoid
- ❌ Overcooking tilapia – It becomes rubbery quickly. Pull it off the heat as soon as it flakes.
- ❌ Skipping the dry pat – Wet fillets won’t brown well.
- ❌ Adding too much flour – Over-coating ruins the bariatric-friendly balance.
- ❌ Using salted butter + salted broth – You’ll end up with an overly salty sauce.
Pro Tips for Best Results
- ✅ Always zest your lemon before juicing — it’s easier and adds brightness.
- ✅ Keep the sauce light by sticking to broth instead of cream.
- ✅ Serve immediately; tilapia doesn’t reheat as well as chicken.
- ✅ For bariatric eaters, pair with soft, non-starchy veggies like zucchini noodles or steamed spinach.
Bariatric Nutrition & Strategy
Tilapia is a superstar in bariatric diets because it’s lean, high in protein, and easy to digest. After surgery, protein is the priority, and this dish delivers without relying on starches. The lemon-butter sauce adds flavor without heavy calories, making it easier to enjoy smaller portions while feeling satisfied.
Pair it with cauliflower mash or roasted zucchini for a complete bariatric-friendly meal.
Variations You Can Try
- Chicken Piccata – Swap tilapia for thin chicken cutlets. Bariatric-friendly and heartier.
- Zucchini Piccata – Vegetarian twist: sauté zucchini slices instead of fish.
- Spicy Piccata – Add red pepper flakes for a little heat.
- Herb Piccata – Try basil or dill instead of parsley for different flavor profiles.
Tips for This Recipe
- Plate it with a lemon wedge for an extra citrus kick.
- Serve on a small plate — it tricks the brain into feeling satisfied.
- For meal prep, keep the sauce separate and add when reheating.
Optional Additions
- Spinach – Stir fresh spinach into the sauce for extra nutrients.
- Mushrooms – Add sautéed mushrooms for earthiness.
- Zoodles – Serve over zucchini noodles for a pasta-like experience.
Serving Ideas
This dish shines as a weeknight dinner, but it also feels elegant enough for a dinner party. It pairs beautifully with:
- Cauliflower rice
- Roasted asparagus
- A crisp green salad
Storage Recommendations
- Fridge: Store in an airtight container for up to 2 days. Reheat gently on low heat.
- Freezer: Tilapia doesn’t freeze well once cooked. If you must, freeze sauce separately.
- Meal Prep Tip: Make sauce ahead of time, then cook tilapia fresh for best texture.
Frequently Asked Questions (FAQ)
Q1: Can I use chicken instead of tilapia?
Yes! Thin chicken cutlets work beautifully and are equally bariatric friendly.
Q2: Can I freeze this recipe?
Not recommended for the fish, but the sauce can be frozen up to 1 month.
Q3: Is this safe for soft-food bariatric stage?
Yes, just flake the fish into small bites and avoid extra butter.
Q4: Can I use an air fryer for the fish?
Absolutely. Air fry fillets at 375°F for 10–12 minutes, then add to sauce.
Q5: How does this fit bariatric nutrition goals?
It’s high in protein, low in carbs, and portion-controlled — a perfect fit.
Q6: What if I don’t like capers?
Replace with chopped olives or skip altogether.
Q7: Can I make it dairy-free?
Yes, use olive oil or ghee instead of butter.
Nutritional Breakdown (Per Serving)
- Calories: 235
- Protein: 28g
- Fat: 11g
- Total Carbs: 4g
- Fiber: 1g
- Net Carbs: 3g
- Sugar: 1g
- Sodium: 460mg
Recipe Snapshot
- Prep Time: 10 minutes
- Cook Time: 20 minutes
- Total Time: 30 minutes
- Course: Main Course
- Cuisine: Italian-American
- Servings: 4
- Calories: 235 (per serving)
Bariatric Tilapia Piccata (Olive Garden Copycat Recipe) Recipe
Ingredients
- 4 tilapia fillets
- 2 tbsp almond flour
- 2 tsp olive oil
- 2 tbsp light butter
- 2 cloves garlic
- 1 cup chicken broth
- ¼ cup lemon juice
- 2 tbsp capers
- 2 tbsp parsley
Instructions
- Pat tilapia dry, lightly coat in almond flour.
- Heat oil + 1 tbsp butter in skillet; sear tilapia 3–4 mins per side. Remove.
- Add garlic, then broth + lemon juice. Simmer 3 mins.
- Stir in capers + remaining butter. Thicken sauce.
- Return fish, spoon sauce over top, finish with parsley.

