This post may contains Amazon affiliate and other affiliate links. If you make a purchase through these links, I may earn a small commission at no extra cost to you. Your support helps me continue to provide quality content. I only recommend products I personally trust and believe will add value to your experience. For more details, please visit my Privacy Policy.
Introduction
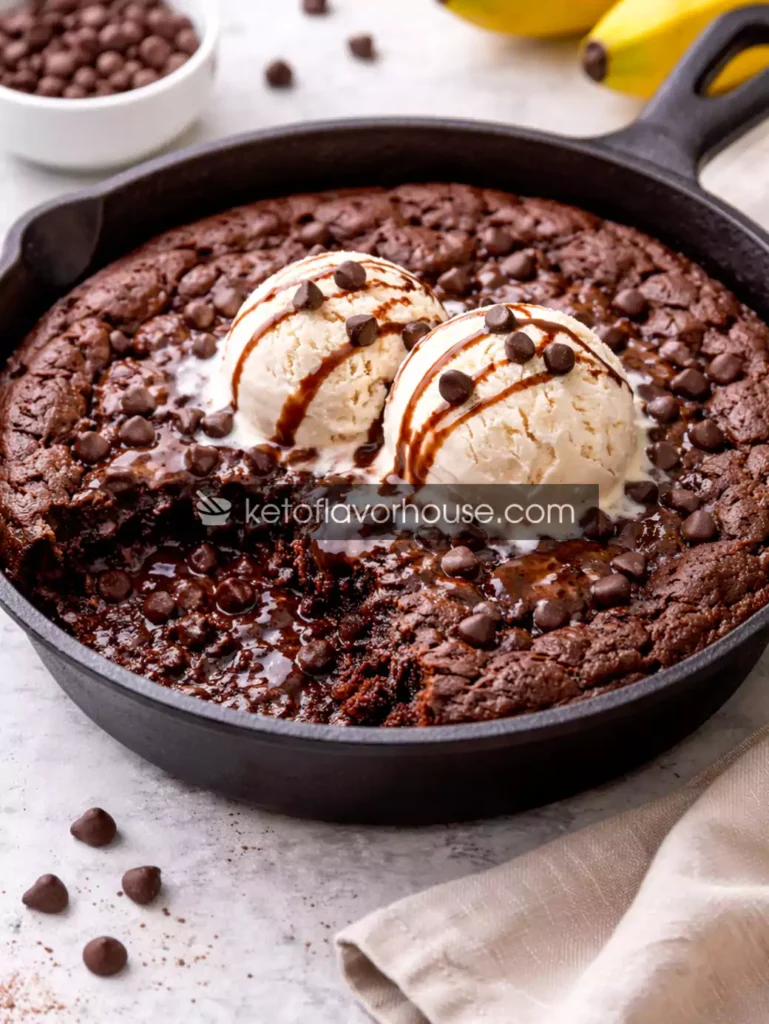
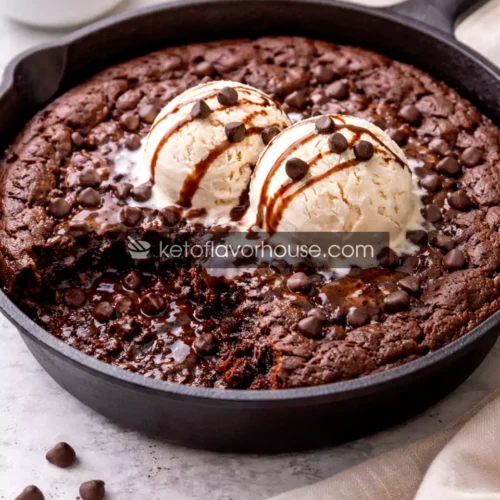
There is something deeply comforting about a warm chocolate dessert served straight from the oven. That moment when the skillet hits the table, the chocolate aroma fills the room, and a scoop of ice cream slowly melts over the top — it feels indulgent, cozy, and almost nostalgic. That’s exactly the feeling this Weight Watchers Chocolate Skillet Cake with Ice Cream was created to deliver, without the usual point overload that comes with skillet desserts.
This recipe came to life on one of those evenings when I wanted real dessert — not a substitute, not a “good enough” option — but something gooey, warm, and deeply chocolatey. I didn’t want a complicated layer cake or a long bake time. I wanted one skillet, one bowl, and something that felt like a hug at the end of the day. To my surprise, with the right balance of ingredients, this Weight Watchers Chocolate Skillet Cake with Ice Cream turned into one of the most satisfying low-point desserts I’ve ever made.
What makes this recipe special is that it doesn’t feel restrained. The edges bake up soft and slightly crisp, the center stays rich and tender, and when paired with a measured scoop of low-point ice cream, it becomes a dessert that feels restaurant-worthy while still fitting beautifully into a Weight Watchers lifestyle.
Why You’ll Love This Recipe
This skillet cake wins hearts quickly, especially for anyone who loves warm desserts:
- 🍫 Deep, rich chocolate flavor without heavy fats
- 🍰 Soft, gooey center with lightly set edges
- 🍨 Perfect with ice cream for a hot-cold contrast
- ⏱️ Quick prep and bake time
- 🥄 One-skillet dessert with minimal cleanup
- 💙 Low-point but satisfying, no “diet” taste
It’s ideal for evenings when cravings hit hard but you still want to stay within your points.
WW SmartPoints Info (Required)
- Estimated SmartPoints per serving: 4 SmartPoints
- Estimated SmartPoints for the full recipe: 16 SmartPoints
- Servings: 4
How SmartPoints were calculated:
SmartPoints are estimated using Weight Watchers SmartPoints principles, accounting for flour, cocoa, sweetener, fat content, and a controlled portion of low-point ice cream. Exact values may vary by plan and app version.
My Personal Experience With This Recipe
The first time I baked this skillet cake, I honestly expected it to be “nice.” Instead, it was dangerously good. I remember cutting into it while it was still warm and watching the center gently sink, releasing that unmistakable chocolate aroma. When I added the ice cream on top, it melted just enough to create a silky sauce over the cake.
I’ve since made this recipe for family nights, casual guests, and even just for myself on quiet evenings. What I love most is how forgiving it is. Once, I slightly overbaked it — still delicious. Another time, I pulled it early — extra gooey and irresistible. It adapts to your mood, and that’s rare in a low-point dessert.
Required Equipment
Oven-Safe Skillet
A medium oven-safe skillet is ideal because it conducts heat evenly and allows you to bake and serve in the same dish. If you don’t have one, a small baking dish works just as well.
Mixing Bowl
Used to combine dry and wet ingredients smoothly. A medium bowl is sufficient.
Whisk or Spoon
Helps incorporate ingredients without overmixing, which keeps the cake tender.
Measuring Cups & Spoons
Accurate measuring ensures the SmartPoints stay consistent and controlled.
Ingredients & Substitutions
- ¾ cup all-purpose flour
Forms the structure of the cake. Reducing flour further makes the cake too dense. - ¼ cup unsweetened cocoa powder
Delivers intense chocolate flavor with minimal points. - ½ cup granulated zero-calorie sweetener
Keeps sweetness high without adding points. - 1 tsp baking powder
Gives light lift without making the cake cakey. - ¼ tsp salt
Enhances chocolate flavor. - ½ cup unsweetened applesauce
Replaces oil and butter, dramatically reducing points while keeping moisture. - ¼ cup low-fat milk
Helps loosen the batter and soften texture. - 1 large egg
Binds the batter and adds richness. - 1 tsp vanilla extract
Rounds out the chocolate flavor. - Low-point vanilla ice cream, measured
Adds creaminess and contrast. Portion control is key.
Lower-Point Substitutions:
- Swap milk for unsweetened almond milk → reduces ~1 SmartPoint total
- Use fat-free ice cream → reduces ~1 SmartPoint per serving
How to Make Weight Watchers Chocolate Skillet Cake with Ice Cream
Step 1: Prepare the Oven and Skillet
Preheat your oven to 350°F (175°C). Lightly coat the skillet with nonstick spray to prevent sticking.
Step 2: Mix Dry Ingredients
In a bowl, whisk together flour, cocoa powder, sweetener, baking powder, and salt until evenly combined.
Step 3: Add Wet Ingredients
Add applesauce, milk, egg, and vanilla. Stir gently just until combined. The batter should be thick but spreadable.
Step 4: Transfer to Skillet
Pour batter into the prepared skillet and spread evenly.
Step 5: Bake
Bake for 18–22 minutes. The edges should be set while the center remains soft.
Step 6: Serve with Ice Cream
Let cool for 5 minutes, then add a measured scoop of ice cream on top and serve warm.
Common Mistakes to Avoid
Overbaking is the biggest issue. A dry center removes the gooey magic. Another mistake is skipping rest time — the cake needs a few minutes to settle before serving.
Pro Tips for Best Results
Use a shallow skillet for even baking. Measure ice cream carefully to keep points accurate. Serve immediately for best texture.
WW-Specific Nutrition & Strategy
This recipe works because it relies on volume-friendly swaps like applesauce and cocoa while keeping indulgence where it matters most. Pairing it with a protein-rich dinner makes it easier to enjoy dessert without triggering cravings later.
Variations You Can Try
- Chocolate Chip Skillet Cake: add 1 tbsp mini chips (+1 SmartPoint per serving)
- Mocha Chocolate Cake: add instant coffee powder (0 points)
- Peanut Butter Swirl: add powdered peanut butter (+1 SmartPoint per serving)
Tips for This Recipe
Serve directly from the skillet for a cozy presentation. Use warm bowls to keep the cake gooey longer.
Optional Additions
- Sugar-free chocolate drizzle (+0–1 SmartPoint)
- Fresh berries (0 SmartPoints)
Serving Ideas
Perfect for date night, family dessert, or casual entertaining. Also works beautifully as a shared dessert.
Storage Recommendations
Store covered in the fridge for up to 2 days. Reheat gently in the microwave. SmartPoints remain unchanged.
Frequently Asked Questions (FAQ)
Can I make this ahead?
Yes, but it’s best served warm.
Can I freeze it?
Texture changes slightly but still enjoyable.
Can I make it without ice cream?
Yes — reduces SmartPoints by ~1 per serving.
Is this kid-friendly?
Very — soft, chocolatey, and not bitter.
How do I make it more gooey?
Bake 1–2 minutes less.
Nutritional Breakdown (Per Serving)
- Calories: ~210
- Protein: ~6 g
- Fat: ~4 g
- Total Carbs: ~34 g
- Fiber: ~5 g
- Net Carbs: ~29 g
- Sugar: ~8 g
- Sodium: ~210 mg
- SmartPoints: 4 (Estimated)
Recipe Snapshot
- Prep Time: 10 minutes
- Cook Time: 20 minutes
- Total Time: 30 minutes
- Course: Dessert
- Cuisine: American
- Servings: 4
- Calories: ~210
- SmartPoints: 4 (Estimated)
Weight Watchers Chocolate Skillet Cake with Ice Cream Recipe
Ingredients
- Flour: ¾ cup 90 g
- Unsweetened cocoa powder: ¼ cup 25 g
- Granulated zero-calorie sweetener: ½ cup
- Unsweetened applesauce: ½ cup
- Egg: 1 large
- Low-fat milk or unsweetened almond milk: ¼ cup
- Vanilla extract: 1 teaspoon
- Low-point vanilla ice cream: ¼ cup per serving
Instructions
- Begin by preheating your oven to 350°F (175°C) so it reaches an even, steady temperature before baking. Lightly spray an oven-safe skillet with nonstick cooking spray, making sure to coat the bottom and sides well to prevent sticking and make serving easier.
- In a mixing bowl, combine all the dry ingredients. Whisk them together thoroughly so the cocoa powder and sweetener are evenly distributed and there are no dry pockets. This step helps ensure the cake bakes evenly and has a smooth chocolate flavor throughout.
- Add the wet ingredients to the bowl with the dry mixture. Stir gently using a spoon or spatula just until everything is combined. The batter should look thick and glossy. Avoid overmixing, as that can make the cake dense instead of soft and gooey.
- Pour the batter into the prepared skillet and spread it out evenly with a spatula. Smooth the top so the cake bakes uniformly, making sure the batter reaches all the edges of the skillet.
- Place the skillet in the preheated oven and bake for 18–22 minutes. The edges should look set and slightly pulled away from the sides, while the center should still be soft and slightly underbaked for that warm, gooey texture.
- Remove the skillet from the oven and let it rest for about 5 minutes. Serve the cake warm, topped with a carefully measured scoop of ice cream so it melts gently over the surface and creates a rich, creamy finish.
Subscribe to our newsletter!