This post may contains Amazon affiliate and other affiliate links. If you make a purchase through these links, I may earn a small commission at no extra cost to you. Your support helps me continue to provide quality content. I only recommend products I personally trust and believe will add value to your experience. For more details, please visit my Privacy Policy.
Introduction
There are some recipes that never seem to go out of style, and chicken Parmesan has always been one of them. The crispy coating, rich tomato sauce, gooey melted cheese, and juicy chicken make it the ultimate comfort food. But for years, I avoided making it regularly because traditional chicken Parmesan can be heavy, time-consuming, and not exactly ideal when you’re trying to eat more protein or prepare healthy meals ahead of time. That’s exactly why this 38g Protein Chicken Parmesan Meal Prep recipe became one of my favorite weekly staples.
The first time I made this healthier version, I wasn’t trying to reinvent a classic. I simply wanted a lunch that tasted comforting enough to look forward to every day while still supporting my nutrition goals. After several rounds of testing, I finally found the perfect balance: juicy seasoned chicken, a light crispy coating, flavorful marinara sauce, just enough melted mozzarella and Parmesan, and wholesome sides that make every meal feel complete. It had all the familiar flavors I loved, but with far more protein and much less guilt.
One thing I appreciate most about this recipe is how practical it is. Instead of spending time wondering what to eat every afternoon, I know I have a satisfying, protein-packed meal waiting in the refrigerator. It’s one of those recipes that reheats beautifully, making it perfect for busy workweeks, post-workout lunches, or quick family dinners.
Protein has become a priority in my kitchen because I know how much it helps with staying full, maintaining muscle, and keeping energy levels steady throughout the day. With approximately 38 grams of protein per serving, this meal delivers exactly what I’m looking for without sacrificing flavor. In fact, many people who have tried this recipe can’t believe it’s actually meal-prep friendly because it tastes freshly made every time.
Another reason this recipe stands out is its versatility. You can pair it with roasted vegetables, high-protein pasta, brown rice, cauliflower rice, or even zucchini noodles depending on your goals. Whether you’re focused on fitness, healthy eating, weight management, or simply enjoying homemade meals, this chicken Parmesan adapts beautifully to your lifestyle.
The crispy chicken stays tender, the marinara brings rich Italian-inspired flavor, and the melted cheese creates that irresistible finishing touch everyone expects from a great chicken Parmesan. Every bite feels comforting without being overly heavy.
If you’ve ever wished meal prep could taste like your favorite comfort food, you’re going to love this recipe. It’s easy enough for beginners, reliable enough for weekly meal prep, and delicious enough that you’ll probably find yourself making it again and again.
Why You’ll Love This Recipe
- 🍗 Delivers approximately 38 grams of protein per serving.
- 🧀 Classic chicken Parmesan flavors with a healthier twist.
- 📦 Perfect for weekly meal prep and busy schedules.
- ⏱ Easy enough for weeknight cooking.
- 🥦 Balanced with lean protein and wholesome sides.
- 💪 Excellent for muscle recovery and active lifestyles.
- ❤️ Comfort food without feeling overly heavy.
- 👨👩👧 Family-friendly and easy to customize.
- 🔥 Reheats beautifully throughout the week.
- 😋 Crispy, cheesy, savory, and incredibly satisfying.
My Personal Experience
Meal prepping used to feel more like a chore than something I actually enjoyed. I’d cook several chicken breasts on Sunday, divide them into containers with plain rice and vegetables, and by Tuesday I was already bored. The meals were healthy enough, but they lacked excitement.
Everything changed one weekend when I was craving chicken Parmesan but didn’t want to undo an entire week of healthy eating. Instead of ordering takeout, I decided to experiment with a lighter homemade version using lean chicken breast, a simple seasoned breadcrumb coating, marinara sauce, and just enough cheese to satisfy that craving.
The first batch wasn’t perfect.
I added the sauce too early, and the crispy coating became soggy before the chicken had finished cooking. The flavor was still great, but the texture wasn’t quite what I wanted.
The next weekend, I tried again. This time I baked the chicken until it was nearly finished before adding the marinara and cheese. That small adjustment made all the difference. The coating stayed lightly crisp around the edges while the cheese melted perfectly over the top.
Since then, this recipe has become one of the meals I prepare almost every other week. Even after several days in the refrigerator, it still tastes fresh, satisfying, and comforting.
One of the biggest surprises was how filling it is. The generous protein content keeps me comfortably satisfied for hours, making it much easier to avoid unnecessary snacking during busy afternoons.
I’ve also served this recipe to family members who had no idea it was designed for meal prep. They simply thought it was a really good homemade chicken Parmesan, which might be the best compliment a healthier recipe can receive.
Sometimes healthy cooking gets a reputation for being bland or repetitive, but recipes like this remind me that nutritious food can absolutely be comforting, flavorful, and something you genuinely look forward to eating.
Required Equipment
Mixing Bowl
I always use a large mixing bowl for seasoning the chicken because it gives plenty of room to coat every piece evenly without making a mess. It also makes dredging the chicken much easier when preparing the breadcrumb mixture.
Alternative: Any medium bowl or food-safe container works just as well.
Shallow Dishes
Using shallow dishes for the egg mixture and breadcrumb coating helps keep the breading process organized. It also prevents excess coating from clumping together.
Alternative: Pie plates or dinner plates with raised edges.
Baking Sheet
A sturdy baking sheet allows the chicken to cook evenly while developing a beautiful golden exterior. I like lining mine with parchment paper for easier cleanup.
Alternative: Large baking dish.
Wire Rack
Placing the chicken on a wire rack set over the baking sheet allows hot air to circulate underneath, producing a crispier coating.
Alternative: Bake directly on parchment paper if you don’t have a rack.
Meat Thermometer
This is probably my favorite kitchen tool for cooking chicken. Instead of guessing when it’s done, I simply check until the thickest part reaches 165°F (74°C).
It completely removes the worry of undercooking or drying out the chicken.
Alternative: Slice into the thickest part, although a thermometer gives much more accurate results.
Chef’s Knife
A sharp chef’s knife makes trimming the chicken and slicing vegetables much quicker and safer.
Alternative: Santoku knife.
Cutting Board
I always recommend using one cutting board for raw poultry and another for vegetables to help reduce cross-contamination.
Measuring Cups and Measuring Spoons
Accurate measurements help create consistent seasoning and breading every time.
They’re especially useful if you’re making several meal prep servings.
Silicone Brush or Spoon
This makes spreading marinara sauce evenly over the chicken quick and easy without disturbing the crispy coating.
Meal Prep Containers
Since this recipe is specifically designed for meal prep, quality airtight containers make a noticeable difference.
Glass containers help maintain texture while reheating evenly throughout the week.
Ingredients & Substitutions
Each ingredient plays an important role in creating a balanced, protein-rich meal.
Boneless Skinless Chicken Breasts – 2 pounds
Chicken breast provides the majority of the protein in this recipe while staying naturally lean.
It’s rich in complete protein that supports muscle maintenance, recovery, and long-lasting fullness.
Substitutions
- Turkey breast cutlets
- Thin chicken cutlets
- Lean turkey breast
Olive Oil Spray – As Needed
A light coating encourages browning while keeping calories lower than deep frying.
Substitution
- Avocado oil spray
- Light olive oil
Whole Wheat Panko Breadcrumbs – 1 cup
Panko creates a light crispy coating without becoming overly thick.
Whole wheat breadcrumbs also contribute extra fiber.
Substitutions
- Regular panko
- Crushed whole grain crackers
- Gluten-free panko
Grated Parmesan Cheese – ½ cup
Parmesan adds bold savory flavor while contributing additional protein and calcium.
Substitutions
- Pecorino Romano
- Asiago cheese
Italian Seasoning – 2 teaspoons
This classic herb blend brings authentic Italian-inspired flavor.
Substitution
Combine dried basil, oregano, parsley, thyme, and rosemary.
Garlic Powder – 1 teaspoon
Adds rich savory depth throughout the coating.
Substitution
Fresh minced garlic.
Onion Powder – 1 teaspoon
Balances the herbs with subtle sweetness.
Smoked Paprika – ½ teaspoon
Provides beautiful color and a gentle smoky note.
Salt – 1 teaspoon
Enhances every ingredient.
Reduce slightly if using salty marinara.
Black Pepper – ½ teaspoon
Freshly ground pepper completes the seasoning.
Large Eggs – 2
Eggs help the breadcrumb mixture adhere to the chicken while adding a small amount of additional protein.
Substitution
Egg substitute or pasteurized egg whites.
Marinara Sauce – 1½ cups
A good-quality marinara adds rich tomato flavor without excessive sugar.
Choose one with simple ingredients whenever possible.
Substitutions
- Homemade marinara
- Tomato basil sauce
- Roasted garlic tomato sauce
Part-Skim Mozzarella Cheese – 1 cup, shredded
Provides creamy melted cheese while keeping saturated fat lower than full-fat versions.
It’s also an excellent source of protein.
Substitutions
- Reduced-fat mozzarella
- Provolone
- Italian cheese blend
Cooked Brown Rice – 2 cups
Brown rice provides complex carbohydrates that pair well with the protein-rich chicken.
Substitutions
- Quinoa
- High-protein pasta
- Cauliflower rice
- Farro
Roasted Broccoli – 4 cups
Broccoli adds fiber, vitamins, minerals, and beautiful color.
It also reheats exceptionally well.
Substitutions
- Green beans
- Asparagus
- Brussels sprouts
- Roasted zucchini
Fresh Basil – 2 tablespoons, chopped
Fresh basil adds brightness and classic Italian flavor.
Substitution
Fresh parsley.
Crushed Red Pepper Flakes (Optional) – ¼ teaspoon
Perfect for anyone who enjoys a little heat.
How to Make 38g Protein Chicken Parmesan Meal Prep
Step 1: Prepare the Chicken
Preheat your oven to 425°F (220°C). If using a wire rack, place it on top of a parchment-lined baking sheet and lightly coat it with cooking spray.
Pat each chicken breast dry using paper towels. Removing excess moisture helps the coating stick better and encourages a crisp, golden finish during baking.
If the chicken breasts are especially thick, carefully slice them horizontally or gently pound them to an even thickness of about ½ inch. This ensures they cook evenly and stay juicy.
Season both sides of the chicken lightly with salt and black pepper before breading.
Mini Tip: Evenly sized chicken pieces cook at the same rate, preventing some pieces from drying out while others are still undercooked.
Step 2: Prepare the Breading Station
In one shallow dish, whisk the eggs until smooth.
In a second shallow dish, combine the whole wheat panko breadcrumbs, grated Parmesan cheese, Italian seasoning, garlic powder, onion powder, smoked paprika, a pinch of salt, and black pepper. Stir everything together thoroughly so the herbs and seasonings are evenly distributed throughout the breadcrumb mixture.
Working with one chicken breast at a time, dip it into the beaten eggs, allowing any excess to drip off. Then press it firmly into the breadcrumb mixture, coating both sides evenly and gently pressing the crumbs onto the surface so they adhere well.
Place each breaded chicken breast onto the prepared wire rack or baking sheet, leaving a little space between each piece so the hot air can circulate.
Mini Tip: Avoid packing the breadcrumbs too tightly. A light, even coating creates a crispier texture while preventing the crust from becoming dense.
Step 3: Bake Until Nearly Cooked
Lightly spray the tops of the breaded chicken with olive oil spray to encourage even browning.
Bake for 18–22 minutes, depending on the thickness of the chicken, until the coating is crisp and the internal temperature is about 155–160°F (68–71°C). At this stage, the chicken will be almost fully cooked but still has a few minutes left before reaching the final safe temperature.
Removing the chicken slightly early allows you to add the marinara sauce and mozzarella without overcooking the meat, ensuring the finished chicken stays tender and juicy rather than dry.
Mini Tip: Resist the temptation to open the oven door repeatedly while the chicken bakes, as this can reduce the oven temperature and prevent the coating from crisping properly.
Step 4: Add the Marinara and Cheese
Carefully remove the baking sheet from the oven once the chicken is nearly cooked. Spoon about 2–3 tablespoons of marinara sauce over each chicken breast, spreading it gently with the back of a spoon while leaving a small border around the edges. This helps preserve some of the crispy coating instead of covering it completely.
Sprinkle each piece evenly with the shredded part-skim mozzarella cheese, followed by a light dusting of grated Parmesan cheese for extra flavor.
Return the baking sheet to the oven and bake for another 5–8 minutes, or until the cheese is fully melted, bubbly, and the chicken reaches an internal temperature of 165°F (74°C).
Mini Tip: Avoid adding too much marinara sauce. A thin layer provides plenty of flavor while helping the breaded coating stay lightly crisp around the edges.
Step 5: Roast the Broccoli
While the chicken is finishing in the oven, prepare the broccoli if it hasn’t already been cooked.
Spread the broccoli florets onto a separate baking sheet, drizzle lightly with olive oil, and season with a pinch of salt, black pepper, garlic powder, and Italian seasoning. Toss everything together until evenly coated.
Roast at 425°F (220°C) for about 15–20 minutes, stirring halfway through, until the broccoli is tender with lightly caramelized edges.
Mini Tip: Don’t overcrowd the pan. Giving the broccoli enough space allows it to roast instead of steam, creating better texture and deeper flavor.
Step 6: Prepare the Brown Rice
While the chicken and broccoli cook, prepare the brown rice according to the package directions if starting from uncooked rice.
If using cooked rice, warm it gently in the microwave or in a saucepan over medium-low heat with a tablespoon of water to restore its soft, fluffy texture.
Fluff the rice with a fork before serving to separate the grains.
Mini Tip: Freshly squeezed lemon juice stirred into warm rice adds subtle brightness without overpowering the Italian flavors.
Step 7: Rest the Chicken
Once the chicken has reached 165°F (74°C), remove it from the oven and let it rest for about 5 minutes.
Resting allows the juices to redistribute throughout the meat, resulting in moist, tender chicken rather than dry slices.
Finish with freshly chopped basil and an extra sprinkle of Parmesan cheese if desired.
Step 8: Assemble the Meal Prep Containers
Divide the cooked brown rice evenly among four meal prep containers.
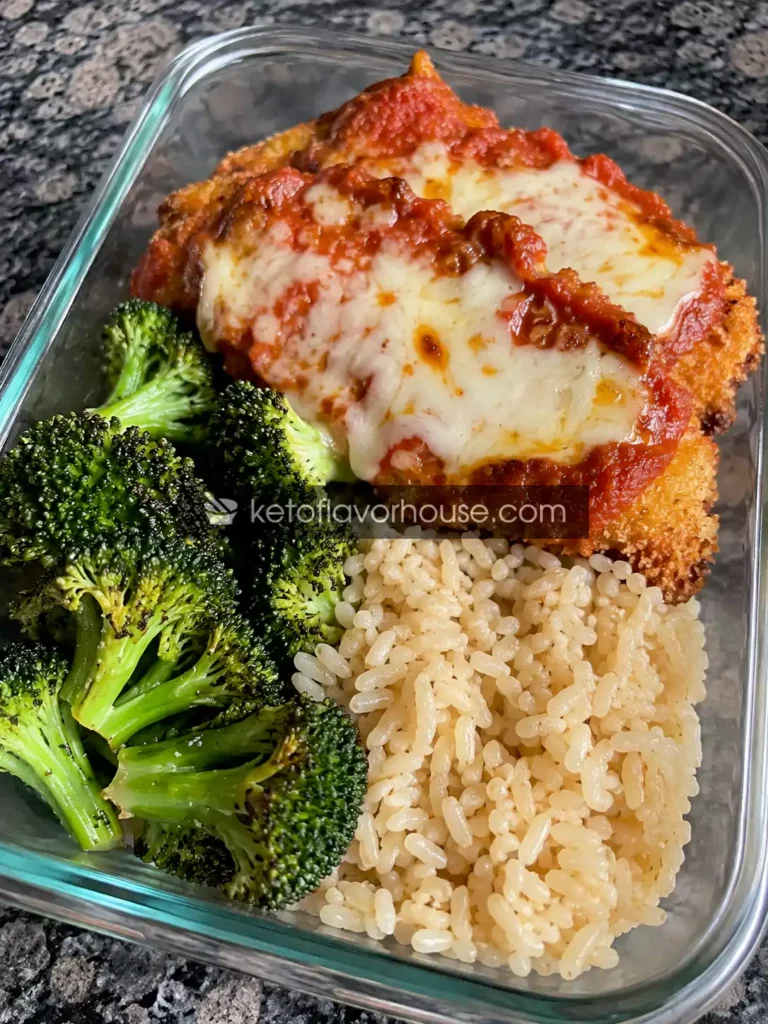
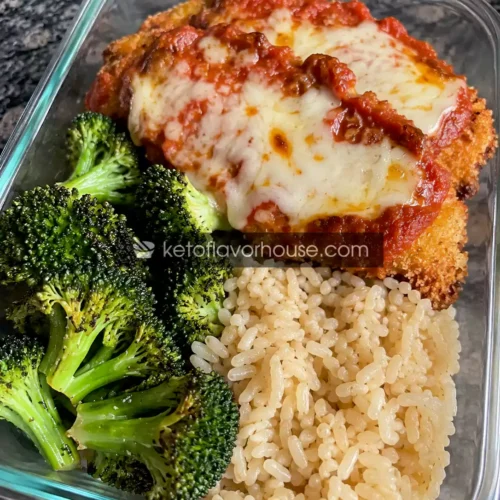
Arrange a generous serving of roasted broccoli beside the rice, then place one chicken Parmesan on top or alongside the rice.
Allow everything to cool slightly before sealing the containers with airtight lids.
Store the fresh basil separately if you prefer the brightest flavor, adding it after reheating.
Your meals are now ready for the week and can be reheated whenever you need a satisfying, protein-packed lunch or dinner.
Air Fryer Method
The air fryer creates an especially crispy coating while keeping the chicken wonderfully juicy.
- Preheat the air fryer to 390°F (199°C).
- Bread the chicken exactly as directed.
- Lightly spray both sides with olive oil spray.
- Arrange the chicken in a single layer without overlapping.
- Cook for 10–12 minutes, flipping halfway through.
- Spoon marinara over each piece, top with mozzarella, and cook for another 2–3 minutes until the cheese melts and the chicken reaches 165°F (74°C).
- Let the chicken rest before serving.
Stovetop Method
If you prefer cooking on the stovetop, this recipe adapts beautifully.
- Heat a large nonstick skillet over medium heat.
- Add a small amount of olive oil.
- Cook the breaded chicken for about 5–6 minutes per side, adjusting the heat as needed to prevent burning.
- Reduce the heat to low.
- Spoon marinara over the chicken and sprinkle with mozzarella.
- Cover the skillet for 2–3 minutes, allowing the cheese to melt completely.
- Verify the chicken reaches 165°F (74°C) before serving.
Common Mistakes to Avoid
Even simple recipes benefit from paying attention to a few important details.
Skipping the Paper Towel Step
Wet chicken prevents the breading from sticking properly.
Fix: Always pat the chicken dry before seasoning and breading.
Using Thick Chicken Breasts
Very thick chicken cooks unevenly.
Fix: Pound or butterfly the chicken to an even thickness.
Overcrowding the Baking Sheet
When pieces touch each other, steam builds up instead of allowing crisp browning.
Fix: Leave space between every piece.
Adding Sauce Too Early
Marinara added at the beginning softens the breadcrumb coating.
Fix: Add the sauce only during the final few minutes of baking.
Overcooking the Chicken
Chicken breast quickly becomes dry if baked too long.
Fix: Use a digital thermometer and remove it once it reaches 165°F (74°C).
Using Too Much Cheese
While extra cheese sounds tempting, it can overwhelm the chicken and increase calories significantly.
Fix: Use enough to cover the chicken without creating an overly thick layer.
Forgetting to Rest the Chicken
Cutting immediately after baking releases valuable juices.
Fix: Rest for at least five minutes before serving or packing.
Pro Tips for Best Results
After preparing this recipe countless times, I’ve learned a few simple tricks that make a noticeable difference.
Freshly grate your Parmesan cheese whenever possible. It melts more smoothly and provides better flavor than pre-grated varieties.
A light coating of olive oil spray is enough to create beautiful browning without the need for deep frying.
If you’re making multiple batches, keep the cooked chicken on a wire rack rather than stacking pieces. This helps preserve the crispy coating.
Choosing a marinara sauce with minimal added sugar keeps the flavors clean and lets the herbs shine.
Don’t skip the fresh basil. Even though it’s just a garnish, it completely transforms the finished dish with fresh Italian flavor.
If you’re looking to increase protein even further, add a spoonful of low-fat cottage cheese alongside the rice or serve with plain Greek yogurt seasoned with Italian herbs.
For lower calories, replace part of the rice with roasted cauliflower or steamed broccoli while keeping the chicken portion generous.
Meal prep containers with divided compartments help keep the chicken coating from becoming soggy by separating the sauce from the vegetables.
High-Protein Nutrition & Strategy
One of the reasons this recipe works so well is because it combines comfort food flavors with balanced nutrition.
Chicken breast is one of the highest-quality lean protein sources available. It supplies all of the essential amino acids needed to support muscle maintenance, recovery, and everyday body functions while remaining relatively low in fat.
Each serving delivers approximately 38 grams of protein, making it an excellent choice for anyone trying to increase protein intake without dramatically increasing calories.
Protein also plays an important role in keeping meals satisfying. Compared with meals that rely heavily on refined carbohydrates, protein-rich meals tend to promote longer-lasting fullness, helping reduce unnecessary snacking between meals.
The brown rice provides complex carbohydrates that supply steady energy throughout the day and help replenish glycogen stores after exercise.
Broccoli contributes fiber, vitamins C and K, folate, and antioxidants while adding volume to the meal without many calories.
Using part-skim mozzarella instead of larger amounts of full-fat cheese allows the dish to maintain the classic chicken Parmesan experience while improving the overall nutritional profile.
Instead of frying the chicken, baking creates a lighter meal while still producing a wonderfully crisp coating.
Why This Meal Works for Different Goals
Muscle Building
The generous serving of complete protein supports muscle repair and growth following resistance training.
Weight Management
Protein and fiber work together to increase satiety, helping you stay full for longer periods.
Busy Workweeks
Preparing several servings at once eliminates daily cooking while ensuring healthy meals are always ready.
Family Dinners
Even family members who aren’t focused on high-protein eating usually enjoy this recipe because it tastes just like classic chicken Parmesan.
Meal Prep Strategy
This recipe was practically designed for meal prep.
Every Sunday, I usually prepare four servings at once.
The chicken, rice, and broccoli all reheat surprisingly well, making weekday lunches effortless.
I like storing a little extra marinara separately so I can add a fresh spoonful after reheating if needed.
Fresh basil is best added just before eating, giving each meal that fresh-from-the-kitchen flavor.
The biggest benefit of meal prepping this recipe isn’t just convenience.
It’s knowing that a comforting, satisfying, protein-packed lunch is already waiting for you, making it much easier to stay consistent with healthy eating throughout the week.
Post-Workout Recovery
After a challenging workout, meals that combine lean protein with complex carbohydrates can help support recovery.
This Chicken Parmesan Meal Prep naturally provides both.
The chicken supplies high-quality protein, while the brown rice helps replenish energy stores.
The broccoli contributes additional vitamins, minerals, and antioxidants that support overall health.
For particularly demanding training days, you can easily increase the protein by adding another few ounces of chicken without dramatically changing the meal.
Everyday Healthy Eating
One thing I appreciate about this recipe is that it doesn’t feel like “meal prep food.”
Instead, it feels like a homemade comfort meal that simply happens to be nutritious.
That’s an important difference.
Healthy eating becomes much easier when the food is genuinely enjoyable rather than something you feel obligated to eat.
Whether your goal is building muscle, losing weight, staying energized during long workdays, or simply enjoying delicious homemade meals, this recipe proves that nutritious food can also be comforting, flavorful, and incredibly satisfying.
By keeping simple, wholesome ingredients at the center of the recipe, you get all the familiar flavors of chicken Parmesan in a version that’s practical enough to enjoy every week.
Variations You Can Try
One of my favorite things about this 38g Protein Chicken Parmesan Meal Prep is how easy it is to customize. Whether you’re looking to increase protein, reduce carbohydrates, or simply change the flavors, there are plenty of delicious ways to make this recipe your own.
Spicy Chicken Parmesan
If you enjoy a little heat, mix crushed red pepper flakes into the breadcrumb mixture and choose a spicy marinara sauce. You can also drizzle a little hot sauce over the finished chicken before serving.
Protein impact: Protein remains almost the same while adding extra flavor without many additional calories.
Extra Cheesy Version
For an even more indulgent meal, add a small amount of reduced-fat provolone or mozzarella on top of the Parmesan.
The cheese becomes beautifully golden and bubbly while adding extra richness.
Protein impact: Adds approximately 6–8 grams of protein per ounce of cheese.
Low-Carb Chicken Parmesan
Replace the brown rice with cauliflower rice or roasted zucchini noodles.
You’ll dramatically reduce carbohydrates while maintaining the generous protein serving.
This variation is especially popular for lower-carb meal plans.
High-Protein Pasta Version
Instead of rice, serve the chicken over high-protein pasta.
This creates a hearty Italian-inspired meal while increasing the total protein content.
Italian Herb Chicken Parmesan
Add chopped fresh oregano, parsley, thyme, and basil to the breadcrumb mixture for even brighter herb flavor.
Fresh herbs make the finished dish taste like it came from an Italian restaurant.
Mushroom Chicken Parmesan
Sauté sliced mushrooms with garlic and add them underneath the marinara sauce before topping with mozzarella.
The mushrooms provide extra moisture and a wonderful earthy flavor.
Turkey Parmesan
Substitute thin turkey breast cutlets for chicken.
Turkey remains lean, cooks quickly, and pairs perfectly with marinara and mozzarella.
Gluten-Free Version
Use certified gluten-free panko breadcrumbs and gluten-free marinara sauce.
The finished meal remains just as flavorful while accommodating gluten-free diets.
Tips for This Recipe
After making this recipe dozens of times, these are the little details that consistently give me the best results.
- Pound the chicken to an even thickness before breading to ensure even cooking.
- Use freshly grated Parmesan whenever possible for the best flavor.
- Don’t overload the chicken with marinara. A light layer keeps the breading crisp around the edges.
- Allow the chicken to rest before packaging meal prep containers.
- Reheat gently to keep the chicken moist and the cheese creamy.
- Add fresh basil only after reheating for the brightest flavor.
- Store extra marinara separately if you enjoy additional sauce at serving time.
- Pair with roasted vegetables to increase volume without adding many calories.
Optional Additions
If you’d like to boost the protein or customize the meal further, these additions work wonderfully.
Cottage Cheese
Blend cottage cheese until smooth and serve it on the side or stir it into the rice for an extra protein boost.
Plain Greek Yogurt
Season Greek yogurt with Italian herbs and garlic powder to create a creamy, high-protein dipping sauce.
Extra Parmesan Cheese
A small sprinkle adds bold flavor and a little additional protein.
Hemp Hearts
Sprinkle over the broccoli for extra plant protein and healthy fats.
Chia Seeds
Mix into the rice or enjoy in a side yogurt bowl for added fiber.
Egg Whites
Serve scrambled egg whites alongside the chicken for a breakfast-inspired high-protein meal.
Crushed Walnuts
Add a light sprinkle for crunch and heart-healthy fats.
Fresh Spinach
Layer spinach beneath the chicken while it’s still warm so the leaves gently wilt.
Serving Ideas
This recipe works beautifully for so many occasions.
It’s perfect for weekday lunches because it reheats exceptionally well and keeps you satisfied throughout the afternoon.
Serve it for family dinners with roasted vegetables and garlic green beans for a balanced Italian-inspired meal.
If you’re entertaining guests, pair the chicken with roasted baby potatoes and a crisp green salad.
For a lighter dinner, serve the chicken over zucchini noodles or cauliflower rice.
After strength training, enjoy it with brown rice and steamed vegetables for a satisfying recovery meal.
If you’re preparing meals for someone with different calorie needs, simply adjust the rice portion while keeping the protein serving generous.
Storage Recommendations
One of the reasons this recipe has become a meal-prep favorite is how well it stores.
Refrigerator
Store fully cooled meal prep containers in airtight containers for up to 4 days.
Fresh basil is best stored separately until serving.
Freezer
The breaded chicken freezes well for up to 3 months.
Freeze the rice separately if possible for the best texture.
Avoid freezing fresh basil.
Reheating
Microwave individual portions for about 2–3 minutes, covering loosely to help retain moisture.
For the crispiest texture, reheat the chicken in a 350°F (177°C) oven or air fryer for several minutes before serving.
Add fresh basil after reheating for maximum flavor.
Frequently Asked Questions
Can I prepare this recipe several days in advance?
Absolutely. It’s specifically designed for meal prep and stays fresh in the refrigerator for up to four days.
Can I freeze Chicken Parmesan Meal Prep?
Yes. The chicken, rice, and broccoli freeze well. Just thaw overnight in the refrigerator before reheating.
Is this recipe good after workouts?
Definitely. The combination of lean protein and complex carbohydrates makes it an excellent recovery meal.
Can I use chicken thighs instead?
Yes. Boneless skinless chicken thighs work well, although they’ll contain slightly more fat and calories.
Can I make this recipe dairy-free?
Yes. Simply use your favorite dairy-free mozzarella alternative and omit the Parmesan.
Can I air fry the chicken?
Absolutely. Air frying creates an especially crispy coating while using very little oil.
Can I increase the protein even more?
Yes. Increase the chicken portion slightly, serve with high-protein pasta, or add a side of plain Greek yogurt or cottage cheese.
Nutritional Breakdown (Per Serving)
Approximate values
- Calories: 485
- Protein: 38g
- Fat: 14g
- Total Carbohydrates: 39g
- Fiber: 6g
- Net Carbohydrates: 33g
- Sugar: 6g
- Sodium: 690mg
Recipe Snapshot
Prep Time: 20 minutes
Cook Time: 30 minutes
Total Time: 50 minutes
Course: Main Course
Cuisine: Italian-Inspired
Servings: 4
Calories: 485 per serving
Protein: 38g per serving
38g Protein Chicken Parmesan Meal Prep

Ingredients
- 2 pounds boneless skinless chicken breasts
- Olive oil spray
- 1 cup whole wheat panko breadcrumbs
- ½ cup grated Parmesan cheese
- 2 teaspoons Italian seasoning
- 1 teaspoon garlic powder
- 1 teaspoon onion powder
- ½ teaspoon smoked paprika
- 1 teaspoon salt
- ½ teaspoon black pepper
- 2 large eggs
- 1½ cups marinara sauce
- 1 cup shredded part-skim mozzarella cheese
- 2 cups cooked brown rice
- 4 cups roasted broccoli
- 2 tablespoons chopped fresh basil
- ¼ teaspoon crushed red pepper flakes optional
Instructions
- Preheat the oven to 425°F (220°C). Line a baking sheet with parchment paper and place a wire rack on top if available. Lightly coat the rack with olive oil spray. Pat the chicken breasts dry with paper towels and, if necessary, pound them to an even thickness of about ½ inch so they cook evenly.
- Season both sides of the chicken lightly with salt and black pepper. In one shallow dish, whisk the eggs until smooth. In another shallow dish, combine the whole wheat panko breadcrumbs, grated Parmesan cheese, Italian seasoning, garlic powder, onion powder, smoked paprika, and a pinch of salt and pepper. Dip each chicken breast into the beaten eggs, allowing any excess to drip off, then coat thoroughly in the breadcrumb mixture, pressing gently so the coating adheres well.
- Arrange the breaded chicken on the prepared baking sheet, leaving space between each piece. Lightly spray the tops with olive oil spray to encourage even browning. Bake for 18–22 minutes, or until the chicken is nearly cooked through and reaches an internal temperature of about 155–160°F (68–71°C).
- Remove the chicken from the oven and spoon 2–3 tablespoons of marinara sauce over each piece, leaving a small border around the edges to help maintain some crispiness. Sprinkle evenly with the shredded mozzarella cheese and an additional light sprinkle of Parmesan if desired.
- Return the baking sheet to the oven and bake for another 5–8 minutes, or until the cheese is melted, bubbly, and the chicken reaches a safe internal temperature of 165°F (74°C). Remove from the oven and let the chicken rest for about 5 minutes before serving.
- While the chicken bakes, roast the broccoli with a light drizzle of olive oil, garlic powder, Italian seasoning, salt, and pepper until tender with lightly browned edges. Warm the cooked brown rice according to package directions or reheat previously cooked rice with a splash of water until fluffy.
- Divide the brown rice evenly among four meal prep containers. Add a generous portion of roasted broccoli to each container, then place one chicken Parmesan alongside the rice. Sprinkle the chicken with freshly chopped basil and additional Parmesan cheese if desired.
- Allow the meals to cool slightly before sealing the containers with airtight lids. Refrigerate for up to four days or freeze for longer storage. Reheat gently before serving, and garnish with fresh basil after reheating for the best flavor and presentation.