This post may contains Amazon affiliate and other affiliate links. If you make a purchase through these links, I may earn a small commission at no extra cost to you. Your support helps me continue to provide quality content. I only recommend products I personally trust and believe will add value to your experience. For more details, please visit my Privacy Policy.
🥣 Introduction
There was a time when my afternoons felt heavier than they should have. You know that feeling—when you’ve eaten something that was supposed to be a “quick snack,” but instead you’re left with bloating, brain fog, and that slow, dragging fatigue that makes even simple tasks feel harder. For me, it often came from sugary, processed bars that promised energy but delivered the exact opposite.
That’s exactly why I started experimenting with anti-inflammatory coco crunch bars—something that could satisfy that chocolatey, crunchy craving without weighing me down.
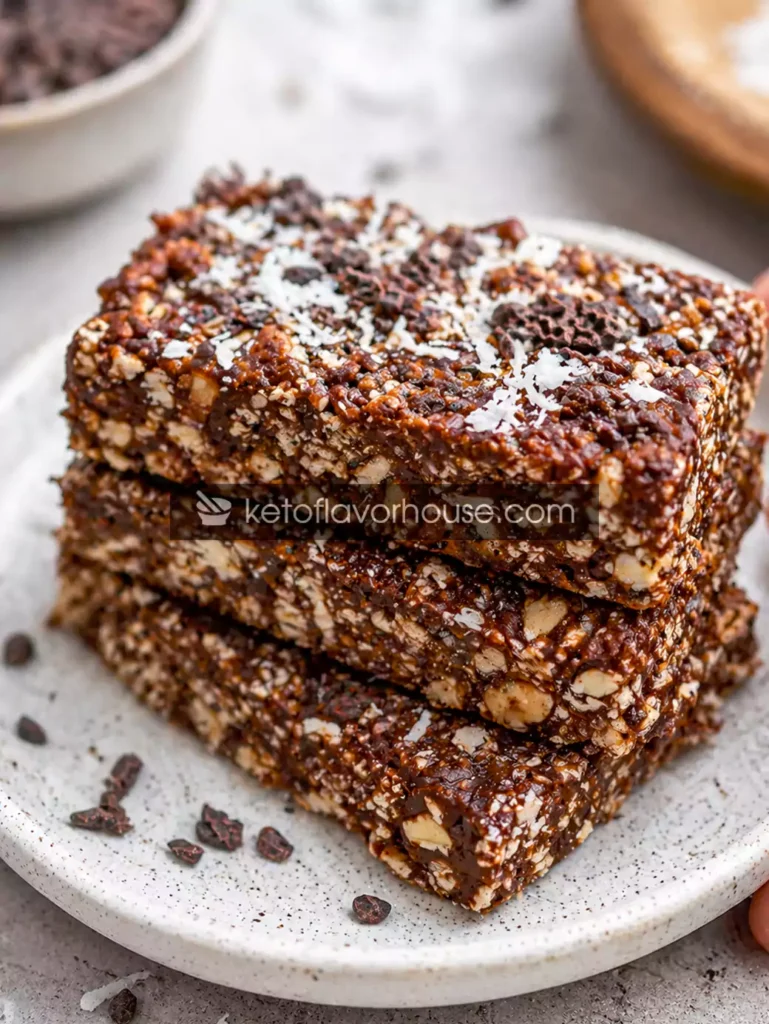
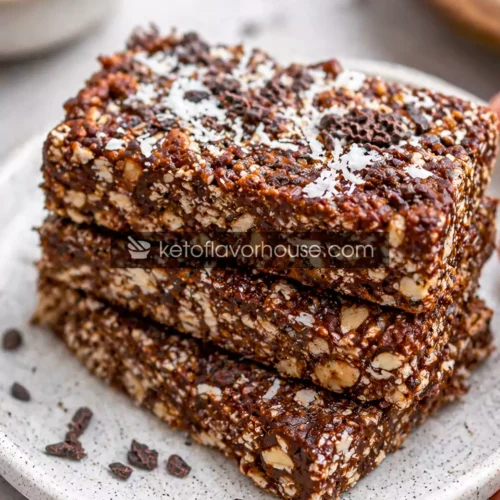
These Anti-Inflammatory Coco Crunch Bars (No-Bake, Low-Sugar, Healthy Snack) became my go-to solution. They’re rich, slightly chewy, perfectly crunchy, and most importantly, they feel good after you eat them. No crash, no heaviness—just steady, satisfying energy.
Built with simple, whole ingredients like cocoa, nuts, seeds, and coconut, these bars support an anti-inflammatory way of eating without feeling restrictive. They’re ideal for anyone who wants a snack that tastes indulgent but fits into a clean, balanced lifestyle—whether you’re following keto, reducing sugar, or simply trying to feel lighter and more energized throughout the day.
💚 Why You’ll Love This Recipe
- 🥬 Made with anti-inflammatory ingredients like cocoa, coconut, and healthy fats
- ⚡ Helps support steady energy without sugar crashes
- 🍽️ Rich, crunchy, and deeply satisfying
- 👩🍳 No-bake and incredibly easy to prepare
- 🧡 Chocolatey comfort with a clean, nourishing twist
🧠 My Personal Experience
The first time I made these bars, I was honestly just trying to fix my snack problem. I wanted something quick, something I could grab without thinking—and something that didn’t leave me regretting it an hour later.
What surprised me was how different I felt after eating them.
No bloating. No heaviness. No sudden need for more sugar.
Instead, I felt balanced. Energized. And most importantly, satisfied. These bars didn’t trigger that endless snacking cycle—they actually closed it. Over time, they became a staple in my kitchen, especially during busy days when I needed something reliable, nourishing, and genuinely enjoyable.
🧰 Required Equipment
🥣 Mixing Bowl
A medium to large bowl is essential for combining all ingredients evenly. Make sure it’s big enough to allow proper mixing without spilling.
🥄 Silicone Spatula or Spoon
Helps mix sticky ingredients like nut butter smoothly and ensures everything is well incorporated.
📏 Measuring Cups & Spoons
Accuracy matters here—especially for maintaining the right texture and balance.
🧊 Square Pan (8×8 inch recommended)
Used to shape and set the bars. Line it with parchment paper for easy removal.
❄️ Refrigerator
Since this is a no-bake recipe, chilling is what helps the bars firm up properly.
🥬 Ingredients & Substitutions
🥜 Almond Butter (1 cup)
Role: Base binder and creamy texture
Benefit: Rich in healthy fats and helps keep you full
Substitute: Peanut butter (stronger flavor), cashew butter (milder, creamier)
🥥 Unsweetened Shredded Coconut (½ cup)
Role: Adds crunch and texture
Benefit: Provides fiber and natural fats
Substitute: Coconut flakes (larger texture) or omit for smoother bars
🍫 Unsweetened Cocoa Powder (¼ cup)
Role: Chocolate flavor
Benefit: Contains antioxidants
Substitute: Cacao powder (slightly more intense, less processed)
🌰 Mixed Nuts (½ cup, chopped)
Role: Crunch and structure
Benefit: Healthy fats + protein
Substitute: Seeds (for nut-free option)
🌱 Chia Seeds (2 tbsp)
Role: Binding and texture
Benefit: Fiber + omega-3 support
Substitute: Flaxseeds (similar effect)
🍯 Natural Sweetener (2–3 tbsp, optional)
Role: Light sweetness
Benefit: Keeps sugar low
Options: Monk fruit, stevia, or small amount of honey
🫒 Coconut Oil (2 tbsp, melted)
Role: Helps firm up bars
Benefit: Supports texture and richness
Substitute: Butter or ghee (if not dairy-free)
🧂 Vanilla Extract (1 tsp)
Role: Enhances flavor
Benefit: Adds warmth and depth
👩🍳 How to Make Anti-Inflammatory Coco Crunch Bars
Step 1: Prepare Your Pan
Line an 8×8 pan with parchment paper. This prevents sticking and makes removal easy.
Step 2: Mix Wet Ingredients
In a bowl, combine almond butter, melted coconut oil, vanilla extract, and sweetener. Stir until smooth and creamy.
Tip: If almond butter is thick, warm it slightly for easier mixing.
Step 3: Add Dry Ingredients
Add cocoa powder, shredded coconut, chopped nuts, and chia seeds. Mix until everything is evenly combined.
Tip: Make sure no dry pockets remain.
Step 4: Transfer & Press
Pour the mixture into the prepared pan. Press it down firmly using a spatula or your hands.
Tip: Press evenly to ensure clean, firm bars later.
Step 5: Chill to Set
Place in the refrigerator for 1–2 hours until firm.
Step 6: Slice & Serve
Remove from pan and cut into bars or squares.
Tip: Use a sharp knife for clean edges.
⚠️ Common Mistakes to Avoid
- Not pressing mixture firmly → bars fall apart
- Using too much sweetener → overly soft texture
- Skipping chilling time → bars won’t hold shape
- Using processed ingredients → reduces quality
🔥 Pro Tips for Best Results
- Add a pinch of sea salt for flavor contrast
- Toast nuts lightly for deeper flavor
- Mix thoroughly for even texture
- Add a touch of cinnamon or turmeric for anti-inflammatory boost
🧬 Anti-Inflammatory Benefits of Cocoa
Cocoa is naturally rich in plant compounds that support a balanced lifestyle. When used in its unsweetened form, it provides deep chocolate flavor without added sugars. Combined with healthy fats and fiber-rich ingredients, it helps create a snack that feels indulgent while staying aligned with clean eating.
🌿 Variations You Can Try
- Dairy-free: Already dairy-free
- Keto version: Use monk fruit sweetener
- Protein boost: Add protein powder
- Crunchy version: Add cacao nibs
🍽️ Tips for This Recipe
- Keep ingredients at room temperature
- Taste mixture before setting
- Adjust sweetness as needed
➕ Optional Additions
- Flaxseed
- Collagen powder
- Cinnamon
- Nutmeg
🍴 Serving Ideas
- Midday snack
- Pre/post workout
- Healthy dessert
- Meal prep snack
🧊 Storage Recommendations
- Fridge: Up to 7 days
- Freezer: Up to 1 month
- Reheat: Not needed
❓ Frequently Asked Questions
1. Are these keto-friendly?
Yes, especially with low-carb sweeteners.
2. Can I make them nut-free?
Yes, use seeds instead.
3. Do they need baking?
No, completely no-bake.
4. Can I skip sweetener?
Yes, but flavor will be more intense.
5. How long do they last?
Up to a week in the fridge.
🧮 Nutritional Breakdown (Per Serving)
- Calories: 210
- Protein: 6g
- Fat: 16g
- Total Carbs: 10g
- Net Carbs: 6g
📌 Recipe Snapshot
- Prep Time: 15 minutes
- Chill Time: 1 hour
- Total Time: 1 hour 15 minutes
- Course: Snack
- Cuisine: Healthy / Low-Carb
- Servings: 9
- Calories: 210
Anti-Inflammatory Coco Crunch Bars Recipe
Ingredients
- 1 cup almond butter
- ½ cup shredded coconut
- ¼ cup cocoa powder
- ½ cup chopped nuts
- 2 tbsp chia seeds
- 2 –3 tbsp sweetener
- 2 tbsp coconut oil
- 1 tsp vanilla
Instructions
- Line an 8×8 inch pan with parchment paper, leaving a bit of overhang on the sides. This will make it much easier to lift the bars out later without breaking them. Gently press the paper into the corners so the base is smooth and even.
- In a medium mixing bowl, add the almond butter, melted coconut oil, vanilla extract, and your chosen sweetener. Stir slowly at first, then more vigorously until the mixture becomes smooth, glossy, and fully blended. If your almond butter is too thick, warm it slightly for easier mixing.
- Add the cocoa powder, shredded coconut, chopped nuts, and chia seeds into the bowl. Sprinkle them evenly over the wet mixture to help distribute everything more uniformly.
- Using a spatula or sturdy spoon, mix everything together thoroughly. Keep folding and pressing the mixture until there are no dry patches left and all ingredients are evenly coated. The texture should be thick, slightly sticky, and well combined.
- Transfer the mixture into the prepared pan. Spread it out evenly, then press it down firmly using the back of a spatula or your hands. Take your time with this step—pressing it tightly ensures the bars hold together properly after chilling.
- Place the pan in the refrigerator and let it chill for at least 1–2 hours, or until the mixture feels firm to the touch. This step allows the coconut oil and nut butter to set, giving the bars their final structure.
- Once fully set, lift the slab out of the pan using the parchment paper overhang. Place it on a cutting board and slice into even bars or squares using a sharp knife. Serve immediately or store in the fridge for later.