This post may contains Amazon affiliate and other affiliate links. If you make a purchase through these links, I may earn a small commission at no extra cost to you. Your support helps me continue to provide quality content. I only recommend products I personally trust and believe will add value to your experience. For more details, please visit my Privacy Policy.
🟢 Introduction
There are days when your body just feels… off. Not sick, not exactly tired—but heavy, sluggish, and a little bloated. You wake up with low energy, your digestion feels slow, and even your usual meals don’t seem to sit right. That’s exactly how I felt the first time I started paying attention to how inflammation shows up in everyday life.
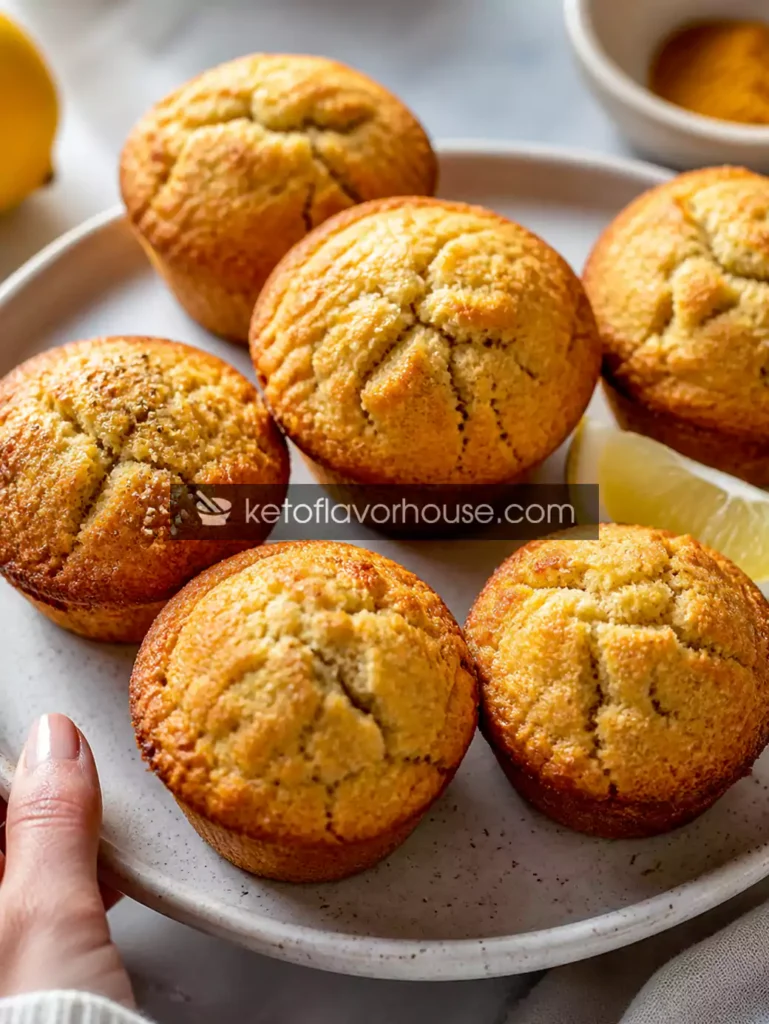
On one of those mornings, craving something comforting but not something that would make me feel worse later, I experimented with what eventually became these Anti-Inflammatory Vanilla Glow Muffins (Healthy, Low Sugar & Gut-Friendly). And honestly, they changed my mornings.
These muffins are soft, lightly sweet, and incredibly satisfying—but what makes them special is how they feel after you eat them. Instead of heaviness, you get a gentle sense of nourishment. Instead of sugar crashes, you feel steady and energized.
This recipe is built around simple, clean ingredients that support anti-inflammatory eating in a natural, balanced way. It’s perfect for anyone trying to:
- Reduce bloating
- Support digestion
- Maintain stable energy
- Enjoy a healthy, comforting snack without guilt
Whether you’re easing into a cleaner diet or just want a better alternative to traditional baked goods, these muffins fit seamlessly into your routine.
💚 Why You’ll Love This Recipe
- 🥬 Made with anti-inflammatory ingredients that support overall wellness
- ⚡ Helps support digestion and steady energy levels
- 🍽️ Perfectly satisfying without being heavy or overly sweet
- 👩🍳 Simple, beginner-friendly recipe with no complicated steps
- 🧡 Soft, moist texture with a comforting vanilla flavor
🧠 My Personal Experience
The first time I baked these, I wasn’t expecting anything dramatic—I just wanted something “better” than regular muffins.
But the difference was noticeable.
Instead of feeling bloated after eating, I felt… light. Not hungry, not overly full—just balanced. That mid-morning slump I usually get? It didn’t hit the same way. I stayed focused, energized, and surprisingly satisfied for hours.
What I loved most was that these muffins didn’t feel like a “diet food.” They felt like something I wanted to eat—something comforting, soft, and naturally sweet without being overwhelming.
Now they’ve become one of those recipes I keep coming back to whenever my body needs a reset.
🧰 Required Equipment
Mixing Bowls
You’ll need at least two bowls—one for dry ingredients and one for wet. This helps ensure everything blends evenly without overmixing.
Whisk or Hand Mixer
A whisk works perfectly for this recipe. It helps create a smooth batter and prevents clumping, especially when working with almond flour.
Muffin Tray
A standard 12-cup muffin tray is ideal. It ensures even baking and proper structure.
Muffin Liners or Greasing Spray
Using liners makes cleanup easier, while greasing prevents sticking if you prefer baking directly in the tray.
Measuring Cups & Spoons
Precision matters—especially in low-carb baking—so accurate measurements are key.
🥬 Ingredients & Substitutions
Almond Flour (2 cups)
- Role: Provides structure and moisture
- Benefit: Naturally low-carb and gentle on digestion
- Substitution: Coconut flour (use less, as it absorbs more moisture)
- Effect: Coconut flour creates a denser texture
Eggs (3 large)
- Role: Binding and structure
- Benefit: Adds protein and satiety
- Substitution: Flax eggs (1 tbsp flax + 3 tbsp water per egg)
- Effect: Slightly softer texture
Greek Yogurt (½ cup)
- Role: Moisture and softness
- Benefit: Supports gut-friendly balance
- Substitution: Coconut yogurt for dairy-free
- Effect: Slightly lighter texture
Olive Oil (¼ cup)
- Role: Adds moisture and richness
- Benefit: Known for its anti-inflammatory properties
- Substitution: Avocado oil
- Effect: Neutral taste, similar texture
Natural Sweetener (⅓ cup, erythritol or monk fruit)
- Role: Sweetness without sugar spike
- Substitution: Honey (not keto)
- Effect: Slightly more moist and caramelized flavor
Vanilla Extract (1 tbsp)
- Role: Flavor base
- Benefit: Comforting aroma and taste
Baking Powder (1 tsp)
- Role: Helps muffins rise
Turmeric (¼ tsp)
- Role: Subtle warmth
- Benefit: Supports anti-inflammatory eating
Cinnamon (½ tsp)
- Role: Enhances flavor
- Benefit: Helps balance sweetness naturally
👩🍳 How to Make Anti-Inflammatory Vanilla Glow Muffins (Healthy, Low Sugar & Gut-Friendly)
Step 1: Preheat and Prepare
Preheat your oven to 180°C (350°F). Line your muffin tray or lightly grease it.
Tip: Proper preheating ensures even baking and prevents dense muffins.
Step 2: Mix Dry Ingredients
In a bowl, combine almond flour, baking powder, cinnamon, and turmeric.
Tip: Sift lightly if needed to avoid clumps.
Step 3: Combine Wet Ingredients
In another bowl, whisk eggs, yogurt, olive oil, sweetener, and vanilla until smooth.
Tip: Make sure all ingredients are at room temperature for better mixing.
Step 4: Combine Wet and Dry
Gradually add dry ingredients into wet mixture. Stir gently until just combined.
Avoid overmixing—this keeps the muffins soft and tender.
Step 5: Fill Muffin Tray
Divide the batter evenly into muffin cups.
Step 6: Bake
Bake for 18–22 minutes until golden and set.
Tip: Insert a toothpick—it should come out clean.
Step 7: Cool and Serve
Let muffins cool for 10 minutes before removing.
This helps them firm up and prevents crumbling.
⚠️ Common Mistakes to Avoid
- Overmixing batter → leads to dense muffins
- Using inflammatory oils → avoid vegetable oils
- Overbaking → dries out muffins
- Incorrect sweetener ratios → affects texture
Fix: Follow measurements precisely and monitor baking time closely.
🔥 Pro Tips for Best Results
- Add a pinch of ginger for extra warmth
- Use high-quality vanilla extract for deeper flavor
- Slightly underbake for a softer center
- Add chia or flax seeds for texture and fiber
🧬 Anti-Inflammatory Benefits of Almond Flour
Almond flour is rich in healthy fats, vitamin E, and antioxidants. It’s naturally low in carbohydrates and supports stable energy levels.
Because it’s gluten-free and minimally processed, it’s easier on digestion and fits well into a clean eating lifestyle focused on reducing inflammation.
🌿 Variations You Can Try
- Add blueberries for a fruity version
- Use coconut yogurt for dairy-free
- Add protein powder for higher protein
- Turn into mini muffins for snacks
🍽️ Tips for This Recipe
- Always measure flour properly
- Let muffins cool before storing
- Use fresh ingredients for best flavor
➕ Optional Additions
- Chia seeds
- Flax seeds
- Collagen powder
- Lemon zest
🍴 Serving Ideas
- Morning breakfast with tea
- Midday snack
- Post-meal light dessert
- Meal prep for busy days
🧊 Storage Recommendations
- Fridge: Up to 5 days
- Freezer: Up to 2 months
- Reheat: Microwave 20–30 seconds
❓ Frequently Asked Questions
1. Are these muffins keto-friendly?
Yes, they are low-carb and suitable for keto lifestyles.
2. Can I make them dairy-free?
Yes, use coconut yogurt.
3. Why are my muffins dense?
Likely overmixing or incorrect flour ratio.
4. Can I skip turmeric?
Yes, but it adds subtle anti-inflammatory support.
5. Can I use honey instead?
Yes, but it changes carb count.
🧮 Nutritional Breakdown (Per Serving)
- Calories: 180
- Protein: 6g
- Fat: 14g
- Total Carbs: 7g
- Net Carbs: 3g
📌 Recipe Snapshot
- Prep Time: 10 mins
- Cook Time: 20 mins
- Total Time: 30 mins
- Course: Snack / Breakfast
- Cuisine: Healthy / Keto
- Servings: 12 muffins
- Calories: 180
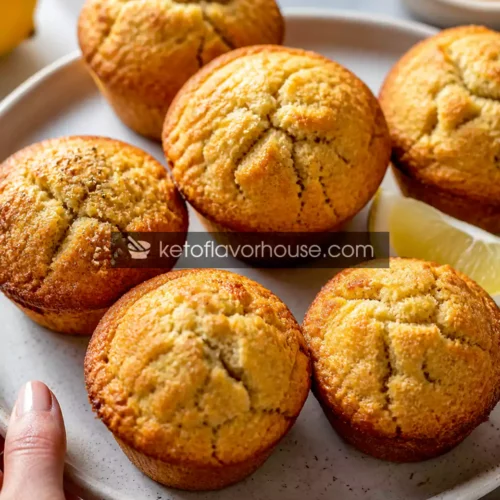
Anti-Inflammatory Vanilla Glow Muffins Recipe
Ingredients
- 2 cups almond flour
- 3 eggs
- ½ cup Greek yogurt
- ¼ cup olive oil
- ⅓ cup sweetener
- 1 tbsp vanilla extract
- 1 tsp baking powder
- ½ tsp cinnamon
- ¼ tsp turmeric
Instructions
- Start by preheating your oven to 180°C (350°F) so it’s fully heated by the time your batter is ready—this helps the muffins rise evenly. Line a muffin tray with paper liners or lightly grease each cavity with oil or butter to prevent sticking. If you skip this step, the muffins may stick and break when removing.
- In a medium mixing bowl, add almond flour, baking powder, cinnamon, and turmeric. Use a whisk or fork to mix everything thoroughly, breaking up any clumps in the almond flour. This step is important to evenly distribute the leavening and spices, ensuring consistent flavor and texture in every muffin.
- In a separate large bowl, crack in the eggs, then add Greek yogurt, olive oil, sweetener, and vanilla extract. Whisk everything together until the mixture becomes smooth, creamy, and slightly glossy. Make sure there are no streaks of egg left—fully combining the wet ingredients helps create a soft, uniform batter.
- Gradually add the dry ingredients into the wet mixture, folding gently with a spatula or spoon. Mix just until everything is combined and you no longer see dry flour—do not overmix, as this can make the muffins dense instead of light and tender.
- Spoon the batter evenly into the prepared muffin cups, filling each about ¾ full to allow space for rising. If you want a cleaner look, you can lightly smooth the tops, but don’t press down too much.
- Place the tray in the center rack of the oven and bake for 18–22 minutes, or until the tops are lightly golden and a toothpick inserted into the center comes out clean. Avoid opening the oven too early, as this can cause the muffins to sink.
- Once baked, remove the tray from the oven and let the muffins cool in the pan for about 10 minutes. Then carefully transfer them to a wire rack to cool completely. This step helps them firm up and prevents them from becoming soggy at the base.