This post may contains Amazon affiliate and other affiliate links. If you make a purchase through these links, I may earn a small commission at no extra cost to you. Your support helps me continue to provide quality content. I only recommend products I personally trust and believe will add value to your experience. For more details, please visit my Privacy Policy.
Introduction
There are mornings when your body just doesn’t feel ready for anything heavy. You wake up a little bloated, maybe a bit sluggish, and the idea of a dense, carb-loaded breakfast feels like too much. I’ve had those mornings more often than I’d like to admit—especially after a few days of rushed meals or takeout. That’s exactly when I started craving something warm, comforting, but still light and nourishing.
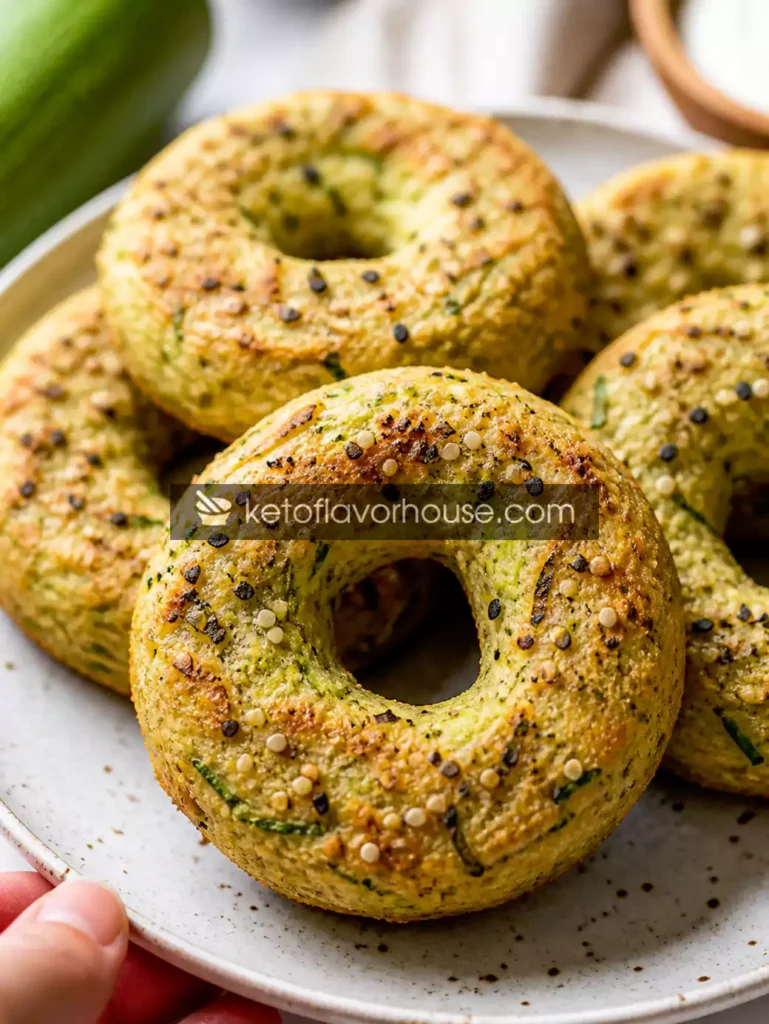
That’s how these anti-inflammatory low-carb zucchini bagels became a staple in my kitchen.
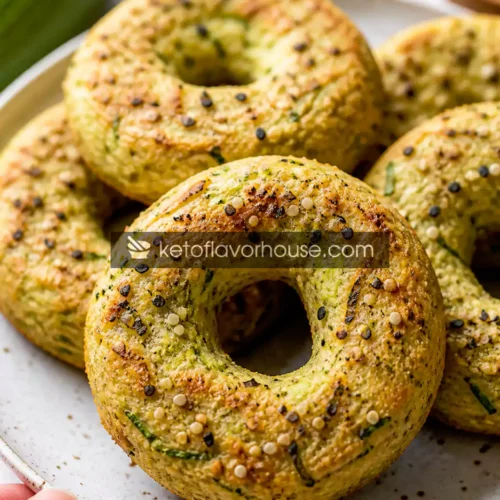
The first time I made these Anti-Inflammatory Low-Carb Zucchini Bagels (Gluten-Free & Healthy), I wasn’t expecting much. I just wanted a clean alternative to regular bagels—something that wouldn’t leave me feeling heavy or drained. But what came out of the oven surprised me: soft on the inside, slightly crisp on the outside, and incredibly satisfying without that post-meal sluggishness.
These bagels support anti-inflammatory eating by focusing on simple, whole ingredients like zucchini, almond flour, eggs, and olive oil. They’re naturally gluten-free, low in carbs, and built in a way that feels balanced—not restrictive. You get comfort without compromise.
If you’re someone who:
- Feels bloated after traditional breads
- Wants a clean, low-carb breakfast option
- Is trying to reduce processed ingredients
- Still craves something warm and bakery-style
These bagels are going to feel like a small win in your routine.
💚 Why You’ll Love This Recipe
- 🥬 Anti-inflammatory ingredients – Zucchini, olive oil, and simple whole foods
- ⚡ Supports digestion and energy – Light yet filling, no heavy feeling afterward
- 🍽️ Satisfying and balanced – Protein + healthy fats + fiber
- 👩🍳 Easy to make – Simple steps, beginner-friendly
- 🧡 Flavor, texture, and comfort – Soft, slightly chewy, and warm
🧠 My Personal Experience
I remember making these on a quiet morning when I just didn’t want another egg-based breakfast. I needed something different—but still aligned with how I wanted to feel.
When I pulled them out of the oven, the smell alone felt comforting. Slightly nutty from the almond flour, fresh from the zucchini, and warm like something you’d expect from a bakery.
After eating one, I noticed something I hadn’t felt in a while after breakfast: lightness. No bloating, no heaviness, just steady energy. I felt satisfied without feeling full in that uncomfortable way.
Over time, these bagels became something I’d prep ahead and reach for on busy mornings. They’re not just a “healthy swap”—they’re something I actually look forward to eating.
🧰 Required Equipment
🥒 Grater
You’ll need this to shred the zucchini finely. This helps it blend smoothly into the dough without large chunks.
🧺 Clean Kitchen Towel
Essential for squeezing out excess moisture from zucchini—this step is key for proper texture.
🥣 Mixing Bowl
A large bowl allows you to combine ingredients evenly without overmixing.
🍩 Baking Tray or Bagel Mold
Helps shape the bagels and ensures even baking.
🧻 Parchment Paper
Prevents sticking and makes cleanup easier.
🥬 Ingredients & Substitutions
🥒 Zucchini – 1 cup grated (well-drained)
- Role: Adds moisture and softness
- Benefit: Light, hydrating, and supports clean eating
- Substitute: Yellow squash (similar texture)
🌰 Almond Flour – 1 ½ cups
- Role: Main structure
- Benefit: Low-carb and gluten-free
- Substitute: Coconut flour (use less, changes texture)
🥚 Eggs – 2 large
- Role: Binding and structure
- Benefit: High-quality protein
- Substitute: Flax eggs (slightly denser result)
🧄 Garlic Powder – ½ tsp
- Role: Flavor depth
- Benefit: Supports anti-inflammatory profile
- Substitute: Fresh garlic (stronger taste)
🫒 Olive Oil – 2 tbsp
- Role: Moisture and richness
- Benefit: Healthy fat source
- Substitute: Avocado oil
🧂 Baking Powder – 1 tsp
- Helps bagels rise and stay fluffy
🧂 Salt – ½ tsp
Enhances overall flavor
👩🍳 How to Make Anti-Inflammatory Low-Carb Zucchini Bagels (Gluten-Free & Healthy)
Step 1: Prepare the Zucchini
Grate zucchini and squeeze out as much water as possible using a towel.
Tip: This step prevents soggy bagels.
Step 2: Mix the Wet Ingredients
In a bowl, whisk eggs and olive oil until smooth.
Step 3: Combine Dry Ingredients
Add almond flour, baking powder, garlic powder, and salt.
Step 4: Form the Dough
Add zucchini and mix until a soft dough forms.
Tip: Don’t overmix to keep texture light.
Step 5: Shape the Bagels
Form into rings and place on parchment-lined tray.
Step 6: Bake
Bake at 180°C (350°F) for 20–25 minutes until golden.
Tip: Avoid overbaking to keep them soft inside.
⚠️ Common Mistakes to Avoid
- Not draining zucchini → soggy texture
- Overbaking → dry bagels
- Using too much flour → dense result
- Skipping seasoning → bland taste
🔥 Pro Tips for Best Results
- Add turmeric for a subtle anti-inflammatory boost
- Use fresh herbs for better flavor
- Lightly brush with olive oil before baking
🧬 Anti-Inflammatory Benefits of Zucchini
Zucchini is naturally light, hydrating, and easy to digest. It blends beautifully into recipes, adding moisture without heaviness. Combined with healthy fats and protein, it supports a balanced, clean eating approach.
🌿 Variations You Can Try
- Dairy-free (already)
- Add seeds for crunch
- Make mini bagels
- Add cheese for richer version
🍽️ Tips for This Recipe
- Always squeeze zucchini well
- Let bagels cool before slicing
- Store properly to maintain texture
➕ Optional Additions
- Chia seeds
- Flax seeds
- Sesame seeds
- Fresh herbs
🍴 Serving Ideas
- With avocado spread
- As a sandwich base
- With eggs for breakfast
- Meal prep option
🧊 Storage Recommendations
- Fridge: 3 days
- Freezer: Up to 1 month
- Reheat: Toast lightly
❓ Frequently Asked Questions
1. Can I make them dairy-free?
Yes, they already are.
2. Can I freeze them?
Yes, freeze and toast when needed.
3. Are they keto?
Yes, low-carb and keto-friendly.
4. Why are my bagels soggy?
Zucchini wasn’t drained enough.
5. Can I make them crispy?
Toast after baking.
🧮 Nutritional Breakdown (Per Serving)
- Calories: 180
- Protein: 8g
- Fat: 14g
- Total Carbs: 6g
- Net Carbs: 4g
📌 Recipe Snapshot
- Prep Time: 15 minutes
- Cook Time: 25 minutes
- Total Time: 40 minutes
- Course: Breakfast
- Cuisine: Healthy / Low-Carb
- Servings: 6
- Calories: 180
Anti-Inflammatory Low-Carb Zucchini Bagels Recipe
Ingredients
- Zucchini – 1 cup grated
- Almond flour – 1 ½ cups
- Eggs – 2
- Olive oil – 2 tbsp
- Garlic powder – ½ tsp
- Baking powder – 1 tsp
- Salt – ½ tsp
Instructions
- Start by preheating your oven to 180°C (350°F) so it’s fully heated and ready when your bagels go in. Line a baking tray with parchment paper to prevent sticking and make cleanup easier. If you have it, lightly grease the parchment with a few drops of olive oil to ensure the bagels release easily after baking.
- Wash the zucchini well, then grate it using the fine side of a grater. Once grated, place it in a clean kitchen towel or cheesecloth and squeeze out as much moisture as possible. This step is very important—excess water will make your dough too wet and result in soft, soggy bagels instead of a firm, bakery-style texture.
- In a large mixing bowl, crack the eggs and add the olive oil. Whisk them together until the mixture is smooth, slightly frothy, and fully combined. This creates a strong base that helps bind the dough and gives the bagels structure.
- Add the almond flour, baking powder, garlic powder, and salt into the same bowl. Mix everything gently until you get a thick, slightly sticky batter. Make sure there are no dry pockets of flour left—everything should be evenly combined.
- Now add the drained zucchini into the mixture. Fold it in using a spatula or spoon until it’s evenly distributed throughout the dough. The dough should feel soft and slightly moist but still hold its shape when pressed. If it feels too wet, you can add a tablespoon of almond flour to balance it.
- Divide the dough into equal portions (about 5–6 pieces depending on size). Roll each portion into a ball using your hands, then gently shape it into a ring by poking a hole in the center and widening it slightly. Keep the thickness even so the bagels bake uniformly.
- Place each shaped bagel onto the prepared baking tray, leaving a little space between them. For a better finish, you can lightly brush the tops with olive oil or sprinkle some seeds (like sesame or chia) for added texture and flavor.
- Transfer the tray to the oven and bake for 20–25 minutes, or until the bagels turn golden brown on the outside. Avoid opening the oven too often, as this can affect the rise and texture. You’re looking for a firm outer layer with a soft, cooked interior.
- Once baked, remove the tray from the oven and let the bagels cool for at least 5–10 minutes. This helps them set properly and makes them easier to handle. Serve warm for the best texture, or allow them to cool completely if you plan to store or slice them later.