This post may contains Amazon affiliate and other affiliate links. If you make a purchase through these links, I may earn a small commission at no extra cost to you. Your support helps me continue to provide quality content. I only recommend products I personally trust and believe will add value to your experience. For more details, please visit my Privacy Policy.
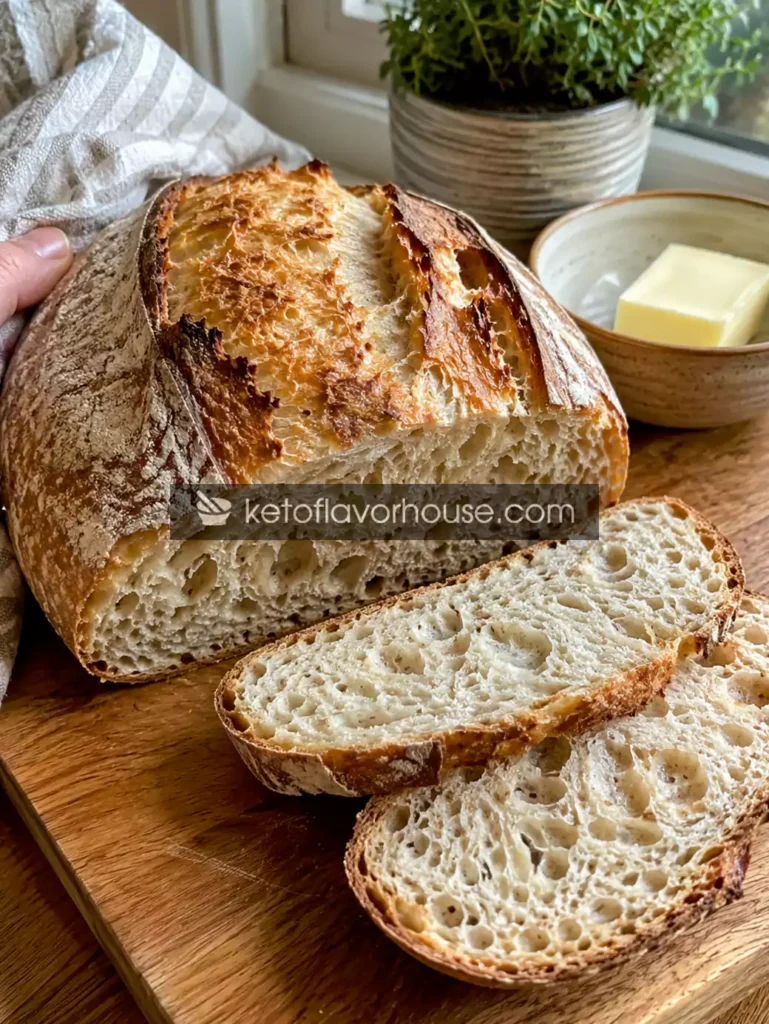
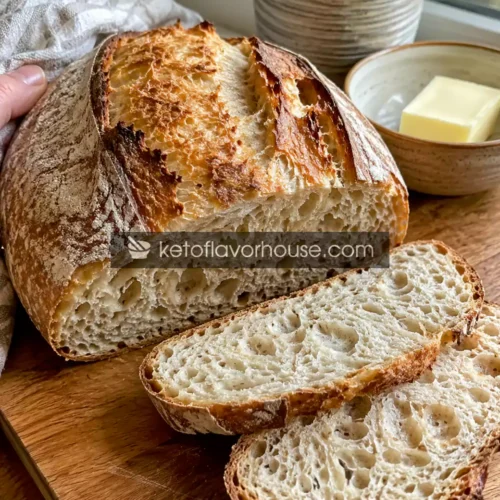
There’s something deeply comforting about homemade bread cooling on the counter late at night while the kitchen still smells warm, nutty, and slightly tangy from fresh sourdough. The first time I made this High-Protein Sourdough Bread Recipe (Why High-Protein Flour Makes a Huge Difference), I honestly wasn’t expecting such a dramatic difference in texture, chew, and overall satisfaction. I had seen countless bakers online talking about high-protein flour, open crumb structure, and stronger gluten development, but I assumed it was mostly “bread nerd” talk. Then I sliced into my first loaf and immediately understood what everyone meant.
The crust crackled as the knife went through it. The inside was airy, chewy, and beautifully structured with those artisan-style holes you usually only see in expensive bakery sourdough. But what surprised me most was how much more filling it felt compared to regular homemade bread. A single slice topped with eggs or cottage cheese kept me full for hours.
That’s exactly why this recipe has become one of my favorite high-protein staples for everyday eating.
This isn’t just another sourdough loaf. This recipe is designed for people who want bread that actually supports a high-protein lifestyle while still tasting like real artisan comfort food. Whether you’re trying to build muscle, recover after workouts, stay full longer, or simply make smarter homemade bread, this recipe delivers both flavor and function.
The combination of bread flour, high-protein flour, and optional vital wheat gluten creates stronger dough structure, better rise, chewier texture, and higher protein content per slice. The long fermentation also develops deeper flavor while improving digestibility compared to many store-bought breads.
And honestly, once you make homemade high-protein sourdough successfully, regular bread starts feeling disappointing.
Why You’ll Love This Recipe
- 🍞 Crispy bakery-style crust with chewy artisan texture
- 💪 Higher protein than traditional sourdough bread
- 🥖 Beautiful open crumb structure from stronger gluten development
- ⏰ Great for meal prep and weekly slicing
- 🧈 Incredible with eggs, avocado, cottage cheese, or smoked salmon
- 🔥 Naturally fermented flavor that tastes rich and complex
- 🥪 Makes amazing high-protein sandwiches and toast
- 🏋️ Perfect for active lifestyles, fitness goals, and satiety
- 👨🍳 Feels impressive but becomes easier with practice
- 🥣 Customizable with seeds, cheese, herbs, or protein add-ins
My Personal Experience with This Recipe
I still remember the exact loaf that changed my opinion about homemade bread.
Before that, my sourdough attempts were always decent but inconsistent. Sometimes the crumb was dense. Sometimes the dough spread too much during baking. Sometimes the bread tasted good but didn’t have that chewy artisan texture I wanted.
Then one evening, after reading endless Reddit threads about stronger flour and protein percentages, I decided to experiment with high-protein bread flour and a small amount of vital wheat gluten.
The difference was immediate.
The dough felt stronger during stretch-and-folds. It held shape better during fermentation. The oven spring was dramatically better. But the real moment happened when I cut into the loaf the next morning and saw those beautiful airy pockets inside.
I ended up standing in the kitchen eating warm slices with butter and scrambled eggs while wondering why I hadn’t switched sooner.
Since then, this recipe has become part of my weekly routine. I use it for:
- High-protein breakfast toast
- Post-workout sandwiches
- Cottage cheese avocado toast
- Turkey sandwiches
- Meal-prep lunches
- Quick snack plates
One thing I love most is how satisfying it feels. High-protein foods tend to keep you fuller longer, and when your bread itself contributes more protein, meals become much more balanced overall.
And unlike some “protein bread” recipes that taste dry or artificial, this still tastes like real artisan sourdough first.
That matters.
Because healthy eating becomes sustainable when food still feels comforting and enjoyable.
Required Equipment
#### Large Mixing Bowl
A large mixing bowl is essential because sourdough dough expands significantly during fermentation. I personally prefer a glass or ceramic bowl because it holds temperature more consistently and makes it easier to monitor dough rise.
If you don’t have a large bowl, a deep food-safe container works perfectly too.
#### Digital Kitchen Scale
This is probably the single most important tool for successful sourdough baking. Measuring flour by weight instead of cups creates dramatically more consistent hydration and texture.
Bread baking becomes much easier once you start using grams instead of volume measurements.
#### Dutch Oven
A Dutch oven helps trap steam during baking, which creates that crispy artisan crust and beautiful oven spring.
If you’ve ever wondered why bakery sourdough has such dramatic crust and rise, steam is a huge reason why.
A heavy cast-iron Dutch oven works best, but any oven-safe covered pot can help.
#### Dough Scraper
This simple little tool makes handling sticky dough so much easier. It helps during shaping, folding, and transferring the dough without tearing it.
If you don’t own one yet, even a silicone spatula can help.
#### Banneton Basket
A banneton basket helps the dough hold shape during its final proof while also creating those beautiful flour rings artisan bread is known for.
You can substitute a bowl lined with a floured kitchen towel if needed.
#### Bread Lame or Sharp Razor
Scoring the dough before baking helps control expansion and prevents random tearing.
A sharp knife can work, but a bread lame gives cleaner cuts.
Ingredients & Substitutions
Bread Flour – 400g
Bread flour forms the foundation of this recipe. Its higher protein content creates stronger gluten structure, which improves rise, chew, and crumb texture.
The protein is important because stronger gluten traps fermentation gases better.
Substitutions:
- High-protein bread flour
- Artisan bread flour
- Strong white flour
Avoid regular all-purpose flour if possible because it weakens structure.
High-Protein Flour – 100g
This is the game-changing ingredient.
High-protein flour improves:
- Dough strength
- Oven spring
- Crumb structure
- Protein content
- Chewy texture
Substitutions:
- Additional bread flour
- Whole wheat bread flour
- Protein-enhanced bread flour
Vital Wheat Gluten – 15g (Optional but Recommended)
Vital wheat gluten dramatically boosts elasticity and protein content.
This ingredient is especially useful if your flour protein percentage is lower.
Nutrition Role:
- Increases protein
- Strengthens dough
- Improves chewiness
- Helps create artisan structure
Substitution:
You can skip it, but the loaf may be slightly less airy.
Active Sourdough Starter – 100g
A healthy starter provides fermentation, flavor, rise, and digestibility.
The starter should be bubbly and active before mixing the dough.
Warm Water – 375g
Hydrates the flour and helps fermentation begin properly.
Warm—not hot—water works best.
Salt – 10g
Salt strengthens gluten and balances flavor beautifully.
Without enough salt, sourdough tastes flat and weak.
Honey or Maple Syrup – 1 tablespoon (Optional)
Adds slight sweetness and supports fermentation.
This doesn’t make the bread sweet—it simply rounds out flavor.
How to Make High-Protein Sourdough Bread Recipe
Step 1: Feed Your Starter
About 4–6 hours before mixing dough, feed your sourdough starter until bubbly and active.
A strong starter is the foundation of good sourdough.
Mini Tip:
Your starter should float in water when ready.
Step 2: Mix the Dough
In a large mixing bowl, combine:
- Warm water
- Active starter
- Honey (optional)
Stir until mostly dissolved.
Add:
- Bread flour
- High-protein flour
- Vital wheat gluten
Mix until a shaggy dough forms.
Let rest for 30 minutes.
Mini Tip:
This resting stage is called autolyse and helps gluten develop naturally.
Step 3: Add Salt
Sprinkle salt over the dough and gently work it in using wet hands.
The dough may feel sticky at first—that’s completely normal.
Step 4: Perform Stretch and Folds
Over the next 2 hours, perform stretch-and-folds every 30 minutes.
Grab one side of the dough, stretch upward, then fold over itself.
Rotate the bowl and repeat.
Mini Tip:
You’ll notice the dough becoming smoother and stronger after each fold.
Step 5: Bulk Fermentation
Cover the bowl and let the dough rise until doubled.
This usually takes 4–6 hours depending on kitchen temperature.
The dough should feel airy and slightly jiggly.
Step 6: Shape the Dough
Transfer the dough onto a lightly floured surface.
Shape gently into a tight round loaf without deflating too much air.
Place seam-side up into a floured banneton basket.
Step 7: Cold Fermentation
Cover and refrigerate overnight for 8–16 hours.
This step develops deeper flavor and better texture.
Step 8: Preheat the Dutch Oven
Preheat oven to 475°F with the Dutch oven inside for at least 45 minutes.
A fully heated Dutch oven creates better oven spring.
Step 9: Score and Bake
Transfer dough onto parchment paper.
Score the top using a bread lame or sharp knife.
Place into the hot Dutch oven.
Bake:
- 25 minutes covered
- 20 minutes uncovered
The crust should become deeply golden brown.
Step 10: Cool Completely
This part is difficult but important.
Let the bread cool for at least 1–2 hours before slicing.
Cutting too early releases steam and can make the interior gummy.
Common Mistakes to Avoid
Using Weak Starter
Weak starter equals dense bread.
Fix:
Feed your starter consistently before baking.
Under-Fermenting the Dough
Dense crumb usually means insufficient fermentation.
Fix:
Allow enough rise time based on room temperature.
Over-Flouring the Dough
Too much flour creates dry bread.
Fix:
Use lightly wet hands instead of excessive flour.
Cutting Too Early
Fresh bread continues cooking internally while cooling.
Fix:
Wait at least one hour before slicing.
Skipping Steam
Steam is critical for crust development.
Fix:
Always preheat the Dutch oven thoroughly.
Pro Tips for Best Results
One of the best things you can do is monitor dough temperature. Slightly warmer dough ferments faster and develops structure more consistently.
Another huge tip is using high-protein flour with at least 13–14% protein content. That stronger gluten network creates dramatically better oven spring.
If your dough feels too sticky, resist adding too much flour immediately. High-hydration dough often feels messy at first but becomes smoother during folds.
For extra protein without ruining texture, I sometimes add:
- Hemp hearts
- Ground flaxseed
- Chia seeds
- Small amounts of whey isolate
But moderation matters because too many add-ins can weigh down the loaf.
High-Protein Nutrition & Strategy
Traditional sourdough already has some nutritional advantages thanks to long fermentation.
But increasing the protein content makes this bread even more satisfying for:
- Muscle recovery
- Satiety
- Blood sugar balance
- Post-workout meals
- Balanced breakfasts
Protein slows digestion and helps meals feel more filling.
That’s why pairing high-protein bread with:
- Eggs
- Cottage cheese
- Greek yogurt
- Turkey
- Smoked salmon
can create extremely balanced meals.
I especially love using this bread for breakfast because it keeps energy more stable compared to sugary breakfast foods.
And unlike many store-bought “protein breads,” homemade sourdough avoids excessive additives or artificial ingredients.
Variations You Can Try
Cheesy High-Protein Sourdough
Add:
- Parmesan
- Cheddar
- Asiago
This creates incredible savory flavor.
Seeded Protein Bread
Add:
- Pumpkin seeds
- Sunflower seeds
- Hemp hearts
- Chia seeds
These increase fiber and nutrition.
Jalapeño Cheddar Version
Adds spicy comfort-food flavor while maintaining protein.
Whole Wheat Version
Replace 20–30% of flour with whole wheat flour.
This adds more fiber but slightly denser texture.
Herb Garlic Sourdough
Add roasted garlic and rosemary for incredible aroma.
Tips for This Recipe
Always let the loaf cool fully before storing.
Use a serrated bread knife for clean slicing.
For softer crust, wrap the loaf in a towel while cooling slightly.
For crispier crust, cool completely uncovered.
If your kitchen is cold, fermentation may take longer than expected.
Patience matters more than exact timing in sourdough baking.
Optional Additions
Hemp Hearts
Boost protein and healthy fats.
Chia Seeds
Increase fiber and moisture retention.
Whey Protein Isolate
Small amounts can increase protein, but too much may affect texture.
Egg Whites
Some bakers mix powdered egg whites into dough for additional protein.
Cottage Cheese
Blended cottage cheese can be incorporated into enriched dough versions.
Serving Ideas
This bread is incredibly versatile.
Serve it with:
- Scrambled eggs
- Cottage cheese
- Avocado toast
- Smoked salmon
- Turkey sandwiches
- Grilled chicken toast
- High-protein soups
- Beef chili
It also works beautifully for:
- Meal prep lunches
- Family breakfasts
- Post-workout meals
- Charcuterie boards
- Healthy snack plates
Storage Recommendations
Room Temperature
Store in a bread bag or wrapped in a towel for 2–3 days.
Avoid refrigerating because it dries bread quickly.
Freezer
Slice and freeze for up to 2 months.
Toast directly from frozen.
Reheating
Toast slices lightly or warm in the oven at 350°F for several minutes.
This restores crust beautifully.
Frequently Asked Questions (FAQ)
Can I make this without vital wheat gluten?
Yes, but the bread may have slightly less structure and chew.
Is this bread actually high in protein?
Compared to standard sourdough, yes. The high-protein flour and gluten significantly increase protein content.
Can I use whole wheat flour?
Yes, but too much can make the loaf denser.
Is this good for post-workout meals?
Absolutely. Pairing it with eggs or lean protein creates an excellent recovery meal.
Can beginners make this recipe?
Yes, although sourdough has a learning curve. Following the fermentation cues carefully helps tremendously.
Can I use instant yeast instead of sourdough starter?
Technically yes, but it changes flavor and fermentation characteristics.
Why is my sourdough dense?
Usually under-fermentation, weak starter, or insufficient gluten development.
Nutritional Breakdown (Per Slice)
Approximate values:
- Calories: 165
- Protein: 10g
- Fat: 1.8g
- Total Carbs: 27g
- Fiber: 2g
- Net Carbs: 25g
- Sugar: 1g
- Sodium: 210mg
Recipe Snapshot
Prep Time: 40 minutes
Cook Time: 45 minutes
Fermentation Time: 12–18 hours
Total Time: About 14–20 hours
Course: Bread
Cuisine: American Artisan Bread
Servings: 12 slices
Calories: 165 per slice
Protein: 10g per slice
High-Protein Sourdough Bread Recipe
Ingredients
- 400 g bread flour
- 100 g high-protein flour
- 15 g vital wheat gluten
- 100 g active sourdough starter
- 375 g warm water
- 10 g salt
- 1 tablespoon honey or maple syrup
Instructions
- About 4–6 hours before you plan to mix the dough, feed your sourdough starter so it becomes active, bubbly, and strong enough to properly ferment the bread. The starter should visibly rise, develop lots of bubbles throughout, and ideally double in size before using. A healthy active starter is one of the most important parts of successful sourdough because it directly affects the rise, texture, flavor, and overall structure of the bread. If your kitchen is cold, it may take slightly longer to become fully active. You can test readiness by placing a small spoonful into water — if it floats, it’s usually ready to bake with.
- In a large mixing bowl, combine the warm water, active sourdough starter, and honey or maple syrup if using. Stir thoroughly using your hands or a wooden spoon until the starter mostly dissolves into the water. The liquid should look cloudy and evenly mixed without large clumps remaining. Using slightly warm water helps wake up the fermentation process and encourages stronger gluten development later. Be careful not to use hot water because excessive heat can weaken or damage the natural yeast in the starter.
- Add the bread flour, high-protein flour, and vital wheat gluten directly into the bowl with the liquid mixture. Use your hands, a sturdy spoon, or a dough whisk to mix everything together until a rough, shaggy dough forms. Make sure there are no dry flour pockets hiding at the bottom of the bowl. The dough will look messy and somewhat sticky at this stage, which is completely normal for high-hydration sourdough. Avoid the temptation to add extra flour too early because the dough will strengthen naturally as it rests and ferments.
- Cover the bowl using a clean kitchen towel, plastic wrap, or lid and allow the dough to rest for about 30 minutes. This resting period is called the autolyse stage and gives the flour time to fully absorb the water while beginning gluten development naturally. During this stage, the dough becomes smoother, more elastic, and easier to handle later. Even though it seems simple, this resting period makes a huge difference in texture and dough strength.
- After the resting period, sprinkle the salt evenly over the dough. Using slightly damp hands, gently squeeze and fold the dough repeatedly until the salt becomes fully incorporated. At first, the dough may feel slippery or uneven, but continue folding gently until the texture smooths out again. Salt strengthens the gluten network while also improving flavor and fermentation balance, so make sure it gets evenly distributed throughout the dough.
- Over the next 2 hours, perform a series of stretch-and-folds every 30 minutes to build structure and strength inside the dough. To do this, grab one side of the dough, gently stretch it upward without tearing, then fold it back over itself. Rotate the bowl and repeat the process several times until all sides have been folded. You’ll notice the dough gradually becoming smoother, stronger, and more elastic after each round. This technique replaces heavy kneading while helping create the airy artisan texture sourdough is known for.
- Once the stretch-and-fold process is complete, cover the bowl again and allow the dough to bulk ferment at room temperature for about 4–6 hours, depending on the warmth of your kitchen. During this stage, the dough should become noticeably puffier, softer, and full of air bubbles while nearly doubling in size. A properly fermented dough will look airy and slightly jiggly when the bowl is moved gently. If your kitchen is cooler, fermentation may take longer, so focus more on how the dough looks and feels rather than strictly watching the clock.
- Lightly flour your work surface and carefully transfer the dough onto it, trying not to deflate too much of the trapped air. Using your hands or a dough scraper, gently shape the dough into a tight round loaf by folding the edges inward and rotating it against the counter to create surface tension. Proper shaping helps the loaf hold its structure during baking and improves oven spring. Be gentle during this process because preserving the air bubbles inside helps create the beautiful open crumb texture.
- Place the shaped dough seam-side up into a generously floured banneton basket or a bowl lined with a clean floured kitchen towel. Cover the dough well so it does not dry out, then place it into the refrigerator overnight for 8–16 hours. This cold fermentation stage develops deeper sourdough flavor, improves texture, and makes the dough easier to score and bake the next day. The slow fermentation also helps create the rich artisan-style taste that makes homemade sourdough so special.
- About 45 minutes before baking, place your Dutch oven with its lid into the oven and preheat everything to 475°F. Fully preheating the Dutch oven is extremely important because the intense heat creates steam and strong oven spring once the dough goes inside. This step helps form the crispy crust and dramatic rise that artisan sourdough is famous for. Be careful when handling the Dutch oven later because it will become extremely hot.
- Remove the dough from the refrigerator and carefully flip it onto a sheet of parchment paper. Using a bread lame or very sharp knife, score the top of the dough with one confident slash or decorative pattern. Scoring controls how the bread expands while baking and prevents random cracking. Carefully lower the dough into the hot Dutch oven using the parchment paper as support, then immediately place the lid on top to trap steam inside.
- Bake the bread covered for 25 minutes to allow steam to develop and help the loaf rise fully. Then carefully remove the lid and continue baking another 20 minutes until the crust becomes deeply golden brown, crisp, and beautifully blistered. The kitchen will smell incredible during this stage. If you prefer an even darker artisan crust, you can bake for an additional few minutes while watching carefully to prevent burning.
- Remove the finished bread from the Dutch oven and transfer it onto a wire cooling rack. Allow the loaf to cool completely for at least 1–2 hours before slicing, even though it will be tempting to cut into it immediately. The inside of the bread continues setting as it cools, and slicing too early can make the crumb gummy or dense. Once cooled, slice using a serrated bread knife and enjoy the chewy texture, crisp crust, and rich homemade sourdough flavor.