This post may contains Amazon affiliate and other affiliate links. If you make a purchase through these links, I may earn a small commission at no extra cost to you. Your support helps me continue to provide quality content. I only recommend products I personally trust and believe will add value to your experience. For more details, please visit my Privacy Policy.
Introduction
There’s a very specific kind of craving that hits when you’re following a keto lifestyle—the craving for something crispy, salty, and deeply satisfying. Not just any snack, but something you can grab by the handful, something that crunches with every bite, something that feels indulgent without the guilt.
That’s exactly where these Keto Crispy Cheese Bites (Low-Carb, Crunchy & Easy Snack) come in.
I remember the early days of going keto, when snack time felt like the hardest part. Chips were off the table. Crackers? Gone. Even “healthy” snacks often hid carbs that didn’t fit my macros. That’s when I realized something important: instead of trying to replace snacks, I needed to reinvent them.
And this recipe? It’s one of the best reinventions I’ve ever made.
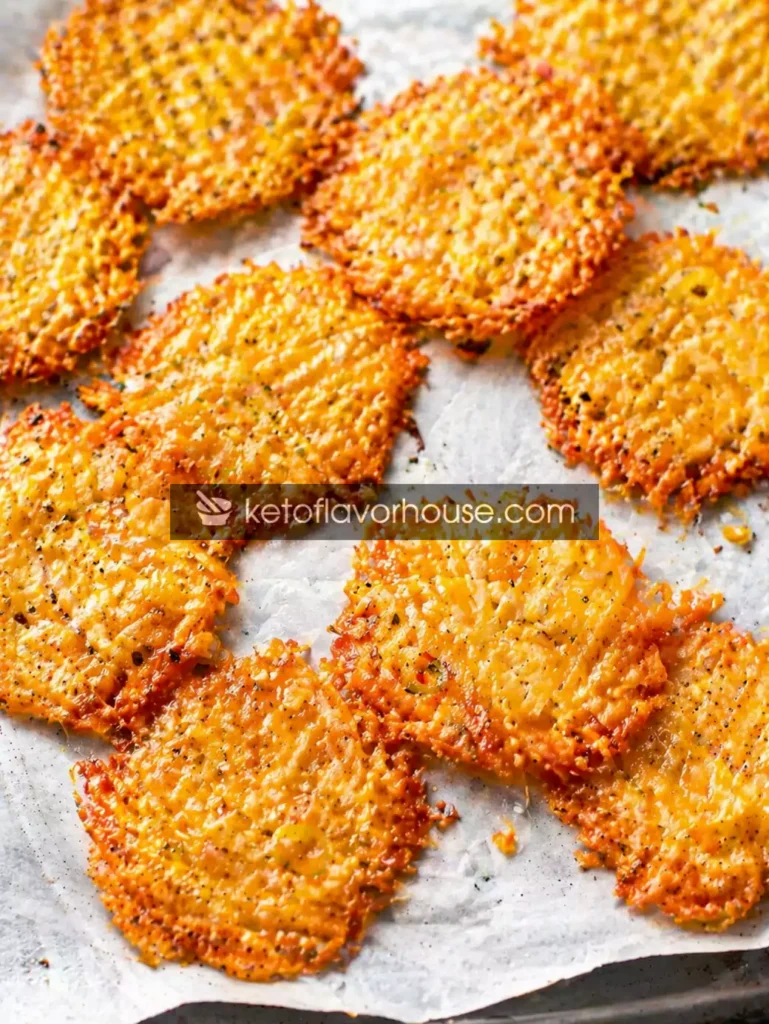
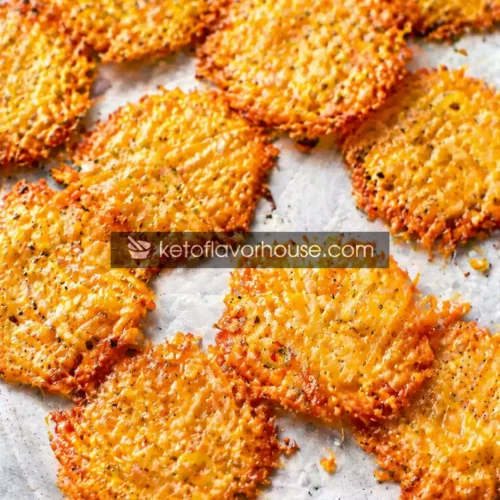
These crispy cheese bites are everything you want in a snack:
- Golden and crunchy on the outside
- Rich, cheesy, and slightly nutty in flavor
- Quick to make with minimal ingredients
- Perfectly keto-friendly
Whether you’re watching a movie, meal prepping snacks for the week, or just want something crunchy without breaking ketosis, this recipe delivers every single time.
Why You’ll Love This Recipe
- 🧀 Ultra Crispy Texture – Perfect crunch in every bite
- 🥑 Keto-Approved – Low in carbs, high in healthy fats
- ⚡ Quick & Easy – Ready in under 15 minutes
- 🍽️ Minimal Ingredients – Simple pantry staples
- 🔥 Versatile Cooking Methods – Oven or air fryer
- 💪 High-Protein Snack – Keeps you full longer
- 😍 Addictive Flavor – You won’t stop at just one
My Personal Experience
The first time I made these cheese bites, I honestly wasn’t expecting much.
I had some leftover shredded cheese in the fridge, and I’d seen people talk about baking cheese into chips. I figured—why not give it a try?
I scooped small piles onto a baking sheet, popped them in the oven, and waited.
A few minutes later, the kitchen started to smell incredible. That rich, toasted cheese aroma filled the air, and I knew something good was happening.
When I pulled them out—golden, bubbling, slightly crisp around the edges—I let them cool just a bit and took a bite.
That crunch.
That deep, cheesy flavor.
It was one of those moments where you realize: this isn’t just a substitute… this is better.
Now, I make these regularly—not just because they’re keto-friendly, but because they’re genuinely one of my favorite snacks.
Required Equipment
Baking Sheet
This is essential for spreading out the cheese portions evenly so they crisp up properly.
Parchment Paper
Prevents sticking and makes cleanup easy. It also helps the cheese crisp instead of burning.
Spoon or Cookie Scoop
Helps portion the cheese evenly for uniform cooking.
Cooling Rack (Optional)
Allows air to circulate underneath for maximum crispiness as they cool.
Ingredients & Substitutions
Main Ingredients:
- 1½ cups shredded cheddar cheese
- 1 cup shredded mozzarella cheese
- ½ teaspoon garlic powder
- ½ teaspoon paprika
- ¼ teaspoon black pepper
Why Each Ingredient Matters
- Cheddar Cheese – Provides bold flavor and crispiness
- Mozzarella Cheese – Adds stretch and balance to texture
- Garlic Powder – Enhances savory depth
- Paprika – Adds subtle warmth and color
- Black Pepper – Brings mild heat
Substitutions
- Use parmesan for extra crispiness
- Swap cheddar with gouda for a smokier taste
- Add chili flakes for spice
- Use Italian seasoning for a herby twist
How to Make Keto Crispy Cheese Bites
Step 1: Preheat the Oven
Set your oven to 200°C and line a baking sheet with parchment paper.
👉 Tip: A properly preheated oven ensures even crisping.
Step 2: Mix the Cheese
In a bowl, combine cheddar, mozzarella, and seasonings.
👉 Mix well so every bite is flavorful.
Step 3: Portion the Cheese
Scoop small mounds onto the baking sheet, leaving space between each.
👉 They spread while baking—don’t overcrowd!
Step 4: Bake
Bake for 6–10 minutes until golden and bubbly.
👉 Watch closely—cheese can burn quickly.
Step 5: Cool & Crisp
Let them cool for 5 minutes so they harden and become crispy.
👉 Don’t worry if they look soft at first—they firm up!
Common Mistakes to Avoid
- ❌ Overcrowding the pan → uneven cooking
- ❌ Baking too long → burnt taste
- ❌ Not letting them cool → no crisp texture
- ❌ Using pre-shredded cheese with additives
Pro Tips for Best Results
- 🔥 Use freshly shredded cheese
- 🧀 Combine multiple cheeses for best texture
- ⏱️ Watch closely in last minutes
- 🌬️ Let cool completely for maximum crunch
Keto Benefits of Cheese
Cheese is one of the most keto-friendly foods:
- Low in carbs
- High in fats for energy
- Rich in protein
- Helps keep you full
It’s the perfect snack base for staying in ketosis.
Variations You Can Try
- 🌶️ Spicy – Add chili flakes
- 🌿 Herby – Add rosemary or thyme
- 🧄 Garlic lovers – Add extra garlic powder
- 🍗 Protein boost – Add shredded chicken
Tips for This Recipe
- Use even-sized portions
- Keep an eye while baking
- Experiment with cheese blends
Optional Additions
- Sesame seeds
- Everything bagel seasoning
- Parmesan dusting
Serving Ideas
- Snack on their own
- Serve with keto dips
- Add to salads for crunch
- Pair with soups
Storage Recommendations
- Store in airtight container for 3–4 days
- Keep at room temperature
- Re-crisp in oven if needed
Frequently Asked Questions
1. Can I make these in an air fryer?
Yes, cook at 180°C for 5–6 minutes.
2. Why aren’t mine crispy?
They may need more cooling time.
3. Can I use one type of cheese?
Yes, but texture may vary.
4. Are these freezer-friendly?
Not recommended.
5. Can I make them thicker?
Yes, but they may be softer inside.
6. What dips go well?
Ranch, garlic mayo, or spicy sauce.
7. Are they kid-friendly?
Absolutely!
Nutritional Breakdown (Per Serving)
- Calories: 180
- Protein: 10g
- Fat: 14g
- Total Carbs: 2g
- Net Carbs: 1g
Recipe Snapshot
- Prep Time: 5 minutes
- Cook Time: 10 minutes
- Total Time: 15 minutes
- Course: Snack
- Cuisine: Keto
- Servings: 4
- Calories: 180 kcal
Keto Crispy Cheese Bites Recipe
Ingredients
- 1½ cups shredded cheddar cheese
- 1 cup shredded mozzarella cheese
- ½ teaspoon garlic powder
- ½ teaspoon paprika
- ¼ teaspoon black pepper
Instructions
- Begin by preheating your oven to 200°C so it’s fully hot before the cheese goes in—this is important for achieving that instant melt and crisp texture. While the oven heats, line a baking sheet with parchment paper, making sure it fully covers the surface. This prevents sticking and helps the cheese spread and crisp evenly without burning on the bottom.
- In a medium-sized mixing bowl, add the shredded cheddar and mozzarella cheese. Sprinkle in the garlic powder, paprika, and black pepper. Use your hands or a spoon to mix everything thoroughly, ensuring the seasoning coats all the cheese strands evenly so every bite has balanced flavor.
- Using a spoon or a small scoop, portion out small mounds of the cheese mixture onto the prepared baking sheet. Keep each mound roughly the same size so they cook evenly. Make sure to leave enough space between each one—about 2–3 inches—because the cheese will melt and spread as it bakes.
- Gently press down on each mound with the back of your spoon to flatten it slightly. You don’t need to make them perfect circles—just enough to create an even thickness so they cook uniformly and develop that crispy texture.
- Carefully place the baking sheet into the preheated oven and bake for about 6 to 10 minutes. Keep a close eye on them, especially after the 5-minute mark. You’ll notice the cheese melting, bubbling, and gradually turning golden around the edges—this is exactly what you want.
- Once the edges are a deep golden brown and the centers look set (not overly wet or shiny), remove the baking sheet from the oven. Be careful not to leave them in too long, as they can go from perfectly crispy to burnt very quickly.
- Let the cheese bites cool directly on the baking sheet for about 5 minutes. This step is crucial—during this time, they firm up and develop that signature crunchy texture. They may look soft at first, but they’ll crisp up as they cool.
- After they’ve set, use a thin spatula to gently lift each cheese bite off the parchment paper. If you want extra crispiness, transfer them to a cooling rack so air can circulate underneath and prevent any trapped moisture.
- Serve them immediately while they’re fresh and crunchy, or let them cool completely before storing. Enjoy the rich, cheesy flavor and satisfying crunch that makes these bites so hard to stop eating.