This post may contains Amazon affiliate and other affiliate links. If you make a purchase through these links, I may earn a small commission at no extra cost to you. Your support helps me continue to provide quality content. I only recommend products I personally trust and believe will add value to your experience. For more details, please visit my Privacy Policy.
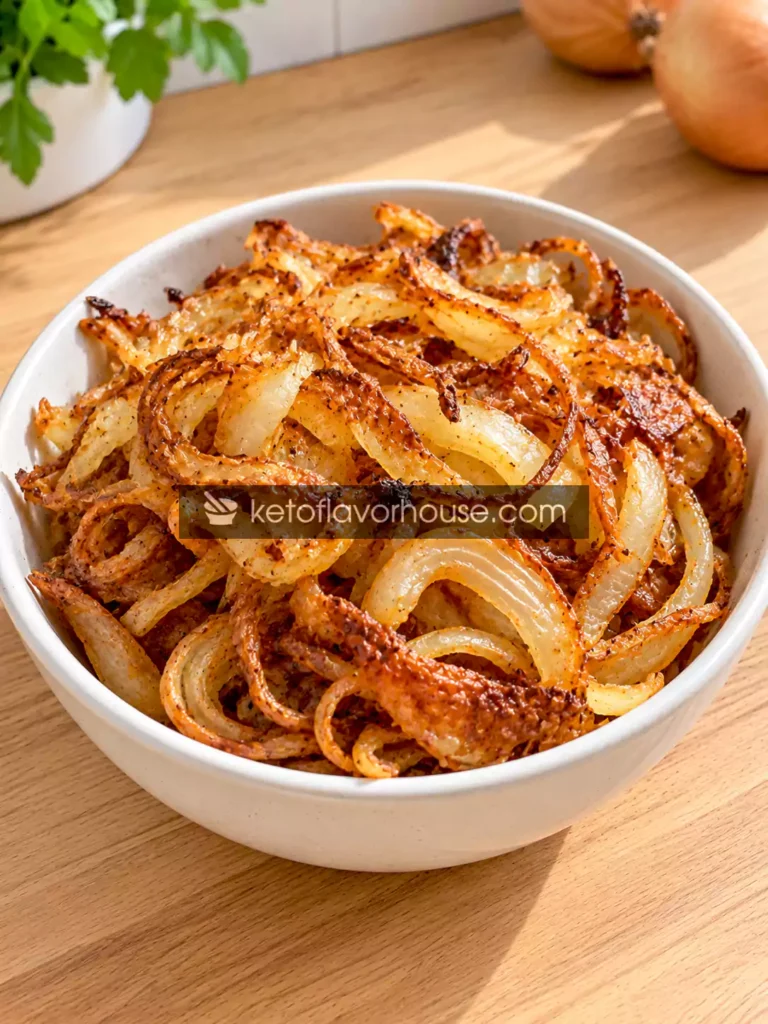
These Air Fryer Crispy Onions recipe are perfect when you want golden, crunchy onions without deep-frying them in a pan full of oil. Thinly sliced onions develop sweet, savory flavor as they cook, with lightly browned edges and a satisfying crispness when prepared in small batches. They make a delicious topping for burgers, salads, soups, casseroles, and all kinds of homemade meals.
The secret is getting the moisture out of the onions while allowing the hot air to circulate around each slice. Onions contain plenty of natural water, so they soften before they become crisp. Slicing them evenly, using a light coating of oil, and avoiding an overcrowded basket all help produce a better result.
For this version, I am using thinly sliced onions, a small amount of oil, and simple seasonings. There is no heavy batter or breadcrumb coating, which keeps the ingredient list short and makes the recipe easy to adapt for different dietary preferences. The onions become naturally sweeter as they cook, while the edges develop a golden color and concentrated onion flavor.
One thing worth knowing before you begin is that thin air-fried onions are not always as uniformly crunchy as deep-fried onion straws. Their final texture depends on the onion variety, slice thickness, moisture content, and air fryer. This recipe focuses on lightly oiled, thinly sliced onions that become golden and crisp around the edges. If you want completely brittle, packaged-style fried onions, you may need a different preparation method.
I also recommend watching the onions closely toward the end. They can move from golden to burnt surprisingly quickly, especially when the slices are very thin. With a little attention, though, this is an easy way to add plenty of onion flavor and texture to everyday meals.
Why You’ll Love This Recipe
- 🧅 Big onion flavor: Cooking brings out the onions’ natural sweetness and savory depth.
- 🔥 Less added oil: You need only a small amount of oil rather than a deep-frying pot.
- ⏱️ Quick preparation: Slicing and seasoning take only a few minutes.
- 🍔 Versatile topping: Sprinkle the onions over burgers, sandwiches, soups, salads, or casseroles.
- 🥗 Easy to customize: Try garlic powder, paprika, black pepper, or dried herbs.
- 🌱 Naturally plant-based: The basic recipe contains onions, oil, salt, and optional seasonings.
- 🥄 No complicated coating: You can make this version without flour, breadcrumbs, or eggs.
- 💛 Budget-friendly: Onions are an affordable ingredient that can add flavor to simple meals.
My Personal Experience
The biggest thing I have learned about making crispy onions is that the process is less about adding more oil and more about controlling moisture. Onions are naturally juicy, and that moisture has to escape before the slices can become properly crisp.
When onions are sliced too thickly, they tend to soften and brown unevenly. The thinner slices may crisp around the edges while the centers remain tender. I therefore aim for slices around 2–3 mm thick and try to keep them as uniform as possible.
I also avoid piling the onions into the basket. It is tempting to put a whole sliced onion into a small air fryer at once, but the overlapping pieces trap steam. Instead of crisping, they can become limp and cook unevenly. Cooking in batches takes a little longer, but the results are usually much better.
Another detail is the amount of oil. A light coating helps the onions brown, but too much oil can leave them greasy without guaranteeing crispness. I prefer to toss the slices thoroughly so that the oil is distributed evenly.
Finally, I stay close to the air fryer during the last few minutes. Onions contain natural sugars, which help them brown but can also make them burn quickly. I check their color frequently, remove the thinner pieces as they finish, and let the onions cool briefly before judging the final texture.
That last point matters because some slices become crisper as they cool. If you expect every onion slice to feel completely crunchy while it is still hot, you might be tempted to cook it too long and end up with bitter, burnt edges.
Required Equipment
Air Fryer
A basket-style air fryer works well for this recipe. A larger basket makes it easier to spread the onions into a thin layer, while a smaller model may require several batches.
Sharp Chef’s Knife or Mandoline
A sharp knife helps you cut even slices. A mandoline can make the job faster, but always use its hand guard and follow its safety instructions.
Cutting Board
Use a stable cutting board to slice the onions safely and consistently.
Mixing Bowl
A medium mixing bowl gives you enough room to toss the onions with oil and seasonings without crushing the slices.
Kitchen Scale or Measuring Spoons
These are useful for measuring the oil and keeping the recipe consistent. You do not need to weigh the onions precisely, but measuring the oil helps control how much you use.
Silicone-Tipped Tongs
Tongs help you separate and turn the onions during cooking. Use them gently so the thinner pieces do not break apart unnecessarily.
Heat-Resistant Spatula
A spatula helps redistribute the onions and loosen any pieces that are sticking together.
Kitchen Timer
Set a timer for short intervals toward the end of cooking. Thin onion slices can brown quickly, and frequent checks help prevent burning.
Fine-Mesh Sieve or Wire Rack
A sieve can help remove loose onion pieces from the basket, while a wire rack allows the cooked onions to cool with better airflow. Avoid piling the hot onions onto a plate if crispness is your priority.
Ingredients & Substitutions
This recipe makes approximately four small topping portions, depending on the size of the onion and how much moisture it loses during cooking.
2 medium yellow onions (approximately 300 g total)
Why they matter: Yellow onions offer a balanced savory flavor and develop a pleasant sweetness as they brown. They are a good all-purpose choice for crispy onion toppings.
Substitution: White onions work well and have a sharper flavor. Red onions can also be used, although their color and sweetness will differ. Shallots are another option, but because they are smaller and can cook faster, watch them carefully.
1 tablespoon olive oil (15 ml)
Why it matters: A light coating of oil helps the onions brown and promotes more even cooking.
Substitution: Avocado oil or sunflower oil works well. You can reduce the oil slightly, but completely oil-free onions may brown less evenly and can dry out before developing the same texture.
¼ teaspoon fine salt
Why it matters: Salt enhances the onions’ natural flavor.
Substitution: Use sea salt or kosher salt, adjusting for grain size. You can also season after cooking if you prefer to control the salt more precisely.
¼ teaspoon garlic powder (optional)
Why it matters: Garlic powder adds a savory note that works especially well when the onions are used as a burger or sandwich topping.
Substitution: Onion powder is not necessary because the recipe already contains onions. You can instead use a small pinch of dried herbs.
¼ teaspoon smoked paprika (optional)
Why it matters: Smoked paprika adds a mild smoky flavor and a warmer golden-red color.
Substitution: Regular paprika gives a milder flavor. Chili powder can be used for more heat, but check the ingredient label if you are monitoring carbohydrates or avoiding added starches.
A pinch of black pepper (optional)
Why it matters: Black pepper adds gentle warmth and balances the onions’ sweetness.
Substitution: Try a pinch of cayenne pepper if you prefer a spicier finish.
Choosing the Best Onions
Look for firm onions with dry outer skins and no soft or damp patches. Fresh, firm onions are easier to slice evenly and generally give you a more consistent starting point.
Yellow onions are a reliable option because they are widely available and work with a range of savory dishes. White onions are useful when you want a sharper flavor, while red onions can add a slightly different color and sweetness.
Avoid using slices of very different thicknesses in the same batch. Thin pieces may burn before thicker pieces have finished cooking. If your knife cuts unevenly, sort the thick and thin slices into separate batches.
Air-Fryer Notes
A few details make a noticeable difference to the final result.
Preheat the air fryer. Start with a preheated air fryer at 160°C (320°F) for approximately 3 minutes. This provides a consistent starting temperature.
Dry the onions if necessary. If the slices are visibly wet after cutting or washing, pat them gently with a clean kitchen towel. Do not crush them.
Use a light, even coating of oil. Toss the onions thoroughly so that the oil is distributed across the slices. You do not need to soak them.
Spread the onions out. Arrange them in a thin layer, avoiding dense piles. If the basket is small, cook in batches rather than trying to fit everything at once.
Shake or stir frequently. Redistribute the slices every 3–4 minutes to reduce uneven browning. Check more often as they become golden.
Do not use a high finishing temperature automatically. A sudden increase in heat can burn the onions’ edges. If they are almost done but need a little more color, increase to 170°C (340°F) for the final 1–2 minutes only, watching closely.
Let them cool before judging crispness. The onions may still feel slightly soft when hot. Spread them out on a wire rack for a few minutes so steam can escape.
Remember that there is no meaningful internal-temperature target for this recipe. Unlike meat, these thin onion slices are judged by moisture loss, color, and texture. A thermometer reading is not a reliable substitute for visual checks.
How to Make Air Fryer Crispy Onions (Golden, Crunchy & Easy)
Step 1: Peel and slice the onions
Remove the papery outer skins and trim the ends. Slice the onions into even rounds approximately 2–3 mm thick, then separate the rings gently with your fingers.
If you prefer shorter pieces for salads or soups, cut the rings in half. Try to keep the slices similar in thickness so they cook at roughly the same rate.
Step 2: Remove excess moisture
If the onion slices feel wet, spread them on a clean kitchen towel and pat them gently. They do not need to be completely dehydrated, but removing surface moisture helps prevent unnecessary steaming.
Keep the slices intact rather than squeezing them. This helps them retain their shape during cooking.
Step 3: Add oil and seasonings
Place the onion slices in a mixing bowl. Add the olive oil, salt, and any optional garlic powder, paprika, or black pepper.
Toss gently until the slices are lightly coated. Avoid pouring in extra oil just because some slices look drier than others; mix thoroughly first.
Step 4: Preheat and arrange
Preheat the air fryer to 160°C (320°F) for approximately 3 minutes.
Place a manageable quantity of onions in the basket, spreading them into a thin, loose layer. A little overlap is fine, but avoid deep piles. Cook in batches if needed for better airflow.
Step 5: Air fry and redistribute
Cook at 160°C (320°F) for approximately 10–16 minutes, stirring or shaking the basket every 3–4 minutes.
Start checking at 8–10 minutes because thin slices and powerful air fryers may cook more quickly. Remove any pieces that are already golden while the thicker or softer pieces continue cooking.
Step 6: Finish carefully
If the onions are cooked but need a little extra color, raise the temperature to 170°C (340°F) for 1–2 minutes, watching continuously. This final step is optional.
Remove the onions as soon as they reach your preferred golden color. If some slices are ready sooner than others, take them out individually rather than risking burnt edges.
Step 7: Cool and serve
Spread the cooked onions out on a wire rack or a plate lined with paper towel. Let them cool for 3–5 minutes before checking the texture.
Use them as a topping while they are fresh. If you want to store them, let them cool completely before transferring them to a suitable airtight container.
How Long Do Onions Take in an Air Fryer?
At 160°C (320°F), thin onion slices generally take around 10–16 minutes, but the exact time depends on the thickness, moisture content, batch size, and air fryer model.
| Slice thickness | Approximate cooking time | Expected result |
|---|---|---|
| Very thin, around 1–2 mm | 7–12 minutes | Quick browning; watch carefully |
| Thin, around 2–3 mm | 10–16 minutes | Golden edges with some crispness |
| Thicker, around 4–5 mm | 14–20 minutes | More tender centers and browned edges |
These timings are estimates, not guarantees. Check frequently, especially toward the end, and remove thinner slices before they burn.
Common Mistakes to Avoid
- Cutting uneven slices: Thin pieces may burn while thicker pieces remain soft. Aim for consistent 2–3 mm slices.
- Overcrowding the basket: Too many onions create trapped steam. Cook smaller batches for more even browning.
- Using too much oil: Excess oil can leave the onions greasy. Start with one tablespoon for two medium onions.
- Adding seasoning too heavily: Garlic powder and paprika can darken quickly. Use small amounts and watch the onions closely.
- Cooking at too high a temperature: High heat can burn the edges before the moisture has escaped. Start at 160°C (320°F) and adjust only when necessary.
- Forgetting to stir: Onions near the heating element may brown faster than those underneath. Redistribute them every 3–4 minutes.
- Expecting every slice to become brittle: Air-fried onions without a coating may remain slightly tender in the center. Their texture depends on thickness and moisture loss.
- Judging them while they are hot: Some slices become crisper as they cool. Allow a few minutes before deciding whether they need more cooking.
- Storing them while warm: Trapped steam creates condensation, which softens the onions. Cool completely before storing.
- Walking away at the end: The final minutes are when onions can burn most easily. Keep a close eye on the basket.
Pro Tips for Best Results
Slice with the grain of your preferred shape. Round slices are convenient for toppings, while half-rings are easier to scatter across salads and soups.
Use a sharp knife. A sharp blade makes cleaner cuts and reduces the likelihood of crushing the onions and releasing excess moisture during preparation.
Choose yellow onions for versatility. They work well in burgers, casseroles, soups, and savory bowls. Red onions are a good alternative when you want a slightly different flavor.
Cook in manageable batches. This is the most important practical tip. A thin layer is much more likely to brown evenly than a full basket of overlapping slices.
Redistribute rather than constantly shaking hard. Gently lift and separate the onions with tongs or a spatula. This helps keep the slices intact while exposing more surfaces to hot air.
Remove pieces as they finish. Onion rings and small fragments may cook at different speeds. Do not keep the golden pieces in the basket simply because a few thicker slices need more time.
Use a cooling rack when possible. Airflow around the cooked onions allows steam to escape, helping them maintain their texture.
Season in stages. Salt can draw moisture from the onions, so if your slices become visibly wet after seasoning, cook them promptly rather than leaving them to sit in the bowl.
Keep expectations realistic. A thin, uncoated onion slice can become golden and crisp around its edges, but it will not necessarily have the uniform crunch of a commercially fried onion topping. For that texture, a coated onion recipe may be more appropriate.
Track the oil accurately. The amount of oil absorbed or left behind varies. If you are calculating calories, include the oil used in the recipe rather than assuming none remains on the onions.
Air-Fryer Benefits of Onions
Onions are naturally flavorful and versatile, making them useful for adding depth to everyday meals. They contain carbohydrates, fiber, and small amounts of several vitamins and minerals. They also contain plant compounds, including quercetin, although the amount in a serving varies with the variety and preparation method.
Air frying allows onions to brown with a relatively small amount of added oil compared with deep-frying them. The circulating hot air helps remove moisture from the surface while encouraging browning and concentrating their flavor.
However, air frying does not automatically make every onion recipe low in calories. The final nutritional profile depends on the amount of oil, any coating, and the portion size. This particular version uses no flour or breadcrumbs, keeping the ingredient list simple.
For KetoFlavorHouse readers, onions can fit into some low-carb meal plans in measured portions. They still contain carbohydrates, so a strict ketogenic diet may require attention to the serving size. The basic recipe is also naturally gluten-free when the oil and seasonings used are free from gluten-containing additives.
Variations You Can Try
Garlic and Herb Crispy Onions
Add a small amount of garlic powder and dried parsley to the oil before tossing the onions. These work particularly well as a topping for creamy soups, chicken dishes, and burgers.
Smoky Paprika Onions
Use smoked paprika and black pepper for a warm, smoky flavor. Keep the paprika quantity modest because heavily seasoned thin slices can darken quickly.
Spicy Crispy Onions
Add a pinch of cayenne pepper or chili powder. This version is especially good on burgers, grilled chicken, tacos, and savory bowls.
Parmesan Onion Topping
For a richer variation, sprinkle a small amount of finely grated Parmesan over the onions during the final few minutes. Cheese may brown rapidly, so lower the heat if necessary and watch closely. This variation is no longer dairy-free.
Red Onion Version
Replace the yellow onions with red onions. Their color and flavor will differ, and the cooking time may need slight adjustment depending on slice thickness and moisture.
Shallot Version
Thinly sliced shallots can also be air-fried. Because they are small and can brown quickly, check them earlier than you would check thicker onion rings.
Lightly Coated Onion Straws
If you prefer a more traditional crunchy onion-strand texture, toss the sliced onions with a small amount of flour or a suitable low-carb alternative before adding oil. A coating changes the recipe, texture, and nutrition, so it should be tested separately rather than assumed to cook identically to the uncoated version.
Oven-Baked Version
Spread the seasoned onions on a parchment-lined baking sheet in a thin layer. Bake at approximately 160°C (320°F) for 15–25 minutes, stirring every 5 minutes and removing pieces as they brown. Oven times vary, so monitor the onions closely.
Tips for This Recipe
- Prepare the onions just before cooking: This reduces the amount of time the cut slices have to release moisture.
- Use a large bowl: Tossing the slices in a roomy bowl helps distribute the oil without breaking the rings.
- Start with half the batch: If you are unsure about your air fryer, test a small batch before cooking all the onions.
- Avoid wet toppings during storage: Keep the onions separate from burgers, salads, and sauces until serving.
- Use a light hand with salt: You can always add a little more after cooking.
- Separate the rings before cooking: Pieces stuck together may remain soft while exposed surfaces become browned.
- Do not line the basket with loose parchment: The liner must be suitable for the appliance and held down by food.
- Serve promptly for maximum crispness: These onions are best when freshly cooked, before humidity softens them.
Optional Additions
The following additions work well with the basic recipe. Carbohydrate estimates are qualitative because exact values depend on the product and quantity used.
| Addition | Suggested amount | Carbohydrate considerations |
|---|---|---|
| Garlic powder | ¼ teaspoon | Very little carbohydrate at this quantity |
| Smoked paprika | ¼ teaspoon | Adds a small amount of carbohydrate |
| Black pepper | A pinch | Negligible at this quantity |
| Dried parsley | ½ teaspoon | Very little carbohydrate |
| Grated Parmesan | 1 tablespoon | Usually low in carbohydrates |
| Cayenne pepper | A pinch | Negligible at this quantity |
| Plain Greek yogurt dip | 1 tablespoon | Contains some carbohydrates |
| Sugar-free mayonnaise-based dip | 1 tablespoon | Usually very low in carbohydrates; check the label |
| Sweet chili sauce | 1 teaspoon | May contain added sugar and carbohydrates |
| Balsamic glaze | 1 teaspoon | Often contains concentrated sugars |
For a simple low-carb topping, garlic powder, black pepper, and a measured amount of oil are enough. If you are following a strict keto plan, calculate the onion portion and any sauces as part of your daily carbohydrate intake.
Serving Ideas
These crispy onions can add flavor and texture to many dishes. Here are some easy ways to use them.
- Burgers: Scatter them over a beef or chicken burger just before serving.
- Sandwiches and wraps: Add a small handful for a savory crunch.
- Salads: Use them as a topping for chicken salads or mixed greens.
- Soups: Sprinkle them over creamy mushroom, tomato, or cauliflower soup immediately before serving.
- Casseroles: Add them after baking if you want to preserve their crispness.
- Egg dishes: Scatter them over omelets, scrambled eggs, or savory egg muffins.
- Grilled chicken: Use them as a finishing topping alongside herbs and a simple sauce.
- Loaded vegetables: Sprinkle over roasted cauliflower, broccoli, or green beans.
- Savory bowls: Add a small amount to a bowl with chicken, vegetables, and a yogurt-based dressing.
For the best contrast, add the onions just before eating. Moisture from sauces and vegetables can soften them quickly, especially if they are very thin.
Storage & Reheating
How to Store Air Fryer Crispy Onions
Let the onions cool completely in a single layer before storing them. Transfer them to a clean, dry, airtight container and refrigerate promptly if you plan to keep them as leftovers.
For best quality, use refrigerated onions within 3–4 days. Keep in mind that refrigeration may soften them, especially if they were not fully crisp when cooled.
Because these onions have a relatively high moisture content compared with commercially dehydrated fried onions, do not assume they are shelf-stable. Avoid storing them at room temperature for extended periods.
Can You Freeze Crispy Onions?
Freezing is possible, but it is not ideal if your priority is crispness. The moisture in the onions can change their texture after thawing, leaving them softer.
If you do freeze them, cool them completely, place them in a freezer-safe container, and use within 1–2 months for best quality. Reheat directly from frozen or thaw in the refrigerator, then crisp briefly in the air fryer while watching closely.
How to Reheat Air Fryer Crispy Onions
- Preheat the air fryer to 150°C (300°F) for approximately 2–3 minutes.
- Spread the onions in a thin layer.
- Heat for 2–4 minutes, checking and stirring after the first 1–2 minutes.
- If needed, continue in short increments until the onions are hot and the edges regain some crispness.
- Let them cool for a minute before serving.
If the onions are already very dark, avoid reheating them at a high temperature because they can burn quickly. Reheat only the amount you intend to use.
Frequently Asked Questions
1. Can I make crispy onions in an air fryer without flour?
Yes. This recipe uses sliced onions, oil, salt, and optional seasonings without flour or breadcrumbs. The onions can develop golden edges and some crispness, although they may not have the same uniform crunch as coated onion straws.
2. Why are my air fryer onions soggy?
The most common reasons are overcrowding, excess moisture, thick slices, and insufficient cooking time. Spread the onions in a thinner layer, pat away surface moisture, and stir regularly so more surfaces are exposed to the hot air.
3. What temperature is best for crispy onions?
Start at 160°C (320°F) and cook for approximately 10–16 minutes, stirring every 3–4 minutes. Thin slices may finish earlier. If the onions need a little extra color, you can briefly raise the temperature to 170°C (340°F), watching closely.
4. Do I need to soak onions before air frying?
No. Soaking is not necessary for this recipe. It can introduce extra moisture, which then needs to evaporate during cooking. Simply slice the onions, pat them dry if needed, and season them.
5. Are air fryer crispy onions keto-friendly?
This uncoated version can fit into some low-carb meal plans because it contains no flour or breadcrumbs. However, onions naturally contain carbohydrates, so portion size matters, especially on a strict ketogenic diet. Include the oil and any toppings when calculating nutrition.
6. Can I make crispy onions ahead of time?
You can prepare them in advance, but their crispness may decrease as they cool and sit. For the best texture, cook them close to serving time. If you make them earlier, cool and refrigerate them promptly, then reheat briefly in the air fryer.
7. Why did my onions burn before they became crispy?
The slices may have been too thin, the temperature too high, or the basket too close to the heating element. Start at 160°C (320°F), check frequently, and remove smaller pieces as soon as they become golden. Do not keep cooking the entire batch just because a few thicker pieces need more time.
Nutritional Breakdown (Per Serving)
Estimated values for one of four portions, using two medium onions (approximately 300 g), one tablespoon of olive oil, and salt. Optional seasonings are excluded.
- Serving size: ¼ of the prepared recipe
- Calories: Approximately 85 kcal
- Protein: 1.3 g
- Total Fat: 3.8 g
- Total Carbohydrates: 12.4 g
- Dietary Fiber: 2.1 g
- Net Carbs: 10.3 g
Nutrition is estimated and will vary with onion size, oil retained after cooking, and portion size. These values are for the recipe as a topping, not a large serving of onion rings.
Recipe Snapshot
- Recipe Name: Air Fryer Crispy Onions (Golden, Crunchy & Easy)
- Prep Time: 5 minutes
- Cook Time: 10–16 minutes per batch
- Total Time: Approximately 15–21 minutes per batch
- Course: Topping, Side Dish, Condiment
- Cuisine: American-inspired
- Servings: 4 small topping portions
- Calories: Approximately 85 per serving
- Air Fryer Temperature: 160°C (320°F)
- Optional Finishing Temperature: 170°C (340°F) for 1–2 minutes
- Dietary Notes: Vegan, dairy-free, gluten-free, and low-carb adaptable when using suitable ingredients; not carb-free.
Air Fryer Crispy Onions

Ingredients
- 2 medium yellow onions approximately 300 g total
- 1 tablespoon olive oil 15 ml
- ¼ teaspoon fine salt
- ¼ teaspoon garlic powder optional
- ¼ teaspoon smoked paprika optional
- A pinch of black pepper optional
Instructions
- Slice the onions: Peel the onions and cut them into even slices approximately 2–3 mm thick. Separate the rings gently.
- Remove excess moisture: If the slices are wet, pat them dry with a clean kitchen towel.
- Season: Toss the onions with olive oil, salt, and any optional seasonings until lightly coated.
- Preheat: Preheat the air fryer to 160°C (320°F) for approximately 3 minutes.
- Arrange: Spread the onions in a thin layer in the basket. Cook in batches if necessary to avoid overcrowding.
- Air fry: Cook at 160°C (320°F) for 10–16 minutes, stirring or shaking the basket every 3–4 minutes. Start checking around 8–10 minutes.
- Finish if needed: If the onions need extra color, increase to 170°C (340°F) for 1–2 minutes, watching continuously to prevent burning.
- Cool: Remove the onions when golden, spread them on a wire rack, and let them cool for 3–5 minutes. They may become crisper as they cool.
- Serve: Sprinkle over burgers, salads, soups, casseroles, or your favorite savory dishes.