This post may contains Amazon affiliate and other affiliate links. If you make a purchase through these links, I may earn a small commission at no extra cost to you. Your support helps me continue to provide quality content. I only recommend products I personally trust and believe will add value to your experience. For more details, please visit my Privacy Policy.
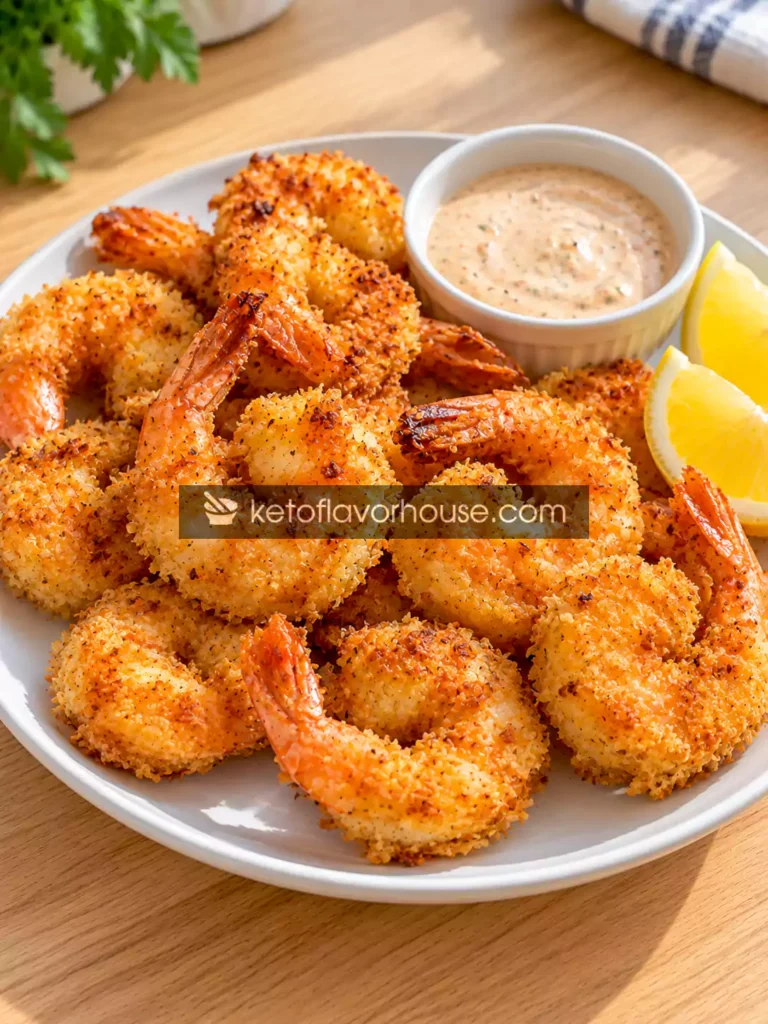
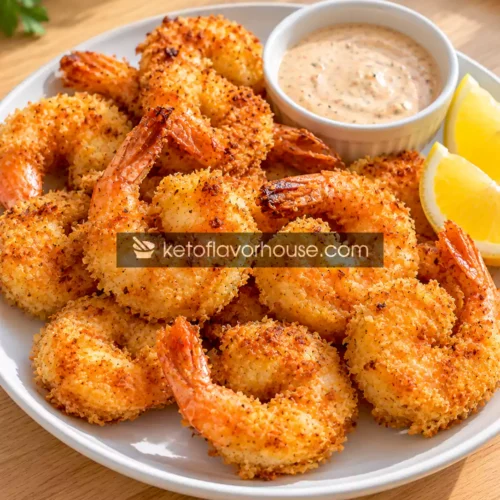
There is something irresistible about biting into a piece of shrimp with a golden, crunchy coating and a juicy, tender center. This Air Fryer Breaded Shrimp recipe brings that satisfying restaurant-style crunch into your home kitchen without requiring a deep pot of hot oil. With a simple seasoned coating, a light spray of cooking oil, and a few minutes in the air fryer, you can make a delicious batch for lunch, dinner, or a quick appetizer.
What I especially like about breaded shrimp is how versatile it is. Serve it with a creamy garlic dip, tuck it into lettuce wraps, add it to a fresh salad, or pair it with roasted vegetables for an easy dinner. Shrimp cook quickly, so this is also a useful recipe when you want something flavorful without spending an hour in the kitchen.
For this version, I use a classic coating made with all-purpose flour, egg, and panko breadcrumbs. The flour helps the egg adhere to the shrimp, while the panko creates a light, crunchy exterior. A little paprika, garlic powder, salt, and black pepper season every layer without overpowering the natural sweetness of the shrimp.
The air fryer makes the process convenient, but there is one important detail: the shrimp need to be arranged in a single layer with space between them. If they overlap, the coating can become patchy and soft instead of evenly crisp. Working in batches is worth the extra few minutes.
Because KetoFlavorHouse also covers healthier recipes, I will keep the preparation practical by using a modest amount of added oil rather than deep-frying. This is a lighter cooking method, although the regular breadcrumb coating means the recipe is not keto-friendly as written. I will also explain how to adapt the coating for a lower-carbohydrate version.
Why You’ll Love This Recipe
- 🍤 Crispy outside, tender inside: Panko breadcrumbs create a light, crunchy coating around juicy shrimp.
- 🔥 Less oil than deep-frying: A light spray of cooking oil helps the coating brown without submerging the shrimp in oil.
- ⏱️ Quick cooking: The shrimp typically cook in just 6–9 minutes, depending on their size and your air fryer.
- 🧄 Simple seasoning: Garlic powder, paprika, salt, and pepper give the coating plenty of flavor.
- 🥗 Easy to serve: Pair the shrimp with salad, vegetables, wraps, or your favorite dipping sauce.
- 🍋 Customizable flavor: Add lemon zest, cayenne pepper, dried herbs, or Parmesan to suit your taste.
- 🍽️ Great for sharing: Serve them as an appetizer, game-day snack, or family dinner.
- 🥑 Adaptable for low-carb eating: Swap the conventional breadcrumbs for a tested low-carb coating if you want a keto-style variation.
My Personal Experience
When making breaded shrimp in an air fryer, I focus on three things: drying the shrimp, creating an even coating, and avoiding overcrowding. These small details have a bigger impact on the final texture than adding lots of extra oil.
First, I pat the shrimp dry with paper towels. Shrimp naturally contain moisture, and excess water can make the coating slide off or turn soggy. Drying them also helps the flour cling to the surface more evenly.
Next, I set up a simple breading station. One bowl holds the seasoned flour, another contains beaten egg, and a third holds the panko breadcrumbs. Keeping the bowls separate makes the process easier to manage and prevents the breadcrumbs from becoming wet too early.
I also prefer to press the panko gently onto the shrimp rather than simply dropping the shrimp into the crumbs and shaking the bowl. That small amount of pressure helps the coating adhere. At the same time, I avoid squeezing the shrimp so hard that the coating becomes thick and compact.
The other lesson is that shrimp do not need a long cooking time. They can go from tender to rubbery surprisingly quickly, especially when they are small. I begin checking at the lower end of the suggested cooking range and look for an opaque center and a pink, curled exterior. For food safety, I confirm that the thickest shrimp reaches an internal temperature of 63°C (145°F).
Finally, I let the cooked shrimp rest briefly on a wire rack rather than stacking them in a bowl. This allows steam to escape and helps preserve the crunch. If you are preparing several batches, keeping them in a single layer is better than piling them together while they are hot.
Required Equipment
Air Fryer
A basket-style air fryer is ideal for this recipe. A larger basket allows you to spread the shrimp out more easily, while a smaller model may require two or three batches.
Three Shallow Bowls
Use three shallow bowls for the seasoned flour, beaten egg, and panko breadcrumbs. Shallow bowls make it easier to coat the shrimp evenly without wasting ingredients.
Kitchen Scale and Measuring Spoons
Accurate measurements help keep the coating consistent and make nutritional estimates more reliable.
Paper Towels
Paper towels help remove excess moisture from the shrimp before breading. This simple step improves coating adhesion.
Silicone-Tipped Tongs
Tongs make it easier to turn the shrimp halfway through cooking without tearing off the breadcrumb coating.
Cooking Oil Sprayer
A refillable food-safe oil sprayer lets you apply a light, even layer of oil over the breadcrumbs. If you do not have one, a pastry brush can work, provided you dab gently instead of dragging the bristles across the coating.
Instant-Read Food Thermometer
A digital thermometer is useful for checking the center of the thickest shrimp. The target internal temperature is 63°C (145°F).
Wire Cooling Rack
A rack helps prevent the bottom of the shrimp from becoming damp after cooking. It is particularly helpful if you are preparing multiple batches.
Ingredients & Substitutions
This recipe makes four appetizer-sized servings, using approximately 450 g of peeled and deveined shrimp.
450 g (1 lb) large raw shrimp, peeled and deveined
Why it matters: Large shrimp are easy to handle, bread, and turn. They also provide a good balance between the crunchy coating and the tender center.
Substitution: Medium shrimp work well, but they cook faster. If using frozen shrimp, thaw them completely in the refrigerator or under cold running water in a sealed bag, then drain and pat dry thoroughly. Remove the shells and devein before breading if needed.
30 g (¼ cup) all-purpose flour
Why it matters: The flour creates a dry surface for the beaten egg to cling to, helping the breadcrumb coating stay attached.
Substitution: Use a gluten-free all-purpose flour blend if needed. For a lower-carb variation, finely ground almond flour may work as the first coating, although it produces a different texture.
1 large egg
Why it matters: Beaten egg acts as the binding layer between the flour and the breadcrumbs.
Substitution: A beaten egg white can be used, although the coating may be slightly less rich. A suitable commercial egg substitute may also work, depending on its consistency.
60 g (about 1 cup) panko breadcrumbs
Why it matters: Panko has larger, lighter flakes than many standard breadcrumbs, giving the coating a crisp texture.
Substitution: Regular breadcrumbs work but generally produce a finer, denser coating. Gluten-free panko is another option. For a keto-style version, use a suitable low-carb breadcrumb alternative and recalculate the nutrition.
1 teaspoon paprika
Why it matters: Paprika adds color and mild, earthy flavor to the coating.
Substitution: Smoked paprika creates a smokier taste. If you prefer heat, use a small amount of cayenne instead.
½ teaspoon garlic powder
Why it matters: Garlic powder adds savory flavor without introducing the extra moisture of fresh garlic.
Substitution: Onion powder can be used, or combine a small amount of both.
½ teaspoon fine salt
Why it matters: Salt seasons the shrimp and the coating.
Substitution: Adjust to taste, especially if the shrimp have been treated with a sodium solution or your dipping sauce is salty.
¼ teaspoon ground black pepper
Why it matters: Black pepper adds a mild warmth that complements the shrimp.
Substitution: White pepper or a pinch of cayenne can be used according to your preference.
1–2 teaspoons neutral cooking oil, for spraying
Why it matters: A light coating of oil helps the breadcrumbs brown and crisp in the circulating hot air.
Substitution: Use avocado oil, canola oil, or another suitable cooking oil. The amount absorbed will vary, so nutritional estimates should account for the quantity actually used.
Lemon wedges, for serving (optional)
Fresh lemon brightens the flavor and balances the savory coating. Add it just before eating rather than squeezing it over the shrimp long before serving, which can soften the crust.
Choosing the Best Shrimp
Large shrimp are convenient for breading because there is enough surface area for the coating to adhere. Look for shrimp that smell fresh and mild rather than strongly fishy.
If buying frozen shrimp, check whether they are raw or already cooked. This recipe is designed for raw shrimp. Pre-cooked shrimp can become tough and dry if breaded and cooked for the same length of time, so I recommend starting with raw shrimp.
For the best results, choose shrimp of similar size. That way, the pieces are more likely to finish cooking together.
Air-Fryer Notes
Preheat the air fryer. Preheat to 200°C (400°F) for approximately 3 minutes, unless your appliance’s instructions recommend a different procedure. A hot cooking chamber helps the coating begin to crisp promptly.
Dry the shrimp thoroughly. Moisture is one of the main reasons breading slips off. Pat the shrimp dry before starting the coating process.
Use three separate coating bowls. Keep the flour, egg, and panko separate. This creates an even coating and reduces the chance of clumps forming in the breadcrumbs.
Do not overcrowd the basket. Leave a small gap between each shrimp. Air must circulate around the coating for even browning.
Spray the breadcrumbs lightly. A thin layer of oil encourages browning. Avoid soaking the coating or using so much oil that the crumbs become heavy.
Turn halfway through. Flip the shrimp gently after approximately 3–4 minutes. Spray any visibly dry areas lightly if needed.
Check the internal temperature. Shrimp cook quickly. The thickest piece should reach 63°C (145°F), and the flesh should be opaque and pearly rather than translucent.
Serve promptly. The coating is crispest just after cooking. Steam from a covered dish or piled-up shrimp can soften the crust.
How to Make Air Fryer Breaded Shrimp (Extra Crispy & Golden)
Step 1: Prepare the shrimp
If using frozen shrimp, thaw them completely and drain well. Remove the shells and devein if necessary, then pat the shrimp thoroughly dry with paper towels.
Keep the shrimp chilled while preparing the coating. Dry surfaces help the flour cling and reduce the chance of the breadcrumb layer slipping off during cooking.
Step 2: Set up the breading station
In the first bowl, mix the flour with paprika, garlic powder, salt, and black pepper. In the second bowl, beat the egg until smooth. Pour the panko into the third bowl.
Arrange the bowls in that order so you can coat the shrimp without repeatedly reaching across the counter. This also helps keep the breadcrumbs dry until they are needed.
Step 3: Coat the shrimp in flour and egg
Toss each shrimp in the seasoned flour, shaking off the excess. Dip it into the beaten egg, allowing the excess egg to drip back into the bowl.
The flour layer should be thin rather than thick and chalky. Too much flour can make the coating heavy and may prevent the breadcrumbs from adhering evenly.
Step 4: Add the crunchy coating
Transfer each egg-coated shrimp to the panko bowl. Gently press the crumbs onto both sides, then place the breaded shrimp on a clean plate or rack.
Continue until all the shrimp are coated. If the breadcrumbs become wet and clumpy, replace them with fresh crumbs rather than trying to force the mixture onto the remaining shrimp.
Step 5: Preheat and arrange
Preheat the air fryer to 200°C (400°F) for about 3 minutes. Lightly spray the basket with a suitable cooking oil if needed to prevent sticking.
Arrange the breaded shrimp in a single layer, leaving space between them. Lightly spray the exposed breadcrumb coating with oil. Cook in batches if necessary rather than stacking the shrimp.
Step 6: Air fry until golden
Cook at 200°C (400°F) for approximately 6–9 minutes, depending on the size of the shrimp and the power of your air fryer.
At around 3–4 minutes, carefully turn each shrimp using tongs. Check the coating and apply a very light spray of oil to any visibly dry areas if needed. Begin checking for doneness at 6 minutes so the shrimp do not overcook.
Step 7: Check and serve
Check the thickest shrimp with an instant-read thermometer. The center should reach 63°C (145°F), and the flesh should be opaque and pearly.
Transfer the shrimp to a wire rack and rest briefly for 1–2 minutes. Serve immediately with lemon wedges and your favorite dipping sauce while the coating is at its crispest.
How Long Does Breaded Shrimp Take in an Air Fryer?
At 200°C (400°F), large raw shrimp generally take around 6–9 minutes, but the exact timing depends on their size, starting temperature, coating thickness, and air fryer model.
| Shrimp size | Approximate cooking time at 200°C (400°F) |
|---|---|
| Small | 4–6 minutes |
| Medium | 5–7 minutes |
| Large | 6–9 minutes |
| Extra-large | 8–10 minutes |
These times are starting estimates, not guarantees. Begin checking early, especially if the shrimp are small or your air fryer runs hot. Confirm that the thickest shrimp reaches 63°C (145°F) before serving.
Common Mistakes to Avoid
- Skipping the drying step: Wet shrimp can cause the flour to clump and the coating to slide off. Pat them dry before breading.
- Using too much flour: Excess flour creates a thick, powdery layer. Shake off the excess before dipping the shrimp into the egg.
- Letting the breadcrumbs get soggy: If you bread all the shrimp in a crowded bowl, moisture can accumulate in the crumbs. Work in batches and replace wet breadcrumbs when necessary.
- Overcrowding the air fryer: Overlapping shrimp can cook unevenly and develop soft patches. Leave space around every piece.
- Using too much oil spray: Excess oil can make the coating heavy. Apply a thin, even layer instead.
- Forgetting to turn the shrimp: Turning halfway through helps both sides brown more evenly.
- Cooking for too long: Shrimp become rubbery when overcooked. Start checking at 6 minutes for large shrimp.
- Assuming a golden coating means the shrimp are done: Color alone does not confirm safe cooking. Check the thickest piece for an internal temperature of 63°C (145°F).
- Covering the shrimp after cooking: Trapped steam softens the crust. Keep them uncovered and serve promptly.
- Using cooked shrimp without adjusting the method: Already-cooked shrimp need much less heating and may turn tough. Raw shrimp are best for this recipe.
Pro Tips for Best Results
Choose large shrimp. They are easier to bread and less likely to overcook while the coating becomes golden.
Use panko for a lighter crunch. Its coarse flakes produce a more textured crust than many fine breadcrumbs.
Season the flour rather than only the breadcrumbs. This distributes flavor throughout the coating instead of leaving the shrimp bland underneath.
Press the panko gently into place. A little pressure improves adhesion, but do not compress the crumbs into a dense layer.
Keep one hand for dry ingredients and one for wet ingredients. This simple breading technique reduces the amount of coating that sticks to your fingers.
Spray the top of the coating lightly. Breadcrumbs that remain completely dry may look pale after air frying. A small amount of oil encourages more even browning.
Work in batches. It is better to cook two properly spaced batches than one overcrowded batch with uneven texture.
Avoid excessive resting before cooking. Once breaded, cook the shrimp reasonably promptly so the coating does not become damp.
Use a rack after cooking. A rack helps preserve crispness by allowing steam to escape from the bottom.
Serve with sauce on the side. Dipping keeps the coating crisp longer than tossing the shrimp in sauce before serving.
Keep the nutrition realistic. The breadcrumb coating adds carbohydrates, while the oil contributes fat and calories. The exact values depend on how much coating and oil remain on the shrimp.
Air-Fryer Benefits of Shrimp
Shrimp are naturally rich in protein and relatively low in fat, making them a useful ingredient for many balanced meals. They also provide nutrients such as vitamin B12, selenium, and iodine.
Air frying offers a convenient alternative to deep-frying because it uses circulating hot air and usually requires much less added oil. In this recipe, a light oil spray helps brown the panko without submerging the shrimp in fat.
However, the nutritional profile depends on the coating. Regular panko breadcrumbs contribute carbohydrates, and the flour and egg also add nutrients and calories. This classic breaded version is not keto-friendly as written, even though shrimp themselves are low in carbohydrates.
For KetoFlavorHouse readers following a low-carb or ketogenic eating plan, a coating made with finely ground almond flour and a modest amount of grated Parmesan may be a suitable alternative. The texture will differ from panko, and the nutrition should be recalculated using the actual ingredients.
Variations You Can Try
Garlic Parmesan Breaded Shrimp
Mix 1 tablespoon of finely grated Parmesan into the panko with the garlic powder. Keep an eye on the shrimp during the final minutes because cheese can brown faster than breadcrumbs.
Spicy Cajun Shrimp
Replace the paprika and black pepper with approximately 1 teaspoon of Cajun seasoning. Check the salt content of the blend before adding extra salt.
Lemon Pepper Shrimp
Add lemon zest and a little extra black pepper to the flour mixture. Serve with fresh lemon wedges for a bright, savory finish.
Italian Herb Shrimp
Add dried oregano, parsley, and a pinch of basil to the breadcrumbs. This variation pairs well with marinara sauce or a simple yogurt-based dip.
Keto-Friendly Breaded Shrimp
Replace the flour and panko with a tested low-carb coating, such as finely ground almond flour mixed with a small amount of Parmesan and seasonings. Dip the shrimp in beaten egg to help the coating adhere. Air fry at 200°C (400°F), beginning to check after 5–6 minutes.
The coating may brown differently from panko, so use the internal temperature of 63°C (145°F) to confirm doneness. Calculate the nutritional values from the exact products and amounts used.
Gluten-Free Shrimp
Use a certified gluten-free flour blend and gluten-free panko breadcrumbs. Check the labels on all seasonings and sauces if gluten avoidance is essential.
Oven-Baked Breaded Shrimp
Arrange the breaded shrimp on a lightly oiled wire rack set over a baking sheet. Bake in a preheated oven at 220°C (425°F) for approximately 8–12 minutes, turning if necessary. Check the thickest shrimp for an internal temperature of 63°C (145°F); adjust the time for size and oven performance.
Other Seafood Options
This breading method can also work with small pieces of firm white fish, but thicker pieces require different cooking times. Avoid assuming that fish fillets will cook as quickly as shrimp; check their thickness and internal temperature.
Tips for This Recipe
- Prepare the dipping sauce first: Shrimp cook quickly, so have the sauce, lemon wedges, and side dishes ready before starting.
- Keep raw shrimp cold: Return them to the refrigerator if you need to pause during preparation.
- Use separate plates for raw and cooked seafood: Do not put cooked shrimp back on a plate that held raw shrimp unless it has been washed thoroughly.
- Do not reuse contaminated egg or flour mixtures: Discard leftover breading ingredients that have come into contact with raw shrimp.
- Cook similar sizes together: This helps the shrimp finish at approximately the same time.
- Check the first batch carefully: Your air fryer may cook faster or slower than the suggested range.
- Serve in a single layer: If making several batches, keep cooked shrimp on a rack in a warm oven set to around 90°C (195°F) for a short time, rather than covering them. Avoid holding them for too long, as the coating can dry out.
- Keep the dipping sauce separate: This protects the crust and lets everyone choose how much sauce they want.
Optional Additions
These additions can change the flavor without making the preparation complicated. Carbohydrate notes are approximate and depend on the product used.
| Addition | Suggested amount | Carbohydrate considerations |
|---|---|---|
| Garlic powder | ½ teaspoon | Very little carbohydrate at this quantity |
| Paprika | 1 teaspoon | Adds a small amount of carbohydrate |
| Parmesan | 1 tablespoon | Usually low in carbohydrates |
| Cayenne pepper | A pinch | Negligible in a small quantity |
| Lemon juice | 1 teaspoon | Adds a small amount of carbohydrate |
| Plain Greek yogurt dip | 2 tablespoons | Contains some carbohydrates |
| Mayonnaise-based garlic dip | 1 tablespoon | Usually very low in carbohydrates; check the label |
| Sugar-free cocktail-style sauce | 1 tablespoon | Varies by brand |
| Regular cocktail sauce | 1 tablespoon | Often contains added sugar |
| Sweet chili sauce | 1 teaspoon | May add sugar and carbohydrates |
For a keto-style serving, choose a suitable low-carb coating and a sauce without added sugar. Remember that even low-carb sauces can contribute calories, and the shrimp’s coating is usually the biggest source of carbohydrates in the classic version.
Serving Ideas
Air fryer breaded shrimp are versatile enough for both casual meals and more complete dinners.
- With lemon garlic dip: A creamy, tangy dip complements the sweet flavor of the shrimp.
- As a shrimp salad: Serve over lettuce, cucumber, tomato, and avocado. Add the shrimp immediately before eating to preserve the crunch.
- In wraps: Place the shrimp in a tortilla or lettuce wrap with shredded cabbage and a yogurt-based sauce.
- With roasted vegetables: Pair with broccoli, green beans, or asparagus for a simple dinner.
- As an appetizer: Arrange the shrimp on a platter with lemon wedges and two dipping sauces.
- With a rice bowl: Add rice, cucumber, carrots, and a light dressing for a more filling meal.
- With zucchini fries: This makes a fun air-fryer meal with contrasting textures.
- For a family dinner: Serve with a fresh salad and baked potatoes, or choose lower-carb sides if that better fits your eating plan.
For the best texture, serve the shrimp as soon as possible after cooking. If preparing a platter for guests, cook the shrimp in batches and avoid covering them tightly.
Storage & Reheating
How to Store Leftover Breaded Shrimp
Allow the shrimp to cool briefly, then refrigerate them in a shallow, airtight container within two hours of cooking. For best quality, use refrigerated leftovers within 3–4 days.
Keep the shrimp separate from sauces, salads, and other moist ingredients. This helps prevent the coating from becoming soggy.
Can You Freeze Breaded Shrimp?
You can freeze cooked breaded shrimp, although the coating may lose some of its original crunch. Cool them promptly, arrange them in a single layer until firm, then transfer them to a freezer-safe container or bag.
For best quality, use within 1–2 months. Reheat from frozen or thaw in the refrigerator, allowing extra time as needed to heat the center thoroughly.
How to Reheat Breaded Shrimp in an Air Fryer
- Preheat the air fryer to 180°C (350°F) for approximately 3 minutes.
- Arrange the shrimp in a single layer.
- Reheat refrigerated shrimp for approximately 3–5 minutes, turning halfway through if needed.
- For frozen cooked shrimp, start with 5–8 minutes and check frequently; larger pieces may need longer.
- Make sure the center reaches 74°C (165°F) when reheating leftovers.
Avoid using a microwave if crispness is your priority. It can heat the shrimp quickly, but the coating is more likely to become soft. Reheat only the amount you intend to eat.
Frequently Asked Questions
1. Can I use frozen shrimp for this recipe?
Yes. Thaw the shrimp completely, drain them well, and pat them dry before breading. Excess moisture is one of the main reasons the coating slips off.
2. How do I keep the breading from falling off?
Dry the shrimp, use a thin flour layer, dip them in beaten egg, and press the panko gently onto the surface. Avoid handling them excessively once coated.
3. What temperature should I use for air fryer breaded shrimp?
Start at 200°C (400°F) and cook large shrimp for approximately 6–9 minutes. The actual time depends on size and appliance performance. Confirm the thickest shrimp reaches 63°C (145°F).
4. Do I need to flip the shrimp?
Yes, flipping once around the halfway point helps the coating brown more evenly. Use tongs and handle the shrimp gently to avoid removing the crust.
5. Can I make this recipe without panko breadcrumbs?
Yes. Regular breadcrumbs or gluten-free panko can be substituted. For a lower-carb version, try a suitable almond-flour and Parmesan coating, recognizing that the texture and nutrition will differ.
6. Are air fryer breaded shrimp keto-friendly?
The classic recipe uses flour and panko, so it is not keto-friendly as written. You can make a lower-carb version with a suitable alternative coating, then recalculate the nutritional information based on the ingredients and serving size.
7. Why are my breaded shrimp not crispy?
The basket may be overcrowded, the shrimp may be too wet, or the coating may not have received enough oil to brown. Dry the shrimp thoroughly, leave space between pieces, and use a light, even spray of oil. Serve promptly to prevent steam from softening the coating.
Nutritional Breakdown (Per Serving)
Estimated values for one of four servings, based on the ingredients above, including a modest amount of oil spray. Actual values depend on how much flour, egg, breadcrumbs, and oil remain on the shrimp.
- Serving size: Approximately ¼ of the prepared recipe
- Calories: Approximately 250 kcal
- Protein: Approximately 27 g
- Total Fat: Approximately 6 g
- Total Carbohydrates: Approximately 21 g
- Dietary Fiber: Approximately 1 g
- Net Carbs: Approximately 20 g
These are estimates, not laboratory-tested values. Calculate the nutrition using your exact ingredients and the amount of coating and oil used. Dipping sauces are not included.
Recipe Snapshot
- Recipe Name: Air Fryer Breaded Shrimp (Extra Crispy & Golden)
- Prep Time: 15 minutes
- Cook Time: 6–9 minutes per batch
- Total Time: Approximately 21–30 minutes, depending on batch size
- Course: Appetizer, Lunch, Dinner
- Cuisine: American-inspired
- Servings: 4
- Calories: Approximately 250 per serving
- Air Fryer Temperature: 200°C (400°F)
- Internal Temperature: 63°C (145°F)
- Main Ingredients: Shrimp, flour, egg, panko breadcrumbs, seasonings, cooking oil
- Dietary Notes: High-protein; not keto or gluten-free as written
Air Fryer Breaded Shrimp Recipe

Ingredients
- 450 g 1 lb large raw shrimp, peeled and deveined
- 30 g ¼ cup all-purpose flour
- 1 large egg
- 60 g about 1 cup panko breadcrumbs
- 1 teaspoon paprika
- ½ teaspoon garlic powder
- ½ teaspoon fine salt
- ¼ teaspoon ground black pepper
- 1 –2 teaspoons neutral cooking oil for spraying
- Lemon wedges for serving (optional)
Instructions
- Prepare the shrimp: Thaw completely if frozen, drain, peel, and devein as needed. Pat thoroughly dry with paper towels.
- Prepare the coating: In a shallow bowl, combine the flour, paprika, garlic powder, salt, and black pepper. Beat the egg in a second bowl and place the panko breadcrumbs in a third.
- Bread the shrimp: Coat each shrimp lightly in seasoned flour, dip it into the egg, then press panko gently onto both sides.
- Preheat the air fryer: Preheat to 200°C (400°F) for approximately 3 minutes.
- Arrange the shrimp: Place the breaded shrimp in a single layer with space between each piece. Lightly spray the coating with cooking oil.
- Air fry: Cook at 200°C (400°F) for approximately 6–9 minutes, depending on shrimp size. Turn gently after 3–4 minutes.
- Check doneness: Confirm that the thickest shrimp reaches an internal temperature of 63°C (145°F). The flesh should be opaque and pearly, not translucent.
- Rest briefly: Transfer to a wire rack and rest for 1–2 minutes so steam can escape.
- Serve: Enjoy immediately with lemon wedges and your favorite dipping sauce.