This post may contains Amazon affiliate and other affiliate links. If you make a purchase through these links, I may earn a small commission at no extra cost to you. Your support helps me continue to provide quality content. I only recommend products I personally trust and believe will add value to your experience. For more details, please visit my Privacy Policy.
If there is one thing that can make a simple chicken dinner disappointing, it is dry, chewy chicken breast. I love how convenient boneless chicken breast is for quick lunches, meal prep, salads, and weeknight dinners, but getting it juicy and flavorful every single time can take a little practice. That is exactly why I keep coming back to this Air Fryer Juicy Boneless Chicken Breast recipe. It uses everyday seasonings, a little olive oil, and a straightforward cooking method to turn lean chicken into a delicious, versatile protein without standing over a hot stove.
The air fryer makes the process especially convenient. Once the chicken is seasoned and the air fryer is preheated, you can let the circulating hot air do most of the work. There is no need to heat a large oven or deal with a skillet full of oil. You get beautifully seasoned chicken with lightly golden edges and a tender center, ready to serve with your favorite sides or save for meals throughout the week.
What I particularly like about this recipe is how easily it fits into a low-carb or keto-friendly lifestyle. Chicken breast is naturally low in carbohydrates and high in protein, so you can pair it with leafy greens, roasted vegetables, cauliflower rice, or a creamy low-carb sauce. You can also slice it over a salad, tuck it into lettuce wraps, or serve it with eggs for a protein-rich breakfast.
And you do not need a complicated marinade or a long ingredient list to make it taste good. A balanced blend of garlic powder, onion powder, paprika, black pepper, and salt provides plenty of flavor while allowing the chicken to remain the star of the dish.
The secret is not simply cooking the chicken for a certain number of minutes. Thickness matters, air fryers cook differently, and the final internal temperature determines when the chicken is safely cooked. With a meat thermometer and a few simple techniques, you can make consistently juicy chicken without guessing.
Whether you are preparing dinner for your family, stocking your refrigerator with protein for the week, or looking for a dependable recipe to add to your keto rotation, this one deserves a place in your kitchen.
Why You’ll Love This Recipe
- 🍗 Juicy and tender: Cooking the chicken to the correct internal temperature helps prevent the dry, rubbery texture that nobody wants.
- ⏱️ Quick and convenient: The chicken cooks in approximately 12–18 minutes, depending on its thickness and your air fryer.
- 🧄 Big flavor from simple ingredients: Garlic, onion, paprika, and black pepper create a savory seasoning blend without complicated preparation.
- 🥗 Perfect for meal prep: Cook a few chicken breasts and use them in salads, bowls, wraps, and quick lunches.
- 🥑 Keto-friendly: The basic recipe contains virtually no carbohydrates, making it easy to fit into a low-carb meal plan.
- 💪 High in protein: Chicken breast provides lean protein to support everyday nutritional needs and muscle maintenance.
- 🍽️ Easy to customize: Change the spices, add herbs, or finish the chicken with a squeeze of lemon.
- 🧽 Less mess: You can cook everything in one air fryer basket, with minimal cleanup afterward.
- 👨🍳 Beginner-friendly: You do not need advanced cooking skills to get excellent results.
- 🌡️ Reliable results: Using a thermometer removes much of the guesswork from air fryer cooking.
My Personal Experience
Chicken breast is one of those ingredients that seems almost impossible to get wrong until you cut into it and discover that the center is dry. Because it is a lean cut, it does not have as much fat to help keep it moist during cooking as fattier pieces of meat do. A few extra minutes in the air fryer can make a noticeable difference.
My approach to cooking chicken breast is to focus on three things: even thickness, balanced seasoning, and temperature control.
First, I pay attention to the shape of the chicken. One end of a boneless breast is often much thicker than the other. If you cook it exactly as it comes from the package, the thin end may become overcooked before the thickest part reaches a safe temperature. Gently pounding the thicker section to create a more even piece helps the chicken cook more consistently.
Next comes the seasoning. I prefer a simple mixture of garlic powder, onion powder, paprika, salt, and black pepper. It gives the chicken a warm, savory flavor without overwhelming it. A little olive oil helps the seasonings adhere and encourages the outside to develop an appetizing golden color.
The final step is the one I consider most important: checking the temperature instead of relying only on the timer.
I use 375°F (190°C) as my starting cooking temperature and begin checking smaller chicken breasts around the 10–12-minute mark. Larger pieces may need longer. The goal is to reach 165°F (74°C) in the thickest part of the chicken, not to cook it for a predetermined amount of time regardless of size.
I also resist the temptation to cut the chicken immediately after cooking. Allowing it to rest for about five minutes makes it easier to slice and helps keep the meat moist.
These small details turn a basic ingredient into something you can confidently serve for dinner or prepare ahead for several meals. Once you understand how your own air fryer cooks, the recipe becomes even easier to repeat.
Required Equipment
Air Fryer
A basket-style or oven-style air fryer works well for this recipe. The important thing is to leave enough room around the chicken for hot air to circulate. If your appliance is small, cook the chicken in batches rather than crowding the basket.
Instant-Read Meat Thermometer
This is the most useful tool for avoiding undercooked or overcooked chicken. Insert the probe into the thickest part of the breast, approaching from the side if necessary to position the tip in the center.
Mixing Bowl
Use a medium-sized bowl to combine the oil and seasonings with the chicken. A bowl gives you enough space to coat every surface evenly.
Measuring Spoons
Measuring spoons help maintain a balanced seasoning blend. Once you know how much seasoning you enjoy, you can adjust the amounts to suit your taste.
Kitchen Tongs
Tongs make it easy to turn the chicken halfway through cooking without piercing it unnecessarily or touching the hot basket.
Cutting Board and Sharp Knife
A clean cutting board and sharp knife make trimming, portioning, and slicing the finished chicken easier. Use a separate board or thoroughly clean it after handling raw poultry.
Small Brush or Oil Sprayer
A food-safe brush or refillable oil sprayer helps distribute a thin layer of olive oil. Avoid aerosol sprays that may damage certain air fryer basket coatings.
Ingredients & Substitutions
This recipe makes four servings using four medium boneless, skinless chicken breasts. For consistent cooking, choose pieces of similar thickness whenever possible.
Boneless, Skinless Chicken Breasts — 4 pieces (about 680–800 g total)
Chicken breast is the main ingredient and provides the lean, protein-rich base of the recipe. Choose fresh chicken breasts that are similar in size.
Substitution: Boneless, skinless chicken thighs also work, although they are generally fattier and may need a different cooking time. Check their internal temperature rather than relying on the breast-cooking schedule.
Olive Oil — 1 tablespoon (15 ml)
Olive oil helps the seasoning stick to the chicken and encourages a lightly golden exterior. It also adds a little richness to an otherwise lean cut of meat.
Substitution: Avocado oil is an excellent alternative because it works well at air fryer temperatures. Another neutral cooking oil can also be used.
Garlic Powder — 1 teaspoon
Garlic powder gives the chicken a savory, aromatic flavor that works with almost any side dish.
Substitution: Granulated garlic can be used in the same amount. Fresh minced garlic is possible, but it can brown more quickly, so use a small amount and monitor the exterior.
Onion Powder — 1 teaspoon
Onion powder adds subtle sweetness and depth without introducing the moisture of fresh onion.
Substitution: Use a little less onion granules if they are particularly coarse.
Paprika — 1 teaspoon
Paprika provides a warm color and mild peppery flavor. Regular sweet paprika works particularly well for this everyday seasoning blend.
Substitution: Smoked paprika creates a deeper, smoky flavor. For a little more heat, try hot paprika.
Fine Salt — ¾ teaspoon, or to taste
Salt enhances the chicken’s natural flavor and balances the other seasonings. The exact amount can be adjusted depending on your dietary preferences and the size of the chicken breasts.
Substitution: Fine sea salt can be used. If using coarse kosher salt, adjust the quantity to account for differences in crystal size.
Black Pepper — ½ teaspoon
Black pepper adds a gentle bite and complements the garlic and paprika.
Substitution: Use freshly cracked pepper for a more pronounced peppery flavor, or reduce it if you prefer a milder seasoning.
Dried Italian Herbs — ½ teaspoon
A small amount of dried Italian herbs adds an optional herbal note that makes the chicken especially good for salads, pasta alternatives, and Mediterranean-inspired meals.
Substitution: Dried oregano, thyme, or rosemary can be used individually. If you prefer a very simple garlic-paprika chicken, leave the herbs out.
Lemon Juice — 1–2 teaspoons, Optional
A little lemon juice added after cooking brightens the flavor and balances the savory seasoning.
Substitution: Lime juice works well, or simply omit it if you prefer a neutral chicken flavor for meal prep.
Air-Fryer Notes
A few air fryer details can make the difference between evenly cooked, juicy chicken and a disappointing result.
Preheat the air fryer. Preheat to 375°F (190°C) for approximately 3–5 minutes, following your appliance’s instructions. A preheated basket helps the chicken begin cooking consistently.
Avoid overcrowding. Arrange the chicken in a single layer with space between each piece. Air needs to circulate around the meat, so cook in batches if necessary.
Use only a thin coating of oil. The chicken does not need to be dripping with oil. One tablespoon for four breasts is generally enough to help the seasoning adhere.
Flip halfway through cooking. Turn the chicken after approximately 6–8 minutes. The precise halfway point depends on the total cooking time.
Check the thickest part. Begin checking smaller pieces early, then continue cooking in short increments until the internal temperature reaches 165°F (74°C).
Do not rely on a high-heat finish for doneness. If you want more color, you can briefly increase the temperature toward the end, but keep monitoring the internal temperature. High heat cannot compensate for unevenly sized chicken breasts.
Rest before slicing. Transfer the cooked chicken to a clean plate and rest for approximately five minutes. Avoid leaving it in the hot air fryer basket, where residual heat may continue cooking it.
How to Make Juicy Air Fryer Boneless Chicken Breast
Follow these steps for tender chicken with a flavorful, lightly golden exterior.
Step 1: Prepare the Chicken
Pat the chicken breasts dry with paper towels. Removing excess surface moisture helps the oil and seasonings adhere more evenly.
Trim away any unwanted fat or connective tissue. If one end of a breast is much thicker than the other, place the chicken between two sheets of food-safe plastic wrap or parchment and gently pound the thicker section until the breast is approximately even in thickness.
Aim for roughly ¾–1 inch (2–2.5 cm) where practical. The pieces do not need to be perfectly flat, but avoiding extremely thick sections helps them cook more evenly.
Step 2: Preheat the Air Fryer
Set your air fryer to 375°F (190°C) and preheat it for 3–5 minutes, unless your appliance manual recommends a different procedure.
While it heats, prepare the seasoning. If your air fryer requires a different preheating routine, follow the manufacturer’s instructions.
Step 3: Mix the Seasonings
In a small bowl, combine the garlic powder, onion powder, paprika, salt, black pepper, and dried Italian herbs.
Stir until the mixture looks evenly blended. This prevents you from accidentally putting too much of one seasoning on a single chicken breast.
Step 4: Coat the Chicken
Place the chicken breasts in a mixing bowl. Add the olive oil and toss to coat each piece lightly.
Sprinkle the seasoning mixture over the chicken, turning the breasts so both sides are covered. Gently rub the seasoning over the surface and along the edges.
For a stronger flavor, let the seasoned chicken sit for 10–15 minutes in the refrigerator while you prepare your side dishes. Do not leave raw chicken at room temperature for an extended period.
Step 5: Arrange the Chicken in the Basket
Place the chicken breasts in the preheated air fryer basket in a single layer. Leave a little space between them, and make sure they are not overlapping.
If four breasts do not fit comfortably, cook two at a time. A less crowded basket generally produces more even results than trying to cook everything in one batch.
Step 6: Air Fry the First Side
Cook at 375°F (190°C) for approximately 6–8 minutes.
The exact time will depend on the size and thickness of the breasts and the strength of your air fryer. Thinner pieces may cook faster, so do not wait until the end of the full estimated time if the chicken is already close to done.
Step 7: Flip and Finish Cooking
Using tongs, carefully turn each breast over. Continue cooking for another 6–10 minutes, checking the thickest part with an instant-read thermometer.
For medium-sized breasts of reasonably even thickness, the total cooking time will often be around 12–18 minutes. Larger or thicker breasts may require longer, while thinner pieces may finish sooner.
The chicken is ready when the thickest part reaches 165°F (74°C). If it has not reached that temperature, continue cooking in 1–2-minute increments and check again.
Do not judge doneness by color alone. Chicken can look white on the outside while remaining undercooked in the center.
Step 8: Rest the Chicken
Transfer the chicken to a clean plate and let it rest for about five minutes.
This brief resting period gives you time to finish your sides and makes slicing easier. If desired, squeeze a little lemon juice over the chicken just before serving.
Step 9: Slice and Serve
Slice the chicken against the grain into strips, or serve each breast whole.
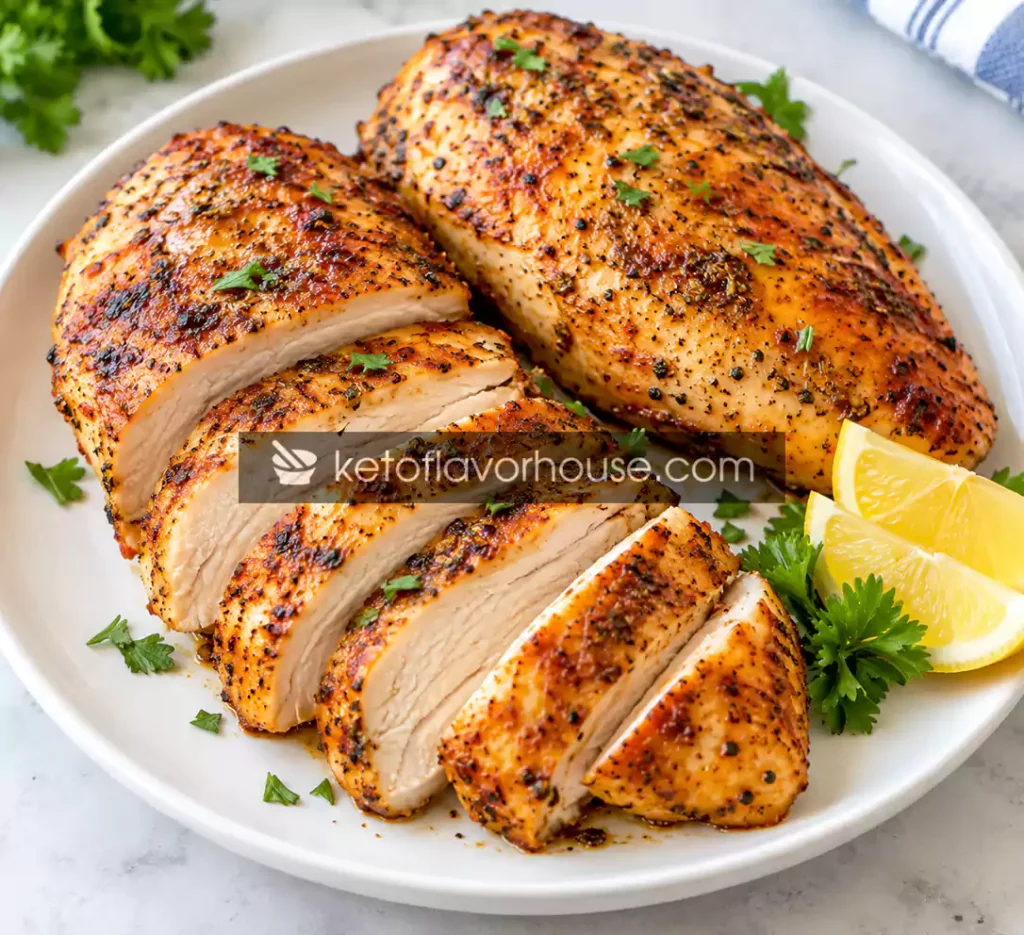
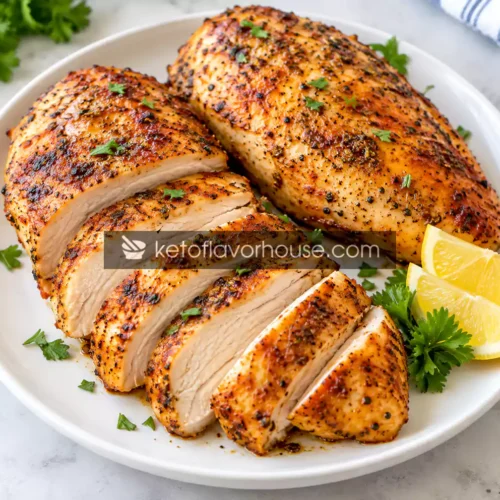
The finished chicken should be tender, juicy, and well seasoned, with a lightly golden exterior. Serve immediately with your favorite vegetables or save the cooled portions for meal prep.
Common Mistakes to Avoid
- Cooking by time alone: Air fryers and chicken breasts vary in size. Use an instant-read thermometer to verify 165°F (74°C).
- Skipping preheating: Starting with a cold basket can change the cooking time and make results less consistent.
- Crowding the basket: Overlapping chicken restricts airflow. Cook in batches when necessary.
- Using uneven chicken breasts: The thinner end may dry out before the thickest section cooks. Gently even out the thickness before seasoning.
- Using too much oil: Excess oil is unnecessary and can create a greasy surface. Use just enough to coat the chicken.
- Adding too much salt: Seasoning blends and different salt types vary. Measure carefully and adjust the next batch to taste.
- Cutting immediately: Slicing as soon as the chicken comes out can make serving messier. Allow it to rest for five minutes.
- Leaving the chicken in the hot basket: Residual heat may continue cooking the meat. Transfer it to a plate once it reaches the target temperature.
- Using contaminated utensils: Never place cooked chicken on the plate that held raw chicken unless the plate has been thoroughly washed.
- Overcooking during reheating: Cooked chicken needs only enough reheating to become hot throughout. Short intervals help prevent it from drying out.
Pro Tips for Best Results
Choose similarly sized breasts. This is one of the easiest ways to make the cooking process more predictable.
Pat the chicken dry before adding oil. Excess moisture can interfere with the development of a lightly golden exterior.
Season every surface. Remember the sides and thinner edges, not just the broad top and bottom.
Use a thermometer correctly. Insert the probe into the thickest portion and avoid touching the basket or passing completely through the meat.
Keep the seasoning flexible. Garlic, paprika, and pepper create a dependable base, but you can adjust the herbs and spices to match the rest of the meal.
Slice across the muscle fibers. Cutting against the grain shortens the muscle fibers and makes each bite easier to chew.
Store portions for different meals. Keep some breasts whole for dinner and slice others for salads, bowls, and wraps. This small step makes weekday meals easier to assemble.
Keep track of your air fryer. If your appliance consistently cooks quickly, begin checking earlier next time. Record the thickness and cooking time that produced your best results.
Air-Fryer Benefits of Chicken Breast
Chicken breast is naturally lean and protein-rich, making it a useful ingredient for a range of balanced eating patterns. The air fryer offers a convenient way to prepare it with a relatively small amount of added oil.
Unlike deep-frying, this recipe does not require submerging the chicken in oil. The hot circulating air cooks the meat while the light coating of oil helps the seasonings adhere and the exterior develop color.
There is also less equipment to clean than with some traditional cooking methods. For people who cook at home regularly, this can make preparing protein-rich meals feel more manageable.
The air fryer does not automatically make every meal healthier, and the final nutrition depends on the ingredients and portions. However, using lean chicken breast, a measured amount of olive oil, and a simple seasoning blend keeps this recipe straightforward and suitable for many low-carb meal plans.
Variations You Can Try
Lemon Garlic Chicken
Add extra garlic powder and finish the cooked chicken with fresh lemon juice. A little dried parsley adds a fresh herbal note.
Smoky Paprika Chicken
Replace the regular paprika with smoked paprika. Add a small pinch of cayenne if you enjoy a little heat.
Italian Herb Chicken
Increase the dried Italian herbs and add a pinch of dried oregano. This version pairs particularly well with zucchini, salad, and cauliflower rice.
Cajun-Style Chicken
Replace the original spice blend with a Cajun seasoning mix. Check its salt content before adding more salt, as many commercial blends are already salted.
Spicy Chili Chicken
Add chili powder or cayenne pepper to the garlic-paprika mixture. Start with a small amount and increase it according to your heat preference.
Chicken Thigh Variation
Boneless, skinless chicken thighs can replace chicken breasts. Their higher fat content gives them a different texture, so use a thermometer and expect the cooking time to vary.
Oven-Baked Version
Preheat a conventional oven to 400°F (200°C). Arrange the seasoned chicken on a baking tray and bake until the thickest portion reaches 165°F (74°C). Depending on thickness, this may take approximately 18–25 minutes, but begin checking early and use the thermometer rather than the estimated time.
Tips for This Recipe
If you are making this chicken for meal prep, start by deciding how you plan to use it. Whole breasts work well for dinner plates, while sliced chicken is easier to distribute across salads and bowls.
You can mix the dry seasonings ahead of time and keep them in a sealed container. This saves a few minutes whenever you need a quick meal.
For more even cooking, allow refrigerated chicken to sit out only briefly while you prepare the seasoning and preheat the air fryer. Do not leave raw poultry at room temperature for long periods.
If you need to cook multiple batches, remember that a hot air fryer may cook the second batch faster than the first. Begin checking early, and avoid assuming that every batch needs exactly the same number of minutes.
For serving, slice only the chicken you plan to eat immediately. Keeping the remaining breasts whole can help them retain moisture during storage.
Optional Additions
The basic recipe is intentionally simple, but a finishing sauce or a small extra seasoning can change its flavor without requiring a complete new recipe.
| Addition | Suggested amount | Approximate carb impact |
|---|---|---|
| Fresh lemon juice | 1–2 tsp | Less than 1 g |
| Chopped parsley | 1 tsp | Negligible |
| Smoked paprika | ¼–½ tsp | Usually less than 1 g |
| Cayenne pepper | A pinch | Negligible |
| Grated Parmesan | 1 tbsp | About 0–1 g |
| Sugar-free hot sauce | 1 tsp | Usually 0–1 g |
| Garlic butter | 1 tsp | Usually 0–1 g |
| Plain Greek yogurt dip | 2 tbsp | Often 1–3 g |
Carbohydrate estimates are approximate and depend on the specific brand and serving size. Check product labels when following a strict keto plan.
For a creamy dip, combine plain Greek yogurt with garlic powder, lemon juice, salt, and pepper. For a richer option, melt a small amount of butter with garlic and spoon it over the cooked chicken just before serving.
Serving Ideas
This chicken is versatile enough to serve in several different ways throughout the week.
- Keto dinner plate: Pair a whole chicken breast with roasted broccoli, sautéed mushrooms, or cauliflower mash.
- High-protein salad: Slice the chicken over lettuce, cucumber, tomatoes, avocado, and a low-carb dressing.
- Meal-prep bowl: Combine sliced chicken with cauliflower rice, roasted zucchini, and a spoonful of garlic yogurt sauce.
- Lettuce wraps: Add strips of chicken to crisp lettuce leaves with avocado, cheese, and a little hot sauce.
- Chicken and eggs: Serve leftover slices with scrambled or fried eggs for a filling breakfast.
- Low-carb lunch: Wrap the chicken in a low-carb tortilla with lettuce, cheese, and a creamy dressing.
- Family dinner: Serve it alongside potatoes, rice, or other favorite sides for anyone who does not follow a low-carb diet.
- Quick post-workout meal: Pair the chicken with a carbohydrate source and vegetables according to your individual nutritional needs.
Because the flavor is mild and savory, you can change the sides without needing to change the chicken recipe itself.
Storage & Reheating
Refrigerator
Allow the chicken to cool promptly, then transfer it to a clean, airtight container. Refrigerate within two hours of cooking, or within one hour if the surrounding temperature is above 90°F (32°C).
Properly refrigerated cooked chicken generally keeps for 3–4 days.
For the best texture, store the breasts whole and slice them when you are ready to eat. You can add a teaspoon of water or a little broth to the container before reheating to help prevent the chicken from drying out.
Freezer
For longer storage, freeze the cooked chicken in airtight freezer-safe containers or bags. Separate individual portions so you can thaw only what you need.
For best quality, use within approximately 2–3 months. Frozen food remains safe longer when continuously stored at 0°F (-18°C), but texture and flavor may gradually decline.
Thaw frozen chicken in the refrigerator rather than on the counter.
Reheating in the Air Fryer
- Preheat the air fryer to 325°F (163°C).
- Place the chicken in a single layer.
- Reheat for approximately 3–6 minutes for sliced pieces or 5–8 minutes for a whole breast, depending on thickness.
- Turn the chicken if necessary and check that it reaches 165°F (74°C) throughout when reheating leftovers.
- Remove promptly once hot to avoid unnecessary moisture loss.
These are starting estimates rather than guarantees. Very thick pieces or cold, dense portions may take longer.
You can also reheat the chicken in a covered skillet with a splash of broth or water. Avoid repeatedly reheating the same portion; take out only what you intend to eat.
Frequently Asked Questions
1. How long does boneless chicken breast take in the air fryer?
At 375°F (190°C), medium-sized boneless chicken breasts often take about 12–18 minutes in total. Thickness, starting temperature, and the air fryer model all affect cooking time. Flip halfway through and check the thickest part with a meat thermometer.
2. What temperature should chicken breast reach?
Chicken breast should reach an internal temperature of 165°F (74°C) in its thickest part. A thermometer is the most dependable way to verify doneness. Do not rely only on the outside color or the number of minutes it has cooked.
3. Should I flip chicken breast in the air fryer?
Yes, flipping halfway through is a useful way to encourage more even browning and cooking. Some air fryers circulate air very effectively, but turning the chicken is still a practical approach for this recipe.
4. How do I keep air fryer chicken breast from drying out?
Choose similarly sized pieces, even out unusually thick sections, use a light coating of oil, and avoid cooking beyond the required internal temperature. Let the chicken rest for about five minutes before slicing.
5. Can I cook frozen boneless chicken breasts?
Yes, but frozen chicken needs a different method and often takes longer. For the most even results, thaw the breasts in the refrigerator first. If cooking from frozen, follow your air fryer’s guidance for frozen poultry, cook until the thickest section reaches 165°F (74°C), and do not assume the fresh-chicken timing applies.
6. Is this air fryer chicken breast recipe keto-friendly?
Yes. Chicken, olive oil, and the listed dried seasonings contain very few carbohydrates. The recipe is suitable for many keto meal plans, although your total meal carbohydrates will depend on the sides, sauces, and specific products you use.
7. Can I make this chicken ahead of time?
Absolutely. Cook the chicken, cool it promptly, and refrigerate it in an airtight container for 3–4 days. Use the portions in salads, lettuce wraps, meal-prep bowls, or quick dinners. Reheat leftovers to 165°F (74°C) and avoid heating them longer than necessary.
Nutritional Breakdown (Per Serving)
The following estimates assume four servings made with 680–800 g of raw boneless, skinless chicken breast, one tablespoon of olive oil, and the listed seasonings. Actual values vary with the weight and brand of chicken and how much oil remains on the food.
| Nutrient | Approximate amount |
|---|---|
| Calories | 230–270 kcal |
| Protein | 40–45 g |
| Total fat | 6–9 g |
| Total carbohydrates | 1–2 g |
| Fiber | 0–1 g |
| Net carbohydrates | 1–2 g |
Net carbohydrates are calculated by subtracting fiber from total carbohydrates. These estimates are for the chicken recipe alone, without optional sauces or side dishes.
Recipe Snapshot
Recipe Name: Juicy Air Fryer Boneless Chicken Breast
Prep Time: 10 minutes
Cook Time: 12–18 minutes
Rest Time: 5 minutes
Total Time: Approximately 27–33 minutes
Course: Main Course
Cuisine: American
Servings: 4
Calories: Approximately 230–270 per serving
Cooking Temperature: 375°F (190°C)
Internal Temperature: 165°F (74°C)
Dietary Notes: High-protein, low-carb, keto-friendly, gluten-free when all ingredients are certified gluten-free.
Juicy Air Fryer Boneless Chicken Breast Recipe

Ingredients
- 4 boneless skinless chicken breasts (680–800 g total)
- 1 tablespoon olive oil
- 1 teaspoon garlic powder
- 1 teaspoon onion powder
- 1 teaspoon paprika
- ¾ teaspoon fine salt or to taste
- ½ teaspoon black pepper
- ½ teaspoon dried Italian herbs
- 1 –2 teaspoons fresh lemon juice optional
Instructions
- Pat the chicken breasts dry with paper towels. Trim as needed and gently pound unusually thick sections to create a more even thickness.
- Preheat the air fryer to 375°F (190°C) for 3–5 minutes, following the appliance instructions.
- Combine the garlic powder, onion powder, paprika, salt, black pepper, and dried Italian herbs in a small bowl.
- Toss the chicken with olive oil, then coat both sides evenly with the seasoning mixture.
- Arrange the chicken in a single layer in the air fryer basket, leaving space between the pieces.
- Air fry at 375°F (190°C) for 6–8 minutes.
- Flip the chicken and cook for another 6–10 minutes, checking the thickest part with an instant-read thermometer. Cooking time varies with thickness and appliance performance.
- Remove each breast when it reaches an internal temperature of 165°F (74°C). If necessary, continue cooking in 1–2-minute increments until it reaches the target temperature.
- Rest the chicken on a clean plate for 5 minutes. Finish with optional lemon juice, slice against the grain, and serve.