This post may contains Amazon affiliate and other affiliate links. If you make a purchase through these links, I may earn a small commission at no extra cost to you. Your support helps me continue to provide quality content. I only recommend products I personally trust and believe will add value to your experience. For more details, please visit my Privacy Policy.
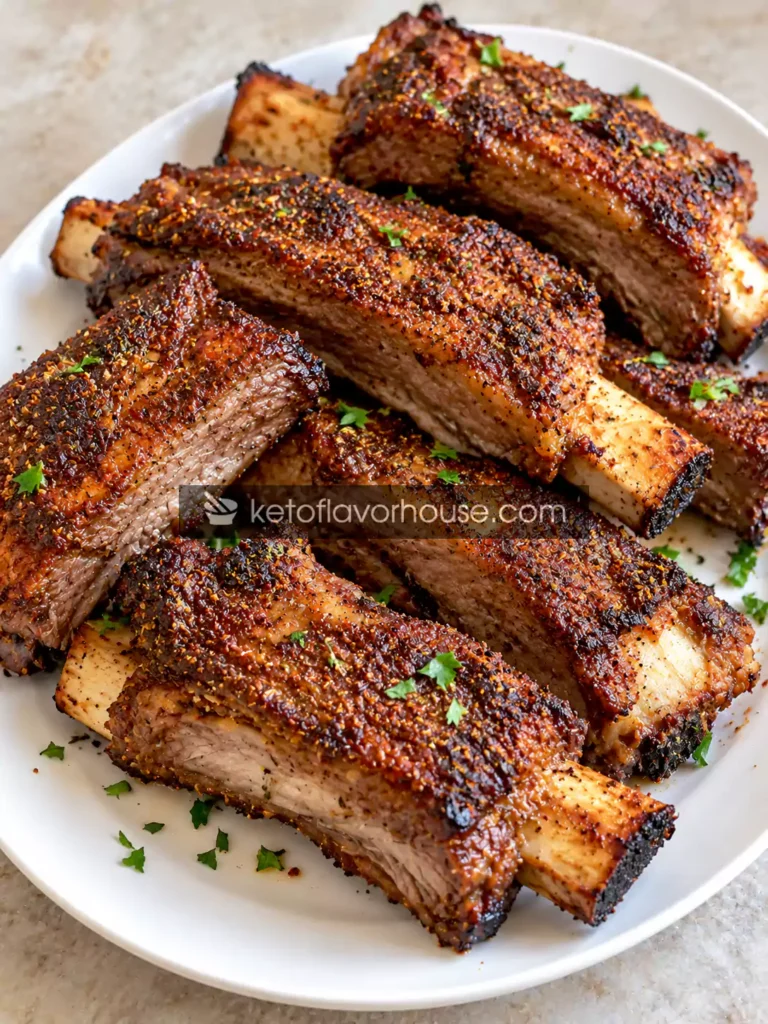
These Air Fryer Dry Rub Ribs recipe are all about getting deeply seasoned, tender beef ribs with a deliciously browned exterior without spending hours tending a grill or heating up the kitchen. A bold homemade dry rub brings together smoky paprika, garlic, onion, and a touch of brown sugar for a savory-sweet crust, while the air fryer makes this comfort-food favorite convenient enough for an ordinary weeknight.
For this KetoFlavorHouse version, I’m using beef ribs, not pork ribs, with a flavorful dry seasoning blend and no barbecue sauce required. The goal is ribs that are juicy inside, richly seasoned throughout, and nicely browned on the outside. You can serve them as they are or add a low-carb dipping sauce if you prefer.
One important thing about ribs: they’re a tougher cut of meat, and getting them genuinely tender requires more than simply browning the outside. The result depends on the cut, thickness, and how much connective tissue it contains. This recipe uses a covered cooking stage to help the ribs soften before finishing them uncovered for color. If your air fryer cannot safely accommodate a covered cooking vessel, use the alternative covered-oven method described below rather than improvising with foil in the basket.
Why You’ll Love This Recipe
- 🍖 Big flavor without barbecue sauce: The dry rub delivers smoky, savory flavor with a touch of sweetness.
- 🔥 A beautifully browned finish: An uncovered finishing stage helps develop a delicious exterior.
- 🧄 Easy homemade seasoning: Everyday spices create a balanced blend without needing a bottled rub.
- 🥩 Beef-based recipe: This version avoids pork and uses beef ribs for a rich, hearty meal.
- 🥗 Easy to pair with low-carb sides: Serve the ribs with cauliflower mash, a crisp salad, or roasted vegetables.
- ⏱️ Less hands-on cooking: Once the ribs are seasoned and cooking, you have time to prepare the rest of the meal.
- 🍽️ Flexible for different occasions: They’re suitable for family dinners, game-day spreads, or casual weekend meals.
My Personal Experience
The biggest lesson with ribs is that a browned exterior doesn’t automatically mean tender meat. Ribs can look ready on the outside while still being chewy around the bone, especially when they’re cooked quickly at a high temperature.
That’s why I approach air fryer ribs in two stages. First, I focus on cooking the meat gently enough to give the connective tissue time to soften. Then I finish the ribs uncovered to deepen the color and help the seasoning form a more appealing crust.
I also like making my own dry rub instead of relying on a premixed seasoning. It gives me control over the salt, sweetness, and heat. Smoked paprika adds a barbecue-style aroma, garlic and onion bring savory depth, and black pepper provides a gentle bite. A small amount of brown sugar helps with browning, but you can leave it out or use a suitable alternative if you want to reduce added sugar.
Another thing worth mentioning is that beef ribs vary considerably. Short ribs are thick and meaty, while back ribs can have less meat between the bones. A recipe that works well for one cut may need a different cooking time for another. For that reason, I recommend checking tenderness rather than relying only on the clock.
The approach below is designed to help you achieve flavorful ribs without unnecessary guesswork. Give them enough time to soften, finish them uncovered, and let them rest briefly before serving. Those small steps make a noticeable difference.
Required Equipment
Air Fryer
A basket-style or oven-style air fryer works for the final browning stage. Choose one large enough to hold the ribs in a single layer without overcrowding.
Oven and Baking Dish
For reliably tender beef ribs, a conventional oven and a covered baking dish are useful for the initial slow-cooking stage. The air fryer then finishes the ribs with a browned, flavorful exterior.
Mixing Bowl
Use a medium bowl to combine the dry rub. Mixing the spices before applying them helps distribute the flavor evenly.
Measuring Spoons
Accurate measurements help balance the smoked paprika, garlic, salt, pepper, and optional brown sugar.
Sharp Knife and Cutting Board
Use these to separate the ribs if they’re attached in a rack. Keep raw meat and its juices away from ready-to-eat foods.
Kitchen Tongs
Tongs make it easier to turn the ribs during cooking and transfer them without piercing the meat repeatedly.
Instant-Read Meat Thermometer
A thermometer helps you check food safety and monitor doneness. Whole cuts of beef should reach at least 145°F (63°C), followed by a 3-minute rest for minimum food safety. However, ribs typically need a higher temperature and additional time to become tender.
Aluminum Foil or a Lid for the Baking Dish
Use foil or a suitable oven-safe lid to cover the ribs during the initial oven stage. The covered dish traps moisture and helps the meat soften. Do not place loose foil in an air fryer basket, where circulating air can lift it toward the heating element.
Pastry Brush (Optional)
A small brush is handy if you decide to apply a thin layer of oil or sauce before the final browning stage.
Ingredients & Substitutions
This recipe makes approximately 3 servings using meaty beef ribs. The final yield depends on the amount of bone and the cut you buy.
For the Beef Ribs
- 2 pounds (900 g) beef ribs: Choose meaty beef back ribs or smaller beef short ribs cut into individual portions. Beef ribs are the main ingredient and provide the rich, savory flavor this recipe is built around.
- 1 tablespoon olive oil or avocado oil: Helps the dry rub adhere and encourages browning. Use a neutral oil if you prefer.
- 1 tablespoon apple cider vinegar (optional): Adds a little acidity to the covered cooking liquid. It won’t make tough ribs tender on its own, but it can brighten the overall flavor.
- ½ cup (120 ml) low-sodium beef broth or water: Used in the covered oven stage to create a moist cooking environment. It should sit beneath the ribs rather than wash away the rub.
For the Homemade Dry Rub
- 2 teaspoons smoked paprika: Adds a smoky, barbecue-style flavor and rich color. Sweet paprika can be substituted, although the smoky character will be milder.
- 1 teaspoon garlic powder: Provides savory depth without adding moisture.
- 1 teaspoon onion powder: Rounds out the seasoning and complements the beef.
- 1 teaspoon fine salt: Enhances the meat’s natural flavor. Reduce this amount if your ribs have already been salted or you’re watching sodium intake.
- 1 teaspoon freshly ground black pepper: Adds gentle heat and a slightly earthy bite.
- ½ teaspoon ground cumin: Gives the rub a warm, earthy background note.
- ½ teaspoon chili powder: Adds mild warmth. Choose a mild blend if you’re serving people who prefer less heat.
- ½ teaspoon dried oregano: Provides a subtle herbal note.
- 1 teaspoon brown sugar (optional): Helps the rub brown and adds a hint of sweetness. Leave it out for a lower-sugar version.
- ¼ teaspoon cayenne pepper (optional): Use this if you like a spicier finish.
Ingredient Substitutions
For a lower-carb rub: Omit the brown sugar. The paprika, garlic, onion, cumin, and pepper still provide plenty of flavor. A sugar substitute designed for cooking can be tested, but it may brown differently.
For less heat: Leave out the cayenne and use mild chili powder. You can also reduce the black pepper slightly.
For a stronger smoky flavor: Use a little extra smoked paprika, but avoid adding so much that it overwhelms the other spices.
For a salt-free version: Leave out the salt in the rub and season to taste at the table. Remember that the broth and any dipping sauce may also contain sodium.
For different beef rib cuts: Meaty back ribs and short ribs can both work, but thick short ribs generally require more time to become tender. Check the meat rather than treating all rib cuts as interchangeable.
Air-Fryer Notes
Because beef ribs are a collagen-rich cut, this recipe uses the oven for the tenderizing stage and the air fryer for the finishing stage. This gives you the convenience of an air-fried exterior without relying on a short, high-temperature cook to soften tough meat.
- Air fryer preheating: Preheat to 390°F (200°C) for about 3 minutes before finishing the ribs.
- Initial cooking: Cook the ribs covered in the oven at 300°F (150°C) until the meat is tender. Allow approximately 1½–2½ hours, depending on cut and thickness.
- Basket spacing: Arrange the ribs in a single layer with room for air to circulate around each piece.
- Oil spray: A light coating of oil can encourage browning, but too much may make the exterior greasy.
- Flipping: Turn the ribs halfway through the air-fryer finishing stage so both sides develop color.
- Finishing heat: Use 390°F (200°C) for approximately 4–8 minutes, checking frequently to avoid burning the spices.
- Internal temperature: Food safety and tenderness are different considerations. The minimum safe temperature for whole beef cuts is 145°F (63°C) with a 3-minute rest, but ribs often become tender closer to 195–205°F (91–96°C). Use temperature as a guide alongside actual tenderness.
- No forced fit: If your ribs don’t fit comfortably, finish them in batches. Crowding can cause uneven browning.
How to Make Air Fryer Dry Rub Ribs (Tender, Juicy & Flavorful)
Step 1: Prepare the Beef Ribs
Pat the beef ribs dry with paper towels. If the ribs are in a rack, cut between the bones to separate them into individual portions, provided the cut and bone structure allow it.
If the ribs have a thick, hard layer of surface fat, trim away some of it while leaving enough to protect the meat during cooking.
Drying the surface helps the oil and seasoning cling to the ribs. It also reduces excess surface moisture, which can interfere with browning later.
Step 2: Mix the Dry Rub
Add the smoked paprika, garlic powder, onion powder, salt, black pepper, cumin, chili powder, oregano, optional brown sugar, and cayenne to a bowl.
Stir until the spices are evenly blended and no large clumps remain.
Taste a tiny pinch of the seasoning before it touches the raw meat. Adjust the salt or heat if needed. Remember that the seasoning will be distributed across 2 pounds of beef, so it should taste bold without being overwhelmingly salty.
Step 3: Season the Ribs
Place the ribs in a large bowl. Drizzle with the olive oil and turn them to coat lightly.
Sprinkle the dry rub over all sides of the meat, rubbing it gently into the surface and around the exposed edges. Try to coat the meat evenly rather than allowing all the seasoning to collect on one side.
For better flavor, refrigerate the seasoned ribs for 30 minutes to 12 hours in a covered container. If you’re short on time, you can cook them immediately.
Keep raw beef refrigerated while it rests with the rub.
Step 4: Prepare the Covered Cooking Stage
Preheat a conventional oven to 300°F (150°C).
Arrange the seasoned ribs in a suitable baking dish. Pour the beef broth or water into the bottom of the dish, along with the optional apple cider vinegar. Avoid pouring the liquid directly over the tops of the ribs, as this can wash off the rub.
Cover the dish tightly with foil or an oven-safe lid.
The liquid creates a moist environment while the low oven temperature gives the connective tissue time to soften. This is particularly important for beef short ribs, which can remain chewy if cooked only briefly at a high temperature.
Step 5: Cook Until Tender
Place the covered dish in the oven and cook for approximately 1½–2½ hours. Start checking after 90 minutes, but expect thicker short ribs to need additional time.
Carefully uncover the dish to check the ribs. Steam will escape, so keep your face and hands away from the opening.
The meat should be noticeably tender, and a probe or skewer should slide into the thickest section with relatively little resistance. If it still feels tight or chewy, cover the dish again and continue cooking in 20–30-minute increments.
The ribs should reach at least the minimum safe temperature for beef, but tenderness is the more useful indicator for this collagen-rich cut. Many ribs become tender around 195–205°F (91–96°C), although the exact temperature varies.
Step 6: Prepare the Air Fryer
Once the ribs are tender, remove them from the oven and carefully uncover the dish. Transfer the ribs to a plate or tray using tongs.
Let excess liquid drain from the surface. You want the ribs moist but not dripping before they go into the air fryer.
Preheat the air fryer to 390°F (200°C) for approximately 3 minutes, following your model’s instructions.
If the ribs are very wet, gently blot the surface with a clean paper towel. Don’t rub away the seasoning crust.
Step 7: Air Fry for a Browned Finish
Place the ribs in the air fryer basket in a single layer, leaving space between the pieces. Work in batches if necessary.
Air fry at 390°F (200°C) for 4 minutes. Turn the ribs with tongs and cook for another 2–4 minutes, watching carefully as the seasoning darkens.
The goal is a browned, flavorful exterior, not a hard or burnt crust. If you used brown sugar, the rub may darken faster, so begin checking after the first few minutes.
If the ribs are already tender but need more color, add another minute or two at a time rather than extending the cook blindly.
Step 8: Rest and Serve
Transfer the ribs to a clean plate and let them rest for approximately 3–5 minutes.
Taste a small piece and adjust the seasoning if needed. A little freshly ground black pepper or a pinch of smoked paprika can brighten the flavor just before serving.
Arrange the ribs on a platter and serve while warm. A creamy cauliflower mash, crisp salad, or roasted green beans makes a good accompaniment.
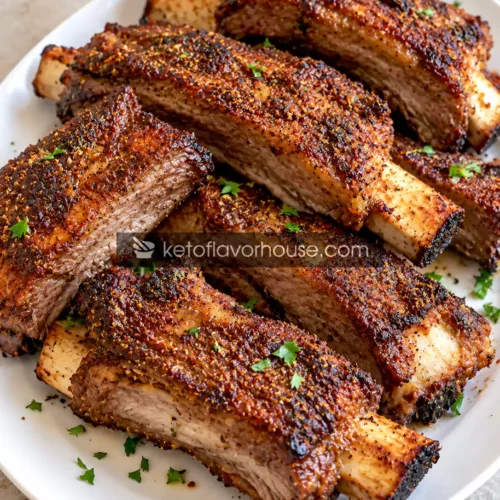
The finished ribs should have a richly seasoned exterior, tender meat, and enough moisture to keep each bite satisfying.
Common Mistakes to Avoid
- Cooking the ribs at high heat from start to finish: This can brown the exterior while leaving the meat tough. Tenderize the ribs first, then use the air fryer for browning.
- Choosing ribs without checking the cut: Thick short ribs and thinner back ribs cook differently. Adjust the covered cooking time according to the meat’s thickness.
- Applying the rub to wet meat: Excess moisture makes the seasoning harder to distribute and can interfere with the final crust. Pat the ribs dry first.
- Adding too much liquid over the meat: Pour the broth into the bottom of the baking dish, not directly over the seasoning.
- Skipping the tenderness check: A thermometer is useful, but temperature alone doesn’t guarantee that collagen-rich ribs are tender. Check how easily a probe enters the meat.
- Overcrowding the air fryer: Stacking ribs restricts airflow and produces uneven browning. Cook in batches when necessary.
- Burning the seasoning during finishing: Paprika and optional sugar can darken quickly. Keep the final air-fryer stage short and inspect the ribs frequently.
- Using loose foil in the air fryer: Loose foil can be pulled toward the heating element. Keep the covered cooking stage in the oven and use the air fryer only for uncovered finishing.
- Serving immediately without resting: A short rest gives the meat time to settle and makes it easier to handle.
Pro Tips for Best Results
Choose meaty ribs. Look for pieces with a reasonable amount of meat around the bones. Very thin ribs may dry out more easily during the finishing stage.
Season ahead when possible. Letting the dry rub sit on the beef for a few hours helps the seasoning flavor the surface. Keep the meat refrigerated during this time.
Use smoked paprika for depth. It provides a smoky note without requiring a smoker or bottled barbecue sauce.
Control the sweetness. The brown sugar is optional. Leaving it out makes the rub less sweet and reduces the added sugar, although the paprika and onion powder still contain small amounts of naturally occurring carbohydrates.
Save the cooking juices. If the juices are flavorful, you can skim off excess fat and simmer a small amount in a saucepan to make a savory accompaniment. Handle and store them safely.
Finish in batches. If you’re cooking more ribs than fit in one layer, keep the first batch warm in a low oven while the remaining ribs brown. Avoid leaving cooked meat at room temperature for extended periods.
Don’t rely on a rigid cooking time. Beef ribs differ in thickness, and the collagen content varies. Check tenderness during the covered stage and color during the air-fryer stage.
Rest before serving. A few minutes of resting makes the ribs easier to handle and gives you time to finish the sides.
Air-Fryer Benefits of Beef Ribs
Beef ribs contain protein, iron, zinc, and vitamin B12. They also provide fat, with the amount depending on the cut and how much surface fat is trimmed before cooking.
Using an air fryer for the finishing stage offers several practical advantages:
- Focused browning: Circulating hot air helps develop a browned exterior without requiring a grill.
- Convenient finishing: You can brown a small batch of ribs without heating a large oven again.
- Less added oil: The ribs generally need only a small amount of oil because the meat already contains fat.
- Flexible portioning: Individual ribs are easy to divide among servings.
The air fryer does not automatically make beef ribs low-calorie or low-fat. The nutrition depends on the cut, the amount of fat eaten, the seasoning, and the serving size. The dry rub itself can be relatively low in carbohydrates when the optional brown sugar is omitted.
Variations You Can Try
Spicy Chili Dry Rub
Increase the cayenne pepper to ½ teaspoon and add a little extra black pepper. This variation works well if you like a more pronounced heat.
Garlic and Herb Ribs
Increase the garlic powder slightly and add extra dried oregano or thyme. This creates a savory, herb-forward flavor without making the ribs sweet.
Sugar-Free Dry Rub
Leave out the brown sugar and check the labels on your spices to make sure there are no added sugars. The result will be less sweet, but the paprika, garlic, onion, and cumin still deliver plenty of flavor.
Smoky Pepper Ribs
Use smoked paprika and freshly cracked black pepper as the dominant flavors. Keep the cumin and chili powder modest for a more straightforward smoky profile.
Beef Back Ribs
Beef back ribs often have less meat between the bones than short ribs. They can work well, but begin checking tenderness earlier and adjust the covered cooking time to the size of the pieces.
Oven-Only Version
If you don’t want to use an air fryer, cook the covered ribs at 300°F (150°C) until tender, then uncover them and raise the oven temperature to 425°F (220°C) for approximately 8–12 minutes to brown the exterior. Watch carefully to prevent the rub from burning.
Tips for This Recipe
- Make the rub in advance: Mix a larger batch of the dry spices and store it in an airtight container. Label it with the date and ingredients.
- Prepare the ribs ahead: Season the beef and refrigerate it for several hours before cooking.
- Cook according to the cut: Use the estimated times as a starting point, not a strict deadline.
- Keep the finishing stage short: The meat should already be tender before it enters the air fryer.
- Serve immediately after resting: The browned exterior is most appealing soon after finishing.
- Keep the sauce separate: Serving a dipping sauce on the side helps preserve the dry rub’s texture.
- Adjust the salt thoughtfully: If you use salty broth or a seasoned commercial rub, reduce the added salt accordingly.
- Use a clean serving plate: Never return cooked ribs to a plate that held raw beef unless it has been thoroughly washed.
Optional Additions
These additions let you customize the flavor without changing the basic method. Carbohydrate amounts depend on the brand and quantity used.
- Sugar-free barbecue sauce: Adds a familiar barbecue flavor. Check the nutrition label, since some products contain more carbohydrates than others.
- Garlic butter: A small amount brushed on after cooking adds richness but also increases the fat and calorie content.
- Fresh lemon juice: A squeeze adds brightness with very little carbohydrate.
- Chimichurri: A parsley, garlic, vinegar, and olive oil sauce adds freshness and generally contributes few carbohydrates in a small serving.
- Hot sauce: Adds heat, usually with very little carbohydrate, although sweetened varieties can contain added sugar.
- Extra smoked paprika: Deepens the smoky flavor with a negligible carbohydrate contribution in the small quantity used.
- Chopped fresh parsley: Adds color and a fresh herbal finish with minimal carbohydrates.
- Creamy garlic dip: A mayonnaise- or sour-cream-based dip complements the savory rub. Check the ingredient label and serving size for carbohydrates.
- Brown sugar glaze: A small glaze adds sweetness and shine, but increases the sugar and carbohydrate content. Apply it only during the last minute or two of finishing to reduce the risk of burning.
For a lower-carb plate, choose a sugar-free sauce or serve the ribs with lemon, herbs, and a simple garlic dip.
Serving Ideas
These ribs are hearty enough to be the main event, so I like pairing them with sides that balance their rich flavor.
- Cauliflower mash: Creamy and comforting, with fewer carbohydrates than traditional mashed potatoes when prepared without added starch.
- Roasted green beans: Their fresh, slightly crisp texture complements the tender beef.
- Cabbage slaw: A tangy vinegar-based slaw cuts through the richness of the ribs.
- Garden salad: Lettuce, cucumber, tomato, and a simple dressing make an easy side.
- Roasted broccoli: Garlic-seasoned broccoli adds texture and a savory flavor.
- Air fryer zucchini: A quick vegetable side that can be seasoned with salt, pepper, and paprika.
- Pickles and sliced onions: Their acidity provides a refreshing contrast to the rich meat.
For a casual gathering, arrange the ribs on a platter with small bowls of dipping sauce. For a weeknight dinner, keep things simple with one vegetable side and a salad.
Storage & Reheating
Refrigerator Storage
Allow the ribs to cool slightly, then transfer them to a shallow, airtight container. Refrigerate within 2 hours of cooking, or within 1 hour if the surrounding temperature exceeds 90°F (32°C).
Store at 40°F (4°C) or below and eat within 3–4 days.
If you have leftover cooking juices, store them separately in a covered container.
Freezer Storage
For longer storage, freeze the cooked ribs in airtight, freezer-safe packaging for approximately 2–3 months for best quality. Remove as much excess air as practical to help prevent freezer burn.
Label the package with the date. Thaw the ribs in the refrigerator rather than on the kitchen counter.
Reheating in the Air Fryer
- Preheat the air fryer to 350°F (175°C) for approximately 3 minutes.
- Place the refrigerated ribs in the basket in a single layer.
- Heat for approximately 5–8 minutes, turning halfway through.
- Check the center of the meat with a thermometer. Reheated leftovers should reach 165°F (74°C).
- If the ribs begin browning too quickly, reduce the temperature slightly and continue until heated through.
The time will vary with the size of the ribs and how cold they are when they go into the basket.
Can You Reheat Frozen Ribs?
For the most even result, thaw them in the refrigerator first. You can then follow the air-fryer reheating instructions above. Avoid leaving ribs at room temperature to thaw.
Frequently Asked Questions
1. Can I cook beef ribs entirely in the air fryer?
You can cook some smaller, thinner beef ribs entirely in an air fryer, but thick beef ribs are difficult to tenderize reliably in a short cooking cycle. This recipe uses a covered oven stage to soften the meat before air frying it for color. If you want an all-air-fryer method, the cooking time and results will depend heavily on the cut and your appliance.
2. What temperature should I use for air fryer dry rub ribs?
For this recipe, use 390°F (200°C) for 4–8 minutes to brown the already-tender ribs. The initial covered cooking stage is done in a conventional oven at 300°F (150°C). This two-stage approach helps avoid burning the rub while the meat is still tough.
3. What internal temperature should beef ribs reach?
For food safety, whole cuts of beef should reach at least 145°F (63°C) followed by a 3-minute rest. However, beef ribs usually need additional cooking to become tender. A range around 195–205°F (91–96°C) is a useful tenderness guide, but check that a probe slides into the meat easily.
4. Can I make these ribs without brown sugar?
Yes. Simply omit it from the dry rub. The seasoning will be less sweet, but smoked paprika, garlic, onion, cumin, and black pepper still provide plenty of flavor. Removing the brown sugar also reduces the amount of added sugar in the recipe.
5. Do I need to boil the ribs before air frying?
No. Boiling isn’t necessary for this method. The covered oven stage provides a controlled way to soften the ribs while retaining their flavor. You can use another suitable tenderizing method if you prefer, but adjust the cooking time to the cut.
6. Why are my beef ribs still tough?
They probably need more time to soften. Beef ribs contain connective tissue that requires prolonged cooking to become tender. Return them to the covered oven dish with some liquid and continue cooking in 20–30-minute increments until a probe enters easily.
7. Are air fryer dry rub ribs keto-friendly?
They can fit into a low-carb eating pattern, especially when the optional brown sugar is omitted and you choose a sauce without added sugar. However, the exact carbohydrate content depends on the seasoning quantities, cut of beef, and any sauces or sides. Calculate the nutrition using the ingredients and portions you actually use.
Nutritional Breakdown (Per Serving)
Estimated values for 1 of 3 servings, using beef ribs, the dry rub, and a modest amount of oil. Actual nutrition can vary substantially with the cut and amount of fat consumed.
| Nutrient | Approximate amount |
|---|---|
| Calories | 650 kcal |
| Protein | 48 g |
| Total fat | 48 g |
| Total carbohydrates | 5 g |
| Fiber | 1 g |
| Net carbohydrates | 4 g |
| Sugar | 2 g |
| Saturated fat | 18 g |
These estimates are illustrative, not laboratory-tested values. Beef ribs vary considerably in their meat-to-bone ratio and fat content, so weigh the edible portion for a more accurate calculation. The optional brown sugar, broth, and sauces can also change the totals.
For a lower-carbohydrate version, omit the brown sugar and use a sauce without added sugar. Remember that the ribs’ calorie and fat content will still depend primarily on the beef cut and portion size.
Recipe Snapshot
- Recipe name: Air Fryer Dry Rub Ribs
- Prep time: 15 minutes
- Optional seasoning time: 30 minutes to 12 hours
- Covered cooking time: 1½–2½ hours
- Air fryer finishing time: 6–8 minutes
- Resting time: 3–5 minutes
- Total active and cooking time: Approximately 2 hours to 3 hours
- Total time with resting: Approximately 2 hours 5 minutes to 3 hours 5 minutes
- Course: Main course
- Cuisine: American-inspired
- Cooking method: Oven tenderizing and air fryer finishing
- Servings: 3
- Main ingredient: Beef ribs
- Air fryer temperature: 390°F (200°C)
- Initial oven temperature: 300°F (150°C)
- Minimum safe temperature for whole beef cuts: 145°F (63°C), followed by a 3-minute rest
- Typical tenderness target for ribs: Approximately 195–205°F (91–96°C), checking tenderness as well
- Calories: Approximately 650 per serving
- Net carbohydrates: Approximately 4 g per serving, estimated
Air Fryer Dry Rub Ribs Recipe

Ingredients
For the ribs
- 2 pounds 900 g beef ribs
- 1 tablespoon olive oil or avocado oil
- 1 tablespoon apple cider vinegar optional
- ½ cup 120 ml low-sodium beef broth or water
For the dry rub
- 2 teaspoons smoked paprika
- 1 teaspoon garlic powder
- 1 teaspoon onion powder
- 1 teaspoon fine salt
- 1 teaspoon freshly ground black pepper
- ½ teaspoon ground cumin
- ½ teaspoon chili powder
- ½ teaspoon dried oregano
- 1 teaspoon brown sugar optional
- ¼ teaspoon cayenne pepper optional
Instructions
- Prepare the ribs: Pat the beef ribs dry with paper towels. Separate them into individual portions if needed and trim away any excessive surface fat.
- Mix the rub: Combine the smoked paprika, garlic powder, onion powder, salt, black pepper, cumin, chili powder, oregano, optional brown sugar, and cayenne in a bowl.
- Season: Coat the ribs lightly with oil, then rub the seasoning evenly over all sides. Refrigerate for 30 minutes to 12 hours if desired.
- Preheat the oven: Heat to 300°F (150°C).
- Cover and cook: Arrange the ribs in a baking dish. Add the broth and optional vinegar to the bottom, cover the dish securely, and cook for approximately 1½–2½ hours until tender.
- Check tenderness: Use a thermometer and probe. The ribs should meet safe-temperature requirements and become tender enough for a probe to enter easily. Continue covered cooking in 20–30-minute increments if necessary.
- Preheat the air fryer: Set to 390°F (200°C) for approximately 3 minutes, following your appliance’s instructions.
- Air fry: Place the tender ribs in a single layer. Cook for 4 minutes, turn, and cook for another 2–4 minutes until browned. Check frequently to prevent the seasoning from burning.
- Rest: Transfer the ribs to a clean plate and rest for 3–5 minutes.
- Serve: Enjoy warm with cauliflower mash, salad, roasted vegetables, or your favorite low-carb dipping sauce.