This post may contains Amazon affiliate and other affiliate links. If you make a purchase through these links, I may earn a small commission at no extra cost to you. Your support helps me continue to provide quality content. I only recommend products I personally trust and believe will add value to your experience. For more details, please visit my Privacy Policy.
Introduction
There are days when your body just feels… off. You wake up a little puffy, your stomach feels heavy, your energy dips by midday, and cravings start creeping in—especially for something cold, sweet, and comforting. I used to reach for regular ice cream in those moments, only to feel even more sluggish afterward. That’s exactly why I started experimenting with anti-inflammatory chocolate nice cream—something that satisfies cravings without leaving that bloated, weighed-down feeling.
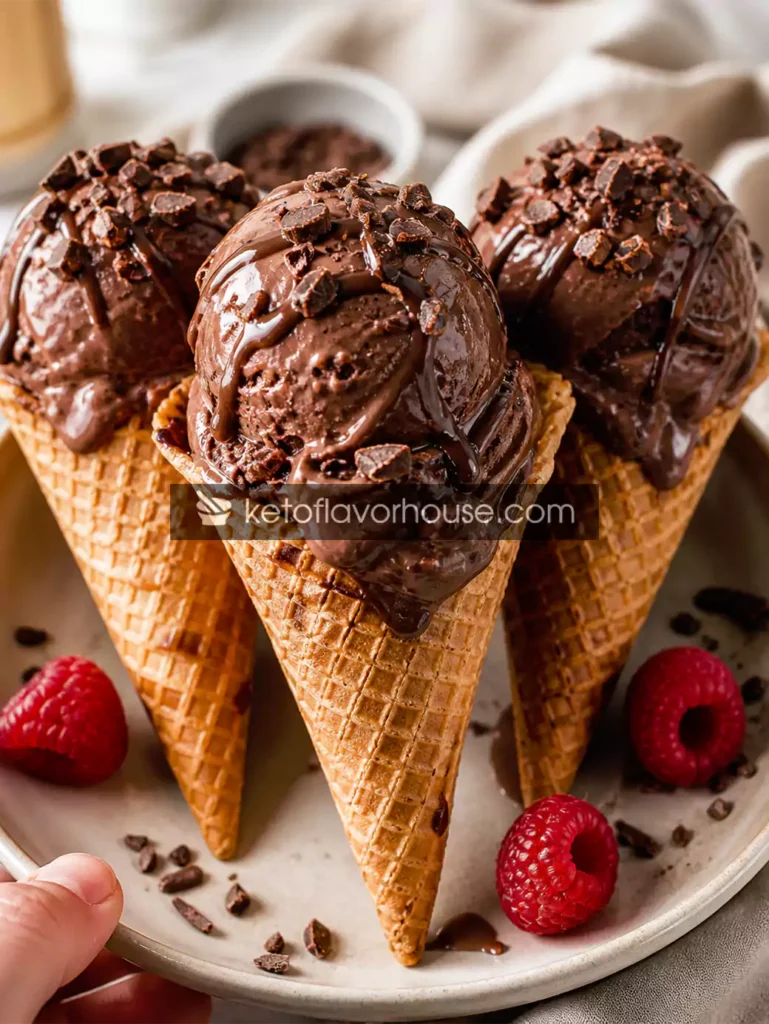
This Anti-Inflammatory Chocolate Nice Cream Cones (Dairy-Free, No Sugar, Healthy Dessert) recipe quickly became one of my go-to comfort treats. It’s rich, chocolatey, creamy, and indulgent—but made with simple, whole ingredients that feel good in your body. No refined sugar. No dairy. No crash afterward.
What I love most is how this recipe supports a more balanced way of eating. It’s naturally sweet, easy to digest, and packed with ingredients that are often associated with reducing inflammation—like cacao, cinnamon, and healthy fats. Whether you’re following a keto lifestyle, trying to reduce sugar, or just want a dessert that doesn’t leave you feeling sluggish, this one fits beautifully into your routine.
💚 Why You’ll Love This Recipe
- 🥬 Made with anti-inflammatory ingredients like cacao, cinnamon, and healthy fats
- ⚡ Supports steady energy without sugar crashes
- 🍽️ Creamy, rich, and deeply satisfying like real ice cream
- 👩🍳 Requires minimal effort and no special cooking skills
- 🧡 Combines smooth texture with a subtle chocolate crunch for comfort
🧠 My Personal Experience
The first time I made this, it was honestly out of frustration. I was tired of desserts that tasted good in the moment but made me feel worse afterward. I remember blending frozen bananas with cacao and thinking, this can’t possibly replace real ice cream.
But the first bite surprised me.
It was creamy. Smooth. Chocolatey in a way that felt deep and real—not overly sweet or artificial. I added a few crunchy cacao nibs on top, scooped it into a cone, and suddenly it felt like a treat again—not a “healthy alternative.”
What stood out most was how I felt afterward. No heaviness. No bloating. Just satisfied and light. Over time, this became my reset dessert—something I turn to when I want comfort without compromise.
🧰 Required Equipment
High-Speed Blender
A good blender is essential for achieving that ultra-creamy, soft-serve texture.
Tip: A powerful blender prevents chunks and gives you a smooth consistency.
Freezer-Safe Container
Used for storing or slightly firming the nice cream.
Tip: Chill it beforehand for better texture control.
Spatula
Helps scrape down the sides of the blender to ensure everything mixes evenly.
Ice Cream Scoop
For that classic scoop shape when serving in cones.
🥬 Ingredients & Substitutions
Frozen Bananas – 2 large (sliced and frozen)
Role: The base of the nice cream, providing natural sweetness and creaminess.
Benefit: Rich in potassium and gentle on digestion.
Substitutions:
- Frozen avocado (lower carb, creamier, less sweet)
- Frozen zucchini (neutral taste, lighter texture)
Unsweetened Cocoa Powder or Raw Cacao – 2 tbsp
Role: Gives deep chocolate flavor
Benefit: High in antioxidants
Substitution:
- Dark chocolate (melted) for richer taste
Almond Milk – 2–4 tbsp
Role: Helps blend smoothly
Benefit: Light and dairy-free
Substitution:
- Coconut milk (creamier, richer texture)
Cinnamon – ½ tsp
Role: Adds warmth and depth
Benefit: Commonly linked to balanced blood sugar
Substitution:
- Nutmeg or cardamom
Vanilla Extract – 1 tsp
Enhances overall flavor
Optional: Cacao Nibs or Dark Chocolate Chips – 1 tbsp
Adds that “choco-crackle” crunch
👩🍳 How to Make Anti-Inflammatory Chocolate Nice Cream Cones
Step 1: Freeze the Bananas Properly
Slice ripe bananas and freeze them for at least 4–6 hours.
Tip: Spread them out so they don’t stick together.
Step 2: Blend the Base
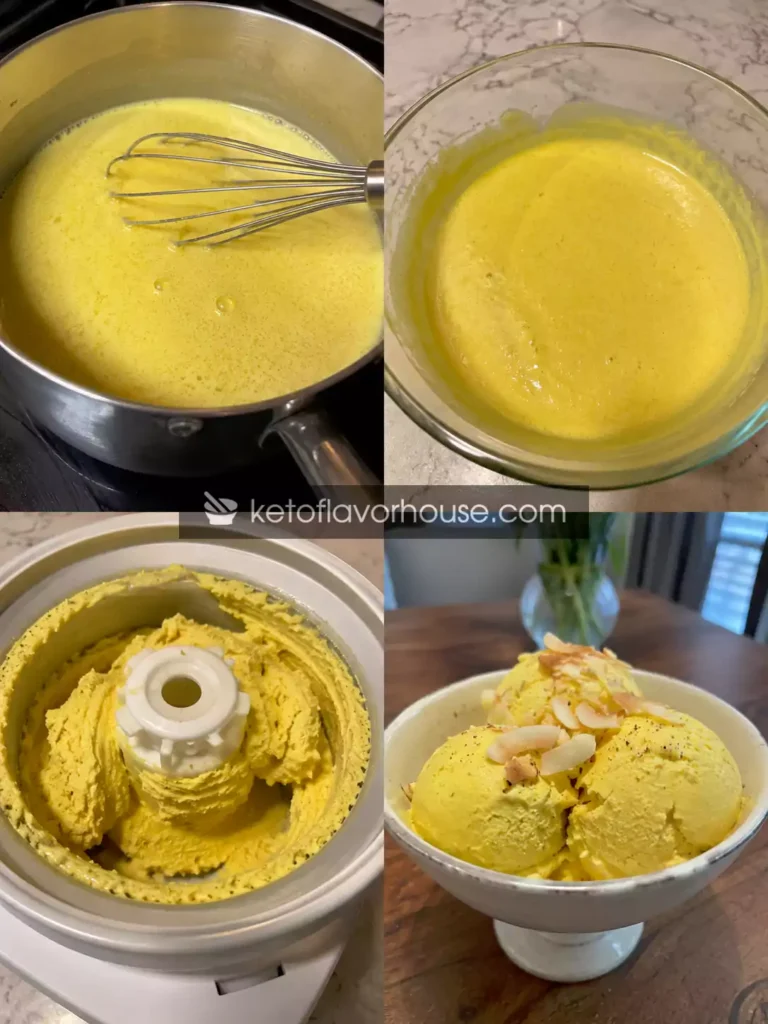
Add frozen bananas, cocoa powder, almond milk, cinnamon, and vanilla into a blender.
Blend slowly at first, then increase speed.
Tip: Pause to scrape sides if needed.
Step 3: Adjust Texture
If too thick, add a splash of milk.
If too soft, blend less or chill briefly.
Step 4: Add Crunch
Stir in cacao nibs or chocolate chips after blending.
Tip: Don’t overblend here—keep texture intact.
Step 5: Scoop and Serve
Scoop into cones or bowls. Serve immediately for soft-serve texture.
⚠️ Common Mistakes to Avoid
- Using unfrozen bananas → results in a runny texture
- Adding too much liquid → makes it soupy
- Overblending → melts the mixture
- Using sweetened cocoa → increases sugar unnecessarily
Fix: Always start with less liquid and adjust gradually.
🔥 Pro Tips for Best Results
- Add a pinch of sea salt to enhance chocolate flavor
- Use frozen coconut cream cubes for extra richness
- Blend in a small piece of ginger for a subtle anti-inflammatory boost
- Chill your serving bowls for a better experience
🧬 Anti-Inflammatory Benefits of Cacao
Cacao is known for its rich antioxidant profile, particularly flavonoids. These compounds are often associated with supporting the body’s natural response to inflammation. Combined with healthy fats and natural sugars from fruit, it creates a dessert that feels indulgent but aligns with clean eating habits.
🌿 Variations You Can Try
- Berry chocolate nice cream
- Peanut butter swirl version
- High-protein version with protein powder
- Coconut chocolate version
🍽️ Tips for This Recipe
- Use ripe bananas for natural sweetness
- Serve immediately for best texture
- Keep toppings simple to maintain balance
➕ Optional Additions
- Chia seeds
- Flaxseeds
- Collagen powder
- Crushed almonds
🍴 Serving Ideas
- As a post-dinner dessert
- After workouts
- In waffle cones for a treat feel
- With berries on top
🧊 Storage Recommendations
- Freeze for up to 1 week
- Let thaw for 5–10 minutes before serving
- Avoid refreezing multiple times
❓ Frequently Asked Questions
1. Can I make this without bananas?
Yes, but texture and sweetness will change.
2. Is it keto-friendly?
Use avocado instead of banana for lower carbs.
3. Can I meal prep it?
Yes, but fresh is best for texture.
4. Can I use regular milk?
Yes, but dairy-free keeps it lighter.
5. Why is my texture icy?
Too much water or not blended enough.
🧮 Nutritional Breakdown (Per Serving)
- Calories: 180
- Protein: 3g
- Fat: 6g
- Total Carbs: 28g
- Net Carbs: 24g
📌 Recipe Snapshot
- Prep Time: 10 minutes
- Cook Time: 0 minutes
- Total Time: 10 minutes
- Course: Dessert
- Cuisine: Healthy / Dairy-Free
- Servings: 2
- Calories: 180

Anti-Inflammatory Chocolate Nice Cream Cones Recipe
Ingredients
- 2 frozen bananas
- 2 tbsp cocoa powder
- 2 –4 tbsp almond milk
- ½ tsp cinnamon
- 1 tsp vanilla
- 1 tbsp cacao nibs
Instructions
- Peel the bananas and slice them into small, even rounds (about ½-inch thick) so they freeze quickly and blend more easily later. Spread the slices out in a single layer on a parchment-lined tray—this prevents them from sticking together into one big frozen block. Place the tray in the freezer for at least 4–6 hours, or until the pieces are completely solid. For best results, use ripe bananas with brown spots, as they’ll give you natural sweetness and a creamier texture.
- Once the banana slices are fully frozen, add them to a high-speed blender along with the cocoa powder, almond milk, cinnamon, and vanilla extract. Start with the lower amount of almond milk—you can always add more later. Begin blending on low speed to break down the frozen chunks, then gradually increase the speed. If your blender struggles, pause and let the bananas soften for 1–2 minutes before continuing.
- As the mixture blends, stop occasionally to scrape down the sides with a spatula. This ensures everything is evenly incorporated and prevents dry pockets of cocoa or banana from sticking to the sides. Keep blending until the mixture transforms into a thick, smooth, and creamy consistency that resembles soft-serve ice cream.
- Check the texture. If it’s too thick and not blending smoothly, add almond milk one teaspoon at a time and blend again. Be careful not to add too much liquid at once, as this can quickly turn the mixture runny instead of creamy. The goal is a thick, scoopable consistency that holds its shape.
- Once the base is perfectly smooth, gently stir in the cacao nibs or chocolate chips using a spoon or spatula instead of blending them. This keeps their crunch intact and creates that “choco-crackle” texture in every bite.
- Immediately scoop the nice cream into cones or bowls using an ice cream scoop or spoon. Serve right away for the best soft, creamy texture. If you prefer a firmer consistency, you can freeze it for an additional 20–30 minutes before serving, but avoid leaving it too long or it may become too hard.