This post may contains Amazon affiliate and other affiliate links. If you make a purchase through these links, I may earn a small commission at no extra cost to you. Your support helps me continue to provide quality content. I only recommend products I personally trust and believe will add value to your experience. For more details, please visit my Privacy Policy.
There are certain cravings that seem to appear out of nowhere when you’re trying to eat healthier, especially after bariatric surgery. For me, one of the hardest cravings to let go of was rich, creamy peanut butter fudge. I used to associate fudge with holidays, cozy evenings, and sneaking little squares straight from the fridge after dinner. But traditional fudge? It’s usually loaded with sugar, butter, and ingredients that can leave bariatric patients feeling sluggish, overly full, or completely off track.
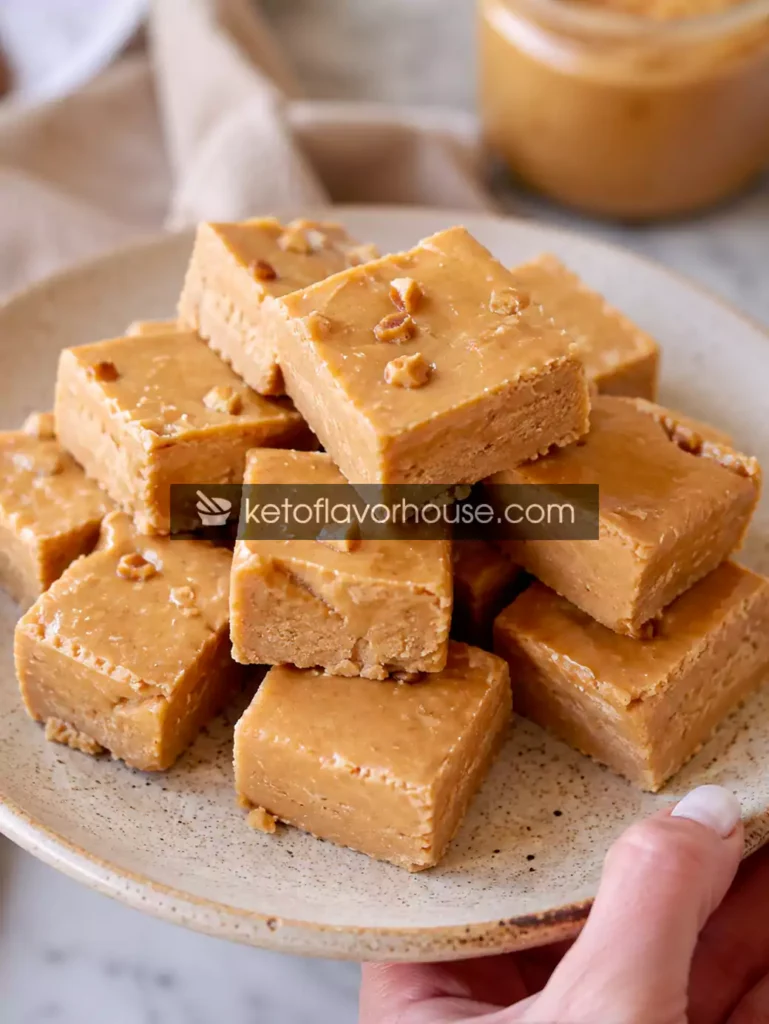
That’s exactly why this Bariatric Peanut Butter Fudge Recipe (High-Protein & Sugar-Free) became one of my favorite homemade treats. It has that silky, melt-in-your-mouth peanut butter flavor you crave, but without the heavy sugar crash afterward. Even better, it’s packed with protein, portion-friendly, and easy enough to make on a busy weeknight.
What I love most is that this recipe doesn’t feel “diet” at all. The texture is creamy and soft, the peanut butter flavor is rich and comforting, and every little square feels indulgent without sabotaging your goals. If you’ve been searching for a bariatric-friendly dessert that actually tastes satisfying, this one deserves a permanent spot in your fridge.
Whether you’re post-op, focused on high-protein eating, following a low-carb lifestyle, or simply trying to avoid sugar overload, this recipe checks all the boxes. It’s simple, freezer-friendly, and perfect for those moments when you want just a little something sweet without losing control.
Why You’ll Love This Recipe
- 🥜 Rich peanut butter flavor without added sugar overload
- 💪 High in protein to support bariatric nutrition goals
- ❄️ Freezer-friendly and perfect for meal prep
- ⏱️ Quick and easy with minimal prep work
- 🍫 Tastes like classic fudge but lighter and healthier
- 🧁 Small portions help satisfy cravings without overeating
- 🥄 Creamy, silky texture that melts in your mouth
- 🧊 Perfect chilled snack for hot afternoons or late-night cravings
- ❤️ Bariatric-friendly and low-carb compatible
- 👨👩👧 Family-friendly enough that everyone enjoys it
My Personal Experience Making This Recipe
The first time I tried making bariatric-friendly fudge, I honestly expected disappointment. I assumed it would either taste chalky from protein powder or become rock-hard in the freezer. I’d tried a few healthier desserts before, and many of them felt more like “healthy experiments” than real comfort food.
But this recipe completely surprised me.
I remember standing in my kitchen late one evening after a long day, craving something sweet but not wanting to undo my progress. I mixed together peanut butter, protein powder, and a few pantry ingredients, spread the mixture into a small dish, and hoped for the best.
A few hours later, I cut into the chilled fudge and took a bite.
It was creamy, rich, slightly salty, and perfectly sweet without tasting artificial. The peanut butter flavor came through beautifully, and the texture reminded me of those classic homemade fudge squares I grew up eating during family gatherings.
What made it even more meaningful was how satisfying it felt without causing discomfort. After bariatric surgery, desserts can sometimes feel risky because sugar-heavy foods may trigger dumping syndrome or leave you feeling uncomfortably full. This recipe felt different. It was balanced, protein-focused, and portion-friendly.
Now I keep a batch in the freezer almost every week. Some days I enjoy one square after dinner. Other times, I pack a piece alongside coffee during busy afternoons when I need something filling and comforting.
It’s proof that bariatric eating doesn’t have to feel restrictive or joyless.
Required Equipment
Mixing Bowl
A medium-sized mixing bowl gives you enough space to stir the ingredients thoroughly without making a mess. Because this fudge mixture thickens quickly, using a bowl with extra room helps make mixing easier.
If you don’t have a medium bowl, any large container will work as long as you can stir comfortably.
Silicone Spatula
A spatula helps scrape every bit of peanut butter mixture from the bowl, which is important because the mixture becomes thick and sticky.
It also helps spread the fudge evenly into the pan for smooth squares.
Small Baking Dish or Container
You’ll need a small dish or loaf pan to shape the fudge. A smaller container creates thicker, richer squares.
Glass or metal containers both work well. You can also use meal prep containers for easy storage.
Parchment Paper
Lining the container with parchment paper makes removal incredibly easy. You can simply lift the entire block of fudge out before slicing.
Without parchment paper, the fudge may stick and become difficult to cut neatly.
Sharp Knife
A sharp knife helps create clean squares without crumbling the fudge.
For extra clean cuts, lightly warm the knife under hot water and wipe it dry before slicing.
Refrigerator or Freezer
Chilling is essential because it allows the fudge to firm up properly. The freezer works faster, while the refrigerator creates a slightly softer texture.
Ingredients & Substitutions
Natural Peanut Butter – 1 Cup
Natural peanut butter gives the fudge its creamy texture and rich flavor. It’s also packed with healthy fats and protein, making it more filling for bariatric eaters.
Choose a peanut butter with minimal ingredients for the best texture.
Substitution Options
- Almond butter for a slightly nuttier flavor
- Sunflower seed butter for a nut-free option
- Cashew butter for an ultra-creamy texture
These substitutions still provide healthy fats and help create satisfying bariatric-friendly desserts.
Vanilla Protein Powder – 1/2 Cup
Protein powder is what transforms this recipe from a regular dessert into a bariatric-friendly treat. It boosts protein content while helping the fudge hold its shape.
Vanilla flavor adds sweetness and dessert-like flavor without needing large amounts of sugar.
Substitution Options
- Unflavored protein powder for a more neutral taste
- Chocolate protein powder for chocolate peanut butter fudge
- Collagen peptides for a softer texture
Protein is especially important after bariatric surgery because it supports healing, muscle preservation, and fullness.
Powdered Erythritol or Monk Fruit Sweetener – 1/4 Cup
This keeps the fudge sweet without the sugar spike.
Powdered sweeteners work best because they blend smoothly and prevent gritty texture.
Substitution Options
- Allulose for a softer texture
- Stevia blend for lower-carb sweetness
Avoid regular sugar if you want to keep the recipe bariatric-friendly and lower in carbs.
Greek Yogurt – 1/4 Cup
Greek yogurt adds creaminess and additional protein while helping create a softer texture.
It also balances the richness of the peanut butter beautifully.
Substitution Options
- Cottage cheese blended smooth
- Dairy-free yogurt for lactose sensitivity
Greek yogurt is especially useful in bariatric recipes because it increases protein while lowering overall calories.
Coconut Flour – 2 Tablespoons
Coconut flour thickens the mixture without adding many carbs.
A little goes a long way because coconut flour absorbs moisture quickly.
Substitution Options
- Almond flour for a softer texture
- Oat fiber for lower calories
Vanilla Extract – 1 Teaspoon
Vanilla deepens the dessert flavor and helps the fudge taste more indulgent.
Even a small amount makes a huge difference.
Pinch of Sea Salt
Salt balances sweetness and intensifies peanut butter flavor.
Don’t skip it — even tiny amounts dramatically improve the taste.
How to Make Bariatric Peanut Butter Fudge Recipe (High-Protein & Sugar-Free)
Step 1: Prepare Your Pan
Line a small loaf pan or container with parchment paper.
Leave extra parchment hanging over the sides so you can easily lift the fudge out later.
This small step saves a lot of frustration during slicing.
Step 2: Mix the Peanut Butter Base
Add peanut butter, Greek yogurt, vanilla extract, and sweetener to a mixing bowl.
Stir until smooth and creamy.
At first, the mixture may look thick or separated, but keep mixing. Eventually it becomes silky and smooth.
Step 3: Add Protein Powder
Slowly mix in the protein powder.
Add it gradually instead of all at once to prevent clumping.
The mixture will thicken significantly during this step.
If it feels too dry, add a tablespoon of Greek yogurt or a splash of unsweetened almond milk.
Step 4: Add Coconut Flour
Sprinkle in coconut flour and sea salt.
Mix thoroughly until everything forms a thick fudge-like consistency.
The texture should feel dense but spreadable.
Don’t worry if it looks slightly sticky — chilling fixes that.
Step 5: Transfer to Pan
Spread the mixture evenly into the prepared pan.
Use a spatula to smooth the top.
For prettier presentation, sprinkle a tiny bit of flaky sea salt on top.
Step 6: Chill Until Firm
Place the fudge in the refrigerator for 2–3 hours or freeze for about 45 minutes.
The colder it gets, the easier it becomes to slice neatly.
Step 7: Slice and Serve
Lift the fudge out using the parchment paper.
Cut into small squares.
Because this recipe is protein-rich and filling, smaller portions are usually perfect.
Air Fryer, Oven, and No-Bake Variations
No-Bake Version
This is the easiest method and the one I use most often.
The texture stays soft, creamy, and almost truffle-like.
Oven Version
Bake at low heat for about 8–10 minutes if you prefer a firmer fudge texture.
Be careful not to overbake, or the protein powder may dry out.
Freezer Fudge Style
Freeze the mixture for a firmer, candy-like texture.
This variation feels especially refreshing during warmer months.
Common Mistakes to Avoid
Using Runny Peanut Butter
Overly oily peanut butter can prevent the fudge from setting properly.
If your peanut butter is extremely thin, stir it well before measuring.
Adding Too Much Protein Powder
Too much protein powder creates dry, chalky fudge.
Start with the listed amount first before adjusting.
Skipping the Chill Time
Warm fudge will feel soft and messy.
Chilling is essential for structure and flavor development.
Using Granulated Sweetener
Granulated sweeteners may leave a gritty texture.
Powdered sweeteners create smoother fudge.
Cutting Large Pieces
Because bariatric portions are smaller, giant squares can feel overwhelming.
Small squares are more satisfying and easier to tolerate comfortably.
Pro Tips for Best Results
One of my favorite tricks is slightly warming the peanut butter before mixing. Warm peanut butter blends more smoothly and creates an incredibly creamy texture.
Another helpful tip is tasting the mixture before chilling. Protein powders vary in sweetness, so you may want a little more sweetener depending on your preference.
For extra richness, add a tablespoon of sugar-free chocolate chips on top before chilling.
If you enjoy firmer fudge, freeze it instead of refrigerating it.
And finally, don’t rush the slicing process. Clean cuts make the fudge feel bakery-quality and more satisfying to serve.
Bariatric Nutrition & Strategy
Peanut butter can actually fit beautifully into a bariatric lifestyle when used thoughtfully. It provides healthy fats, protein, and lasting satisfaction that help reduce cravings between meals.
The addition of protein powder makes this recipe even more beneficial because bariatric patients often struggle to reach daily protein goals.
Another major advantage is portion control.
Traditional desserts can trigger overeating because they’re loaded with sugar and refined carbs. This fudge is intentionally rich and satisfying in small amounts.
Pairing one square with coffee or a high-protein snack can help prevent emotional eating later in the day.
This recipe also works well for:
- Meal prep desserts
- Evening sweet cravings
- Post-dinner treats
- Freezer snack boxes
- High-protein snack plates
Variations You Can Try
Chocolate Peanut Butter Fudge
Add cocoa powder or sugar-free chocolate chips.
This creates a flavor similar to peanut butter cups while staying bariatric-friendly.
Cinnamon Roll Version
Add cinnamon and a tiny swirl of cream cheese.
This variation tastes cozy and comforting during colder months.
Mocha Peanut Butter Fudge
Add espresso powder for a coffee-inspired flavor.
Perfect for afternoon cravings.
Crunchy Nut Version
Mix in chopped nuts for texture.
This adds crunch and extra healthy fats.
Tips for This Recipe
Serve the fudge chilled for the best texture.
If you want a prettier presentation, cut tiny squares and place them in mini paper liners.
A sprinkle of flaky salt on top makes the peanut butter flavor pop beautifully.
For meal prep, individually wrap pieces so you can grab one quickly without overeating.
Optional Additions
Sugar-Free Chocolate Drizzle
Adds richness without excessive sugar.
Chia Seeds
Adds fiber and texture while supporting fullness.
Crushed Peanuts
Provides crunch and stronger peanut flavor.
Cinnamon
Adds warmth and sweetness without calories.
Serving Ideas
This fudge pairs beautifully with:
- Coffee
- Unsweetened iced tea
- Protein shakes
- Greek yogurt bowls
- Fresh berries
It’s also wonderful for:
- Holiday dessert trays
- Meal prep boxes
- Afternoon snacks
- Family movie nights
- Bariatric support gatherings
Storage Recommendations
Refrigerator
Store in an airtight container for up to 1 week.
The texture becomes even creamier after the first day.
Freezer
Freeze for up to 2 months.
Place parchment paper between layers to prevent sticking.
Reheating
No reheating needed.
Simply allow frozen fudge to sit at room temperature for a few minutes before eating.
Frequently Asked Questions
Can I freeze this fudge?
Yes. Freezing actually creates an amazing firm texture that many people prefer.
Is this recipe good for bariatric patients?
Yes, because it’s high in protein, portion-controlled, and sugar-free.
However, portion size still matters.
Can I use almond butter instead?
Absolutely. Almond butter creates a slightly nuttier flavor but works beautifully.
Does protein powder change the texture?
Yes. Protein powder thickens the fudge and adds structure while boosting protein content.
Can I make this dairy-free?
Yes. Use dairy-free yogurt and a dairy-free protein powder.
How many pieces should I eat?
Most people find 1–2 small squares satisfying because the recipe is rich and filling.
Is this keto-friendly too?
Yes, especially if you use low-carb sweeteners and unsweetened peanut butter.
Nutritional Breakdown (Per Serving)
Approximate values per small square:
- Calories: 98
- Protein: 7g
- Fat: 7g
- Total Carbs: 4g
- Fiber: 2g
- Net Carbs: 2g
- Sugar: 1g
- Sodium: 85mg
Recipe Snapshot
Prep Time: 10 minutes
Cook Time: 0 minutes
Total Time: 2 hours 10 minutes (including chilling)
Course: Dessert / Snack
Cuisine: American
Servings: 16 small squares
Calories: 98 per serving
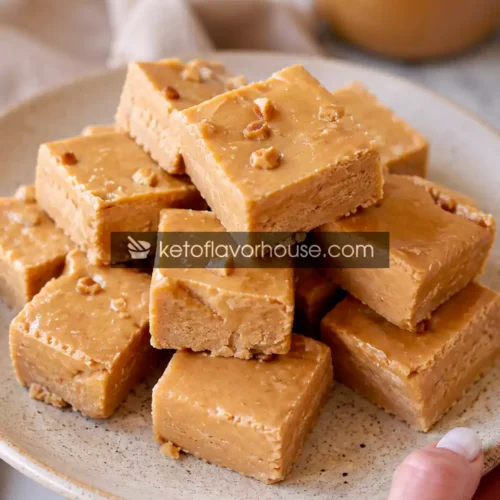
Bariatric Peanut Butter Fudge Recipe
Ingredients
- 1 cup natural peanut butter
- 1/2 cup vanilla protein powder
- 1/4 cup powdered erythritol
- 1/4 cup Greek yogurt
- 2 tablespoons coconut flour
- 1 teaspoon vanilla extract
- Pinch of sea salt
Instructions
- Line a small loaf pan, meal prep container, or square dish with parchment paper, leaving a little extra parchment hanging over the sides. This makes it much easier to lift the fudge out later without sticking or breaking apart. If you skip the parchment paper, the peanut butter mixture can cling tightly to the pan and make slicing messy.
- Add the peanut butter, Greek yogurt, vanilla extract, and powdered sweetener to a medium mixing bowl. Stir everything together slowly at first, then continue mixing until the texture becomes completely smooth, creamy, and glossy. Make sure there are no streaks of yogurt or pockets of sweetener left behind. If your peanut butter is thick or slightly firm, warming it for a few seconds can help everything blend more easily.
- Gradually add the protein powder a little at a time while stirring continuously. Mixing slowly helps prevent clumps and keeps the texture silky instead of chalky. As the protein powder blends in, the mixture will start becoming thicker and more fudge-like. Don’t worry if it seems dense — that’s exactly what you want for rich, creamy fudge.
- Sprinkle in the coconut flour and a pinch of salt, then continue mixing until the mixture becomes thick, smooth, and fully combined. The coconut flour helps absorb extra moisture and gives the fudge its perfect sliceable texture. If the mixture feels too dry, add a tiny spoonful of Greek yogurt. If it feels too soft, let it sit for a minute so the coconut flour can absorb more moisture naturally.
- Transfer the mixture into the prepared pan and use a spatula or the back of a spoon to spread it evenly into all corners. Smooth the top carefully so the fudge sets evenly and looks neat when sliced. For extra flavor and presentation, you can lightly sprinkle flaky salt or a few crushed peanuts over the top before chilling.
- Place the pan into the refrigerator for about 2 to 3 hours until the fudge feels firm and chilled all the way through. If you’re short on time, place it in the freezer for about 45 minutes instead. The colder the fudge gets, the cleaner and easier it will be to cut into perfect little squares.
- Once fully chilled, lift the fudge out using the parchment paper and place it onto a cutting board. Use a sharp knife to slice it into small squares or bite-sized pieces. Because the fudge is rich and high in protein, smaller portions are usually the most satisfying. Serve chilled straight from the fridge for the creamiest texture and best flavor.