This post may contains Amazon affiliate and other affiliate links. If you make a purchase through these links, I may earn a small commission at no extra cost to you. Your support helps me continue to provide quality content. I only recommend products I personally trust and believe will add value to your experience. For more details, please visit my Privacy Policy.
Introduction
There’s something almost impossible to resist about the smell of birria slowly simmering in the kitchen.
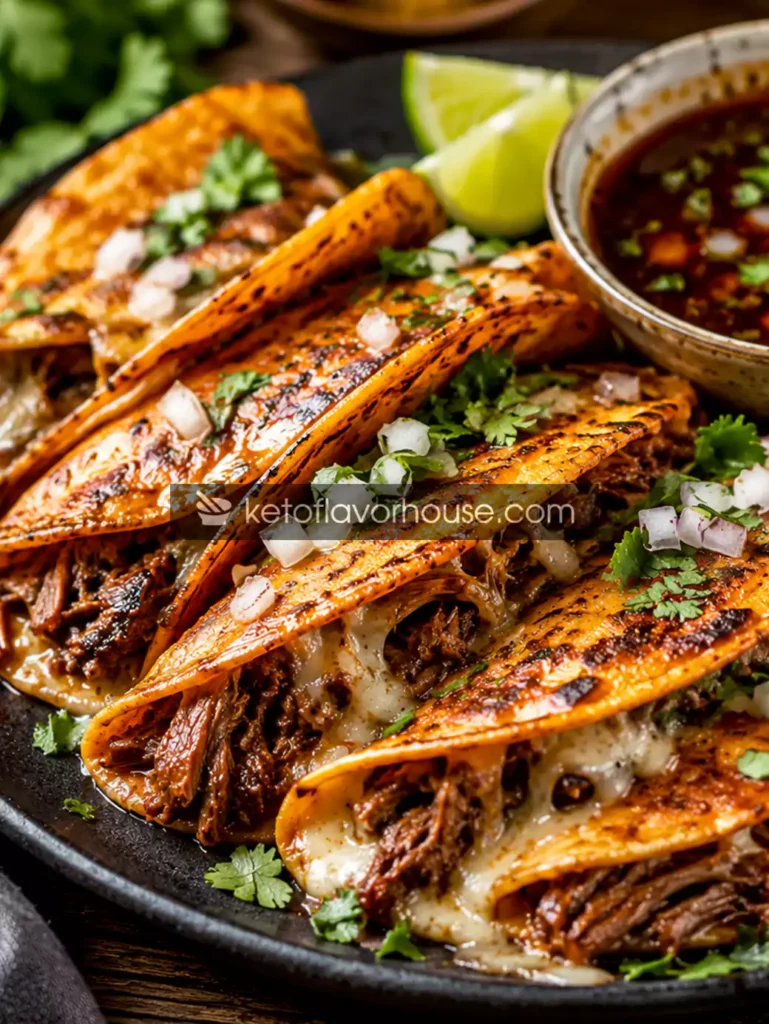
The warm smoky chilies. The garlic. The rich beef broth bubbling away for hours until the meat becomes fall-apart tender. And then comes the moment that always gets me — dipping tortillas into that deep red consommé before crisping them on a hot skillet until the edges turn golden and crunchy.
It’s comfort food at its absolute best.
But I’ll be honest — traditional quesabirria tacos can sometimes leave me feeling overly full, sluggish, and heavy afterward, especially when they’re loaded with excess oil and cheese. And lately, I’ve been trying to find ways to enjoy the foods I genuinely love while leaning more into anti-inflammatory eating habits that help me feel energized instead of weighed down.
That’s exactly how these Anti-Inflammatory Quesabirria Tacos came to life.
This version keeps everything people adore about classic quesabirria:
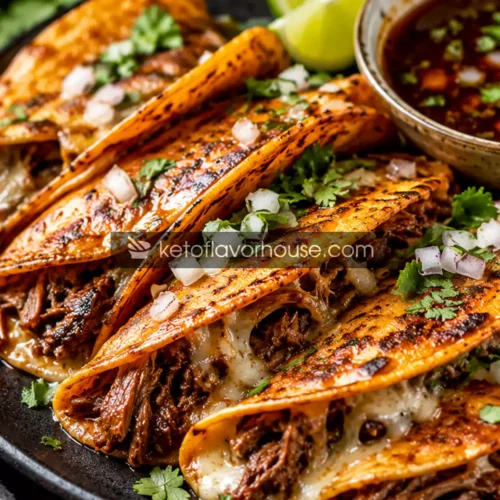
crispy tortillas, juicy shredded beef, rich consommé, melted cheese, smoky chilies, and fresh toppings.
But the ingredients are balanced more intentionally.
We’re using olive oil instead of heavily processed oils, layering in garlic and warming spices like cumin and oregano, adding fresh cilantro and lime, and keeping the cheese balanced so the tacos still feel indulgent without becoming overwhelmingly heavy.
And honestly?
I don’t feel like I’m sacrificing anything.
The flavor is still rich, deeply savory, smoky, and comforting. The tortillas crisp beautifully. The consommé still has that restaurant-style richness that makes dipping absolutely addictive. And the fresh toppings brighten everything in a way that keeps the tacos feeling vibrant instead of greasy.
This recipe has become one of my favorite healthy comfort-food dinners because it satisfies those deep comfort cravings while still fitting into a more balanced lifestyle.
Whether you’re craving crispy birria tacos, planning a cozy taco night, meal prepping flavorful shredded beef, or simply looking for an anti-inflammatory dinner that actually tastes exciting, these tacos are incredibly satisfying.
And yes — they absolutely taste like something you’d order from a really good taco spot.
💚 Why You’ll Love This Recipe
- 🌮 Crispy, cheesy tacos with rich slow-cooked flavor
- 🥬 Includes anti-inflammatory ingredients like garlic, olive oil, chilies, and lime
- ⚡ Feels satisfying without feeling overly greasy or heavy
- 🍽️ High-protein comfort food the whole family loves
- 👩🍳 Beginner-friendly and surprisingly easy to make
- 🧡 Cozy, smoky, savory flavor with restaurant-style texture
- 🥣 Great for meal prep and leftovers
- 🔥 Rich consommé perfect for dipping
- 💪 Protein-rich and deeply filling
- 🌿 Easy to customize with healthier toppings and sides
🧠 My Personal Experience
The first time I made homemade quesabirria tacos, I remember standing in front of the skillet completely mesmerized by the sound.
That sizzling tortilla hitting the pan after being dipped into the consommé is honestly one of the best cooking sounds ever.
And then came the smell.
The smoky chilies mixed with garlic and beef filled the kitchen so intensely that everyone kept wandering in asking when dinner would be ready.
But what really surprised me was how much lighter this version felt afterward compared to restaurant birria tacos.
Instead of feeling weighed down, these tacos felt balanced.
The fresh cilantro, lime juice, onions, and slightly lighter cheese ratio helped cut through the richness beautifully. Pairing the tacos with crunchy cabbage slaw or avocado made them feel even fresher.
Now these tacos have become one of those recipes I save for cozy weekends, casual family dinners, or nights when I want something comforting that still aligns with healthier eating habits.
And honestly, dipping crispy tacos into warm consommé never stops feeling satisfying.
🧰 Required Equipment
Large Dutch Oven or Slow Cooker
Perfect for slowly cooking the beef until tender and flavorful.
High-Speed Blender
Used for blending the chili sauce until smooth and rich.
Large Skillet or Griddle
Essential for crisping the tacos properly.
Cast iron works beautifully here.
Tongs
Helpful for flipping crispy tacos without tearing them.
Sharp Knife
Needed for slicing onions, garlic, cilantro, and toppings.
🥬 Ingredients & Substitutions
Beef Chuck Roast — 3 Pounds
Chuck roast becomes beautifully tender after slow cooking.
Substitutions:
- Beef short ribs
- Brisket
- Boneless beef stew meat
Grass-fed beef works especially well for richer flavor.
Olive Oil — 1 Tablespoon
Olive oil helps sear the beef while supporting anti-inflammatory cooking.
Substitutions:
- Avocado oil
Dried Guajillo Chilies — 2
Guajillo chilies provide smoky sweetness and authentic birria flavor.
Substitutions:
- New Mexico chilies
Dried Ancho Chilies — 2
Adds rich earthy depth.
Substitutions:
- Pasilla chilies
Garlic Cloves — 3
Garlic builds savory flavor throughout the broth.
Substitutions:
- Garlic powder
Fresh garlic is best.
Onion — 1 Large
Onion adds sweetness and depth to the consommé.
Substitutions:
- Shallots
- White onion
Cumin — 1 Teaspoon
Warm earthy spice that gives classic taco flavor.
Oregano — 1 Teaspoon
Adds herbal warmth and Mexican-inspired depth.
Corn Tortillas — 12
Corn tortillas crisp beautifully when dipped into consommé.
Substitutions:
- Grain-free tortillas
- Almond flour tortillas
Cheese — 1 1/2 Cups
Use moderately for balance.
Best Options:
- Oaxaca cheese
- Monterey Jack
- Mozzarella
Fresh Cilantro & Lime
Brightens the rich beef beautifully.
👩🍳 How to Make Anti-Inflammatory Quesabirria Tacos
Step 1: Season and Sear the Beef
Pat the beef dry thoroughly before seasoning with salt and pepper.
Heat olive oil in a Dutch oven over medium-high heat and sear the beef on all sides until deeply browned.
This step creates massive flavor.
The caramelized crust helps build a richer consommé later.
Step 2: Soften the Chilies
Remove stems and seeds from the dried chilies.
Simmer them briefly in hot water until softened.
The aroma at this stage becomes smoky, earthy, and deeply comforting.
Step 3: Blend the Sauce
Add softened chilies, garlic, onion, cumin, oregano, and broth to a blender.
Blend until completely smooth.
The sauce should look rich, deep red, and velvety.
Step 4: Slow Cook the Beef
Pour the sauce over the seared beef.
Cover and cook low and slow for several hours until the beef becomes tender enough to shred easily with forks.
This slow cooking process creates incredibly flavorful consommé.
Step 5: Shred the Beef
Remove the beef carefully and shred it into bite-sized pieces.
The meat should feel juicy, tender, and deeply infused with flavor.
Step 6: Dip the Tortillas
Lightly dip tortillas into the consommé.
Don’t soak them too long or they can tear.
The tortillas should become lightly coated with rich red broth.
Step 7: Crisp the Tacos
Place dipped tortillas onto a hot skillet.
Add cheese and shredded beef to one side before folding.
Cook until crispy, golden, and slightly crunchy on both sides.
This is the magic moment.
The edges become crisp while the inside stays melty and juicy.
Step 8: Garnish and Serve
Serve immediately with:
- Fresh cilantro
- Diced onions
- Lime wedges
- Warm consommé for dipping
That first dip into the broth is absolutely incredible.
⚠️ Common Mistakes to Avoid
Skipping the Sear
Browning the beef creates deeper flavor.
Don’t rush this step.
Oversoaking the Tortillas
Too much broth makes tortillas fragile and soggy.
Quick dips work best.
Using High Heat While Crisping
Medium heat creates crisp tacos without burning.
Overfilling the Tacos
Too much filling makes flipping difficult.
Not Cooking the Beef Long Enough
The beef should shred effortlessly.
Low and slow matters here.
🔥 Pro Tips for Best Results
- Use freshly grated cheese for better melting
- Let beef rest briefly before shredding
- Use cast iron for crispier tortillas
- Add lime right before serving
- Use grass-fed beef when possible
- Blend sauce completely smooth
- Reserve extra consommé for reheating leftovers
🧬 Anti-Inflammatory Benefits of Slow-Cooked Beef & Spices
These Anti-Inflammatory Quesabirria Tacos balance rich comfort food flavor with ingredients that naturally fit into wellness-focused eating.
Garlic, chilies, oregano, cumin, and lime provide bold flavor while helping the tacos feel vibrant instead of heavy.
Using olive oil instead of heavily processed oils helps create a more balanced cooking base.
Fresh toppings like cilantro, onion, avocado, and cabbage slaw add freshness and texture that brighten the richness of the beef.
And when paired with mindful portions and vegetable sides, these tacos become a deeply satisfying high-protein meal that still supports balanced eating habits.
🌿 Variations You Can Try
Lower-Carb Version
Use:
- Cheese taco shells
- Almond flour tortillas
- Lettuce wraps
Dairy-Free Version
Skip cheese and add avocado for creaminess.
Spicy Version
Add:
- Chipotle peppers
- Extra chili flakes
- Hot sauce
Higher-Protein Version
Add extra shredded beef or serve alongside protein-rich sides.
Slow Cooker Version
Cook on low for 8–10 hours.
🍽️ Tips for This Recipe
- Warm tortillas before dipping
- Don’t overcrowd the skillet
- Use freshly squeezed lime juice
- Let consommé rest briefly before serving
- Store beef separately for meal prep
- Crisp tacos fresh for best texture
➕ Optional Additions
- Avocado slices
- Cabbage slaw
- Pickled onions
- Greek yogurt drizzle
- Jalapeños
- Hemp seeds
- Fresh radish slices
- Hot sauce
- Cilantro lime crema
🍴 Serving Ideas
Serve these tacos with:
- Mexican cauliflower rice
- Cabbage slaw
- Avocado salad
- Roasted vegetables
- Black beans
- Grilled corn
These tacos also pair beautifully with anti-inflammatory sides and fresh citrus-based salads.
For KetoFlavorHouse.com, this recipe fits perfectly alongside:
- healthy taco recipes
- high-protein dinners
- anti-inflammatory comfort food
- Mexican-inspired healthy meals
- cozy weeknight dinners
🧊 Storage Recommendations
Refrigerator
Store shredded beef and consommé separately for up to 4 days.
Freezer
Beef freezes beautifully for up to 2 months.
Reheating
Reheat beef gently in consommé to keep it juicy.
Crisp tacos fresh before serving.
❓ Frequently Asked Questions
What makes these tacos anti-inflammatory?
Ingredients like garlic, olive oil, chilies, lime, herbs, and fresh toppings naturally fit into anti-inflammatory eating patterns.
Can I make these in a slow cooker?
Yes. Slow cook on low for 8–10 hours.
What cheese works best?
Oaxaca, Monterey Jack, or mozzarella melt beautifully.
Can I freeze the beef?
Absolutely. The shredded beef freezes very well.
Are corn tortillas healthier?
Corn tortillas are typically less processed and work best for authentic quesabirria texture.
How do I keep tacos crispy?
Cook over medium heat and avoid oversoaking tortillas.
What toppings pair best?
Cilantro, onions, avocado, cabbage slaw, and lime all work wonderfully.
🧮 Nutritional Breakdown (Per Serving)
Approximate values per serving:
- Calories: 420
- Protein: 32g
- Fat: 24g
- Total Carbs: 18g
- Fiber: 4g
- Net Carbs: 14g
📌 Recipe Snapshot
Prep Time: 25 minutes
Cook Time: 4 hours
Total Time: 4 hours 25 minutes
Course: Dinner
Cuisine: Mexican-Inspired
Servings: 6
Calories: 420
Anti-Inflammatory Quesabirria Tacos Recipe
Ingredients
- 3 pounds beef chuck roast
- 1 tablespoon olive oil
- Salt and black pepper
- 2 dried guajillo chilies
- 2 dried ancho chilies
- 3 garlic cloves
- 1 large onion
- 1 teaspoon cumin
- 1 teaspoon oregano
- 12 corn tortillas
- 1 1/2 cups shredded cheese
- Fresh cilantro
- Lime wedges
Instructions
- Pat the beef dry with paper towels first, then season all sides generously with salt and black pepper. Drying the meat helps it brown properly instead of steaming, which creates deeper flavor for the final tacos. Let the beef sit at room temperature for about 15–20 minutes while you prepare the other ingredients so it cooks more evenly.
- Heat olive oil in a large Dutch oven or heavy pot over medium-high heat until the oil is hot and shimmering. Carefully place the beef into the pot and sear it for several minutes on each side until a deep golden-brown crust develops. Avoid moving the meat too often during this step so it caramelizes properly. The browned bits left in the pot help create a rich, flavorful consommé later.
- While the beef sears, remove the stems and seeds from the dried chilies. Place the chilies into a bowl and cover them with hot water. Let them soak for about 10–15 minutes until softened and flexible. Softening the chilies helps them blend smoothly into the sauce and releases their smoky flavor more evenly.
- Add the softened chilies, garlic, onion, cumin, oregano, and broth into a blender. Blend everything on high speed until completely smooth and velvety. The sauce should look deep red and smell smoky, savory, and slightly earthy. If the sauce seems too thick, add a small splash of extra broth to help it blend more easily.
- Pour the chili sauce over the seared beef inside the pot. Cover with a lid and let the beef cook slowly over low heat for several hours, or until it becomes incredibly tender and easy to pull apart with forks. Slow cooking allows the meat to absorb all the rich chili and spice flavors while creating a deeply savory consommé.
- Once the beef is fully tender, carefully remove it from the pot and transfer it to a large bowl or cutting board. Use two forks to shred the meat into bite-sized pieces. The beef should pull apart effortlessly and stay juicy from the slow cooking process.
- Warm the tortillas slightly so they become flexible and easier to fold without cracking. Lightly dip each tortilla into the warm consommé, coating both sides with a thin layer of the flavorful broth. Avoid soaking them too long, or the tortillas may become too soft and difficult to handle.
- Place the dipped tortillas onto a hot skillet or griddle over medium heat. Sprinkle one side with shredded cheese, then add a generous spoonful of shredded beef on top. Fold the tortilla gently in half and press lightly with a spatula so the filling stays in place while cooking.
- Cook the tacos for about 2–3 minutes per side until the tortillas become crispy and golden brown and the cheese melts completely. Adjust the heat if needed to prevent burning while still achieving that classic crispy quesabirria texture. The edges should look lightly crisp while the inside stays juicy and cheesy.
- Transfer the finished tacos to a serving plate and top with freshly chopped cilantro and diced onions for brightness and crunch. Serve immediately with lime wedges and warm consommé on the side for dipping. The rich broth paired with the crispy tacos creates the classic quesabirria experience that makes every bite deeply comforting and flavorful.