This post may contains Amazon affiliate and other affiliate links. If you make a purchase through these links, I may earn a small commission at no extra cost to you. Your support helps me continue to provide quality content. I only recommend products I personally trust and believe will add value to your experience. For more details, please visit my Privacy Policy.
Introduction
There was a time when I didn’t think twice about sauces. I’d drizzle them over everything—bowls, grilled chicken, even snacks—without realizing how quickly they could turn a clean meal into something heavy. It wasn’t until I started feeling that familiar post-meal sluggishness—slight bloating, low energy, and that “why do I feel off?” feeling—that I began paying attention.
That’s when I started experimenting with this anti-inflammatory sweet chili sauce.
The first version of this Anti-Inflammatory Sweet Chili Sauce (Healthy Homemade & Clean Eating) came from a simple goal: keep the flavor I loved, but remove the ingredients that didn’t make me feel good. No refined sugar overload. No overly processed elements. Just simple, real ingredients that still delivered that perfect balance of sweet, tangy, and mildly spicy.
What surprised me most wasn’t just how easy it was to make—but how different I felt after eating it. The meals felt lighter, cleaner, and more satisfying without that heavy after-effect.
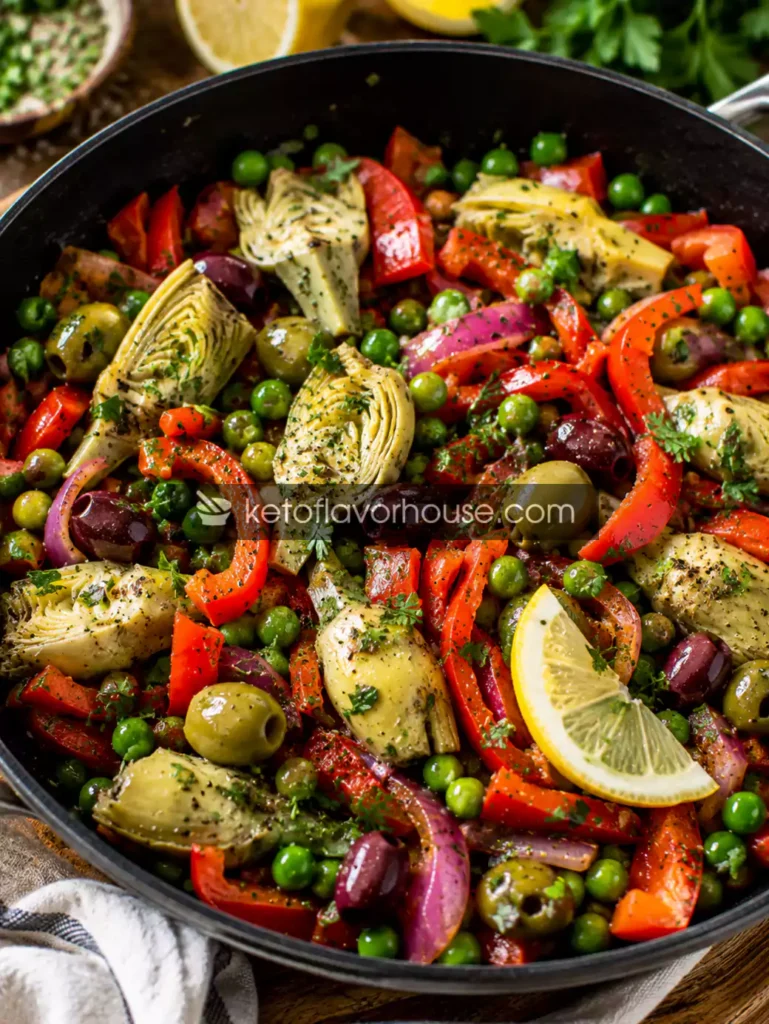
This recipe supports anti-inflammatory eating by using fresh chili, garlic, ginger, and natural sweeteners, creating a sauce that enhances your food instead of overwhelming your body. It’s nourishing, balanced, and incredibly versatile.
If you’re someone who:
- Feels bloated after store-bought sauces
- Wants cleaner, homemade alternatives
- Is trying to reduce refined sugar
- Still loves bold, sweet-spicy flavors
This is going to become one of your kitchen essentials.
💚 Why You’ll Love This Recipe
- 🥬 Anti-inflammatory ingredients – Garlic, ginger, chili, and clean sweeteners
- ⚡ Supports digestion and energy – Lighter than store-bought versions
- 🍽️ Satisfying and balanced – Sweet, tangy, and gently spicy
- 👩🍳 Easy to make – Simple steps, minimal ingredients
- 🧡 Flavor, texture, and comfort – Smooth, glossy, and incredibly flavorful
🧠 My Personal Experience
I remember the first time I swapped my regular sweet chili sauce with this homemade version. I wasn’t expecting much difference—just a slightly “healthier” option.
But what I noticed was subtle and important.
After meals, I didn’t feel that usual heaviness. No slight bloating. No energy dip. Just a clean, satisfied feeling.
Over time, this sauce became something I relied on—not because it was “healthy,” but because it felt right. It made meals more enjoyable without adding unnecessary weight to them.
🧰 Required Equipment
🥄 Saucepan
Essential for simmering and thickening the sauce evenly.
🥣 Blender or Food Processor
Helps create a smooth base from chilies and water.
🥄 Whisk or Spoon
Used for stirring and ensuring the sauce doesn’t stick or clump.
🫙 Glass Jar
Perfect for storing the sauce while keeping it fresh.
🥬 Ingredients & Substitutions
🌶️ Red Chilies – ½ cup
- Role: Main flavor and heat
- Benefit: Adds warmth and depth
- Substitute: Chili flakes (milder texture)
🧄 Garlic – 2 tbsp minced
- Role: Strong flavor base
- Benefit: Supports a clean, balanced profile
- Substitute: Garlic powder (less intense)
🫚 Ginger – 1 tsp grated
- Role: Freshness and slight spice
- Benefit: Adds warmth and balance
- Substitute: Ground ginger (milder)
🍯 Natural Sweetener – ⅓–½ cup (honey or coconut sugar)
- Role: Sweetness
- Benefit: Less processed than refined sugar
- Substitute: Maple syrup (slightly different flavor)
🍎 Apple Cider Vinegar – ½ cup
- Role: Tanginess
- Benefit: Adds brightness
- Substitute: Rice vinegar
🧂 Salt – 1 tsp
Enhances flavor
🐟 Fish Sauce – 1 tsp (optional)
Adds umami depth
🌽 Cornstarch – 1 tbsp + 2 tbsp water
- Thickens the sauce
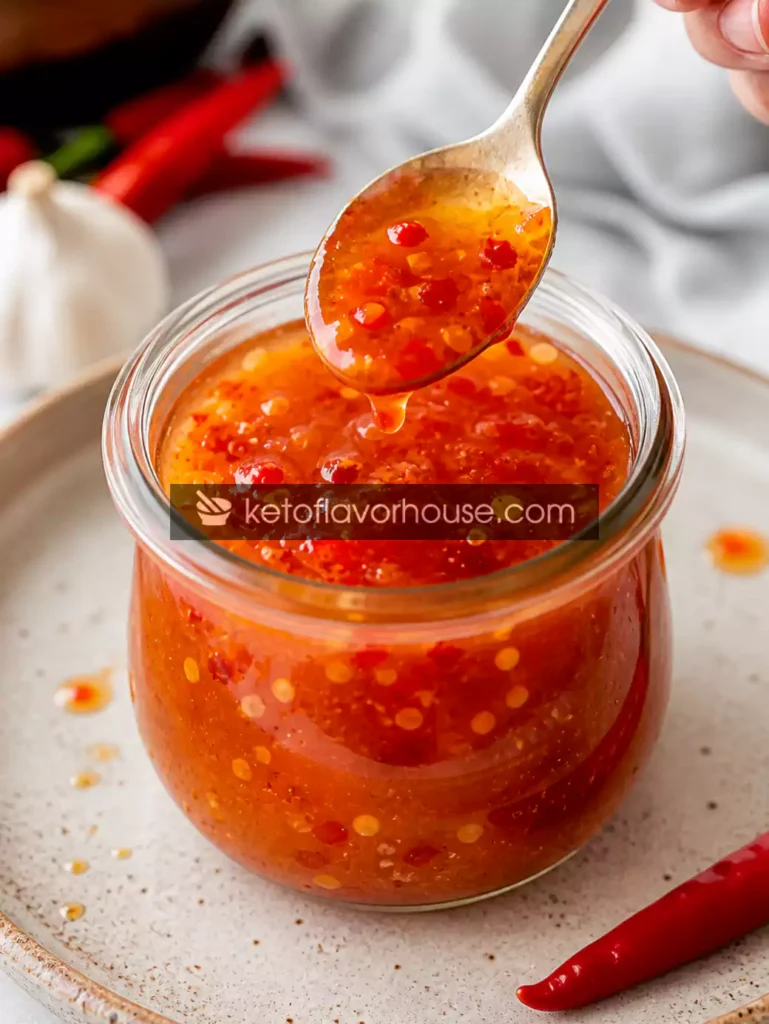
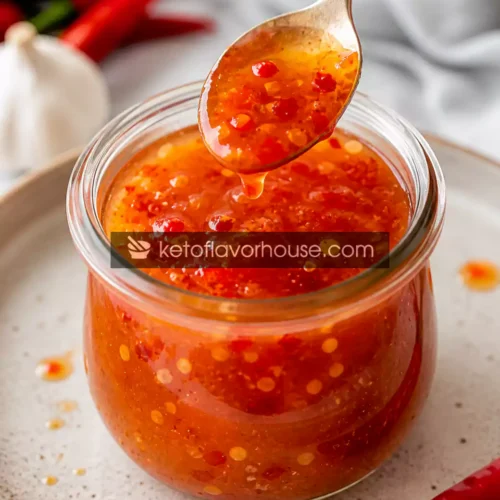
👩🍳 How to Make Anti-Inflammatory Sweet Chili Sauce (Healthy Homemade & Clean Eating)
Step 1: Blend the Chilies
Blend red chilies with water until smooth.
Tip: Blend thoroughly for a smoother texture.
Step 2: Build the Base
Pour into a saucepan and add sweetener, vinegar, garlic, ginger, and salt.
Step 3: Simmer Gently
Cook on low heat for 5–10 minutes.
Tip: Avoid high heat to preserve flavor balance.
Step 4: Thicken the Sauce
Add cornstarch mixture and stir continuously.
Tip: Stir constantly to avoid lumps.
Step 5: Cool and Store
Let it cool completely before storing.
⚠️ Common Mistakes to Avoid
- Overcooking → overly thick sauce
- Too much sweetener → overpowering
- Skipping ginger/garlic → flat flavor
- Using refined sugar → heavier result
🔥 Pro Tips for Best Results
- Add turmeric for extra warmth
- Use fresh ingredients only
- Balance sweet and tangy carefully
- Let sauce rest before using
🧬 Anti-Inflammatory Benefits of Chilies
Chilies bring natural heat and depth while adding vibrant flavor to dishes. When used in moderation alongside ingredients like garlic and ginger, they create a balanced sauce that feels light yet satisfying.
🌿 Variations You Can Try
- Extra spicy version
- Sweeter version
- Garlic-heavy version
- Thicker dip-style version
🍽️ Tips for This Recipe
- Always taste before finalizing
- Adjust thickness with water
- Store properly for freshness
➕ Optional Additions
- Sesame seeds
- Chili flakes
- Fresh herbs
- Lime juice
🍴 Serving Ideas
- With grilled chicken
- Drizzled over bowls
- As a dipping sauce
- Meal prep addition
🧊 Storage Recommendations
- Fridge: 1 week
- Use clean jar
- Shake before use
❓ Frequently Asked Questions
1. Can I make it sugar-free?
Yes, use low-carb sweeteners.
2. Can I freeze it?
Not recommended.
3. Is it spicy?
Mild to medium, adjustable.
4. Can I skip fish sauce?
Yes, it’s optional.
5. How long does it last?
About 1 week refrigerated.
🧮 Nutritional Breakdown (Per Serving)
- Calories: 60
- Protein: 1g
- Fat: 0g
- Total Carbs: 12g
- Net Carbs: 10g
📌 Recipe Snapshot
- Prep Time: 10 minutes
- Cook Time: 10 minutes
- Total Time: 20 minutes
- Course: Sauce
- Cuisine: Asian-inspired
- Servings: 10
- Calories: 60
Anti-Inflammatory Sweet Chili Sauce Recipe
Ingredients
- Red chilies – ½ cup
- Water – ½ cup
- Honey or coconut sugar – ⅓–½ cup
- Apple cider vinegar – ½ cup
- Garlic – 2 tbsp
- Ginger – 1 tsp
- Salt – 1 tsp
- Fish sauce – 1 tsp
- Cornstarch – 1 tbsp
Instructions
- Start by adding the red chilies and water into a blender. Blend on high speed until the mixture becomes completely smooth and slightly thick. Make sure there are no large chili pieces left, as a smooth base will give your sauce that glossy, professional texture. If needed, pause and scrape down the sides to ensure everything blends evenly.
- Carefully pour the blended chili mixture into a saucepan. Place it over low to medium heat—avoid high heat at this stage, as it can affect the balance of flavors and cause the mixture to cook too aggressively.
- Add your sweetener, vinegar, minced garlic, grated ginger, salt, and fish sauce into the saucepan. Stir gently to combine everything. At this point, the sauce will start to smell rich and aromatic as the garlic and ginger release their flavors. Make sure all ingredients are evenly mixed so no part of the sauce tastes too strong or too mild.
- Let the mixture simmer gently for about 5–10 minutes. Stir occasionally to prevent sticking at the bottom. You’ll notice the sauce slightly thickening and the flavors becoming more rounded. Keep the heat low to preserve the freshness of the ingredients and avoid overcooking, which can dull the taste.
- In a small bowl, mix the cornstarch with water until it forms a smooth, lump-free slurry. Slowly pour this mixture into the saucepan while stirring continuously. This step is important—adding it gradually while stirring prevents clumps and ensures a smooth, even consistency.
- Continue stirring the sauce over low heat as it thickens. Within a few minutes, you’ll see it turn glossy and slightly translucent. Keep stirring until you reach your desired thickness—remember, it will thicken a little more as it cools.
- Once the sauce has thickened properly, remove the saucepan from heat. Allow it to cool at room temperature for about 10–15 minutes. This cooling stage helps the flavors settle and develop a more balanced taste.
- Transfer the cooled sauce into a clean, dry glass jar. Seal it tightly and store it in the refrigerator. Before each use, give it a quick stir or shake, as natural separation can occur. The sauce will stay fresh and flavorful for several days when properly stored.