This post may contains Amazon affiliate and other affiliate links. If you make a purchase through these links, I may earn a small commission at no extra cost to you. Your support helps me continue to provide quality content. I only recommend products I personally trust and believe will add value to your experience. For more details, please visit my Privacy Policy.
Estimated SmartPoints: approximately 2–3 per slice, based on 8 slices; independent estimate, not an official WW calculation.
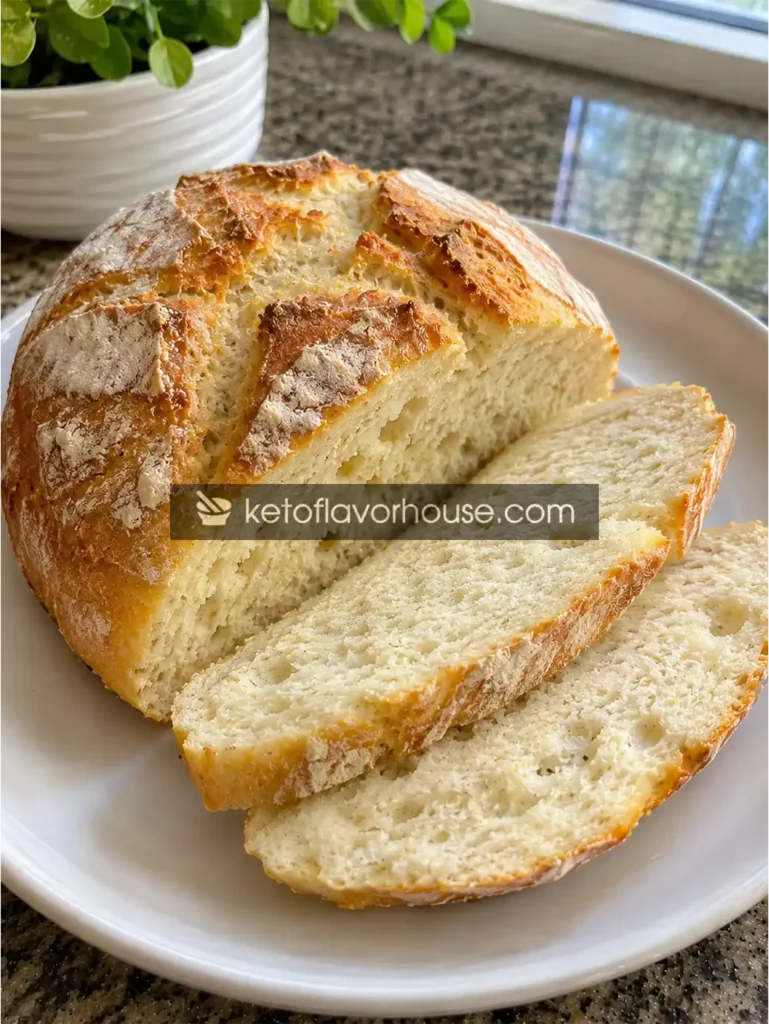
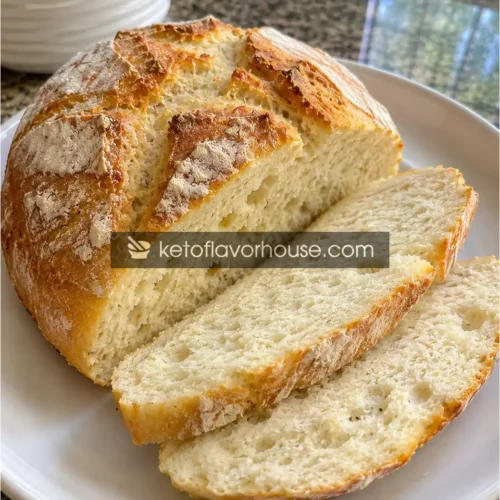
This Weight Watchers 2-Ingredient Yogurt Bread is a simple homemade bread made with just two main ingredients: self-rising flour and plain nonfat Greek yogurt. It has a lightly crisp exterior, a soft, slightly chewy center, and a mild flavor that works with both sweet and savory toppings. There is no yeast, no lengthy rising time, and no complicated bread-making equipment required.
If you enjoy having fresh bread with breakfast, soup, or a sandwich but want to keep an eye on your daily Points budget, this is a useful recipe to have in your collection. The Greek yogurt adds protein and moisture, while the self-rising flour provides the structure and lift. The result is more rustic and substantial than a fluffy supermarket sandwich loaf, but it is satisfying and straightforward to make.
For this version, the dough is shaped into a small round loaf and divided into eight slices after baking. The estimated Points range is a planning guide only. Flour is the main Points contributor, and your personal WW app may calculate a different value depending on your plan and the exact products you use.
Why You’ll Love This Recipe
Two main ingredients
Self-rising flour and plain nonfat Greek yogurt create a simple dough without yeast, oil, or added sugar.
No yeast rising
There is no proofing stage. Mix, knead briefly, shape, and bake when the oven is ready.
Versatile bread
Serve it with eggs, soup, lean protein, or a measured spread. Its mild flavor suits many meals.
Yogurt protein
Greek yogurt contributes protein and moisture, giving this simple bread a more substantial nutritional profile.
There is a reason two-ingredient dough has become popular with home cooks: it removes several of the steps that make traditional bread feel intimidating. You do not need to activate yeast, wait for the dough to double in size, or plan your afternoon around proofing times.
Here are a few practical advantages:
- Accessible ingredients: Both ingredients are widely available in US grocery stores.
- Flexible serving options: A slice can accompany breakfast, lunch, or dinner.
- Easy portioning: Cutting the loaf into eight equal slices gives you a consistent serving size.
- No added oil in the dough: The basic recipe does not need butter or oil to come together.
- Easy to customize: Herbs, garlic powder, or other seasonings can be added, although these additions mean the recipe is no longer strictly two ingredients.
One thing to understand is that this is not a zero-carb bread. Flour contains carbohydrates, and Greek yogurt also contains some naturally occurring carbohydrates. The benefit is simplicity and the opportunity to make a measured homemade loaf, not the elimination of carbohydrates.
WW SmartPoints Information
For the recipe as written, I would use approximately 2–3 Estimated SmartPoints per slice, assuming eight equal slices and a plain nonfat Greek yogurt. This is an independent estimate rather than an official WW calculation.
The full loaf would therefore be approximately 16–24 estimated Points. The range is intentionally broad because the flour brand, flour quantity, yogurt product, and current WW plan all matter.
| Recipe detail | Estimate |
|---|---|
| Main ingredients | 2 |
| Loaf yield | 8 slices |
| Estimated Points per slice | 2–3 |
| Estimated Points for whole loaf | 16–24 |
| Main Points contributor | Self-rising flour |
| Main protein contributor | Greek yogurt |
Self-rising flour is not automatically a zero-point ingredient. It contains wheat flour and contributes carbohydrates and calories. Plain nonfat Greek yogurt may be treated differently depending on the member’s plan and account settings, so do not assume it is zero-point for every reader.
To calculate your personal result, enter the full quantities and brands into your current WW app, then divide the total recipe Points by eight. If you cut the loaf into ten thinner slices, the total Points remain the same, but the Points per slice will be lower. If you make six thicker slices, each serving will contain more.
My Personal Experience With Two-Ingredient Yogurt Dough
The first thing to expect with this style of bread is a dough that feels different from conventional yeast bread. It is sticky, soft, and somewhat tacky when the yogurt and flour first come together. That does not mean something has gone wrong. Greek yogurt has a thick consistency, and the dough needs a little kneading to become more manageable.
I would resist the temptation to keep adding flour until the dough feels completely dry. Too much extra flour can make the finished bread dense and tough. Instead, lightly flour your hands and work surface, knead briefly, and add only a small amount of flour when the dough is genuinely too sticky to handle.
The finished loaf is best thought of as a rustic quick bread rather than a classic airy sandwich loaf. It has a closer crumb and a mild tang from the yogurt. I like the idea of serving it warm with eggs or using a cooled slice as the base for a simple open-faced sandwich. Its versatility is one of its strongest features.
Required Equipment
Large mixing bowl
A large bowl gives you enough room to combine the yogurt and flour without sending flour over the sides. A wide bowl is easier to work in than a narrow container. You can use a stand mixer with a dough hook, but hand mixing is perfectly adequate for this small batch.
Measuring cups or kitchen scale
A scale is the more consistent option. Flour can vary considerably depending on how firmly it is packed into a measuring cup. For this recipe, use 240 g self-rising flour and approximately 490 g plain nonfat Greek yogurt. If you use volume measurements, spoon the flour into the measuring cup and level it rather than scooping directly from the bag.
Baking sheet
A flat baking sheet gives the round loaf room to spread slightly as it bakes. Line it with parchment paper to reduce sticking and make cleanup easier. Avoid placing the loaf too close to the edge of the tray.
Parchment paper
Parchment helps prevent the dough from sticking to the pan. It also makes it easier to transfer the shaped loaf without adding oil or butter to the baking surface.
Bench scraper or spatula
A bench scraper helps lift sticky dough from the work surface. A sturdy spatula is useful for combining the initial mixture and scraping the bowl clean.
Sharp knife
Use a sharp knife to score the top of the loaf before baking. A shallow cross or a few short slashes help control how the surface opens as the bread expands in the oven.
Wire cooling rack
A cooling rack allows steam to escape from the bottom of the loaf. If you leave hot bread on a solid surface, condensation can collect underneath and soften the crust.
Ingredients and Substitutions
The basic dough has only two ingredients. That simplicity is useful, but it also means the quality and consistency of those ingredients matter.
Ingredient 1: Self-rising flour — 2 cups (240 g)
Self-rising flour is all-purpose wheat flour that already contains baking powder and salt. It provides the structure for the bread and the leavening needed to help it rise in the oven.
Use a fresh bag that has been stored in a dry place. If the flour has been sitting in your cupboard for a long time, its leavening may not perform as well. Since the recipe depends on the baking powder already mixed into the flour, freshness matters.
WW considerations: Flour is the main Points contributor in this recipe. It provides carbohydrates and calories, so it should be measured carefully. Adding extra flour during kneading can increase the final nutrition and Points beyond the estimate.
Substitution: You can make a self-rising flour substitute by combining 2 cups all-purpose flour with 3 teaspoons baking powder and ½ teaspoon salt. Whisk thoroughly before adding the yogurt. This keeps the same basic type of flour, although your exact brand and measurements may change the nutritional calculation.
Ingredient 2: Plain nonfat Greek yogurt — 2 cups (about 490 g)
Greek yogurt supplies moisture and helps bind the flour into a dough. It also contributes protein and gives the bread a subtle tang.
Use thick, plain, unsweetened Greek yogurt. Avoid flavored yogurt because it may contain added sugar, sweeteners, fruit, or extra liquid. Regular plain yogurt is usually thinner than Greek yogurt and may make the dough too wet.
WW considerations: Plain nonfat Greek yogurt may be treated as a ZeroPoint food for some members and plans, but eligibility is not universal. Check your personal app. Its protein content also varies by brand.
Substitution: Plain low-fat Greek yogurt can work, but it may contribute more calories and fat. If you use regular yogurt, strain it through a fine sieve until it thickens before measuring. Do not pour extra liquid into the dough simply to make it easier to mix.
What about extra flour for kneading?
You may need a little flour to dust your hands and work surface. Try to keep this to 1 tablespoon (about 8 g) or less, using only what is needed to shape the dough. This is additional flour and should be included in your final ingredient calculation if you use it.
Ingredient anatomy and practical swaps
How to Make Weight Watchers 2-Ingredient Yogurt Bread
The key to this recipe is managing the dough’s moisture. Greek yogurt brands vary in thickness, so the exact feel of the dough may differ slightly. Follow the visual cues below instead of adding large amounts of flour to force it into a particular consistency.
Step 1: Preheat the oven and prepare the baking sheet
Preheat your oven to 375°F (190°C). Line a baking sheet with parchment paper and set it aside.
Make sure the oven is fully heated before the bread goes in. Because this dough does not have a yeast proofing stage, it relies on the leavening in the self-rising flour and the heat of the oven to develop its structure. A properly preheated oven helps the outside begin setting while the inside cooks.
Step 2: Measure the ingredients
Measure 2 cups (240 g) of self-rising flour and 2 cups (about 490 g) of plain nonfat Greek yogurt.
If you are using measuring cups, spoon the flour into the cup and level the top. Do not pack it down. For yogurt, use a spoon to transfer it into the measuring cup and level it gently.
If the yogurt has liquid sitting on the surface, stir it back in only if the yogurt is still thick. If it has separated significantly and looks watery, drain it briefly before measuring. Very watery yogurt can make the dough difficult to handle.
Step 3: Mix the flour and yogurt
Place the flour in a large mixing bowl. Add the Greek yogurt and stir with a sturdy spoon or spatula until a shaggy dough forms.
At first, you may see dry patches of flour around the edges and sticky clumps in the middle. Keep mixing and scrape the bottom of the bowl. The mixture should gradually come together into one rough mass.
Do not worry if the dough looks uneven at this stage. The next step will bring it together. However, if there is a large amount of loose flour after thorough mixing, check that the yogurt was measured correctly before adding more.
Step 4: Knead briefly
Lightly flour your work surface and your hands. Turn the dough out of the bowl and knead for approximately 2–3 minutes, folding it over itself and pressing gently.
The goal is to make the dough more uniform, not to develop the same gluten structure as a traditional yeast loaf. Over-kneading can make the bread tough. If the dough sticks heavily to your fingers, dust your hands with a little flour rather than adding a large amount directly to the dough.
The finished dough should be soft and slightly tacky. It does not need to feel completely dry or smooth.
Step 5: Shape the loaf
Gather the dough into a round ball. Transfer it to the parchment-lined baking sheet and gently flatten it into a thick round loaf, approximately 6–7 inches wide.
Avoid making the loaf too tall or too wide. A very thick loaf may brown on the outside before the center is fully cooked, while a very flat loaf may bake quickly and become dry.
Use a sharp knife to make a shallow cross on the top, about ¼ inch deep. This gives the surface a controlled place to expand as the bread bakes.
Step 6: Bake until the center is cooked
Place the baking sheet on the middle rack and bake for approximately 35–45 minutes. The exact time will depend on the thickness of the loaf, your oven, and the moisture content of the yogurt.
Look for a golden exterior and a loaf that feels firm when gently tapped. The center should not feel wet or doughy. For a more reliable check, use an instant-read thermometer inserted into the thickest part of the loaf. Aim for approximately 200–205°F (93–96°C).
If the outside is becoming dark before the center is ready, loosely tent the loaf with foil and continue baking. Do not slice it immediately to check the center, because cutting into hot bread releases steam and can make the crumb seem gummy.
Step 7: Cool before slicing
Remove the bread from the oven and let it rest on the baking sheet for about 5 minutes. Transfer it to a wire rack and allow it to cool for at least 30 minutes before slicing.
This cooling period is important. The interior continues to set as the bread cools. If you cut into it too soon, the center may compress and appear undercooked even when it has baked properly.
Use a serrated bread knife and gentle sawing motions to cut the loaf into eight equal slices. If you want consistent portions for WW tracking, divide the loaf in half, then into quarters, and finally into eighths.
Step-by-step process guide
From mixing bowl to fresh bread
Heat the oven to 375°F and line a baking sheet. Cue: oven fully hot and tray ready.
Stir flour and Greek yogurt until a shaggy mass forms. Cue: no large dry pockets remain.
Knead briefly, form a round loaf, and score the top. Cue: soft dough that holds its shape.
Bake 35–45 minutes. Cue: golden crust and a cooked center around 200–205°F.
Cool at least 30 minutes before cutting. Cue: crumb has set and slices hold together.
Common Mistakes to Avoid
1. Using thin or watery yogurt
The dough depends on thick Greek yogurt. Regular yogurt or a product with excess whey can make the mixture too sticky to shape. Choose plain Greek yogurt and drain it briefly if it is unusually loose.
2. Adding too much flour during kneading
A sticky dough can be frustrating, but adding several extra tablespoons of flour changes the flour-to-yogurt ratio. It can also make the bread dry and dense. Start with lightly floured hands and add only the smallest amount needed to handle the dough.
3. Kneading for too long
This is not a traditional yeast loaf. It does not need extended kneading or a long gluten-development stage. A few minutes is enough to bring the dough together. Excessive kneading can produce a tougher crumb.
4. Making the loaf too thick
A very thick round loaf can brown before the center is cooked. Shape it into a broad, moderately thick round rather than a tall ball. If the outside is browning too quickly, tent it loosely with foil.
5. Slicing while hot
The crumb needs time to set after baking. Cutting immediately can compress the center and make it seem gummy. Give the loaf at least 30 minutes on a cooling rack before slicing.
6. Assuming all yogurt breads have the same Points
Different recipes use different amounts of flour, yogurt, oil, cheese, or toppings. Even if two recipes both use Greek yogurt, their Points may be very different. Calculate this specific ingredient list and serving count in your current WW app.
Pro Tips for Better Yogurt Bread
- Choose thick yogurt: A thick, spoonable Greek yogurt gives you better control over the dough.
- Weigh the flour: Measuring by weight reduces variation caused by packing flour into a cup.
- Keep kneading brief: Bring the dough together without working it excessively.
- Use parchment: This prevents sticking without needing to grease the baking sheet.
- Score the top: A shallow cut helps the loaf expand more predictably.
- Check the center: A golden crust alone does not confirm that the inside is cooked.
- Cool completely: This makes the crumb easier to slice and portion.
- Use a serrated knife: A gentle sawing motion helps prevent the soft interior from being compressed.
Troubleshooting: What Went Wrong?
WW-Friendly Nutrition and Serving Strategy
This bread can be useful in a WW meal plan because it gives you a defined portion of homemade bread made from a short ingredient list. However, it is important to understand what it does and does not offer.
Flour is still the main source of energy
Self-rising flour provides most of the carbohydrates and calories in the loaf. Even though the recipe has no added sugar or oil, flour is not calorie-free and should not be treated as a zero-point ingredient. Measuring the flour accurately is the most important step for keeping the nutrition estimate consistent.
Greek yogurt contributes protein
Greek yogurt adds protein and moisture. Compared with using water alone, it gives the dough a richer texture and improves the protein content of the finished bread. The amount of protein varies by brand, so check the nutrition label if you are tracking macros.
Portion size matters
The recipe is divided into eight slices. That serving count is important for both nutrition and Points. If you cut the loaf into four large pieces, each piece contains twice as much of the recipe as one of the eight-slice portions.
For consistent tracking, let the loaf cool and weigh it if needed. Divide the total loaf weight by eight, then portion each slice as closely as possible to that target. This is especially useful if the loaf has an uneven shape.
How to build a balanced meal around it
The bread can be part of a meal with lean protein and vegetables. For example:
- Serve one slice with scrambled eggs and tomatoes for breakfast.
- Pair a slice with grilled chicken and a large salad for lunch.
- Use it alongside vegetable soup and a lean protein source for dinner.
- Top it with cottage cheese and cucumber for a simple savory snack.
The bread itself does not guarantee weight loss or a calorie deficit. It is one component of the meal, and your total food intake and personal Points budget still matter.
Variations You Can Try
The recipe below is deliberately kept to two main ingredients. Once you have made it successfully, you can experiment with additions. Keep in mind that every addition changes the recipe’s nutrition and may change its Points.
Garlic and herb yogurt bread
Add ½ teaspoon garlic powder and 1 teaspoon dried Italian herbs to the flour before mixing. This gives the bread a savory aroma that works well with soup, grilled chicken, and eggs. The small amount of seasoning has little impact on calories, but the recipe is no longer strictly two ingredients.
Everything-seasoned bread
Add 1 tablespoon of everything seasoning to the dough or sprinkle a measured amount over the top before baking. Check the seasoning label because some blends contain added salt. Seeds can also contribute calories and Points, depending on the quantity.
Black pepper and chive bread
Fold 1 tablespoon of finely chopped fresh chives and ¼ teaspoon black pepper into the dough. The flavor is mild and savory, making this version especially good with eggs or cottage cheese. Fresh herbs add very little energy in the amount used, although the complete recipe should still be recalculated if tracking precisely.
Cheesy yogurt bread
Fold ¼ cup (28 g) finely grated reduced-fat cheddar into the dough. The bread will taste richer and have a slightly softer interior. Cheese adds protein, fat, sodium, and calories, so the Points estimate will likely increase. Calculate the revised recipe rather than assigning an arbitrary increase.
Cinnamon breakfast bread
Add ½ teaspoon ground cinnamon and a suitable amount of granulated zero-calorie sweetener. This produces a lightly sweet version that pairs well with fruit or a thin layer of yogurt. Check the sweetener label, as some products contain added carbohydrates or calories.
Small individual rolls
Instead of shaping one round loaf, divide the dough into eight equal portions and form them into rolls. Place them on a parchment-lined baking sheet with space between them. Begin checking for doneness earlier than you would for a whole loaf, as smaller rolls bake faster. The total recipe Points remain the same if you do not add ingredients, but the individual roll size determines the Points per serving.
Tips for Serving and Optional Additions
The mild flavor of yogurt bread makes it easy to pair with different ingredients. It is not strongly flavored, so it can work with both sweet and savory toppings.
For a simple savory option, toast a slice and add cottage cheese, sliced cucumber, and black pepper. For breakfast, serve it with scrambled eggs and tomatoes. If you prefer a sweeter option, add fresh berries and a spoonful of plain Greek yogurt.
Here are a few additions to consider:
- Cottage cheese: Adds protein and moisture as a topping. The Points impact depends on the product and serving size.
- Reduced-fat cheese: Works well for a savory open-faced sandwich but adds fat, calories, and Points.
- Fresh herbs: Chives, parsley, and rosemary add flavor with minimal calories in small quantities.
- Tomato and cucumber: Add freshness and texture without needing a rich spread.
- Measured nut butter: Provides a richer topping, but it is calorie-dense and should be measured carefully.
- Fruit preserves: Choose a no-added-sugar variety if desired, but check the label and count any ingredients that contribute to your personal Points calculation.
Serving Ideas
Easy ways to serve yogurt bread
Toast a slice and serve with scrambled eggs and sliced tomatoes for a balanced start.
Top with cottage cheese, cucumber, and black pepper for a quick savory lunch.
Serve beside vegetable or chicken soup instead of a larger bread portion.
Add sliced chicken breast, lettuce, and tomato for a simple sandwich-style meal.
Pair a slice with berries and a little plain yogurt for a naturally sweet combination.
For sandwiches, remember that this loaf has a more compact crumb than a conventional sandwich bread. It is best for open-faced sandwiches or modest fillings rather than very tall, heavily loaded sandwiches. Toasting also helps the surface become firmer and adds a pleasant contrast to the soft interior.
Storage Recommendations
Because this bread contains yogurt, it should be stored carefully once cooled. Do not leave it uncovered on the counter for an extended period.
Room temperature
For best quality, let the loaf cool completely, then store it in a clean, airtight container. If you plan to eat it the same day, it can be kept in a cool, dry place for a short period. For longer storage, refrigeration is the safer choice because the bread contains dairy.
Refrigerator storage
Store the cooled bread in an airtight container or a resealable food-storage bag in the refrigerator. Use within 3–4 days for best quality. Keep it away from foods with strong odors.
Refrigeration can make bread feel firmer. Toasting a slice briefly can help restore some of its pleasant texture. Do not add butter or oil automatically when reheating; those additions change the nutrition and Points.
Freezing
This bread freezes well when wrapped properly. Slice the fully cooled loaf, place small pieces of parchment between slices, and store them in a freezer-safe bag or container. Remove as much air as possible before sealing.
For best quality, use frozen slices within about 2–3 months. Label the container with the date so you can keep track of storage time.
Thawing and reheating
You can thaw a slice in the refrigerator or toast it directly from frozen. For a softer texture, warm it briefly in the oven. Avoid microwaving for too long, as the bread can become rubbery or overly firm as it cools.
Storage timeline
Yogurt bread storage guide
Allow steam to escape on a wire rack before wrapping.
Keep slices covered in an airtight container.
Freeze slices separately with parchment between them.
Toast refrigerated or frozen slices until warmed through.
Discard bread if it develops mold, an unusual smell, or other signs of spoilage. Keep it refrigerated rather than leaving it in a warm kitchen for prolonged storage.
Refrigerating, freezing, or toasting the same bread does not materially change the Points for the same ingredients. If you add butter, cheese, spreads, or other toppings, calculate those separately.
Frequently Asked Questions
1. Is two-ingredient yogurt bread really Weight Watchers-friendly?
It can fit into a Weight Watchers eating plan, but it is not automatically low-point or zero-point. The flour contributes most of the calories, carbohydrates, and Points. Plain nonfat Greek yogurt may have different Points treatment depending on your personal plan. Calculate the complete recipe in your current app and divide by the number of slices you make.
2. Can I use regular plain yogurt instead of Greek yogurt?
Greek yogurt is preferred because it is thicker and contains less free liquid. Regular yogurt may make the dough sticky and difficult to shape. If you only have regular plain yogurt, strain it through a fine sieve until thick, then measure the required amount. The nutrition and Points will depend on the product you use.
3. Can I make this bread without self-rising flour?
Yes. Use 2 cups (240 g) all-purpose flour, 3 teaspoons baking powder, and ½ teaspoon salt. Whisk those ingredients together before adding the yogurt. This is a practical substitute for self-rising flour, but it does not reduce the flour’s calories or Points.
4. Does this bread contain zero carbohydrates?
No. Flour is a carbohydrate-containing ingredient, and Greek yogurt also contains some carbohydrates. This recipe is not suitable to describe as zero-carb. It is a simple two-ingredient bread, not a carb-free bread.
5. Can I make individual rolls instead of a loaf?
Yes. Divide the dough into eight equal portions and shape each into a small round roll. Place them on a parchment-lined baking sheet, leaving space between them. Smaller portions will bake more quickly than a whole loaf, so begin checking for doneness earlier. If you make eight rolls from the same dough, the approximate nutrition per roll will be similar to one-eighth of the loaf.
6. Can I freeze the bread?
Yes. Cool the loaf completely, slice it, and freeze the slices in a sealed freezer-safe bag with parchment between them. For best quality, use within approximately 2–3 months. You can toast a slice directly from frozen or thaw it in the refrigerator.
7. Why is my yogurt bread dense?
A dense loaf can result from old self-rising flour, too much extra flour during kneading, a very thick loaf shape, or insufficient baking. Check the freshness of the flour, measure by weight, knead only briefly, and shape the loaf to a moderate thickness. Allow it to cool fully before judging the crumb.
Nutritional Breakdown Per Serving
Estimated nutrition for one slice, assuming the loaf is divided into eight equal portions and made with 240 g self-rising flour and approximately 490 g plain nonfat Greek yogurt.
| Nutrient | Estimated amount |
|---|---|
| Calories | 140–150 kcal |
| Protein | 9–10 g |
| Fat | 0.5–1.5 g |
| Total carbohydrates | 24–26 g |
| Fiber | 0.5–1 g |
| Net carbohydrates | 23–25 g |
| Sugar | 1–2 g |
| Sodium | 350–450 mg |
| Estimated SmartPoints | 2–3 |
These are approximate values. Flour brands differ in sodium and nutrition, and Greek yogurt brands vary in protein and carbohydrate content. Net carbohydrates are total carbohydrates minus fiber; they are not WW Points.
Recipe Snapshot
- Prep Time: 10 minutes
- Cook Time: 35–45 minutes
- Cooling Time: 30 minutes
- Total Time: Approximately 1 hour 25 minutes
- Course: Bread, Side Dish
- Cuisine: American
- Servings: 8 slices
- Calories: Approximately 140–150 per slice
- Estimated SmartPoints: Approximately 2–3 per slice
Closing Note
This Weight Watchers 2-Ingredient Yogurt Bread is a practical homemade alternative when you want bread without yeast, added oil, or a complicated preparation process. Greek yogurt contributes moisture and protein, while self-rising flour creates the structure. Keep the flour measured, divide the loaf into eight equal slices, and use your personal WW app to confirm the Points for your ingredients.

Ingredients
- 2 cups 240 g self-rising flour
- 2 cups approximately 490 g plain nonfat Greek yogurt
- Up to 1 tablespoon 8 g additional flour for dusting, only as needed
Instructions
- Preheat the oven to 375°F (190°C). Line a baking sheet with parchment paper.
- Place the self-rising flour in a large mixing bowl. Add the Greek yogurt.
- Stir until a shaggy dough forms and no large dry patches remain.
- Lightly flour your hands and work surface. Knead the dough for 2–3 minutes, using as little additional flour as possible.
- Shape into a round loaf approximately 6–7 inches wide and place on the prepared baking sheet.
- Score a shallow cross on top with a sharp knife.
- Bake for 35–45 minutes, until golden and cooked through. The center should reach approximately 200–205°F (93–96°C).
- Cool for 5 minutes on the baking sheet, then transfer to a wire rack and cool for at least 30 minutes.
- Slice into 8 equal portions and serve.