This post may contains Amazon affiliate and other affiliate links. If you make a purchase through these links, I may earn a small commission at no extra cost to you. Your support helps me continue to provide quality content. I only recommend products I personally trust and believe will add value to your experience. For more details, please visit my Privacy Policy.
Estimated SmartPoints: approximately 2–4 per slice, assuming 8 servings. This is a provisional estimate, not an official WW calculation; verify it in your current WW app using your exact ingredients and plan.
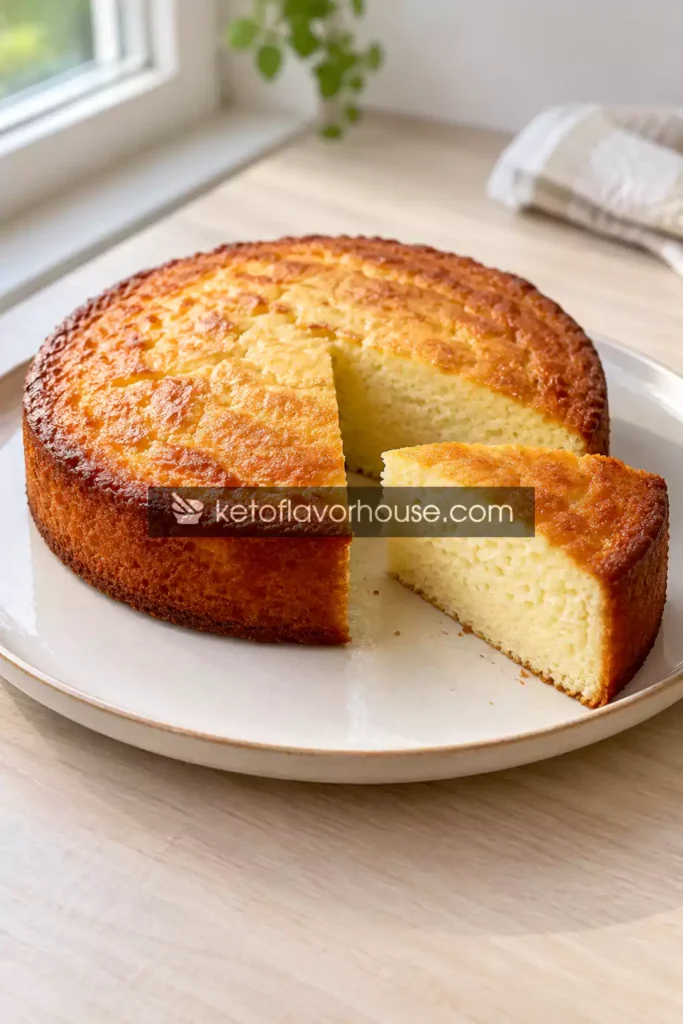
This Weight Watchers Greek Yogurt Cake (Low-Calorie & Easy) is a light, gently tangy dessert made with creamy Greek yogurt, eggs, a little flour, vanilla, and a calorie-conscious sweetener. It is designed to deliver the soft, delicate texture of a simple yogurt cake without relying on large amounts of butter, oil, or sugar.
If you enjoy having something sweet with your afternoon coffee or want an easy dessert to share with your family after dinner, this cake is worth adding to your baking list. It uses familiar ingredients, comes together without complicated techniques, and can be flavored with lemon, cinnamon, or a little extra vanilla.
The recipe below uses nonfat Greek yogurt, a calorie-free granulated sweetener, and a modest amount of flour and cornstarch. These choices help keep the calorie content relatively low while allowing the cake to set into a tender, moist slice. The exact nutrition and Points will depend on your ingredient brands and the WW plan you use, so treat the figures throughout this recipe as estimates rather than official values.
Why You’ll Love This Recipe
This cake is for the days when you want a homemade dessert that feels like a treat but doesn’t need a long ingredient list or an elaborate frosting. Its appeal comes from its simplicity: a creamy yogurt base, a delicate vanilla aroma, and a texture that sits somewhere between a light snack cake and a soft baked yogurt dessert.
Why This Yogurt Cake Works
Simple ingredients, gentle sweetness, and a soft texture.
Tender texture
Greek yogurt brings moisture and a mild tang, creating a soft cake when it is baked gently.
Everyday ingredients
Yogurt, eggs, flour, sweetener, and pantry staples are all you need for the basic version.
Easy preparation
Mix the wet ingredients, fold in the dry ingredients, and let the oven do the work.
Flexible flavor
Vanilla, lemon zest, cinnamon, or a small amount of fruit can give each batch a different character.
A soft cake without a heavy frosting
The Greek yogurt gives the batter moisture and a pleasant dairy tang. Because this recipe doesn’t use much added fat, the result won’t taste exactly like a traditional butter cake. Instead, expect a more delicate crumb with a slightly creamy center, especially if you chill the cake before slicing.
The texture is best when you avoid overbaking it. The edges should look set, while the center may retain a slight wobble when the pan is moved gently. It will continue to firm as it cools.
A dessert you can portion easily
Cutting the cake into eight equal slices makes it easier to track your serving and estimate the nutrition for your own WW plan. If you prefer smaller portions, you can cut it into ten slices instead, although the nutritional figures per slice will change accordingly.
Remember that dividing a cake into more pieces reduces the calories and nutrients per piece, but it does not change the total nutrition of the whole cake.
Easy to adapt for your household
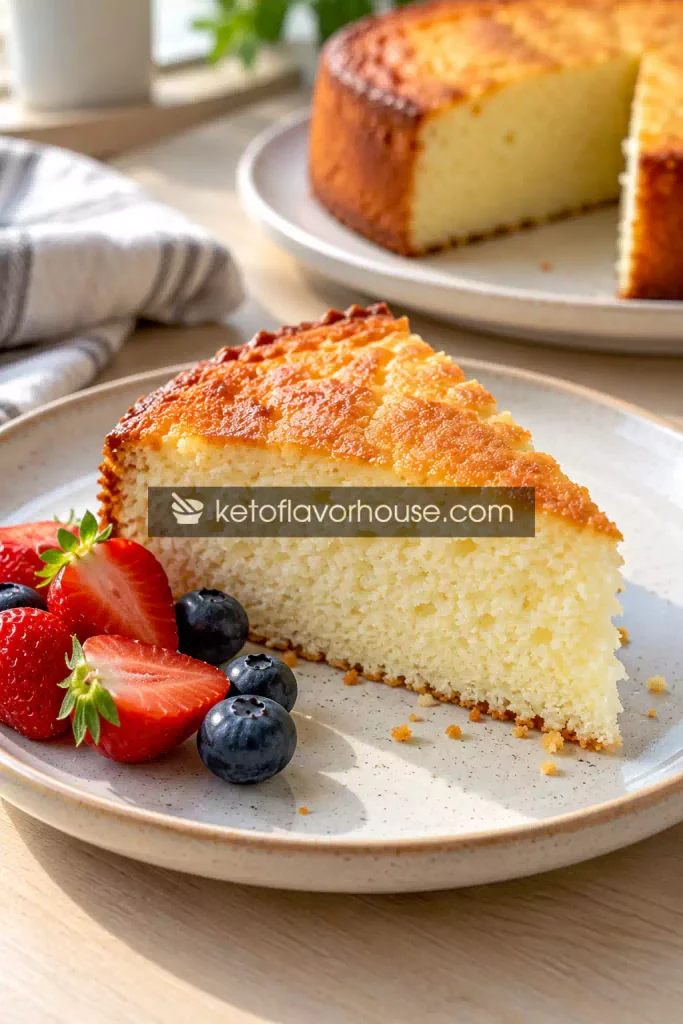
Vanilla makes a dependable everyday version, while lemon zest gives the cake a brighter flavor. Cinnamon can make it taste warmer and more comforting. You can also serve individual slices with fresh strawberries or blueberries rather than covering the entire cake with a sugary topping.
Choose additions deliberately. Nuts, chocolate chips, honey, syrup, and richer toppings can raise calories and Points, so measure them and recalculate your serving if you add them.
WW SmartPoints Information
The exact SmartPoints value for this Greek yogurt cake cannot be confirmed without running the full ingredient list through the applicable WW calculation system. Different WW plans may treat foods differently, and some members have personalized Points budgets or food classifications.
For planning purposes, the recipe uses an initial estimate of 2–4 SmartPoints per slice for 8 servings. This range is provisional and should not be presented as an official WW result. The actual value may fall outside it depending on your plan, the sweetener used, the yogurt label, and the calculation rules in your app.
The estimate is based on the ingredients listed in the recipe card rather than on the title alone. Nonfat Greek yogurt may be a zero-Points food under some applicable plans, but that is not universal. Eggs, flour, and other ingredients must also be entered according to the reader’s own plan.
How to use this estimate responsibly
For the most accurate result, check the nutritional label of your yogurt and sweetener, weigh the flour, and enter the exact ingredients into your current WW app. If you replace the sweetener with regular sugar, add oil, or use full-fat yogurt, recalculate the recipe rather than keeping the original estimate.
It is also worth separating calories from Points. A recipe can have relatively few calories and still have a different Points value depending on the plan. Conversely, a food that qualifies as zero Points for one member may not have the same treatment for another.
My Personal Cooking Notes
For a cake built around Greek yogurt, the biggest thing to understand is that the batter is naturally wetter than a traditional cake batter. When you first combine the yogurt and eggs, the mixture should look smooth and creamy. Once the flour and cornstarch are added, it will thicken a little, but it won’t resemble a stiff cookie dough. That’s normal.
I would focus on gentle mixing rather than trying to beat lots of air into the batter. Too much mixing after adding flour can make the cake tougher, while aggressive baking can cause the edges to set long before the middle has finished cooking. A moderate oven temperature gives the center time to set without drying the outside.
Cooling is just as important as baking. A yogurt-based cake can seem softer than expected when it first comes out of the oven. Let it cool in the pan, then chill it before cutting if you want neat slices. The flavor also becomes more settled after chilling, particularly when lemon zest or vanilla is used.
One practical adjustment I would make for future batches is to taste the yogurt before mixing. Some brands are tangier than others, and different calorie-free sweeteners vary in sweetness and aftertaste. Start with the listed amount of sweetener, and choose a product you already enjoy rather than assuming all granulated substitutes behave identically.
Required Equipment
You don’t need specialist baking equipment for this recipe. A few basic tools will help you mix the batter evenly, bake the cake through, and remove it without damaging the soft sides.
Mixing Bowl
Use a medium or large bowl with enough room to whisk the yogurt, eggs, sweetener, and vanilla without splashing. A bowl with a stable base is helpful when you add the dry ingredients. A large measuring jug can work as an alternative, provided it has enough capacity.
Whisk
A balloon whisk is useful for breaking up the eggs and blending the yogurt into a smooth mixture. You don’t need an electric mixer; in fact, a hand whisk makes it easier to avoid excessive mixing. A fork will work in a pinch, but take extra care to remove visible streaks of egg.
Measuring Cups and Kitchen Scale
Accurate measurements matter in lower-calorie baking because there is less butter or oil to compensate for changes in flour quantity. A kitchen scale is particularly helpful for measuring the flour and cornstarch. Weighing ingredients also makes it easier to enter the correct amounts into your WW app.
8-Inch Round Cake Pan
An 8-inch round pan is a practical size for the listed batter. A springform pan can make removal easier, but a standard cake pan also works if it is lined properly. A pan that is much smaller may leave the center underbaked, while a larger pan will produce a thinner cake that may finish sooner.
Parchment Paper
Line the base of the pan with parchment and lightly coat the sides with nonstick cooking spray. This helps prevent sticking without adding a substantial amount of fat. Cut the parchment to fit the base rather than allowing large pieces to fold into the batter.
Oven Thermometer
If your oven tends to run hot or cool, an oven thermometer can help. A difference of even a small number of degrees can affect the way a delicate yogurt cake sets. Place the cake on the center rack for more even heat exposure.
Ingredients and Substitutions
This version uses a short ingredient list with each ingredient serving a specific purpose. Because the cake relies on yogurt and eggs for its structure, avoid making several substitutions at once unless you are prepared to test the results.
Nonfat Plain Greek Yogurt — 2 cups (about 450 g)
Greek yogurt is the defining ingredient. It adds moisture, a mild tang, and protein while creating a thicker batter than regular yogurt. Choose plain, unsweetened yogurt so that you can control the sweetness and avoid unexpected added sugar.
Nonfat Greek yogurt is often a useful option for a lighter dessert because it generally contains less fat and fewer calories than full-fat yogurt. However, the nutritional values vary by brand, and its WW Points treatment depends on your plan.
Substitution: Full-fat Greek yogurt can make the cake taste richer and may produce a creamier texture. It will generally increase the fat and calorie content, so recalculate the nutrition and Points. Regular yogurt is thinner and may make the cake softer or wetter; if you use it, choose a thick variety and expect some texture differences.
Large Eggs — 3
Eggs help bind the ingredients and give the cake structure as it bakes. They also contribute protein and fat, which influence the nutrition profile. Use large eggs at room temperature if possible; they blend more evenly with the yogurt.
Substitution: An egg substitute may work, but results vary considerably by product. Replacing all three eggs with a liquid egg substitute can change the cake’s firmness and moisture. Follow the substitute’s conversion instructions, and recalculate the nutritional information using the amount actually used.
Granulated Calorie-Free Sweetener — ½ cup
Choose a granulated sweetener intended for baking, such as an erythritol-based blend or another product labeled for one-to-one sugar replacement. Sweetener products differ in sweetness, bulk, and aftertaste, so check the package instructions.
The sweetener contributes sweetness without the same calories as an equivalent quantity of regular sugar, depending on the specific product. It may still affect the recipe’s texture, and it should not automatically be assumed to contribute zero Points under every WW plan.
Substitution: Regular granulated sugar can be used, but it will substantially increase the recipe’s sugar and calorie content. Liquid sweeteners are less convenient because they add moisture and may change how the cake sets.
All-Purpose Flour — ½ cup (about 60 g)
Flour gives the yogurt-and-egg mixture enough structure to become a sliceable cake. The modest amount keeps the cake from becoming too dense while helping absorb some of the moisture from the yogurt.
Substitution: A gluten-free all-purpose baking blend may work if it is designed to replace wheat flour in cakes. Different blends absorb moisture differently, so the texture may be slightly more delicate. Almond flour is not a direct one-to-one replacement: it has a different fat content and structure, and it can produce a denser cake.
Cornstarch — 2 tablespoons (about 16 g)
Cornstarch helps soften the crumb and can reduce the heavy texture that sometimes develops in yogurt-based baking. It works alongside the flour rather than replacing all of it.
Substitution: Arrowroot starch may work in a similar quantity, although the final texture may differ. If you omit the starch, expect a potentially firmer or less delicate crumb. Because changing the quantity of starch also changes the recipe’s nutrient profile, update your calculation if you experiment.
Vanilla Extract — 1 teaspoon
Vanilla rounds out the tang of the yogurt and gives the cake a familiar dessert aroma. Pure vanilla extract and imitation vanilla both work; the choice mainly affects flavor and cost at this quantity.
Substitution: A little almond extract can provide a different flavor, but it is stronger than vanilla. Use it sparingly. Lemon extract can also be used, although fresh lemon zest provides a more natural citrus aroma.
Baking Powder — 1 teaspoon
Baking powder gives the batter some lift. Check that it is fresh, since an old container may produce a flatter, denser cake. Distribute it evenly through the dry ingredients to avoid pockets of uneven rising.
Lemon Zest — 1 teaspoon, optional
Lemon zest adds fragrance and brightens the flavor without requiring a large quantity of juice or sugar. Use only the colored outer skin of the lemon; the white pith underneath can taste bitter.
You can omit the zest for a plain vanilla cake or replace it with a small amount of cinnamon. Either choice should have only a modest effect on the overall nutrition when used in the quantities suggested.
Smart Swaps for Yogurt Cake
Choose substitutions based on texture, flavor, and the nutrition label — not just the package claims.
| Original | Possible swap | What changes? |
|---|---|---|
| Nonfat Greek yogurt | Full-fat Greek yogurt | Richer flavor and creamier mouthfeel; usually more calories and fat. |
| Baking sweetener | Regular sugar | More calories and sugar; sweetness and browning may change. |
| All-purpose flour | Gluten-free baking blend | Can work, but absorbency and crumb depend on the blend. |
| Lemon zest | Cinnamon or extra vanilla | Changes flavor without materially changing the recipe structure. |
How to Make Weight Watchers Greek Yogurt Cake
The key to a successful yogurt cake is managing moisture and giving the center enough time to set. Follow the steps below in order, and resist the temptation to cut into the cake while it is still warm.
Step 1: Prepare the Oven and Pan
Preheat the oven to 350°F (175°C). Position a rack in the center of the oven, then line the base of an 8-inch round cake pan with parchment paper. Lightly coat the sides with nonstick cooking spray.
Prepare the pan before mixing the batter so that the ingredients can go straight into the oven once combined. If the oven is still heating after the batter is ready, the baking powder may begin reacting before the cake reaches the correct temperature.
Step 2: Whisk the Yogurt, Eggs, Sweetener, and Vanilla
Add the Greek yogurt to a mixing bowl. Whisk in the eggs one at a time, then add the granulated sweetener and vanilla. Continue whisking until the mixture looks uniform and creamy, with no obvious streaks of egg white.
This should take about two to three minutes by hand. You are looking for a smooth mixture rather than a foamy one. If the yogurt is especially thick, scrape the sides and bottom of the bowl so that no dense pockets remain.
Add the optional lemon zest at this stage if you are using it. Mixing the zest into the wet ingredients helps distribute its aroma throughout the cake.
Step 3: Combine the Dry Ingredients
In a separate bowl, whisk together the flour, cornstarch, and baking powder. This step distributes the baking powder through the flour so that the cake rises more evenly.
Add the dry mixture to the yogurt mixture in two portions. Fold gently with a spatula or whisk just until no dry flour remains. The batter should be smooth and pourable, although it will be thicker than milk-based cake batter.
Avoid vigorous mixing once the flour is incorporated. If the batter looks a little lumpy, check whether the lumps are simply thicker yogurt or dry flour. A few small yogurt streaks can be worked out gently; don’t continue beating the mixture for several minutes.
Step 4: Transfer the Batter to the Pan
Pour the batter into the prepared cake pan. Use a spatula to scrape the bowl and spread the batter into an even layer. Tap the pan lightly on the counter once or twice to release large air pockets.
The surface should be fairly level, with no large clumps of flour. If the batter is uneven, one side of the cake may bake faster than the other.
Step 5: Bake Until the Center Sets
Bake for approximately 30–40 minutes, checking toward the earlier end of the range. Exact timing depends on your oven, pan material, yogurt consistency, and the temperature of the ingredients.
The edges should look set, and the top may develop a light golden color. The center should no longer look liquid. A gentle wobble is acceptable, but the cake should not ripple like uncooked batter.
If the edges are browning quickly while the center remains wet, your oven may be running hot. Reduce the temperature slightly for the remaining baking time and continue checking at short intervals. Avoid opening the oven repeatedly during the first 20 minutes, when the cake is still developing its structure.
Step 6: Cool Before Slicing
Remove the cake from the oven and let it rest in the pan for about 15–20 minutes. The structure will continue to settle as it cools. Run a thin knife carefully around the edge if needed, then remove the cake from the pan once it is firm enough to handle.
Transfer it to a cooling rack. For cleaner slices and a firmer texture, refrigerate the cooled cake before serving. If you try to slice it while warm, the center may compress or stick to the knife.
Step 7: Portion and Serve
Once the cake is cool, divide it into eight equal slices. A long, sharp knife works well; wipe the blade between cuts for a cleaner finish.
Serve plain, or add a few fresh berries and a small spoonful of yogurt if desired. Record any toppings in your nutrition calculation, because even small additions can affect the final calories and Points.
The Cake-Making Process at a Glance
Heat the oven to 350°F (175°C) and line an 8-inch cake pan. Look for a fully heated oven and a flat parchment-lined base.
Blend yogurt, eggs, sweetener, and vanilla until creamy. Look for an even mixture without streaks of egg.
Add the flour, cornstarch, and baking powder gently. Look for a smooth, pourable batter without dry flour pockets.
Bake for roughly 30–40 minutes. Look for set edges and a center that no longer appears liquid.
Let the cake cool and chill before portioning. Look for a stable slice that holds its shape.
Common Mistakes to Avoid
Baking at Too High a Temperature
A hot oven can set and brown the outside before the center has finished baking. If the edges are already dark while the middle is still liquid, reduce the oven temperature slightly and give the cake more time. Use an oven thermometer if this happens regularly with your baked goods.
Using Thin or Watery Yogurt
The recipe is designed around thick Greek yogurt. Regular yogurt with a thinner consistency can leave the batter excessively wet, which may result in a cake that takes longer to set or becomes difficult to slice. If you need to use regular yogurt, choose a thick variety and understand that the result may differ from the intended texture.
Overmixing After Adding Flour
Once the flour and cornstarch are incorporated, stop mixing as soon as the batter is uniform. Excessive mixing can develop the gluten in the flour and produce a less tender cake. Small differences in batter texture are normal, so don’t try to make it perfectly silky by whisking indefinitely.
Cutting the Cake While Warm
This cake needs time to firm up. Cutting it immediately after baking can make the center appear underdone even when it has baked properly. Allow it to cool, then chill it before slicing if necessary.
Assuming Every Sweetener Behaves the Same
Some calorie-free sweeteners can leave a cooling sensation or slightly gritty texture, while others dissolve more smoothly. A product that measures cup-for-cup like sugar is convenient, but it may not behave identically during baking. Follow the manufacturer’s baking guidance and expect some variation.
Pro Tips for Best Results
- Use thick yogurt. The consistency of your Greek yogurt has a direct effect on the batter. Avoid products with a pool of separated liquid unless you have mixed them back to the intended consistency.
- Bring cold ingredients closer to room temperature. Yogurt and eggs that are not extremely cold tend to combine more evenly. You don’t need to leave them out for a long time; prepare them while the oven heats.
- Measure flour accurately. Spoon flour into a measuring cup and level it off, or weigh it. Scooping directly from the bag can pack in extra flour and make the cake dense.
- Don’t chase a dark golden top. This is a relatively low-fat cake, so a deeply browned surface isn’t necessary. Use the center’s texture and the overall bake time to judge doneness.
- Chill for neat slices. Refrigeration helps the cake firm up and makes it easier to divide into equal portions.
- Use zest rather than lots of juice. Lemon zest gives a concentrated citrus aroma without introducing much extra liquid.
- Keep toppings measured. Fresh berries can add color and flavor, while large amounts of honey, syrup, nuts, or chocolate can quickly change the nutritional profile.
Troubleshooting: What Went Wrong?
WW-Friendly Nutrition and Portion Strategy
This cake is designed to be a lighter dessert, not a food that automatically causes weight loss. Its usefulness in a Weight Watchers routine depends on the portions you eat, the rest of your meals, and the Points budget assigned to you.
Why Greek Yogurt Is Useful Here
Greek yogurt contributes protein and moisture, which are valuable in a dessert that uses relatively little added fat. Protein is one of several nutrients that can help make food satisfying, although the amount in a single slice will depend on the yogurt and the final number of servings.
Nonfat yogurt also tends to have fewer calories than a comparable full-fat variety. That can make it useful when you’re trying to create a lighter dessert, but it doesn’t mean that every product has the same nutrition or Points classification.
Why Portion Size Still Matters
An eight-slice cake is easy to divide, making portion tracking straightforward. If you cut it into eight equal portions and log the entire recipe correctly, you can more easily keep your serving information consistent.
Cutting the same cake into four large portions doubles the amount of cake in each serving compared with eight equal slices. The calories, protein, carbohydrates, and fat per portion also double. Points may be calculated according to your plan’s rules, so confirm the value rather than assuming it changes in a simple linear fashion.
Fit Dessert Into Your Overall Day
You can enjoy a slice after a balanced meal or alongside coffee as an afternoon snack. If you’re building a meal plan, focus on your overall pattern of eating rather than trying to make every single food as low in Points as possible.
For example, you might pair a slice with fresh strawberries or enjoy it after a meal containing vegetables, a lean protein source, and a fiber-rich carbohydrate. The pairing can make the eating occasion more satisfying without requiring a rich frosting or heavy sauce.
Individual WW budgets differ, and your current plan may use a Points system that differs from older SmartPoints calculations. Use the estimate as a starting point for recipe planning, not as a substitute for your own app.
Variations You Can Try
Lemon Greek Yogurt Cake
Keep the base recipe and add the listed teaspoon of lemon zest. For a stronger citrus flavor, you can add a small amount more zest, but avoid adding a large quantity of lemon juice without adjusting the batter. The zest provides fragrance with minimal impact on the recipe’s moisture.
Cinnamon Vanilla Cake
Add ½ teaspoon of ground cinnamon to the dry ingredients. The cake will have a warmer, more comforting aroma, making it a nice option for a fall dessert or an afternoon coffee break. The small amount of cinnamon should have little effect on the overall nutrition, although your exact calculation may vary.
Berry-Topped Yogurt Cake
Serve each slice with a small portion of fresh strawberries, blueberries, or raspberries. Adding the fruit after baking helps preserve the cake’s texture and avoids introducing extra moisture into the batter. Log the amount of fruit according to your plan, since the Points treatment of fruit depends on the applicable WW rules.
Chocolate-Flavor Variation
You could test a small amount of unsweetened cocoa powder in the dry ingredients, but cocoa absorbs moisture and can make the cake denser. Start with a modest adjustment and expect to test the baking time and batter consistency. Chocolate chips are a different choice: they add sweetness, fat, and calories, so measure them and recalculate the recipe.
A Richer Version
If you prefer a fuller dairy flavor, use full-fat Greek yogurt instead of nonfat. The cake may taste creamier, although the calorie and fat content will generally rise. This version can still be enjoyed as a homemade dessert, but don’t keep the original nutritional estimate after making the substitution.
Naturally Sweetened With Sugar
If you don’t enjoy calorie-free sweeteners, use regular sugar and adjust the recipe to your taste. Sugar contributes sweetness and affects the cake’s texture, so the result may not be identical. It will also raise the sugar and calorie totals, and the Points estimate must be recalculated.
Tips for Serving and Presentation
A simple cake often looks best when the slices are clean and the topping is restrained. After chilling, transfer each slice to a small plate and add a few fresh berries or a little lemon zest. You don’t need frosting to make the dessert appealing.
For a family gathering, arrange the slices on a serving plate and keep optional toppings on the side. That allows everyone to choose their own portion and makes it easier to record additions separately.
If you are preparing the cake for the week, cut it only after it has cooled completely. You can store individual slices in separate containers, which makes them convenient to serve and helps prevent repeated handling of the whole cake.
Optional Additions
- Fresh berries: Add color, freshness, and extra fiber. The effect on Points depends on your plan and the quantity used.
- A spoonful of Greek yogurt: Provides extra creaminess and some additional protein. Use the nutrition information for the yogurt you choose.
- A light dusting of cinnamon: Adds aroma with very little added energy at a small serving quantity.
- A small drizzle of honey: Makes the cake sweeter, but adds sugar and calories. Measure the amount and update your calculation.
- Chopped nuts: Add crunch and a richer flavor, along with additional fat and calories. Keep the portion modest if that fits your goals.
Serving Ideas for Different Occasions
This Greek yogurt cake is versatile enough for an ordinary afternoon snack, a casual family dessert, or a make-ahead sweet for the weekend. The best pairings are simple and let the mild vanilla and tangy yogurt flavor stand out.
One Cake, Four Serving Ideas
Toppings and pairings have their own nutrition values. Add them to your calculation when they are part of your serving.
Storage Recommendations
Because this cake contains yogurt and eggs, it should be stored as a perishable food.
Refrigerating the Cake
Allow the cake to cool, then refrigerate it in a covered container within two hours of baking. If the room temperature is above 90°F (32°C), refrigerate it within one hour. Store the cake at 40°F (4°C) or below.
For best quality, aim to eat the refrigerated cake within three to four days. Keep it covered so that it doesn’t absorb refrigerator odors or dry out. Separate slices with parchment paper if you need to stack them.
Freezing Individual Slices
You can freeze the cake if you want to keep portions for longer. First, chill the cake and cut it into slices. Wrap each slice securely, then place the wrapped pieces in a freezer-safe container or bag.
For best texture, use frozen portions within about two months. The cake may become slightly wetter or softer after thawing because yogurt-based mixtures can release moisture. This is a quality recommendation, not a guarantee that the cake will retain its original texture indefinitely.
Thawing and Serving
Thaw frozen slices in the refrigerator rather than leaving them at room temperature for an extended period. Serve chilled, or allow a portion to sit briefly before eating if you prefer a less-cold texture. Reheating is generally unnecessary.
Refrigeration, freezing, and thawing do not meaningfully change the Points assigned to the same ingredients by themselves. However, if you add toppings, discard ingredients, or change the portion size, the calculation may need to be updated.
Storage Timeline
Let the cake cool briefly, then refrigerate within two hours — or within one hour above 90°F (32°C).
Keep at 40°F (4°C) or below and aim to use within three to four days for quality and safe handling.
Wrap cooled slices well and freeze. For best texture, use within about two months.
Let frozen portions thaw under refrigeration. Expect a possible change in moisture and texture.
Frequently Asked Questions
1. Is Greek yogurt cake suitable for Weight Watchers?
It can fit into a Weight Watchers eating plan, depending on the ingredients, portion size, and Points budget assigned to you. This version uses nonfat Greek yogurt and a calorie-free baking sweetener to help keep calories lower than some traditional cakes. However, the actual Points value must be calculated using your current WW app, because different plans can treat ingredients differently.
2. How many SmartPoints are in one slice?
A provisional planning estimate is approximately 2–4 SmartPoints per slice when the cake is divided into eight servings. This is not an officially verified value, and the actual result could be different. Enter the exact yogurt, sweetener, flour, eggs, and other ingredients into your WW app to obtain the value for your plan.
3. Can I use regular Greek yogurt instead of nonfat?
Yes. Full-fat Greek yogurt can produce a richer flavor and a creamier mouthfeel, but it generally contains more calories and fat than nonfat Greek yogurt. The cake may still work well, but you should update the nutrition and Points calculation rather than using the figures for the original recipe.
4. Can I use regular sugar instead of a calorie-free sweetener?
Yes, but the recipe will no longer have the same nutritional profile. Regular sugar adds calories and carbohydrates, and it can affect browning and texture. Use a measured quantity, then recalculate the complete recipe. Don’t assume the original calorie or Points estimate still applies.
5. Why is my yogurt cake soft in the middle?
A yogurt-based cake naturally has more moisture than some traditional cakes. If the center is slightly soft but set, it may firm as the cake cools and chills. If it is visibly wet or liquid, it needs more baking time. Check the center carefully and return it to the oven if it is genuinely underbaked.
6. Can I make this cake ahead of time?
Yes. In fact, preparing it ahead can make portioning easier. Bake it, let it cool safely, and refrigerate it in a covered container. Chilling also helps the cake become firmer, making it easier to cut into neat slices. For quality, aim to eat it within three to four days.
7. Can I freeze Greek yogurt cake?
Yes, although freezing may change its texture slightly. Chill the cake, cut it into portions, wrap the slices, and freeze them in a suitable container. Thaw individual slices in the refrigerator before serving. If you notice an unusually wet texture after thawing, blot away surface moisture gently rather than trying to rebake the entire cake.
8. Can I add berries or chocolate chips to the batter?
You can experiment with small quantities of berries or chocolate chips, but they affect the cake differently. Berries can release moisture, particularly when frozen, while chocolate chips add fat, sugar, and calories. For the most predictable result, serve fresh berries on top instead of mixing a large quantity into the batter. If you do add anything, recalculate the nutritional information and Points.
Nutritional Breakdown Per Serving
Serving Size: 1 slice (1/8 of the cake)
- Calories: 97 kcal
- Protein: 9 g
- Total Carbohydrates: 10 g
- Dietary Fiber: 0 g
- Net Carbohydrates: 10 g
- Total Sugar: 2 g
- Total Fat: 2 g
- Saturated Fat: 1 g
- Sodium: 100–150 mg
- Estimated WW SmartPoints: 2–4 per serving
Note: Nutritional values are estimates and may vary depending on the brands of Greek yogurt, sweetener, and other ingredients used. Net carbohydrates are calculated by subtracting dietary fiber from total carbohydrates. WW SmartPoints are provisional estimates, not official WW values; verify them using your current WW app and plan.
Recipe Snapshot
- Prep Time: 10 minutes
- Cook Time: 30–40 minutes
- Cooling Time: Approximately 1 hour, plus optional chilling
- Total Active and Baking Time: 40–50 minutes
- Course: Dessert, snack
- Cuisine: American-inspired home baking
- Servings: 8 slices
- Calories: Approximately 97 per serving
- Protein: Approximately 9 g per serving
- Estimated SmartPoints: Provisional estimate of 2–4 per serving
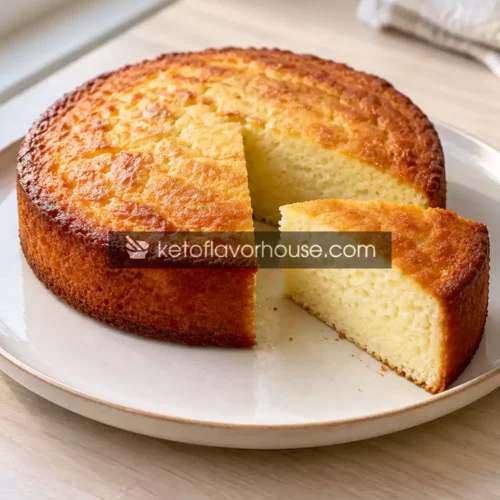
Weight Watchers Greek Yogurt Cake (Low-Calorie & Easy)

Ingredients
- 2 cups 450 g plain nonfat Greek yogurt
- 3 large eggs
- ½ cup granulated calorie-free baking sweetener
- ½ cup 60 g all-purpose flour
- 2 tablespoons 16 g cornstarch
- 1 teaspoon vanilla extract
- 1 teaspoon baking powder
- 1 teaspoon lemon zest optional
- Nonstick cooking spray for the pan
Instructions
- Preheat the oven to 350°F (175°C). Line the bottom of an 8-inch round cake pan with parchment paper and lightly coat the sides with nonstick cooking spray.
- In a large mixing bowl, whisk the Greek yogurt, eggs, sweetener, and vanilla until smooth and creamy. Add the lemon zest if using.
- In a separate bowl, whisk together the flour, cornstarch, and baking powder.
- Add the dry ingredients to the yogurt mixture in two portions, folding gently until no dry flour remains. Avoid overmixing.
- Pour the batter into the prepared cake pan. Smooth the surface and tap the pan gently on the counter to release large air pockets.
- Bake for approximately 30–40 minutes, checking toward the earlier end of the range. The edges should be set and the center should no longer look liquid.
- Remove the cake from the oven and let it rest in the pan for 15–20 minutes. Transfer to a rack and cool completely.
- Refrigerate the cooled cake before slicing if you prefer a firmer texture. Cut into eight equal portions and serve plain or with fresh berries.