This post may contains Amazon affiliate and other affiliate links. If you make a purchase through these links, I may earn a small commission at no extra cost to you. Your support helps me continue to provide quality content. I only recommend products I personally trust and believe will add value to your experience. For more details, please visit my Privacy Policy.
There are nights when I want something that feels a little indulgent, a little messy, and completely satisfying, and this Mediterranean-Style Bourbon Queso Crunch Taco Tray is exactly that kind of dinner. Crispy taco shells are packed with savory seasoned beef, Mediterranean-inspired vegetables, a splash of bourbon for depth, and plenty of creamy queso, then baked together until everything is hot, bubbly, and wonderfully crunchy.
This recipe started with a simple question: what would happen if the familiar taco tray got a Mediterranean-inspired makeover? Instead of relying only on traditional taco seasoning, I leaned into garlic, oregano, smoked paprika, cumin, tomatoes, red onion, parsley, lemon, and olive oil. Then I added a small splash of bourbon to the beef while it cooked, which gives the filling a surprisingly rich, slightly caramelized flavor.
The result isn’t an authentic Mediterranean or traditional Greek dish, and it isn’t meant to be. It’s a fun Mediterranean-inspired fusion recipe that brings together familiar taco-night textures with Mediterranean-style ingredients and seasonings.
And then there is the queso.
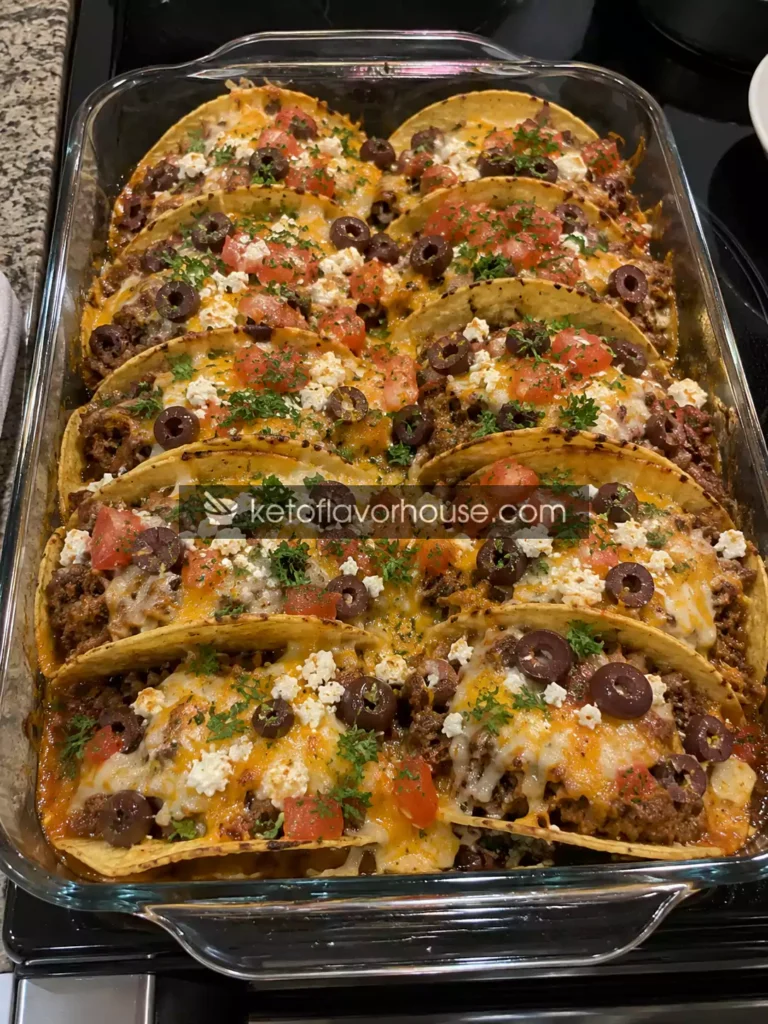
The creamy cheese sauce melts into the crunchy shells, settles around the seasoned beef, and creates those little golden, bubbling spots that make you want to grab a fork before the tray even reaches the table.
I especially love making this when I’m feeding a hungry group. Instead of assembling individual tacos one by one, everything goes into one baking dish. You can put the entire tray in the middle of the table and let everyone add their favorite toppings.
It’s casual food, but it still feels special.
Why You’ll Love This Recipe
- 🌮 Crunchy taco shells: The shells stay crisp around the edges while the warm filling makes every bite satisfying.
- 🧀 Creamy queso: Melted queso brings richness and ties the beef, vegetables, and spices together.
- 🥩 Savory seasoned beef: Ground beef gives the tray plenty of hearty flavor and pairs beautifully with the Mediterranean-inspired seasonings.
- 🫒 Mediterranean-inspired ingredients: Olive oil, garlic, oregano, tomatoes, parsley, red onion, lemon, and paprika add brightness and depth.
- 🥃 A little bourbon adds depth: A small amount cooked into the beef brings a subtle caramelized note without making the dish taste strongly alcoholic.
- 🧄 Big garlic flavor: Fresh garlic gives the beef filling a warm, savory aroma.
- 🍋 Fresh lemon finish: A squeeze of lemon cuts through the richness of the queso and beef.
- 🌿 Fresh herbs: Parsley adds a bright finish that keeps the tray from feeling too heavy.
- 🔥 Easy oven finish: Once assembled, the oven takes care of melting and crisping everything.
- 👨👩👧👦 Great for sharing: The tray is ideal for family dinners, game nights, casual gatherings, or taco night.
- ⏱️ Straightforward preparation: The filling comes together in one skillet before everything is assembled and baked.
- ✨ Fun presentation: A bubbling taco tray covered with queso and fresh toppings is meant to be brought straight to the table.
My Personal Experience
I have always liked food that can be placed in the middle of the table and shared.
There is something different about a tray of food compared with individual plates. Everyone reaches in, picks their favorite piece, adds a little extra sauce, and suddenly dinner becomes much more relaxed.
That’s exactly what I wanted when I started working on this recipe.
I had been making taco trays for years, but I wanted something with a little more personality. I started thinking about the ingredients I reach for most often when I want Mediterranean-inspired flavor: garlic, olive oil, oregano, tomatoes, red onion, parsley, lemon, and paprika.
The first version was almost too complicated.
I kept adding ingredients because I thought the recipe needed more.
It didn’t.
Once I simplified the filling and focused on a few strong flavors, everything started working together.
The bourbon was one of those happy accidents. I wanted something that would give the beef a little extra depth after browning, so I added a small splash to the skillet and let it cook down completely.
The smell was incredible.
After the bourbon cooked off, what remained was a deeper, slightly caramelized flavor that worked surprisingly well with the garlic, paprika, tomato, and beef.
Then came the queso.
I knew immediately that I wanted plenty of it, but I didn’t want the queso to completely bury the crunchy shells. So instead of drowning the tacos in cheese sauce, I spoon it generously over the center and let some of the shells remain exposed around the edges.
That gives you the best of both worlds.
You get creamy, cheesy bites alongside those wonderfully crisp corners.
The final touch is always lemon and parsley.
It might sound like a small detail, but the acidity from fresh lemon makes a big difference. After eating rich beef and queso, that bright citrus flavor wakes everything back up.
This has become one of those recipes I make when I don’t want dinner to feel too serious.
It’s messy.
It’s cheesy.
It’s crunchy.
And everyone seems to gather around the tray.
Required Equipment
Large Skillet
A large skillet is needed to brown the beef and cook the vegetables and seasonings together. Use one large enough that the beef can brown instead of steaming.
9 x 13-Inch Baking Dish
This is the main vessel for assembling and baking the taco tray. A standard 9 x 13-inch dish should comfortably fit 12 taco shells.
Wooden Spoon or Spatula
Use this for breaking up the ground beef and stirring the filling as it cooks.
Chef’s Knife
A sharp knife makes quick work of the onion, garlic, tomatoes, and fresh herbs.
Cutting Board
Use a sturdy cutting board to prepare the vegetables and herbs.
Small Bowl
A small bowl is useful for mixing the fresh lemon-herb topping before serving.
Ingredients & Substitutions
Crunchy Taco Shells
Use 12 hard corn taco shells.
Corn shells provide the signature crunch that makes a taco tray so enjoyable.
If you prefer flour-based crunchy shells, you can use them, although they may have a slightly different texture after baking.
Choose sturdy shells that can stand upright in the baking dish.
Ground Beef
Use 1½ pounds lean ground beef, preferably around 85–90% lean.
Ground beef provides the savory base for the filling.
You can substitute ground turkey or ground chicken if you prefer a lighter-tasting filling. Because poultry is leaner, add an extra teaspoon of olive oil if necessary while cooking.
Extra-Virgin Olive Oil
Use 1 tablespoon extra-virgin olive oil.
The olive oil helps sauté the vegetables and contributes a Mediterranean-style richness.
If your beef is particularly fatty, you may only need 1–2 teaspoons.
Red Onion
Use 1 medium red onion, finely diced.
Red onion adds sweetness, mild sharpness, and color.
A yellow or white onion can be substituted, but red onion fits particularly well with the fresh Mediterranean-style toppings.
Garlic
Use 4 cloves garlic, finely minced.
Fresh garlic gives the beef mixture a much more aromatic flavor than garlic powder.
Red Bell Pepper
Use 1 medium red bell pepper, finely diced.
The pepper adds natural sweetness, color, and a little texture to the beef mixture.
Yellow or orange bell pepper can easily be substituted.
Diced Tomatoes
Use 1 cup finely diced tomatoes, well drained.
Tomatoes bring moisture and acidity to the beef filling.
Drain them well so that the taco shells don’t become unnecessarily soggy.
Bourbon
Use 2 tablespoons bourbon.
The bourbon is cooked into the beef mixture and allowed to reduce completely.
It contributes a subtle depth and caramelized character rather than turning the filling into a sweet bourbon sauce.
If you prefer not to use bourbon, substitute 2 tablespoons beef broth. The flavor will be slightly less complex but still delicious.
Tomato Paste
Use 2 tablespoons tomato paste.
Tomato paste concentrates the tomato flavor and helps the beef mixture become rich rather than watery.
Dried Oregano
Use 1 teaspoon dried oregano.
Oregano provides an aromatic Mediterranean-style note.
Smoked Paprika
Use 1 teaspoon smoked paprika.
Smoked paprika gives the beef a warm, slightly smoky character.
Sweet paprika can be used instead if you prefer a more traditional paprika flavor.
Ground Cumin
Use 1 teaspoon ground cumin.
Cumin connects nicely with the taco element while working well with garlic, paprika, and beef.
Red Pepper Flakes
Use ½ teaspoon red pepper flakes.
This provides gentle heat.
Increase to 1 teaspoon if you like a spicier filling.
Salt
Use 1 teaspoon kosher salt, divided.
Because queso and other toppings can contain salt, it’s better to season gradually.
Black Pepper
Use ½ teaspoon freshly ground black pepper.
Black pepper adds another layer of warmth without overpowering the other seasonings.
Queso
Use 1½ cups prepared queso cheese sauce.
A creamy queso works best because it spreads easily across the taco shells.
You can use homemade queso or a good-quality prepared queso.
Feta Cheese
Use ½ cup crumbled feta cheese.
Feta adds a salty, tangy Mediterranean-style element that cuts through the richness of the queso.
If you don’t want two cheeses, you can omit the feta, but it adds a particularly nice contrast.
Fresh Parsley
Use ¼ cup finely chopped fresh parsley, plus extra for garnish.
Parsley gives the finished tray a fresh, vibrant flavor.
Fresh Lemon Juice
Use 1 tablespoon fresh lemon juice, plus lemon wedges for serving.
Lemon brightens the rich beef and queso and keeps the dish from feeling overly heavy.
Kalamata Olives
Use ¼ cup pitted and sliced Kalamata olives, optional.
Olives add a salty, briny flavor that fits naturally with the Mediterranean-inspired theme.
How to Make Mediterranean-Style Bourbon Queso Crunch Taco Tray
Prepare the Vegetables
Start by finely dicing the red onion and red bell pepper.
Mince the garlic and chop the parsley.
If you’re using fresh tomatoes, remove excess watery seeds before dicing them.
Don’t worry if the vegetables aren’t perfectly uniform.
The important thing is that the onion and pepper are small enough to soften quickly and distribute throughout the beef.
Brown the Beef
Heat a large skillet over medium-high heat.
Add the olive oil, followed by the ground beef.
Cook for approximately 6–8 minutes, breaking the beef apart with a wooden spoon as it cooks.
You want the meat to develop some browned edges rather than simply turning gray.
If your skillet is crowded, work in batches.
Browning is important because it creates much more flavor than simply cooking the beef until no longer pink.
Once browned, drain excess grease if necessary.
Leave just enough fat in the pan to keep the mixture flavorful.
Add the Onion and Bell Pepper
Reduce the heat to medium.
Add the diced red onion and bell pepper to the skillet.
Cook for approximately 4–5 minutes, stirring occasionally.
The onion should become softer and slightly translucent, while the pepper should begin to soften but still retain a little texture.
This is where the filling starts to smell fantastic.
Add the Garlic and Spices
Add the minced garlic, oregano, smoked paprika, cumin, red pepper flakes, black pepper, and ½ teaspoon salt.
Stir continuously for approximately 30–60 seconds.
Don’t let the garlic sit against the bottom of the skillet for too long.
You want it fragrant, not browned.
Cooking the dry spices briefly in the beef mixture also helps release their aroma.
Add the Bourbon
Pour 2 tablespoons bourbon into the skillet.
Stir immediately, scraping the bottom of the skillet to release any browned bits.
Let the bourbon simmer for approximately 2–3 minutes, until most of the liquid has cooked away.
You should no longer have a noticeable pool of liquid.
The goal is to leave the beef with the flavor of the bourbon rather than making the filling wet.
If you are using beef broth instead, let it reduce in the same way.
Add Tomato and Tomato Paste
Stir in the diced tomatoes and tomato paste.
Cook for another 3–4 minutes.
The tomato paste should become fully incorporated and the mixture should look thick and cohesive.
If the filling looks watery, keep cooking for another minute.
Remember that the taco shells are crisp, so you don’t want a loose filling soaking them from the inside.
Taste the mixture.
Add the remaining ½ teaspoon salt only if needed.
Prepare the Taco Tray
Preheat the oven to 375°F (190°C).
Arrange the 12 taco shells upright in a 9 x 13-inch baking dish.
If they don’t stand securely on their own, place them close enough together that they support one another.
You can also use a small amount of the beef mixture between the shells to help stabilize them.
Fill the Taco Shells
Spoon the warm beef mixture evenly into the taco shells.
Aim for approximately ¼ cup filling per shell.
Don’t overfill them.
The taco shells need enough room for the queso and toppings.
Press the filling gently into the bottom of each shell, but don’t compact it too firmly.
Add the Queso
Spoon the queso evenly over the filled tacos.
You don’t need to completely cover every inch of the shells.
In fact, leaving some shell exposed around the edges helps preserve the crunch.
Sprinkle the crumbled feta over the queso.
Add the sliced Kalamata olives if using them.
The combination of creamy queso and tangy feta creates a nice contrast.
Bake the Taco Tray
Place the baking dish in the preheated oven.
Bake for approximately 10–12 minutes.
The queso should be hot and bubbling, the feta warmed, and the taco shells crisp.
Don’t bake for too long.
The filling is already cooked, so you’re primarily heating the cheese and bringing the entire tray together.
If you want slightly more browning on top, switch to broil for 1–2 minutes.
Watch carefully.
The queso can brown quickly.
Finish with Lemon and Herbs
Remove the tray from the oven and allow it to rest for 3–5 minutes.
Drizzle the tablespoon of fresh lemon juice lightly over the filling.
Scatter the chopped parsley generously over the top.
Add additional lemon wedges around the tray.
If you like heat, add another pinch of red pepper flakes.
Bring the entire tray directly to the table while it’s still warm.
Common Mistakes to Avoid
Using Wet Tomatoes
Excess tomato juice can make the taco shells soft.
Fix: Drain the tomatoes thoroughly before adding them to the beef.
Skipping the Beef Browning
Simply cooking the beef until done doesn’t create the same depth of flavor.
Fix: Give the beef enough time over medium-high heat to develop browned edges.
Adding Too Much Bourbon
More isn’t necessarily better.
Fix: Stick to the measured 2 tablespoons and allow it to reduce completely.
Leaving the Filling Watery
A wet filling will quickly destroy the crunch of the taco shells.
Fix: Cook the tomato mixture until thick and cohesive before filling the shells.
Overfilling the Tacos
Too much filling makes them difficult to eat and leaves little room for queso.
Fix: Use approximately ¼ cup filling per taco.
Baking Too Long
The beef is already cooked before assembly.
Fix: Bake just long enough to heat the queso and crisp everything.
Burning the Garlic
Garlic only needs a short time with the spices.
Fix: Cook it for about 30–60 seconds before adding the bourbon.
Using Too Much Salt
Queso, feta, olives, and seasoned beef can all contribute salt.
Fix: Season the beef gradually and taste before adding the final amount.
Adding Lemon Before Baking
Fresh lemon juice loses some of its bright character during extended cooking.
Fix: Add the main lemon finish after the tray comes out of the oven.
Pro Tips for Best Results
Use a wide skillet. More surface area means better browning and faster evaporation.
Drain the tomatoes well. This one step makes a big difference in taco texture.
Cook the bourbon down completely. You want depth, not a wet taco filling.
Keep the filling thick. Think spoonable and cohesive rather than saucy.
Don’t drown the taco shells in queso. Generous is good; excessive liquid isn’t.
Use the feta as a finishing cheese. It provides a salty contrast to the creamy queso.
Add parsley after baking. Fresh herbs taste brighter when they’re not subjected to the oven heat.
Finish with lemon. A little acidity balances the beef and cheese.
Serve immediately. Crunchy taco shells are at their best right after baking.
Let everyone customize. Put extra toppings on the table so everyone can build their ideal bite.
Air Fryer Option
An air fryer works well for individual taco portions, but a standard basket usually won’t accommodate an entire 12-taco tray.
Prepare the beef filling as directed.
Arrange filled taco shells in the air fryer basket and top with queso and feta.
Air fry at 350°F (175°C) for approximately 5–7 minutes, checking frequently.
The shells can crisp quickly, so don’t walk away during the final couple of minutes.
Finish with parsley and lemon after cooking.
Mediterranean Benefits of Bell Peppers
Bell peppers are a wonderful ingredient in Mediterranean-inspired cooking because they provide sweetness, color, and texture without requiring complicated preparation.
Red bell peppers become sweeter as they cook, which makes them especially useful in savory fillings.
In this recipe, the diced pepper adds another layer to the beef without competing with the oregano, garlic, paprika, or cumin.
It also gives the filling a little texture so every bite isn’t simply beef and cheese.
Fresh bell peppers contribute fiber and naturally occurring vitamins while keeping the filling vegetable-forward.
Their bright color is also useful visually.
Against the dark browned beef, red pepper, creamy queso, green parsley, and white feta, the finished taco tray looks colorful and inviting.
Variations You Can Try
🌶️ Spicy Mediterranean
Increase the red pepper flakes to 1 teaspoon.
You can also add one finely chopped fresh chili pepper with the bell pepper.
Finish with sliced pickled peppers for extra heat and acidity.
🌿 Extra Herby
Add an additional 2 tablespoons chopped fresh parsley to the beef after cooking.
You can also add a small amount of fresh oregano or dill.
The extra herbs make the finished tray taste fresher.
🧄 Garlic-Lover’s Version
Increase the garlic from 4 cloves to 6 cloves.
Add two additional roasted garlic cloves to the queso for an especially rich garlic flavor.
🧀 Extra Cheesy Version
Increase the queso to 2 cups and add ¾ cup crumbled feta.
For an extra browned topping, add a small amount of shredded mozzarella before baking.
🍋 Lemon-Herb Version
Add 1 teaspoon finely grated lemon zest to the cooked beef.
Finish the tray with extra lemon juice, parsley, and fresh dill.
This variation is especially bright and fresh.
🥗 Extra Vegetable Version
Add 1 cup finely diced zucchini or ½ cup chopped mushrooms to the onion and pepper.
Cook until the vegetables have released their moisture before adding the bourbon.
🔥 Grilled Version
Prepare the beef filling on the stovetop.
Grill the bell pepper and onion separately until lightly charred, then stir them into the beef.
Assemble the tacos and finish them briefly in the oven to melt the queso.
💨 Air Fryer Version
Prepare smaller batches in the air fryer.
Use sturdy taco shells and avoid overfilling them.
The air fryer produces particularly crisp shells, so keep the cooking time short.
Tips for This Recipe
Prepare all the toppings before you begin cooking the beef.
Once the filling is ready, assembly goes quickly.
For the crispiest taco shells, avoid preparing the entire tray too far ahead of baking.
The longer the shells sit next to a warm, moist filling, the more likely they are to soften.
If you’re serving this at a party, prepare the beef filling ahead and refrigerate it.
Reheat the filling in a skillet before assembling the tacos.
Keep the queso warm but not boiling.
If the queso becomes too thick, a small splash of milk can loosen it.
For meal prep, store the beef separately from the taco shells.
Keep queso and toppings in separate containers.
Assemble individual tacos shortly before reheating so the shells retain their crunch.
When portioning, two tacos per person is a good starting point for a meal, although larger appetites may want three.
If you’re serving many side dishes, one or two tacos may be enough.
Optional Additions
There are plenty of toppings that work beautifully with this taco tray.
Try:
- Fresh parsley
- Fresh dill
- Lemon zest
- Kalamata olives
- Crumbled feta
- Diced cucumber
- Fresh tomatoes
- Red onion
- Pickled red onions
- Jalapeños
- Red pepper flakes
- Tzatziki
- Greek yogurt
- Hummus
- Tahini sauce
- Chopped roasted red peppers
- Fresh mint
- Extra-virgin olive oil
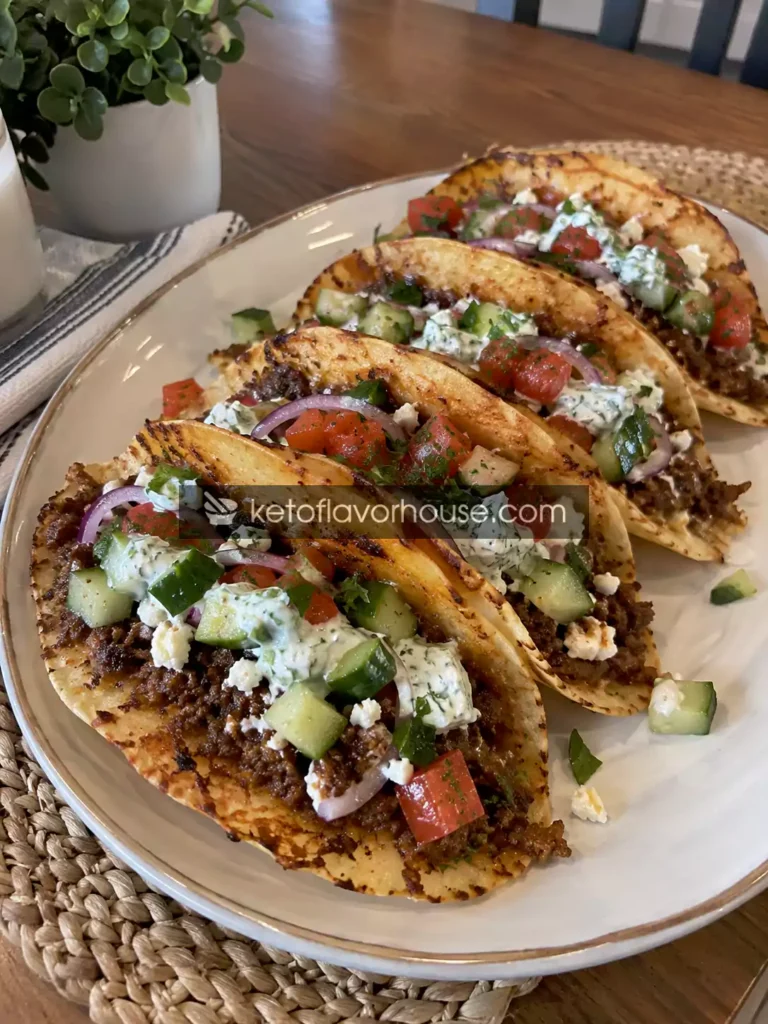
A spoonful of tzatziki is particularly good because its cool, creamy texture contrasts with the hot beef and queso.
For a stronger Mediterranean-inspired finish, add diced cucumber, parsley, tomato, and a few sliced Kalamata olives.
Serving Ideas
This taco tray is substantial enough to serve as the centerpiece of a casual dinner.
For a simple meal, serve it with a crisp cucumber and tomato salad.
A bowl of hummus with warm pita makes another easy side.
You can also serve roasted vegetables such as zucchini, bell peppers, or eggplant alongside the tacos.
For a taco-night spread, place bowls of toppings around the tray:
- Chopped tomatoes
- Cucumber
- Red onion
- Parsley
- Feta
- Olives
- Tzatziki
- Lemon wedges
- Red pepper flakes
For entertaining, bring the baking dish directly to the table.
This recipe is especially fun for game nights, casual gatherings, family dinners, weekend lunches, and informal parties.
If you’re making a larger Mediterranean-inspired meal, pair the taco tray with hummus, a chopped salad, roasted vegetables, and warm pita.
Storage Recommendations
Store leftover beef filling in an airtight container in the refrigerator for up to 4 days.
For the best results, store the taco shells separately.
Keep queso in a separate sealed container as well.
Fully assembled leftover tacos can be refrigerated, but the shells will soften considerably.
For meal prep, store:
- Beef filling separately.
- Taco shells in their original sealed packaging or another dry airtight container.
- Queso separately.
- Fresh toppings separately.
Reheat the beef filling in a skillet over medium heat until hot.
Warm queso gently in a saucepan or microwave, stirring frequently.
Then assemble fresh taco shells.
The assembled tray is best eaten immediately after baking.
You can freeze the cooked beef filling for approximately 2–3 months in a freezer-safe container.
Thaw it overnight in the refrigerator before reheating.
I don’t recommend freezing assembled tacos because the shells will lose their crisp texture.
Frequently Asked Questions
Can I make this taco tray ahead of time?
Yes. The beef filling can be prepared up to 3–4 days ahead and stored in the refrigerator.
For the best texture, assemble the tacos shortly before baking.
This keeps the shells from absorbing moisture from the filling.
Can I use ground turkey instead of beef?
Absolutely.
Ground turkey creates a milder, leaner filling.
Because turkey contains less fat, you may need an additional teaspoon of olive oil when cooking the vegetables.
The Mediterranean-inspired seasonings work very well with turkey.
Can I skip the bourbon?
Yes.
Replace the bourbon with 2 tablespoons beef broth or chicken broth.
You won’t get the same subtle caramelized depth, but the taco filling will still be flavorful.
Does the taco tray taste strongly like bourbon?
No.
The bourbon is used in a small amount and cooked down in the skillet.
The finished filling should taste savory and deeply seasoned rather than strongly alcoholic.
How do I keep the taco shells crunchy?
The most important thing is controlling moisture.
Drain the tomatoes thoroughly, reduce the bourbon completely, cook the beef mixture until thick, and avoid assembling the tacos too far in advance.
Bake only until the queso is hot.
Can I use flour taco shells?
Yes, although traditional hard flour shells can have a different texture from corn shells.
Use sturdy shells designed to hold substantial fillings.
Can I make this vegetarian?
Yes.
Replace the ground beef with a hearty mixture of cooked lentils and finely chopped mushrooms.
Cook the mushrooms until their moisture has evaporated before adding the seasonings.
The result will have a softer filling but can still work beautifully with the queso, feta, herbs, and Mediterranean-inspired seasonings.
Can I make the recipe spicier?
Yes.
Increase the red pepper flakes, add fresh chili, or serve sliced jalapeños alongside the tray.
You can also add a spicy pepper sauce to individual portions.
Can I use another cheese instead of feta?
Yes.
Crumbled goat cheese is a good alternative because it provides a similar tangy quality.
You can also use shredded mozzarella if you want a milder, stretchier topping.
Can I use homemade queso?
Definitely.
Homemade queso works very well as long as it remains creamy enough to spoon over the tacos.
If your queso becomes very thick as it cools, loosen it with a small amount of milk before assembling.
Can I make this in an air fryer?
Yes.
The beef filling should still be prepared in a skillet.
Assemble a few tacos at a time in the air fryer and cook at approximately 350°F (175°C) for 5–7 minutes.
Check them frequently because taco shells can brown quickly.
What should I serve with this taco tray?
Cucumber-tomato salad, hummus, tzatziki, roasted vegetables, olives, warm pita, and lemony greens all work well.
For a larger spread, offer several fresh toppings and sauces so guests can customize their tacos.
Can I freeze the finished tacos?
I don’t recommend freezing the assembled tacos because the shells will become soft after thawing.
Freeze the cooked beef filling instead and assemble fresh tacos when you’re ready to eat.
Can I use fresh herbs instead of dried oregano?
Yes, although dried oregano is convenient because it holds up well during cooking.
If using fresh oregano, use approximately 1 tablespoon finely chopped fresh oregano.
Add some during cooking and reserve a little for finishing.
Nutritional Breakdown (Per Serving)
The recipe makes 6 servings, with each serving containing 2 taco shells.
Estimated nutritional values per serving:
- Calories: 590
- Protein: 32 g
- Fat: 36 g
- Total Carbohydrates: 39 g
- Fiber: 5 g
- Net Carbohydrates: 34 g
- Sugar: 7 g
- Sodium: 1,080 mg
Nutritional values are estimates and can vary depending on the type of ground beef, taco shells, queso, feta, tomatoes, and other ingredients used.
Recipe Snapshot
Prep Time: 20 minutes
Cook Time: 30 minutes
Total Time: 50 minutes
Course: Dinner, Main Course, Appetizer
Cuisine: Mediterranean-Inspired Fusion
Servings: 6
Calories: Approximately 590 per serving
Mediterranean-Style Bourbon Queso Crunch Taco Tray

Ingredients
- 1½ pounds lean ground beef
- 1 tablespoon extra-virgin olive oil
- 1 medium red onion finely diced
- 1 medium red bell pepper finely diced
- 4 garlic cloves minced
- 1 cup finely diced tomatoes well drained
- 2 tablespoons bourbon
- 2 tablespoons tomato paste
- 1 teaspoon dried oregano
- 1 teaspoon smoked paprika
- 1 teaspoon ground cumin
- ½ teaspoon red pepper flakes
- 1 teaspoon kosher salt divided
- ½ teaspoon black pepper
- 12 hard corn taco shells
- 1½ cups queso cheese sauce
- ½ cup crumbled feta
- ¼ cup sliced Kalamata olives optional
- ¼ cup fresh parsley chopped
- 1 tablespoon fresh lemon juice
- Lemon wedges for serving
Instructions
- Heat a large skillet over medium-high heat. Add the olive oil and ground beef, then cook for 6–8 minutes, breaking it apart until browned. Drain excess grease if necessary.
- Reduce the heat to medium. Add the diced red onion and bell pepper and cook for 4–5 minutes until softened.
- Add the minced garlic, oregano, smoked paprika, cumin, red pepper flakes, black pepper, and ½ teaspoon salt. Cook for 30–60 seconds until fragrant.
- Pour in the bourbon and stir, scraping the browned bits from the bottom of the skillet. Simmer for 2–3 minutes until most of the liquid has cooked away.
- Stir in the diced tomatoes and tomato paste. Cook for 3–4 minutes until the beef mixture is thick and cohesive. Taste and add the remaining ½ teaspoon salt if needed.
- Preheat the oven to 375°F (190°C). Arrange 12 hard taco shells upright in a 9 x 13-inch baking dish.
- Divide the beef mixture evenly among the taco shells, using approximately ¼ cup filling per shell.
- Spoon the queso evenly over the tacos, then sprinkle with crumbled feta and Kalamata olives if using.
- Bake for 10–12 minutes, until the queso is hot and bubbling and the taco shells remain crisp. Broil for 1–2 minutes if additional browning is desired, watching closely.
- Remove from the oven and rest for 3–5 minutes. Drizzle with fresh lemon juice and garnish generously with chopped parsley. Serve immediately with lemon wedges and desired toppings.