This post may contains Amazon affiliate and other affiliate links. If you make a purchase through these links, I may earn a small commission at no extra cost to you. Your support helps me continue to provide quality content. I only recommend products I personally trust and believe will add value to your experience. For more details, please visit my Privacy Policy.
There are days when I want something sweet, creamy, and genuinely comforting, but I don’t necessarily want the heavy, overly sugary feeling that can come after a traditional dessert. When I’m already feeling sluggish, bloated, or just generally “off,” a super-rich dessert can sometimes leave me wishing I had chosen something lighter. That’s exactly where these Anti-Inflammatory Vanilla Bean Crème Brûlée Cheesecake Cupcakes come in.
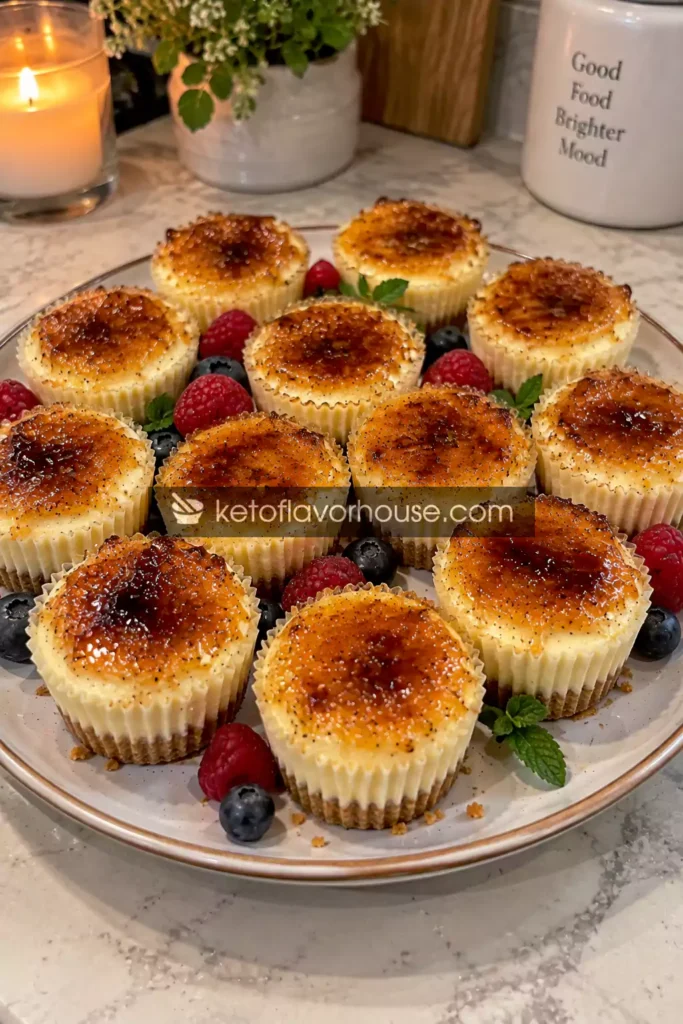
These little cheesecakes have everything I love about a classic dessert: a buttery almond-flour crust, an incredibly creamy vanilla cheesecake center, bright lemon zest, and that wonderfully dramatic crackly brûlée topping. The difference is that the recipe is built around ingredients that can fit comfortably into an anti-inflammatory eating pattern, including almonds, extra-virgin coconut oil, vanilla, cinnamon, lemon, and protein-rich Greek yogurt.
And then there’s that topping.
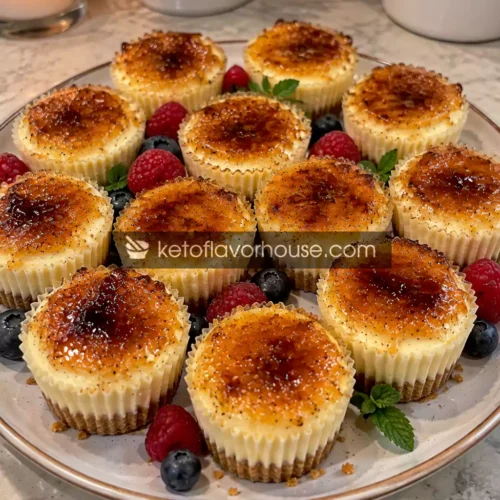
Once the cheesecakes are completely chilled, a thin layer of allulose is sprinkled over each one and gently caramelized until golden and crisp. The first tap of a spoon through that shell is ridiculously satisfying. Underneath, the cheesecake is cool, silky, and soft.
It feels like a restaurant dessert without requiring restaurant-level effort.
These vanilla bean cheesecake cupcakes are especially nice when you want something portion-controlled. Instead of slicing into a giant cheesecake and hoping you stop at one piece, each cupcake is already individually portioned. They’re also wonderfully make-ahead friendly, which makes them useful for dinner parties, weekend meal prep, holidays, or simply having a special dessert waiting in the refrigerator.
If you love healthy comfort food, lower-carb desserts, creamy cheesecake, and desserts that feel indulgent without being excessively sweet, this one deserves a spot in your recipe rotation.
Why You’ll Love This Anti-Inflammatory Vanilla Bean Crème Brûlée Cheesecake Cupcakes Recipe
- 🥬 Anti-inflammatory-style ingredients: Almonds, vanilla, cinnamon, lemon, and whole-food ingredients complement an anti-inflammatory eating pattern.
- ⚡ Steady, satisfying dessert: Greek yogurt and eggs contribute protein, helping make these more satisfying than a typical sugary cupcake.
- 🍽️ Perfectly portioned: Each cheesecake is baked individually, so serving is simple.
- 👩🍳 Surprisingly easy: There’s no complicated water bath or fussy cheesecake technique required.
- 🧡 Incredibly comforting: Creamy vanilla filling and a crisp caramelized top make every bite feel special.
- 🥣 Great for make-ahead desserts: The cheesecakes actually benefit from several hours of chilling.
- 🔥 Naturally flavorful: Real vanilla bean, lemon zest, and cinnamon provide depth without needing a long ingredient list.
- 💪 Protein-rich compared with many desserts: Greek yogurt and eggs add a useful protein boost.
- 🌿 Lower-carb friendly: Almond flour and allulose keep the carbohydrate load considerably lower than a traditional cheesecake cupcake.
My Personal Experience With These Cheesecake Cupcakes
What I particularly love about this recipe is that it doesn’t taste like a dessert designed around restrictions.
That matters to me.
There are plenty of recipes that technically check a “healthy” box but leave you thinking about the dessert you actually wanted. These aren’t like that. The cheesecake filling is smooth and rich, the vanilla tastes warm and fragrant, and the tiny bit of lemon zest keeps everything from becoming flat or overly heavy.
The brûlée topping is what really changes the experience.
You get the creamy cheesecake first, then suddenly your spoon hits that thin, crisp shell. It cracks, gives way, and melts into the filling. That combination of textures makes a relatively small dessert feel much more substantial.
I also like serving these very cold. When they’re properly chilled, the filling becomes dense and silky without feeling hard. If you rush the chilling process, they’re still tasty, but you miss some of that classic cheesecake texture.
And honestly, that’s one of my favorite things about making them: the difficult part is mostly waiting.
The kitchen smells softly of vanilla while they’re baking, and once they’re out of the oven, you just let them cool and give them time. No complicated decorating. No piping bags. No elaborate layers.
Just really good cheesecake.
🧰 Required Equipment
Standard 12-Cup Muffin Tin
A standard muffin pan gives these cheesecakes their individual cupcake shape and makes portioning effortless.
I recommend using a sturdy metal muffin tin because it conducts heat consistently. Silicone can work too, but the cheesecakes may take slightly longer to firm up.
Paper or Parchment Cupcake Liners
Use good-quality liners so the cheesecakes lift cleanly after chilling.
Parchment-style liners are especially helpful because the almond-flour crust can be slightly more delicate than a traditional graham-cracker crust.
Mixing Bowls
You’ll want at least two bowls: one for the crust and one for the cheesecake filling.
Keeping the crust mixture separate also makes cleanup easier.
Electric Hand Mixer
A hand mixer makes the cream cheese filling exceptionally smooth.
You can mix by hand, but make sure the cream cheese is properly softened first. Cold cream cheese is one of the easiest ways to end up with tiny lumps.
Measuring Cups and Spoons
Accurate measurements matter particularly with cheesecake. Too much liquid can loosen the filling, while too much sweetener can alter the texture.
Fine Microplane or Zester
Fresh lemon zest is one of those tiny ingredients that makes a surprisingly big difference.
You want the yellow outer layer of the lemon rather than the white pith underneath, which can taste bitter.
Kitchen Torch
A small culinary torch gives you the best control for the crème brûlée topping.
If you don’t have one, you can use your oven’s broiler, but watch the cheesecakes extremely closely because the topping can go from golden to burned quickly.
🥬 Ingredients & Substitutions
Almond Flour — 1 cup
Almond flour creates the tender, nutty crust underneath the cheesecake.
It also contributes healthy fats, vitamin E, magnesium, and some fiber, making it a natural choice for a lower-carb dessert.
Substitution: Finely ground pecan flour works beautifully and gives the crust a deeper, more buttery flavor. Coconut flour isn’t a direct 1:1 substitute because it absorbs much more moisture.
Unsweetened Coconut Oil — 2 tablespoons
Coconut oil binds the almond flour while adding richness.
Use refined coconut oil if you don’t want any coconut flavor. Unrefined coconut oil gives the crust a subtle coconut aroma.
Substitution: Melted butter works perfectly from a texture standpoint, although it changes the fat profile and gives the crust a more traditional cheesecake flavor.
Granulated Allulose — 1 tablespoon for the crust
Allulose adds sweetness without contributing the same carbohydrate load as regular sugar.
Substitution: Monk fruit-allulose blend can work well, although sweetness levels vary by brand. If your blend is significantly sweeter than allulose, adjust accordingly.
Fine Sea Salt — ¼ teaspoon
Don’t skip the salt.
A tiny amount makes the almond and vanilla flavors taste fuller and prevents the dessert from tasting one-dimensionally sweet.
Full-Fat Cream Cheese — 16 ounces, softened
Cream cheese is the foundation of the cheesecake filling.
Full-fat cream cheese gives the smoothest, richest texture and helps the cupcakes set beautifully after chilling.
Substitution: Reduced-fat cream cheese can be used, but the finished cheesecake will be slightly lighter and may have a less luxurious mouthfeel.
For the smoothest filling, let the cream cheese sit at room temperature until softened.
Plain Greek Yogurt — 1 cup
Greek yogurt adds protein and a gentle tang that balances the richness of the cream cheese.
It also helps create a creamy texture without requiring additional heavy cream.
Substitution: Plain skyr works particularly well if you want even more protein. Regular yogurt can be used, but because it contains more moisture, the filling may be slightly softer.
Large Eggs — 3
Eggs provide structure and help the cheesecake set during baking.
They also contribute protein and several important micronutrients.
Bring them close to room temperature before mixing for a smoother batter.
Granulated Allulose — ½ cup
This sweetens the cheesecake while keeping the recipe lower in sugar than a conventional cheesecake.
Allulose is particularly useful here because the finished dessert isn’t intended to be aggressively sweet.
If you prefer a sweeter cheesecake, you can add another tablespoon or two, but I recommend tasting the batter before the eggs are incorporated if you want to adjust the sweetness.
Vanilla Bean — 1 whole bean
This is the star flavor.
Split the vanilla bean lengthwise and scrape out the tiny seeds. Those little black specks throughout the cheesecake make it look beautiful and give the dessert a much deeper vanilla aroma.
Substitution: Use 2 teaspoons pure vanilla extract or 2 teaspoons vanilla bean paste. Vanilla bean paste will provide the closest visual effect.
Fresh Lemon Zest — 1 teaspoon
Lemon zest adds brightness without making the cheesecake taste lemony.
It’s particularly helpful in a rich dessert because it keeps the flavor lively.
Fresh Lemon Juice — 1 tablespoon
Lemon juice provides acidity that balances the cream cheese and Greek yogurt.
Fresh lemon juice is preferable to bottled because the flavor is brighter.
Ground Cinnamon — ½ teaspoon
Cinnamon adds warmth and works surprisingly well with vanilla.
It also brings naturally occurring plant compounds to the recipe and fits nicely into a spice-forward, whole-food approach.
Allulose for the Crème Brûlée Topping — ¼ cup
This creates the thin, crisp caramelized shell.
Divide it evenly among the chilled cheesecakes rather than piling it on. A thin layer gives you that ideal brittle crack without overpowering the cheesecake underneath.
👩🍳 How to Make Anti-Inflammatory Vanilla Bean Crème Brûlée Cheesecake Cupcakes
1. Prepare the Muffin Pan
Start by heating your oven to 325°F.
Line a 12-cup muffin pan with cupcake liners.
I like to arrange everything on the counter before mixing the filling because cheesecake batter comes together quickly once the cream cheese is soft.
Set the pan aside while you prepare the crust.
2. Make the Almond Flour Crust
Combine the almond flour, melted coconut oil, 1 tablespoon allulose, and sea salt.
Stir until the mixture resembles damp sand.
It shouldn’t be greasy or swimming in oil. When you squeeze a little mixture between your fingers, it should hold together.
Divide the crust mixture between the 12 liners.
Press it firmly into the bottom of each cup using the back of a small spoon or the bottom of a shot glass.
Don’t make the crust too thick. You want enough for a satisfying bite, but the cheesecake filling should remain the star.
Bake the crusts for about 5–7 minutes, just until they become lightly fragrant.
They won’t look dramatically different when they come out, and that’s okay.
Let them cool slightly while you prepare the filling.
3. Prepare the Vanilla Bean
Slice the vanilla bean lengthwise using a sharp knife.
Run the back of the knife along the inside of the pod and scrape out the tiny vanilla seeds.
You’ll notice immediately how fragrant real vanilla bean is.
Add those seeds to a small bowl with the allulose and gently rub them together with your fingers or a spoon. This helps distribute the vanilla seeds throughout the sweetener.
If you’re using vanilla extract instead, simply add it later with the other wet ingredients.
4. Beat the Cream Cheese Until Smooth
Place the softened cream cheese in a large mixing bowl.
Beat it on medium speed until smooth and creamy.
This step is worth taking seriously.
If you see lumps now, those lumps are unlikely to magically disappear later. Scrape down the sides of the bowl once or twice as you mix.
The cream cheese should look smooth, soft, and spreadable.
5. Add the Greek Yogurt and Sweetener
Add the Greek yogurt and ½ cup allulose.
Mix on low to medium speed until combined.
Don’t whip the mixture aggressively for several minutes. You don’t need a lot of air in cheesecake batter.
Too much air can cause the cheesecakes to puff dramatically in the oven and then sink as they cool.
We’re aiming for silky rather than fluffy.
6. Add the Eggs One at a Time
Add the eggs individually, mixing on low speed after each addition.
Stop mixing as soon as each egg disappears into the batter.
This is one of those little techniques that helps cheesecake stay creamy.
Overmixing isn’t catastrophic, but there’s no advantage to beating the batter more than necessary.
7. Add Vanilla, Lemon, and Cinnamon
Add the scraped vanilla seeds, lemon zest, lemon juice, and cinnamon.
Mix gently until everything is evenly distributed.
At this point, the batter should smell incredible.
You should notice the vanilla first, followed by the subtle citrus and warm cinnamon.
The lemon shouldn’t dominate.
8. Fill the Cupcake Liners
Divide the cheesecake batter evenly between the prepared crusts.
Fill each liner about three-quarters full.
Gently tap the muffin pan against the counter once or twice to release any large air bubbles.
Don’t aggressively shake or slam the pan. A gentle tap is plenty.
If you have a few extra tablespoons of batter, distribute them evenly rather than overfilling individual cups.
9. Bake Until Just Set
Bake at 325°F for approximately 20–25 minutes.
The edges should look set while the centers still have a gentle wobble.
That wobble is what you want.
Don’t wait for the center to become completely firm in the oven. Cheesecake continues cooking from residual heat after you remove it.
Overbaking is one of the easiest ways to turn a creamy cheesecake into a dry one.
If the tops begin browning significantly, your oven may run hot. Lower the temperature slightly for the next batch.
10. Cool Slowly
Remove the pan from the oven and place it on a cooling rack.
Allow the cheesecakes to cool in the pan for about 20–30 minutes.
Then transfer them to the refrigerator.
Don’t try to brûlée them while they’re warm.
They need to become thoroughly chilled first.
11. Chill Completely
Refrigerate the cheesecake cupcakes for at least 4 hours, although overnight is even better.
This is the patience portion of the recipe.
When properly chilled, the filling becomes dense, creamy, and incredibly smooth.
If you cut into one after only an hour, it may seem softer than expected. Give it time.
12. Create the Crème Brûlée Topping
Once the cheesecakes are completely cold, sprinkle a very thin, even layer of allulose over each one.
You don’t need much.
Heat your kitchen torch and move it continuously across the surface.
The allulose will begin melting and eventually turn glossy and golden.
Keep the torch moving. Holding it in one place for too long can create bitter, burnt patches.
Once caramelized, let the topping sit for a minute or two.
That thin shell will harden as it cools.
Then comes the best part: crack it.
⚠️ Common Mistakes to Avoid
Overbaking the Cheesecake
The center should have a slight jiggle when you remove the cupcakes from the oven.
Fix: Start checking around 20 minutes and remember that residual heat continues cooking the filling.
Using Cold Cream Cheese
Cold cream cheese tends to create stubborn lumps.
Fix: Let it soften at room temperature before mixing.
Overmixing the Batter
Excessive mixing introduces unnecessary air.
Fix: Mix just until each ingredient is incorporated.
Using Too Much Lemon
A little lemon creates balance. Too much can turn vanilla cheesecake into lemon cheesecake.
Fix: Measure the lemon juice and zest rather than adding them by eye.
Making the Brûlée Layer Too Thick
A thick layer can become hard and overly sweet.
Fix: Use a very thin, even coating of allulose.
Burning the Topping
A culinary torch can caramelize quickly.
Fix: Keep the flame moving constantly and stop once the surface is evenly golden.
Skipping the Chill
Warm cheesecake won’t have the firm, creamy texture you’re looking for.
Fix: Refrigerate for at least four hours.
Using an Aggressive Sweetener Blend
Some sugar-free sweeteners have a strong cooling or bitter aftertaste.
Fix: Allulose generally works particularly well here because the goal is a clean sweetness and crisp brûlée finish.
🔥 Pro Tips for the Best Results
Use room-temperature ingredients. Cream cheese, yogurt, and eggs blend much more smoothly when they’re not refrigerator-cold.
Don’t rush the cooling process. Cheesecake texture improves dramatically after proper chilling.
Use fresh vanilla whenever possible. Vanilla bean makes this dessert taste noticeably more luxurious.
Add lemon zest. Even if you think you don’t need it, that tiny amount of citrus helps balance the richness.
Keep the brûlée thin. You’re looking for a delicate crackly shell, not a thick layer of hardened sweetener.
Torch immediately before serving. For the crispiest topping, brûlée the chilled cheesecakes shortly before you plan to eat them.
Choose quality fats. Using minimally processed fats and whole-food ingredients keeps the recipe aligned with a clean-eating approach.
Boost the anti-inflammatory flavor profile. If you’re serving these as part of a larger dessert spread, pair them with berries, walnuts, cinnamon, or unsweetened herbal tea.
🧬 Anti-Inflammatory Benefits of Vanilla Bean and the Key Ingredients
The phrase anti-inflammatory is best understood here as describing an overall style of eating rather than a promise that one food or dessert can treat inflammation.
This recipe includes several ingredients that fit naturally into a nutrient-conscious, anti-inflammatory-style eating pattern.
Vanilla Bean
Vanilla brings more than aroma. Vanilla contains naturally occurring plant compounds, including vanillin, and using real vanilla allows the recipe to get a huge amount of flavor without relying on artificial syrups or heavily processed flavorings.
Almond Flour
Almond flour provides monounsaturated fats, vitamin E, magnesium, and some dietary fiber.
It also replaces refined wheat flour in the crust, helping keep the recipe lower in carbohydrates.
Greek Yogurt
Greek yogurt contributes protein and adds a pleasant tang.
Protein is especially useful in desserts because it can make a small serving more satisfying.
Eggs
Eggs provide complete protein and help give the cheesecake its characteristic structure.
They also provide nutrients including choline and vitamin B12.
Lemon
Fresh lemon contributes vitamin C and bright acidity.
That acidity is important from a culinary perspective too: it keeps the cheesecake from tasting overwhelmingly rich.
Cinnamon
Cinnamon provides warm flavor and naturally occurring plant compounds.
A little goes a long way in this recipe.
Together, these ingredients make a dessert that can sit comfortably alongside other gut-friendly meals, vegetables, berries, nuts, seeds, quality fats, and minimally processed foods.
The overall eating pattern matters much more than any single ingredient.
🌿 Variations You Can Try
Dairy-Free Cheesecake Cupcakes
Use a dairy-free cream cheese alternative and unsweetened dairy-free yogurt.
Look for products with a relatively simple ingredient list.
The texture may be slightly softer, so allow extra chilling time.
Gluten-Free Version
The recipe is naturally gluten-free when using certified gluten-free ingredients where necessary.
Because the crust is almond flour-based, there is no conventional wheat flour required.
Higher-Protein Version
Replace part of the Greek yogurt with thick skyr.
You can also choose a higher-protein Greek yogurt.
I don’t recommend adding a large amount of protein powder because it can make the cheesecake dense or chalky.
Lower-Carb Variation
The base recipe is already relatively low in carbohydrates because it uses almond flour and allulose.
For an even lower-carb version, use a low-carb yogurt and avoid serving with sweetened fruit sauces.
Berry Vanilla Version
Top each chilled cheesecake with a few fresh blueberries or raspberries immediately before serving.
The tart berries are fantastic with the vanilla and brûlée topping.
Cinnamon-Vanilla Version
Increase cinnamon to ¾ teaspoon and add a tiny pinch of nutmeg.
This gives the cheesecake a warmer, almost holiday-like personality.
Chocolate Version
Add 1–2 tablespoons unsweetened cocoa powder to the filling.
The result will be less classic but wonderfully rich.
Mini Cheesecake Bites
Use a mini muffin tin and reduce the baking time significantly.
These are excellent for parties because each bite becomes a tiny dessert.
🍽️ Tips for This Recipe
The biggest thing to remember is that cheesecake rewards patience.
Don’t judge the finished texture while the cupcakes are warm. They’re supposed to look softer when they first come out of the oven.
For the best flavor, make them the day before you need them.
Keep them covered once they’re fully chilled, but don’t brûlée the tops until you’re ready to serve. Moisture from refrigeration can soften the caramelized topping.
If you’re serving these at a dinner party, prepare the cheesecakes the night before. Then, about 10 minutes before dessert, sprinkle the allulose and torch the tops.
That way everyone gets the satisfying crackle.
For flavor balance, consider serving them with something fresh and slightly tart rather than another rich component. A few raspberries or blueberries are enough.
➕ Optional Additions
You can keep these classic or add small finishing touches.
Try:
- Fresh blueberries
- Raspberries
- Chopped walnuts
- Toasted pumpkin seeds
- Chia seeds
- Ground flaxseed
- A tiny pinch of cinnamon
- Fresh mint
- Lemon zest
- Unsweetened berry compote
- A sprinkle of hemp seeds
- A small amount of collagen peptides in the batter
If adding collagen, keep the amount modest so you don’t interfere with the cheesecake’s smooth texture.
I particularly like fresh berries because their acidity cuts through the richness of the cheesecake.
🍴 Serving Ideas
These cheesecake cupcakes are flexible enough for a casual dessert and pretty enough for a dinner party.
For a cozy evening, serve one cold cheesecake with fresh berries and a cup of unsweetened tea.
For a holiday table, arrange them on a large platter and add a few fresh vanilla beans, berries, and lemon slices around the edges.
For meal prep, place individual cheesecakes in small airtight containers so they’re ready when a dessert craving appears.
You can also create a complete wellness-focused meal by serving these after a dinner built around vegetables, lean protein, whole-food carbohydrates, and healthy fats.
For readers building collections of recipes on KetoFlavorHouse.com, this recipe would naturally link to related content such as anti-inflammatory meals, keto recipes, healthy dinners, high-protein meals, and low-carb side dishes.
🧊 Storage Recommendations
Refrigerator
Store the cheesecake cupcakes in an airtight container in the refrigerator for up to 4–5 days.
For the best texture, keep them covered so they don’t absorb refrigerator odors.
Crème Brûlée Topping
For the crispiest topping, brûlée individual portions shortly before serving.
If you caramelize all of them several days ahead, the crisp shell can gradually soften from refrigerator moisture.
Freezer
The cheesecake portions can be frozen without the brûlée topping.
Place the fully cooled cheesecakes in a freezer-safe airtight container, separating layers with parchment paper.
Freeze for up to 2 months for the best quality.
Thawing
Transfer individual cheesecakes to the refrigerator and allow them to thaw slowly overnight.
Don’t microwave them to speed up thawing.
Once completely thawed and chilled, add the allulose topping and brûlée fresh.
❓ Frequently Asked Questions
What makes these cheesecake cupcakes anti-inflammatory?
The recipe includes ingredients such as almonds, vanilla, cinnamon, lemon, eggs, and Greek yogurt that can fit within an overall anti-inflammatory-style eating pattern. However, no single dessert should be considered a treatment for inflammation. The broader dietary pattern matters most.
Are these cheesecake cupcakes good for meal prep?
Yes. They’re excellent for make-ahead dessert prep because the cheesecake needs several hours to chill anyway. Store them covered in the refrigerator and brûlée the tops shortly before serving.
Can I make these dairy-free?
Yes. Use dairy-free cream cheese and thick unsweetened dairy-free yogurt. Expect some variation in texture because different dairy-free products contain different amounts of moisture.
Can I freeze cheesecake cupcakes?
Yes. Freeze the cheesecakes without the brûlée topping. Thaw them overnight in the refrigerator, then caramelize the allulose immediately before serving.
How do I keep cheesecake cupcakes creamy?
Avoid overmixing, don’t overbake them, and chill them completely. The center should still have a gentle wobble when they leave the oven.
Can I use vanilla extract instead of vanilla bean?
Absolutely. Replace the vanilla bean with about 2 teaspoons pure vanilla extract. The flavor will still be delicious, although you won’t get the beautiful vanilla-speckled appearance.
Why is my crème brûlée topping soft?
Moisture from the refrigerator can soften a caramelized topping over time. For the crispest result, brûlée the cheesecakes immediately before serving.
🧮 Nutritional Breakdown Per Serving
Estimated nutrition based on 1 cheesecake cupcake:
- Calories: approximately 220
- Protein: approximately 20 g
- Fat: approximately 7 g
- Total Carbohydrates: approximately 5.5 g
- Fiber: approximately 1 g
- Net Carbohydrates: approximately 4.5 g
Nutrition can vary depending on the brands of cream cheese, Greek yogurt, almond flour, and sweetener used.
The recipe’s relatively high protein content comes primarily from the Greek yogurt, cream cheese, and eggs, while almond flour contributes additional protein and fiber.
📌 Recipe Snapshot
| Category | Details |
|---|---|
| Prep Time | 20 minutes |
| Cook Time | 25 minutes |
| Chilling Time | 4 hours |
| Total Time | About 4 hours 45 minutes |
| Course | Dessert |
| Cuisine | American-inspired |
| Servings | 12 cheesecake cupcakes |
| Calories | ~220 per serving |

Ingredients
For the Almond Flour Crust
- 1 cup finely ground almond flour
- 2 tablespoons melted unsweetened coconut oil
- 1 tablespoon granulated allulose
- ¼ teaspoon fine sea salt
For the Vanilla Bean Cheesecake Filling
- 16 ounces full-fat cream cheese softened
- 1 cup plain Greek yogurt
- ½ cup granulated allulose
- 3 large eggs preferably room temperature
- 1 vanilla bean split and scraped
- 1 teaspoon fresh lemon zest
- 1 tablespoon fresh lemon juice
- ½ teaspoon ground cinnamon
For the Crème Brûlée Topping
- ¼ cup granulated allulose
Optional Garnishes
- Fresh raspberries
- Fresh blueberries
- Extra lemon zest
- Fresh mint
- Chopped walnuts
- A light dusting of cinnamon
Instructions
- Preheat the oven to 325°F and line a standard 12-cup muffin pan with paper or parchment liners.
- In a medium bowl, combine the almond flour, melted coconut oil, 1 tablespoon allulose, and sea salt. Stir until the mixture resembles damp sand and holds together when pressed.
- Divide the crust mixture evenly between the 12 liners. Press firmly into the bottoms using the back of a spoon or a small flat-bottomed glass.
- Bake the crusts for 5–7 minutes, just until fragrant and lightly set. Remove from the oven and allow them to cool slightly.
- Slice the vanilla bean lengthwise and scrape out the seeds. Set the seeds aside. If using vanilla extract instead, reserve it for the filling.
- Place the softened cream cheese in a large mixing bowl and beat on medium speed until completely smooth, scraping down the sides of the bowl as needed.
- Add the Greek yogurt and ½ cup allulose. Mix on low to medium speed just until smooth and combined, avoiding excessive whipping.
- Add the eggs one at a time, mixing gently after each addition until incorporated.
- Add the vanilla bean seeds, lemon zest, lemon juice, and cinnamon. Mix gently until the flavorings are evenly distributed throughout the batter.
- Divide the cheesecake mixture evenly among the prepared muffin cups, filling each approximately three-quarters full. Gently tap the pan once or twice against the counter to release large air bubbles.
- Bake for 20–25 minutes, or until the edges are set and the centers still have a slight gentle wobble. Do not wait for the centers to become completely firm.
- Remove the pan from the oven and cool the cheesecakes in the pan for 20–30 minutes. Transfer them to the refrigerator and chill for at least 4 hours, preferably overnight.
- When completely chilled, sprinkle a very thin, even layer of allulose over each cheesecake.
- Using a kitchen torch, caramelize the allulose while continuously moving the flame across the surface. Stop when the topping is melted, golden, and crisp.
- Allow the brûlée topping to cool for 1–2 minutes so it hardens into a delicate shell.
- Serve the cheesecake cupcakes cold, optionally garnished with fresh berries, lemon zest, mint, or a light sprinkle of cinnamon.